Integrating Single Sign-On (SSO) Support with OpenStack Keystone
This tutorial describes how to integrate Single Sign-On (SSO) support into Platform9 Managed OpenStack.
Supported Identity Providers
Platform9 currently supports the following SSO integrations:
If you’d like to integrate your Platform9 Managed OpenStack cloud with a specific SSO vendor, contact support@platform9.com.
Single Sign-On Integration
With SSO integration, you no longer need to create individual username and password based accounts for your Platform9 Managed OpenStack users. This allows for easier integration across groups of users and different organizations in your environment, since users maintain a single login and password across various tools in the environment, including Platform9 Managed OpenStack.
Keystone Groups
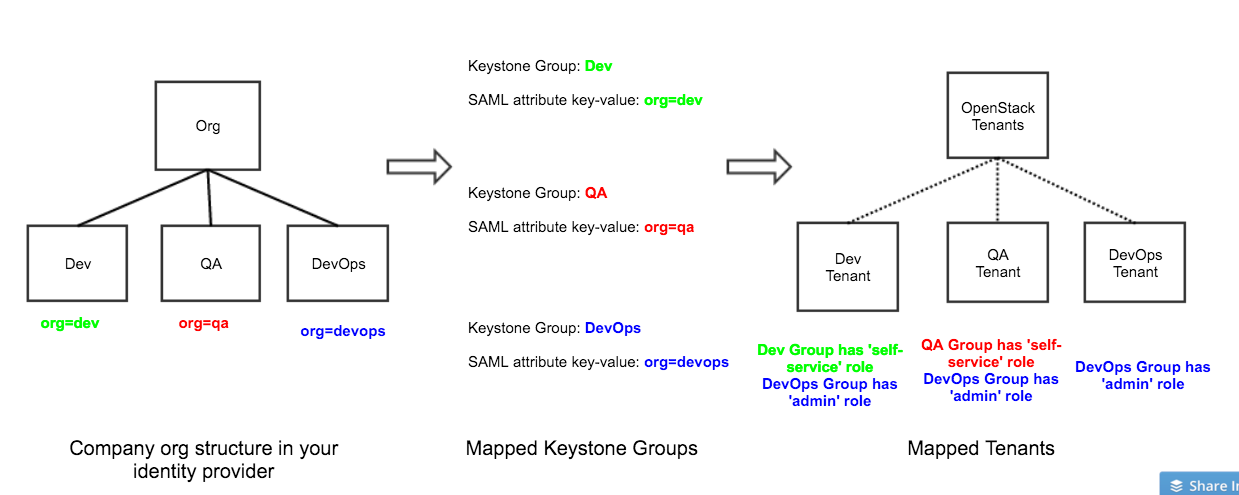
The SSO integration relies on the ‘Group’ concept exposed by OpenStack Keystone. A Keystone Group allows an Administrator to map a collection of users from his external identity provider such as Okta to OpenStack. When a user from that collection signs into Platform9 after authentication with the identity provider, Keystone identifies what OpenStack Group the user belongs to based on the SAML attributes for this user supplied by the identity provider. The user’s access to OpenStack Tenants and Regions is then decided based on that Group mapping.
Mapping Between Identity Provider and Keystone Group
Setting Up SSO Integration
Step 1 Contact Platform9 Support to Enable SAML on the Cloud Controller
Before you begin with configuring the SSO integration with OpenStack Keystone, you must have SAML 2.0 enabled on your Platform9 Managed OpenStack cloud controller.
You must contact Platform9 support to enable SAML on the cloud controller. After SAML is enabled, you can configure the SSO integration with your identity provider.
Step 2 Identify the Metadata Attributes in your Identity Provider
Your identity provider will have information about your company organization structure, and what metadata attributes correspond to the teams/groups that you’d like to provide access to Platform9. Identify those metadata attributes. You will need to supply them to Keystone.
Step 3 Create Keystone Groups
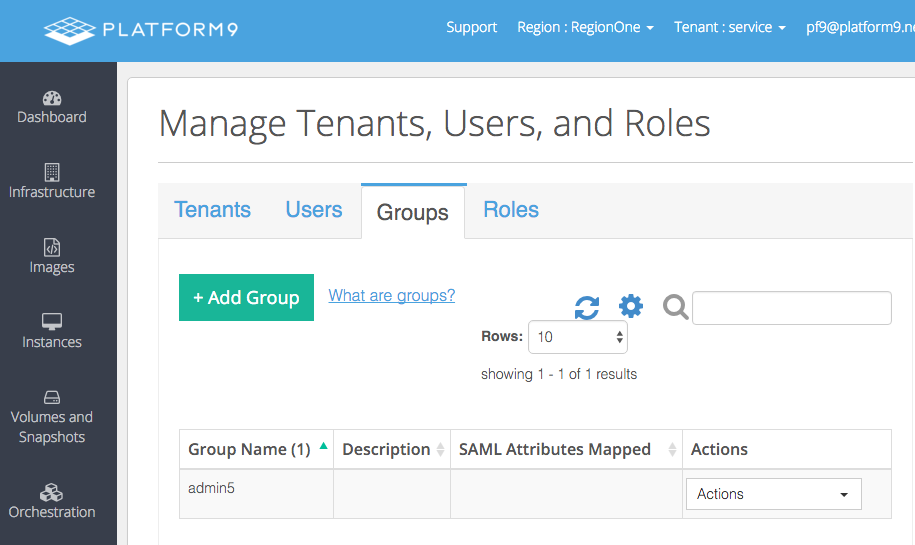
In Platform9 UI, navigate to ‘Tenants and Users’ -> ‘Groups’. Create a new group for each team of users that you’d like to provide access to Platform9.
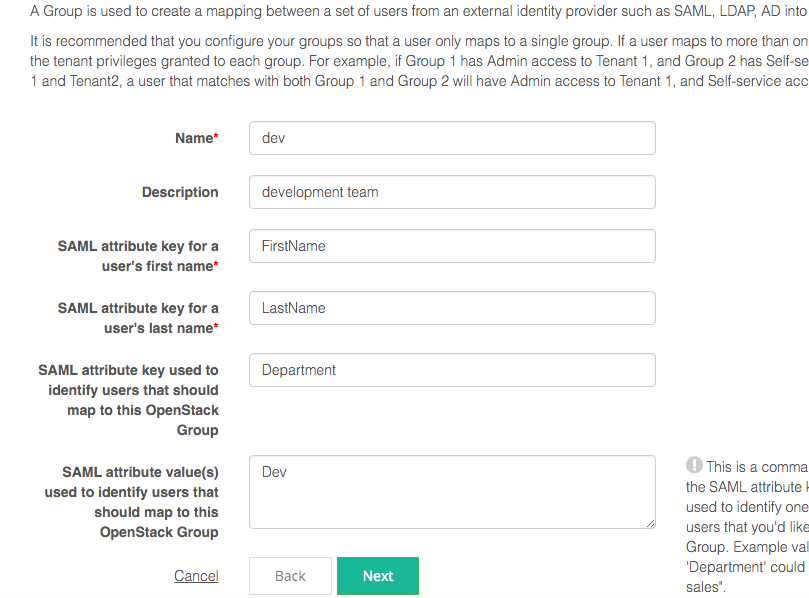
As part of Group creation, provide the following SAML attributes corresponding to the team in your identity provider that you’d like to map to this Group.
- SAML attribute keys used to identify user’s first name and last name – These will be the attribute keys you use in your identity provider to identify first name and last name for all your users. When a user signs into Platform9, his first name and last name attributes will be used to create a unique key for the user to store into keystone.
- SAML attribute key and value(s) for the metadata to identify a user’s membership to a team that should map to this keystone group – This will be the key value metadata used to identity those teams within your identity provider that should map to this keystone group. For eg the key could be ‘Department’, or ‘Organization’, or ‘Team’. You can supply multiple values as a comma separated list. Some examples of values are ‘dev’, ‘qa’, ‘devops’, ‘administrators’ etc
Step 4 Map Keystone Groups to Tenants Via Roles
One the groups are created, map them to one or more OpenStack Tenants via roles, just like you map ordinary OpenStack users to Tenants via roles. This can be done as part of Group creation as a last step in the wizard, or at a later point by editing the properties of a group.
Step 5 Finished
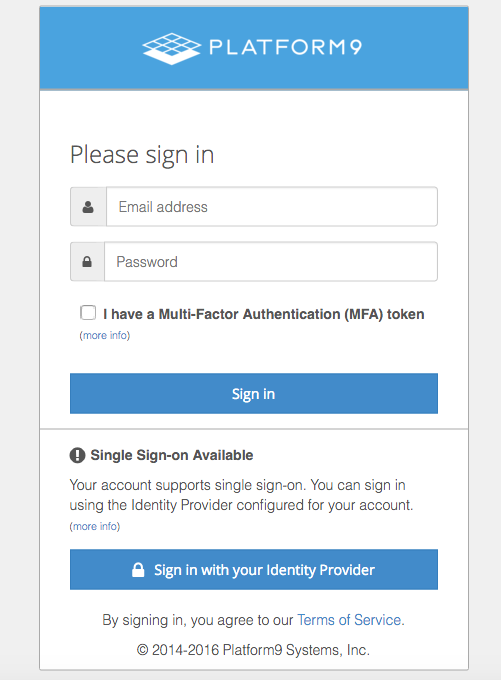
At this point your SSO integration with Platform9 is enabled! All users within your organization will be provided with following sign-in prompt that offers an alternative to sign in using your identity provider.
When a user signs in via the identity provider, the user is identified to be part of a Keystone group based on the SAML attribute mappings. The user is able to access the set of tenants that the group has been given access to.