Storage Policy-Based Management Support for Cinder in Platform9 VMware
The VMFS-based Cinder service on VMware currently uses the best possible datastore it can find for creation of volumes. However, there can be situations where certain types of volumes need to be placed on certain datastores only. It is possible to achieve this with the latest release of Platform9. With this release of Platform9 VMware, we are enabling the use of vCenter storage policies to allow specification of backend datastores. This functionality is supported on vCenter 5.5 and above only.
The following steps need to be performed on vCenter to create a new tag-based storage policy which can then be used with Platform9:
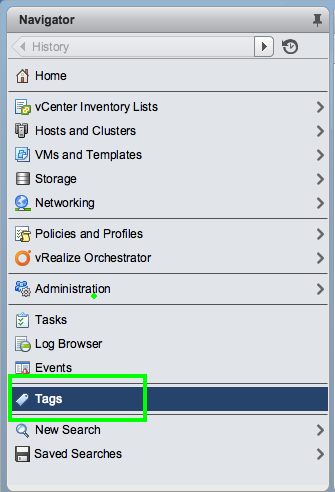
1. Create a new tag – Create a new tag by clicking on “Tags” in vCenter Web UI under the “Navigator” tab on the left hand side.
Then click on “New tag” and provide an appropriate name and category for the new tag. You can also create a new category if needed.
2. Navigate to the datastore view in the vCenter Web UI and go to the “Manage” tab and then click on “Tags”. Then click on “Assign Tag…” and select appropriate tags to be assigned to this datastore. Repeat this step for all datastores that need to be selected as a part of particular storage policy. Generally, it is better if at least one datastore on each cluster is paired with Platform9 has the required tags. This allows volumes to be easily migrated across the clusters in case the volumes are detached and attached to VM in different cluster.
3. Navigate back to the “Home” page in vCenter Web UI and click on “VM Storage Policies”. Click on “Create New VM Storage Policy”.
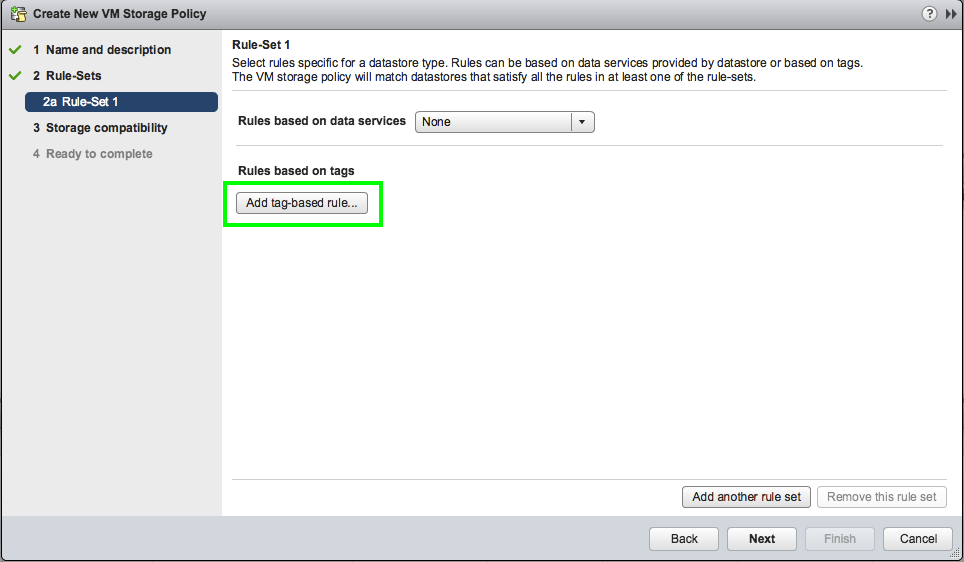
a. Provide an appropriate name for the policy. This is the name that will be used with Cinder in Platform9 VMware. Click “Next” till you reach the window labelled “Rule-Set 1”. Then click on “Add tag based rule” –
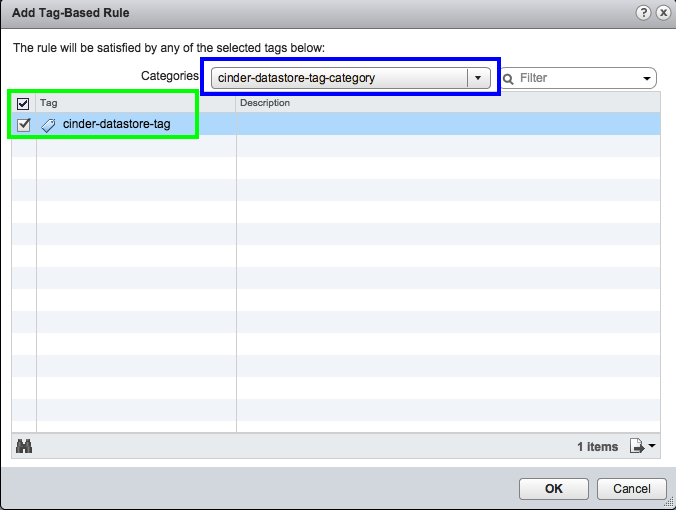
b. Select the appropriate category to display the tags under that category and then select the appropriate tags that were created in step (1).
c. The next window will show all the datastores that are compatible. Please review that all required datastore get listed under “Compatible storage” section. Click “Finish” to complete the policy creation.
Now that the storage policy has been successfully created and configured in VMware vCenter, we can start using it from Platform9 to schedule volumes on particular datastore:
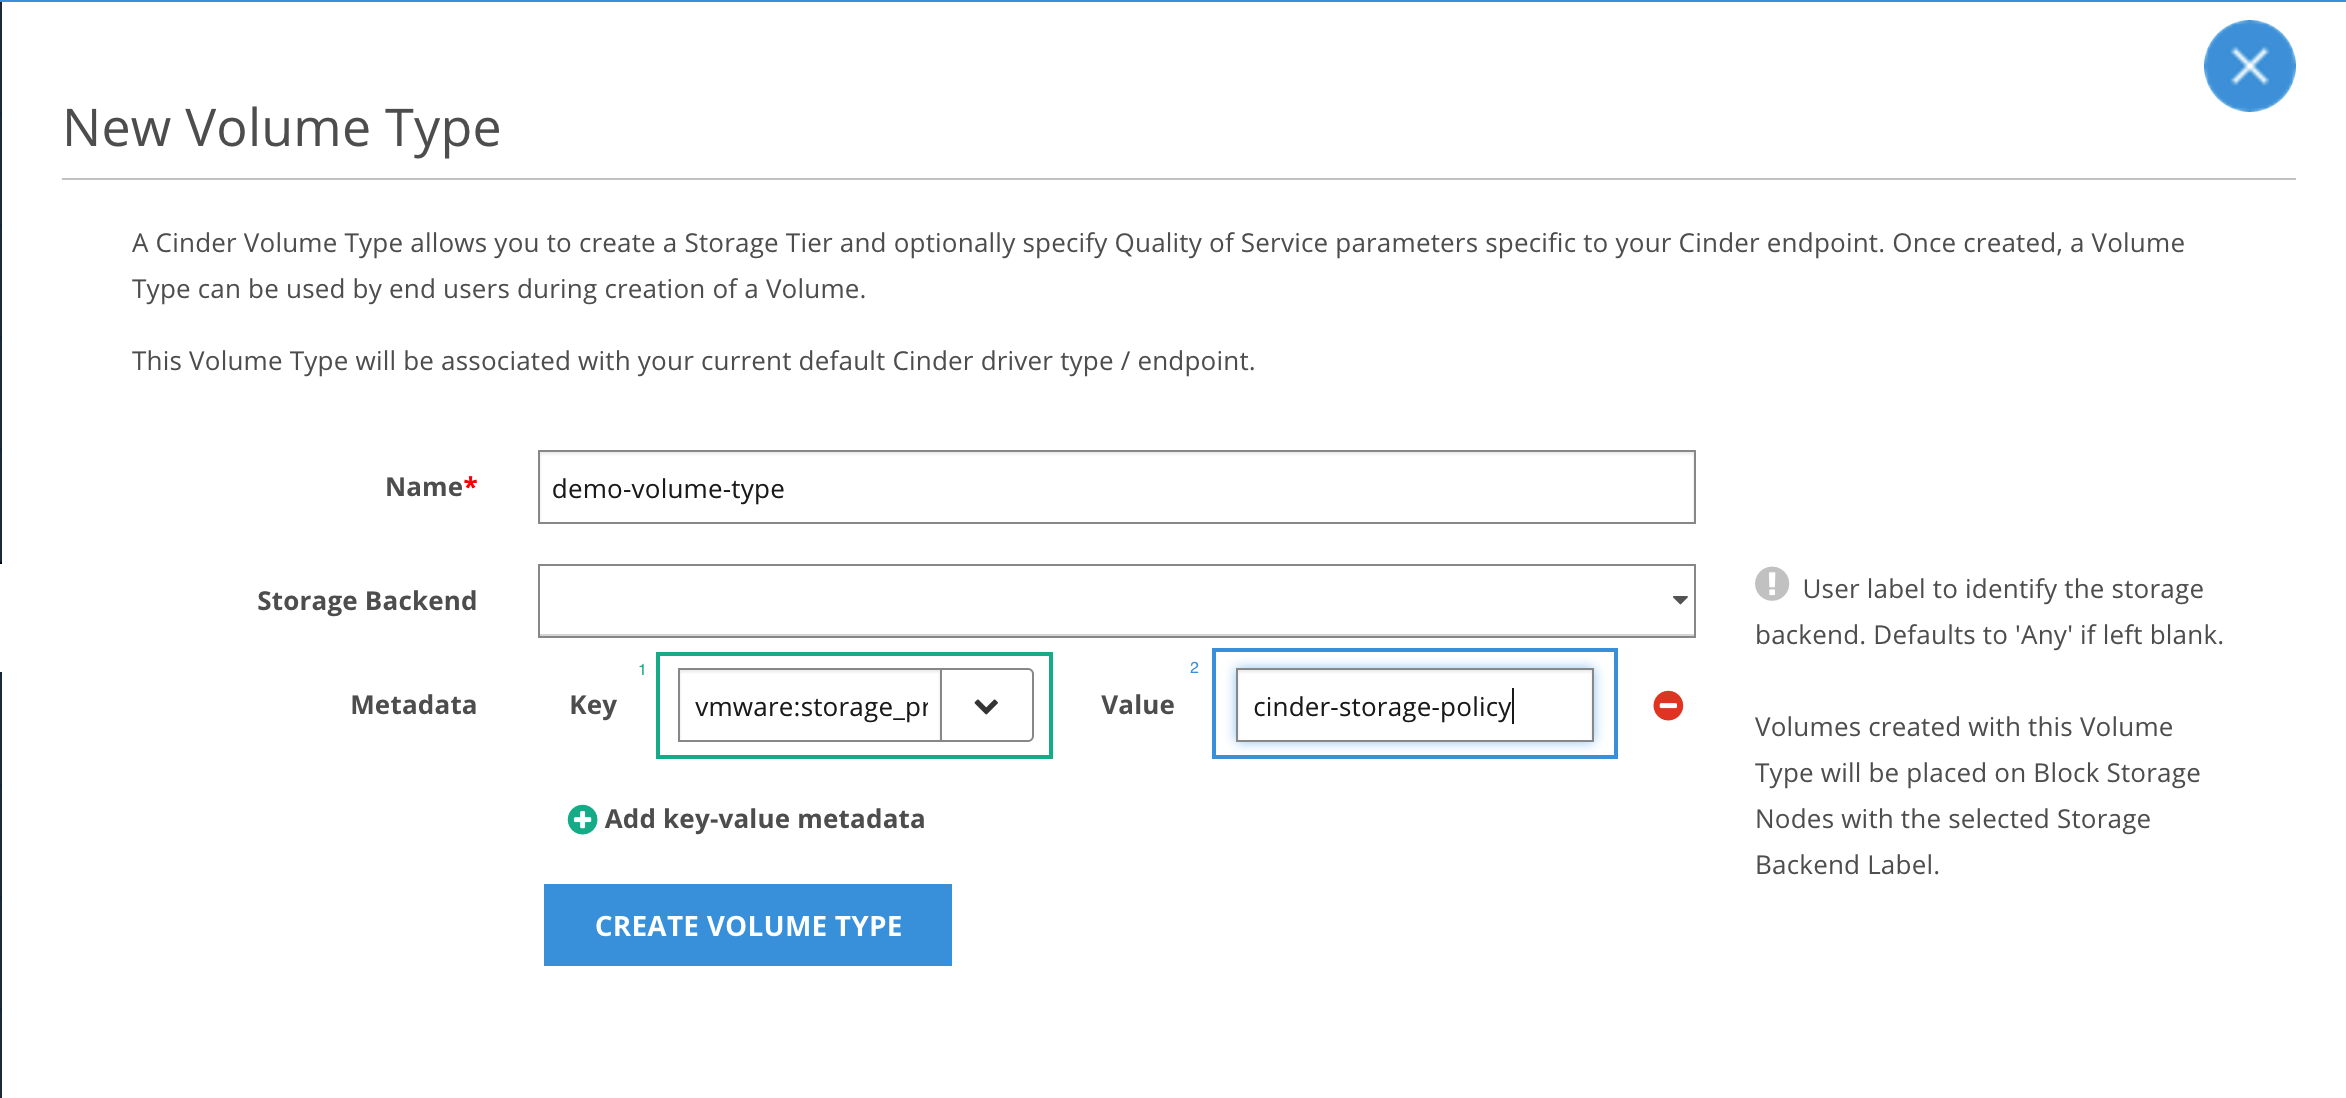
1. Create a new volume type – Select the “Volumes and Snapshots” tab in the left hand section in Platform9 UI and go to the “Volume Types” tab. Click on “Create New Volume Type” –
Give an appropriate name for the volume type and select “vmware:storage_profile” from drop down for “Key” and provide the name of the policy that was configured earlier in the step (3.a) as the “Value”.
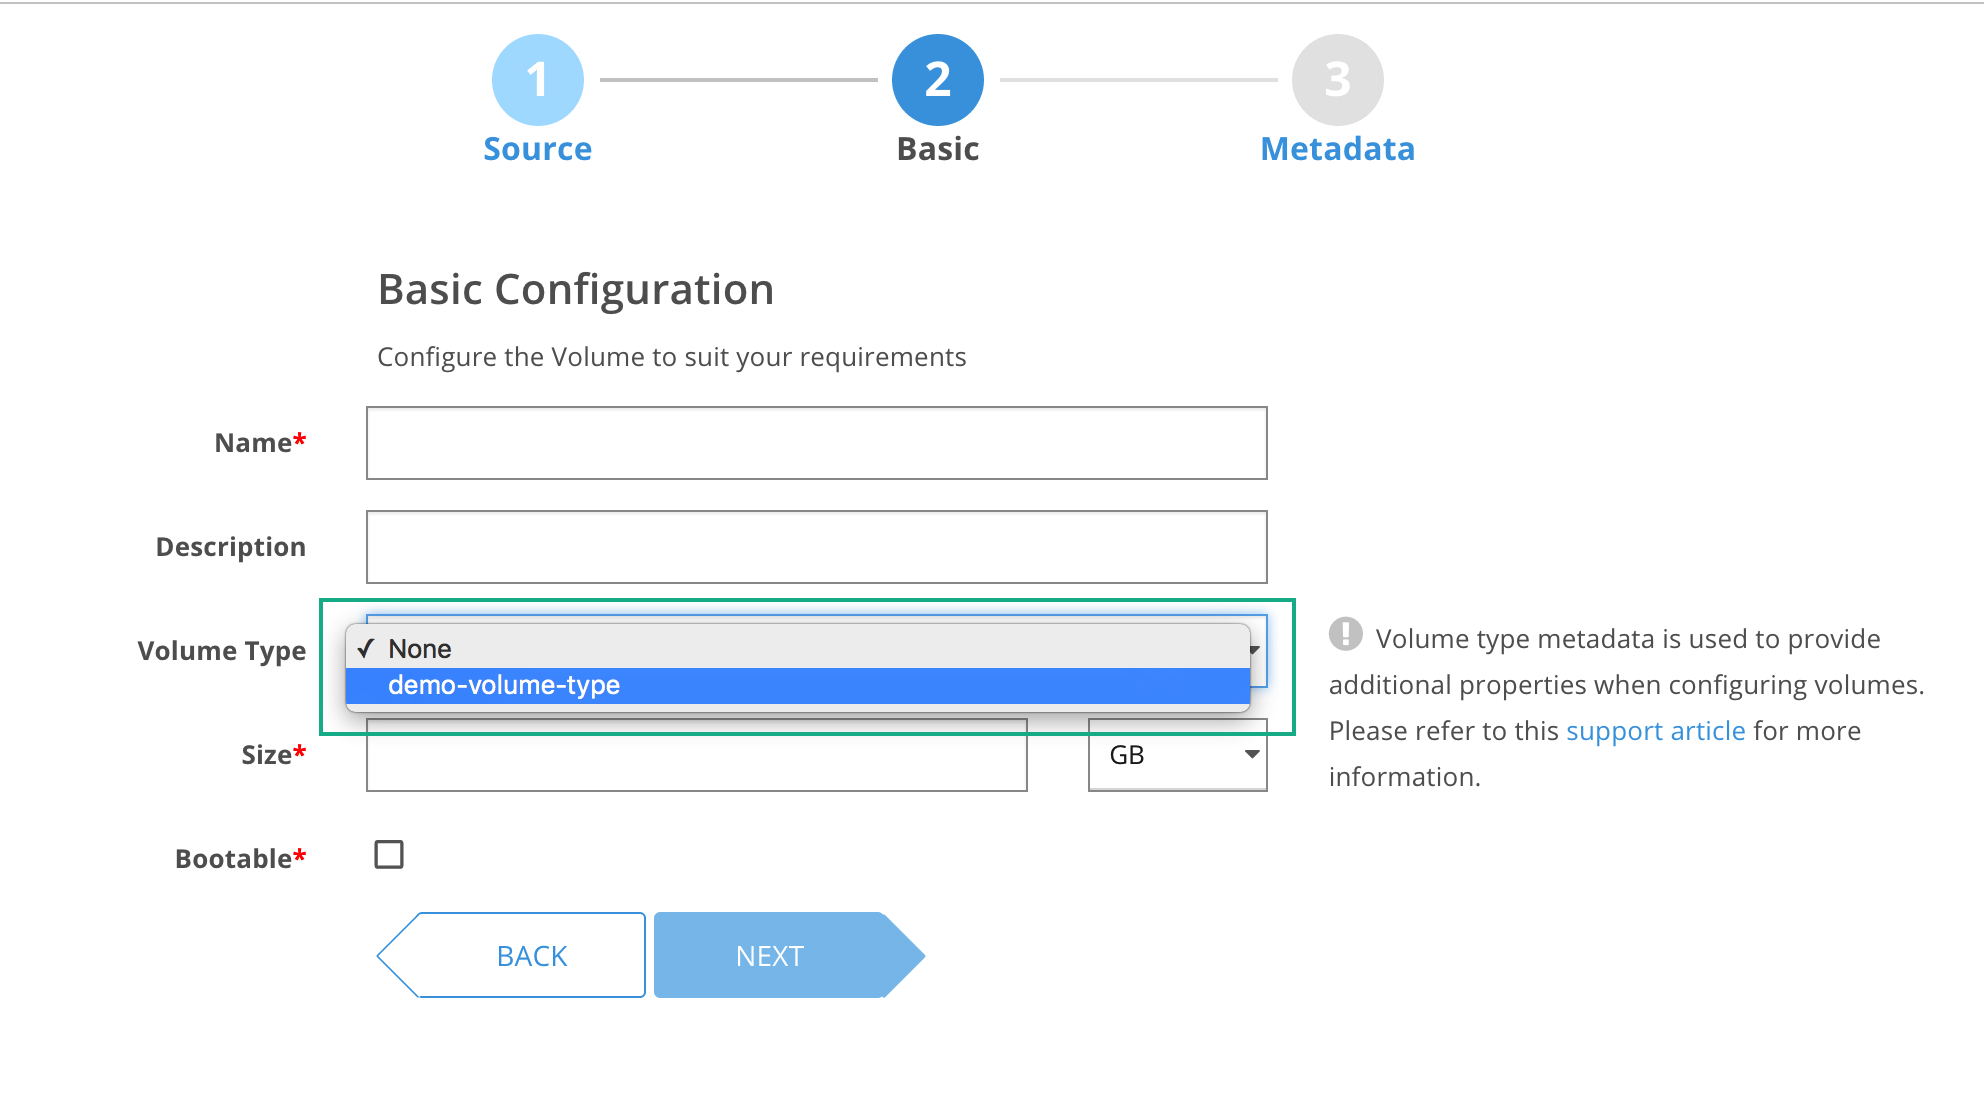
2. Select the appropriate volume type on the “Basic Configuration” page in the volume creation wizard and the volume will be placed on one of the datastore that matches the policy corresponding to the volume type.