Create a Windows Virtual Machine Image from Scratch
This tutorial describes how to create and deploy Windows virtual machine images using Platform9.
Platform9 currently does not support creating a new virtual machine from scratch. You need to use the KVM utility called “Virtual Machine Manager” to do this. This tutorial goes over the process of creating a Windows virtual machine image from scratch using Virtual Machine Manager, and get it configured with cloud-init scripts. Once this is done, you can check the image into Platform9 image catalog. From that point onwards, any new virtual machines can be created using this image.
This tutorial uses Windows 2008 R2 evaluation version as an example.
Step 1 – Get Prerequisites
Get the ISO Image for the Windows distribution you wish to deploy for the virtual machine. Microsoft makes a 180 days evaluation version of Windows 2008 R2 available. You can download it here Windows 2008 R2 Evaluation Image
Download the VirtIO driver ISO file for Windows from here: https://fedoraproject.org/wiki/Windows_Virtio_Drivers#Direct_download
Next step is to download the cloud-init installation package for Windows. Cloud-init is the de-facto multi-distribution package that handles early initialization of a cloud instance. For more information on cloud-init, read here.
Download Cloudbase Cloud-init package for Windows here: https://www.cloudbase.it/downloads/CloudbaseInitSetup_Beta_x64.msi
Install Virtual Machine Manager on your Linux server that you plan to use to create this Windows virtual machine image.
For CentOS:
[code lang=”bash”]sudo yum install virt-manager[/code]For Ubuntu:
[code lang=”bash”]apt-get install virt-manager [/code]Step 2 – Create Virtual Machine
With the prerequisites, now we are ready to start deploying the Windows virtual machine.
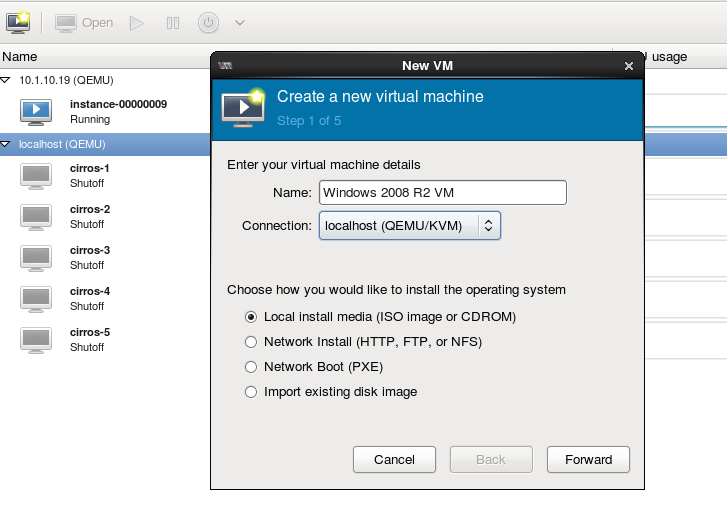
Create a new virtual machine using Virtual Machine Manager. Select the Local Install Media option for the operating system.
Select Windows for the operating system type and select the appropriate version.

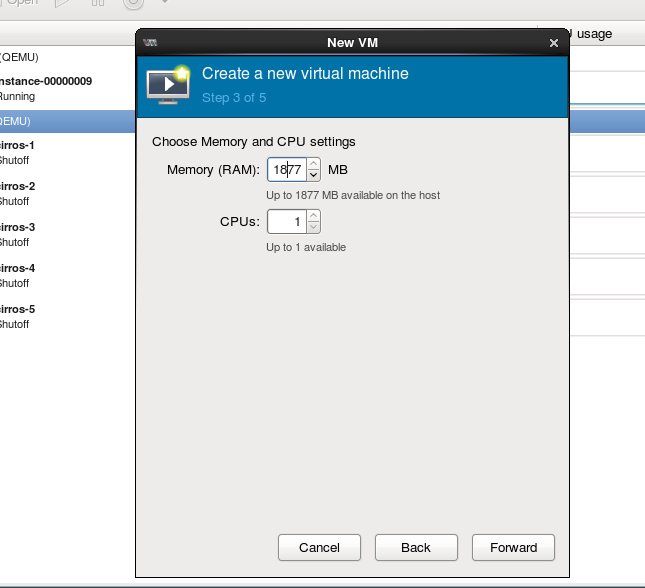
Select appropriate options for number of CPUs and memory.
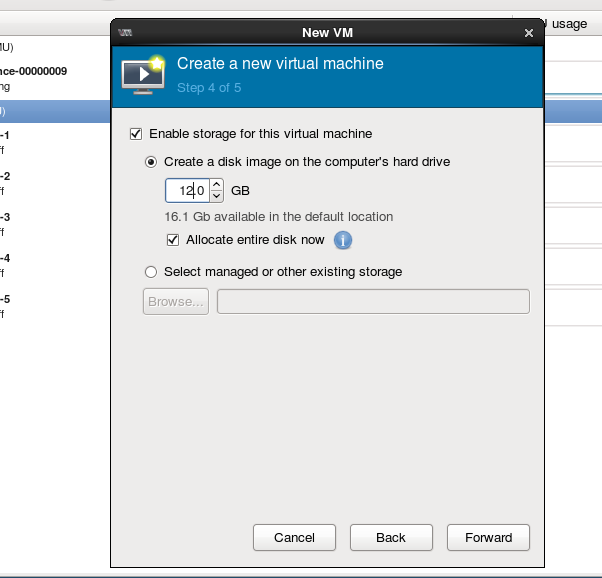
Select at least 12 GB for disk size.
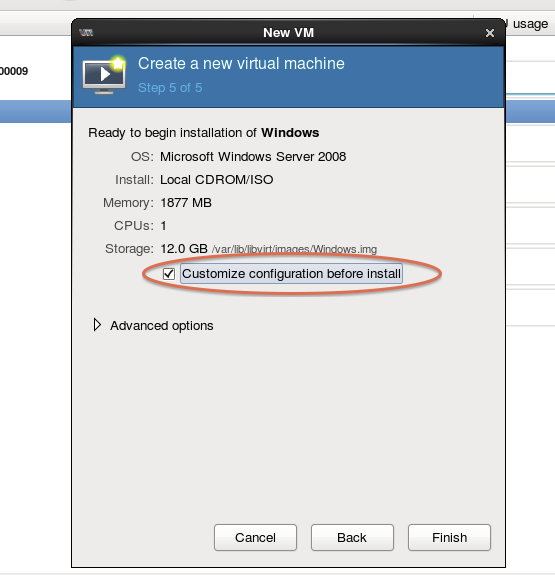
In the last option, make sure to select the “Customize configuration before install” option. This option will allow you to do advance changes to the disk and network device types before the virtual machine creation begins.
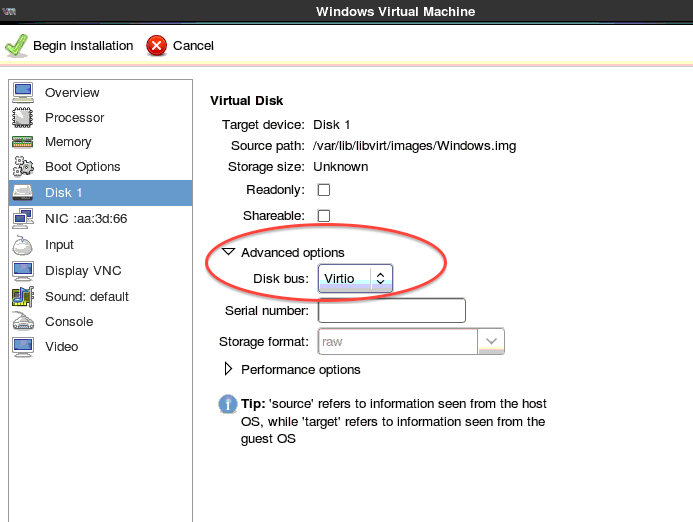
In the virtual machine configuration wizard that opens up next, select the disk, select Advance options and choose “Virtio” as the value for Disk bus.
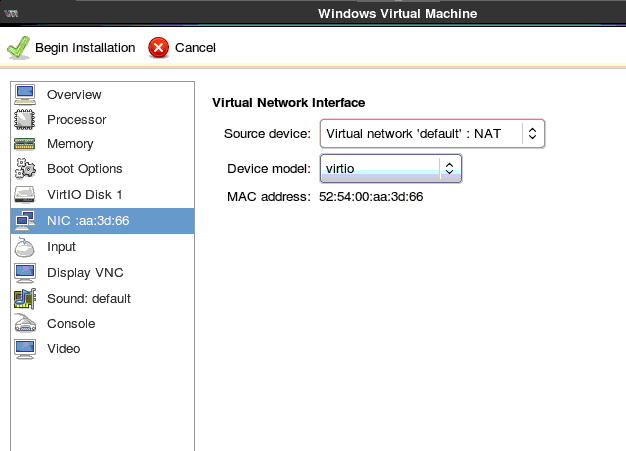
Next, select NIC, then under Device model: select “virtio”.
Finally, add two CDROM devices to the virtual machine. Attach the Windows ISO and the ISO for the VirtIO driver to those two CDROMs. (Note: You can do this with one CDROM too, but you will need to switch during installation).
Now press “Begin Installation” and the standard Windows installation will begin.
Step 3 – Install the Windows Operating System
During the installation, you will be prompted to load drivers for disk and network. Please load VirtIO storage and network drivers from the VirtIO ISO mounted on one of the CDROM.
Once installation completes, power on the virtual machine. Configure the operating system to enable Remote Desktop Access. Make sure to also change the Windows firewall setting to allow incoming RDP traffic.
Copy netkvm.* from the virtio folder (win8/amd64/netkvm.*) to c:windowsinf folder. This is the VIRTIO network driver. This step is necessary because sysprep can remove some non-standard drivers during generalization process.
(Optional) Download the SDelete utility from Windows Sysinternals here http://technet.microsoft.com/en-us/sysinternals/bb897443.aspx to clean up and zero fill unused disk space for the Virtual Machine.
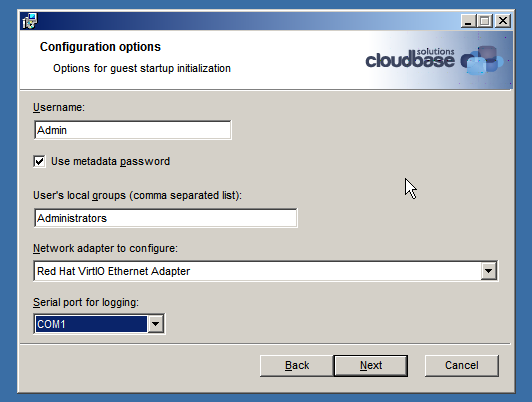
[code lang=”bash”]sdelete -z -c <drive letter>[/code]Finally, install and run the cloud-init package that we downloaded above. Pick the Network Adapter to be “Red Hat VirtIO Ethernet Adapter”
At the end of cloud-init installation, you will be prompted to run Sysprep package to create a generalized image. Select this option as well as the option to shutdown the instance when Sysprep terminates.
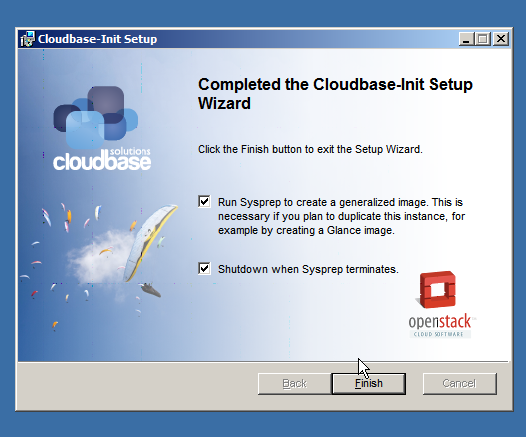
When Sysprep finishes running, the virtual machine will be shut down. At this point your Windows virtual machine creation is done! You can copy over the image to Platform9 Glance image catalog to get started.
Note: Convert the virtual machine to qcow2 format to trim the physical size of the disk.