Tutorial: Set Up Resource Tiers Using OpenStack Host Aggregates
Platform9 enables creation of efficient and scalable resource tiers using OpenStack host aggregates. Aggregates allow you to:
- Create virtual clusters or tiers of resources by group together one or more hypervisors using simple key-value pair tagging.
- Utilize the tiers across different tenants, to restrict placement of specific groups of virtual machines to only the tier that is applicable to them.
For example,
- An SSD tier can be created to ensure that all production workloads get efficient and fast storage I/O access
- A Production tier and Dev-Test tier strategy can be used to separate your workloads.
In this tutorial, we will demonstrate creating host aggregates and utilizing them as part of your Platform9 Managed OpenStack private cloud.
Step 1 – Create a New Host Aggregate
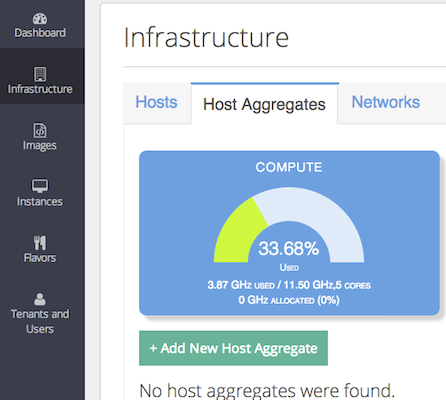
After signing into your Platform9 account, switch to the Infrastructure View. Click on the Host Aggregates tab, as shown here.
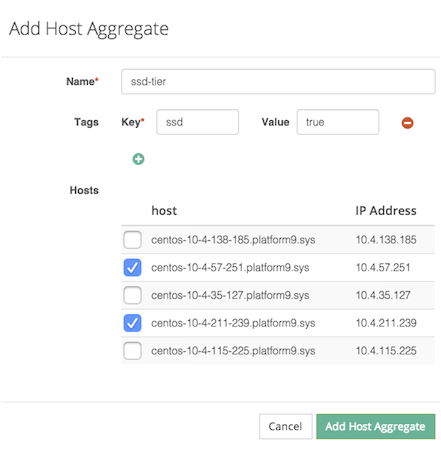
Click on the button to create a new host aggregate. In the wizard that pops up, you can
- Give the aggregate a name.
- Define one or more key-value pair tags to associate with the aggregate
- Select hypervisors that should be part of this aggregate.
- Submit the form.
Congratulations! At this point, the host aggregate is created and should be listed as part of the host aggregates tab.
Step 2 – View Utilization/Allocation Across Aggregate
Once you define an aggregate, Platform9 immediately gives you visibility into your current resource utilization and allocation, across compute, storage, and memory, in the context of the specific aggregate. This information can be used to answer questions such as how much capacity do I have in my Palo Alto data center, etc.

Step 3 – Add to Flavor
At this point, you are ready to start utilizing the resource tier as part of your multi-tenancy, or VM deployment. You do this by adding the aggregate to a new flavor.
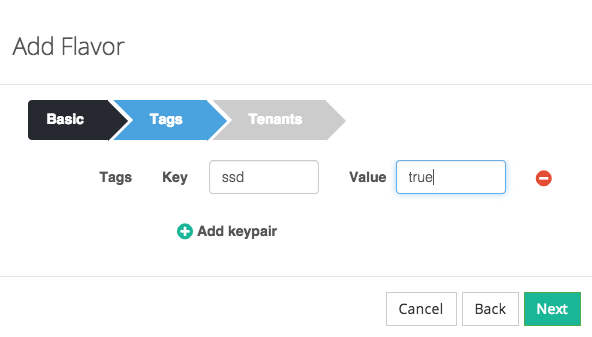
- Go to the flavors tab, and create new flavor.
- Specify the right amount of RAM, CPU, disk, for the flavor.
- Specify one or more tags to be included in the flavor.
- NOTE: If the tags specified in the flavor correspond to multiple aggregates, the OpenStack scheduler will choose one of the host aggregates when scheduling an instance.
- Select one or more tenants the flavor should belong to.
- Submit the form. This flavor is now ready to be used with the host aggregate created in step 1.
Step 4 – Launch an Instance
Now that we have set up the host aggregates and flavors, we will launch an instance on the host aggregate.
1. Go to the instances view, and click the button to create a new VM instance.
2. Select the image that the instance will use.
3. Select the flavor created in step 2.
Congratulations! The instance should now be running on the host aggregate created in step 1.
Step 5 – Aggregates and Multi-Tenancy
By giving access to the flavors that include the host aggregate to one or more tenants, OpenStack allows you to restrict access from that tenant to only resources that are part of that host aggregate. This is the mechanism to achieve isolation of resources across different tenants.