Customize a Virtual Machine Instance with Cloud-init
This Platform9 OpenStack tutorial describes tips on using various options to customize a virtual machine using cloud-init.
Customize Virtual Machine Hostname
Virtual machines deployed using cloud-init enabled images will by default be configured with hostname created using the name given to the virtual machine, and a randomization suffix.
Set Default Password and Inject Custom Script Using User Data
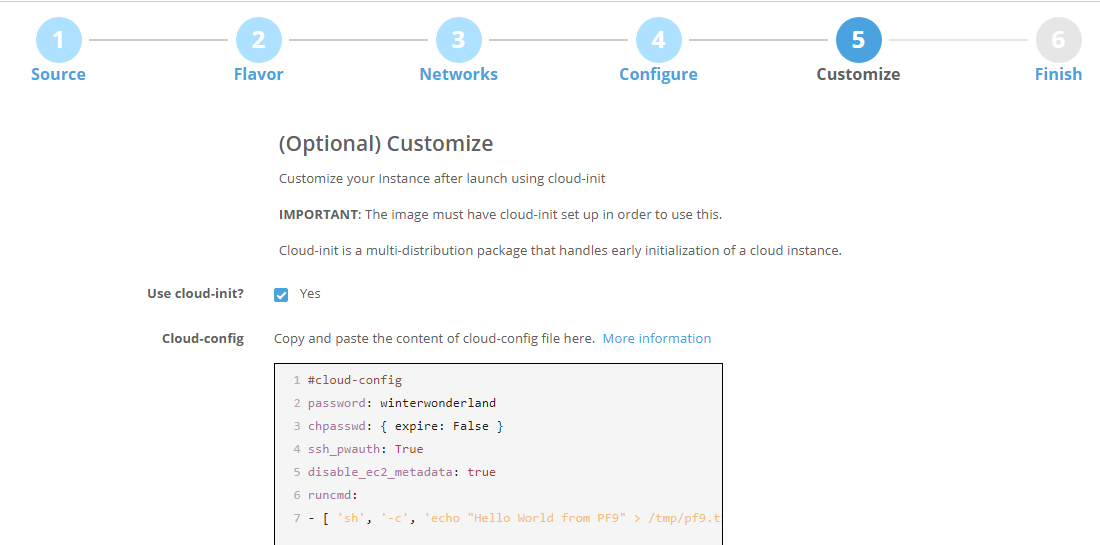
Create a text file with following information.
[code lang=”yaml”]#cloud-configpassword: winterwonderland
chpasswd: { expire: False }
ssh_pwauth: True
runcmd:
– [ ‘sh’, ‘-c’, ‘echo “Hello World from PF9” > /tmp/pf9.txt’][/code]
Paste the configuration above to the cloud-init config text area:
where:
- NOTE: the first line is NOT a comment and should not be skipped or modified. It is a directive indicating that the content that follows should be merged with cloud.cfg that the virtual machine instance already has.
- NOTE: This is a YAML file. Be careful with the YAML syntax around spacing. Failing to include appropriate spacing where required will result in silent failures (For example, inability to logon to the instance). TIP: Verify the YAML syntax by writing small sample python code such as this:
file = open(“/tmp/pf9-user-data.txt”)
obj = yaml.load(file)
print obj[/python]
The output should be a Python dict string representation of the above YAML file.
[json]{‘password’: ‘winterwonderland’, ‘chpasswd’: {‘expire’: False}, ‘ssh_pwauth’: True, ‘runcmd’: [[‘sh’, ‘-c’, ‘echo “Hello World from PF9” > /tmp/pf9.txt’]]}[/json]- ‘winterwonderland’ is the desired default password you wish to set for this virtual machine
- ‘runcmd’ is a list of commands you would like to inject into this virtual machine. Each element can be a string or another list (like execev). Following article offers comprehensive details: http://cloudinit.readthedocs.org/en/latest/topics/examples.html#run-commands-on-first-boot
Finally, invoke Nova command via CLI or REST API to create a new instance, passing the extra parameters for customization.
[bash linenum=”false”]# format# nova boot –config-drive=true –image <name of the image> –flavor <flavor-id> –nic net-id=<network id to connect to> –user-data <path to user-data file> <name of the instance>
# example
nova boot –config-drive=true –image ubuntu-16.04-cloudimg.img –flavor 2 –nic net-id=c3454717-f813-4419-9203-ceb78b0aa3f9 –user-data /tmp/pf9-user-data.txt pf9-ubuntu-test-1[/bash]
Inject SSH Key-Pair into Virtual Machine
- First, generate a new ssh key pair to be used for the new virtual machine:
- Now add the key pair to Nova:
# nova keypair-add -p <path to the public key> <name of the key>
# example
nova keypair-add -p ~/.ssh/id_rsa.pub rparikh-ssh[/bash]
- List key pairs registered with Nova:
- Now with nova boot command you can optionally pass the key-name as the argument:
- That’s it. Once the virtual machine instance is active, you can ssh into the instance using the private key.
Example cloud-config File with Comments
Note that some features only work with cloudinit >= v0.7.5 (Ubuntu 14 or newer, and CentOS 7.x)
[code lang=”yaml”]#cloud-config# 1. Create a new group
groups:
– pf9testgroup
# 2. Change default user add to new group and add sudo access
system_info:
default_user:
name: default-user
lock_passwd: true
groups: pf9testgroup
sudo: [“ALL=(ALL) NOPASSWD:ALL”]
# 3. Change password of default user
password: groovy
chpasswd: { expire: False }
ssh_pwauth: True
# 4. Create new user and also create the default user
# 5. Add ssh-key
# 6. Add password (“groovy”)
# 7. Add to group
# 8. Add sudo access
users:
– default
– name: new-user
ssh-authorized-keys:
– ssh-rsa AAAAB3NzaC1yc2EAAAABIwAAAGEArdM+gvsEq8BBvtTRHPa23mRsGSWDlWi9gvRSjhvcgYhsnssEy/QvSokqQgfJ7O8uEf3JEvDhGbX/G65YzLeyO4hS+R86vGAyyJuLXPuAyrWwccWdeOJeno26P5CutRVp test_key@platform9
lock_passwd: false
groups: pf9testgroup
passwd: $6$whatwhat1$mkCxCGXIEgF.6CjvGsdcoseQNFy/IvKS3dxz64uHxH7Y75KvJVMc96oEjhgd2ixrMpTwNjiWVG967009HqAyT1
sudo: [“ALL=(ALL) NOPASSWD:ALL”]
# 9. File creation
write_files:
– content: |
# This will go inside the file
OK Platform9, this is working.
path: /tmp/pf9_write_file.txt
permissions: ‘0777’
# 10. Run arbitrary commands
runcmd:
– [ ‘sh’, ‘-c’, ‘echo “Hello World from PF9” > /tmp/pf9_hello.txt’]
– [ ‘sh’, ‘-c’, ‘date > /tmp/pf9_date.txt’]
# 11. Set hostname
hostname: pf9-hostname
# 12. Set timezone
timezone: US/Eastern
# 13. Install packages
packages:
– git
– gdb
# 14. Restart network service for Redhat guests (this will fail gracefully on Debian guests)
bootcmd:
– [ ‘sh’, ‘-c’, ‘service network restart’ ][/code]