How To Create Multi-Master, Highly Available Kubernetes Clusters
Managed Kubernetes supports creation of highly available, multi-master Kubernetes clusters that can tolerate the failure of one or more master nodes as well as an entire availability zone (AZ) going down. This is critical for running production workloads in Kubernetes.
Kubernetes Cluster Management
A highly available cluster is composed of at least 3 master nodes, each running a member of the etcd distributed database and all the Kubernetes master components (API, controller manager and scheduler). We choose an odd number of master nodes so that it’s possible to establish quorum. At least one instance of a master node is deployed per AZ. If the number of AZs is even, one additional master node is created to meet the odd number requirement. The worker nodes are then evenly spread across the given AZs. In the event one AZ fails, the cluster will continue to be available if the number of surviving masters is a majority of the original number of members. In order to maximize the odds of maintaining cluster availability after the loss of an AZ, it is recommended to deploy the cluster into a region that has at least 3 AZs.
To create a highly available cluster, use the Platform9 Clarity UI to register a new Cloud Provider account, then create a cluster using that cloud provider.
Follow the steps given below to create a highly available Kubernetes cluster in Platform9 Clarity UI.
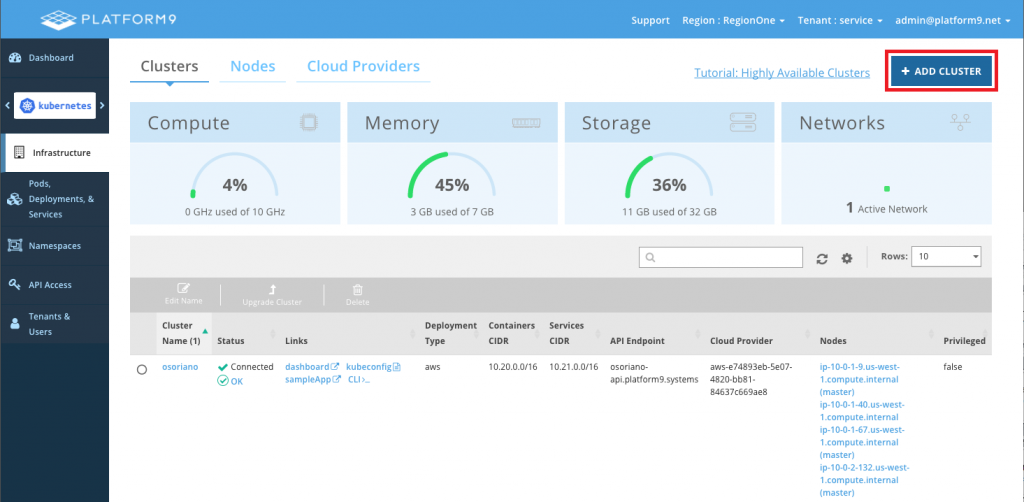
- Click Infrastructure>Clusters>Add Cluster.
- Select Auto-deploy cluster as the Deployment Type.
Select the cloud provider to auto-deploy the cluster on and also select a region, preferably one that has 3 or more availability zones.
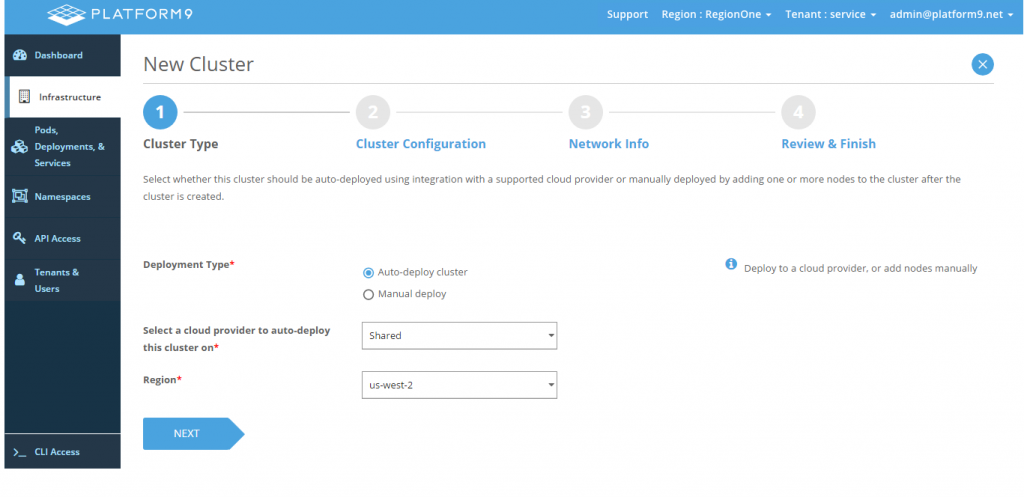
- Click Next.
- Enter the cluster configuration details.
Select at least three availability zones from the available zones for the region.
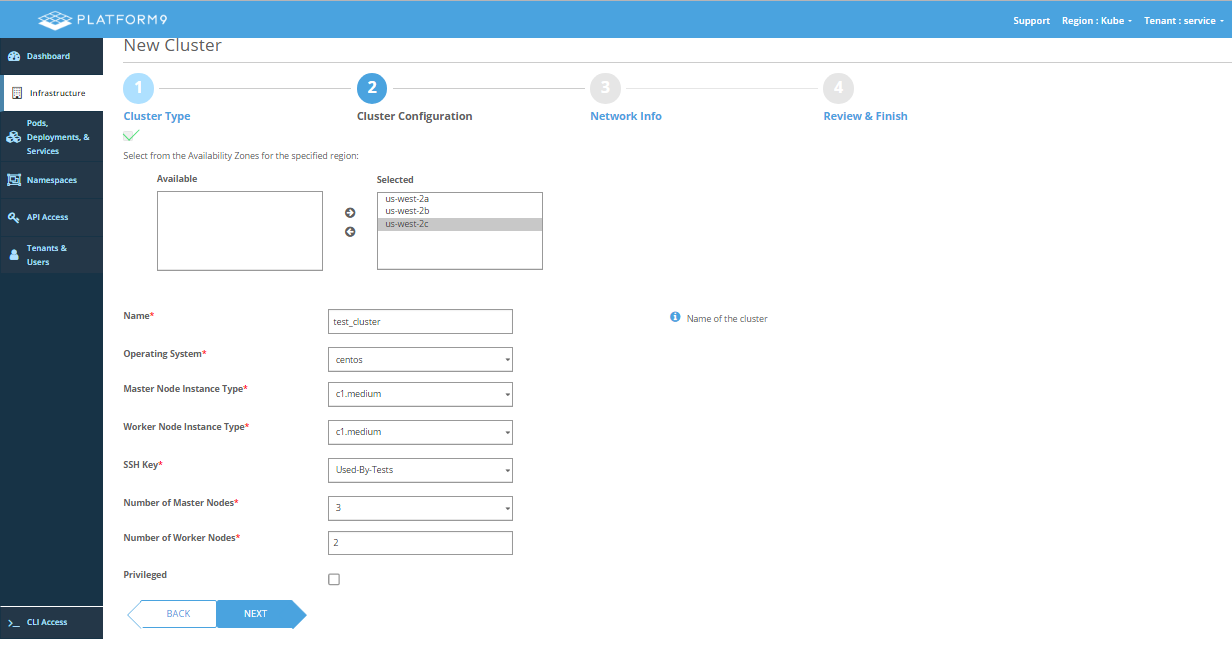
Field Description Name The name of the cluster Operating System The operating system version for the nodes deployed in the cluster. Note that you are only selecting the operating system major version. Master Node Instance Type Instance type for the master node Worker Node Instance Type Instance type for the worker node SSH Key The SSH key your public cloud account has access to. AWS injects the keys into the node while deploying it. The SSH key is useful for debugging purpose if you ever need to log in to the node. Number of Master Nodes Number of master nodes in the Kubernetes cluster Number of Worker Nodes Number of worker nodes in the Kubernetes cluster Privileged Select the check box to enable the cluster to run privileged containers - Click Next.
- Enter the network related details.
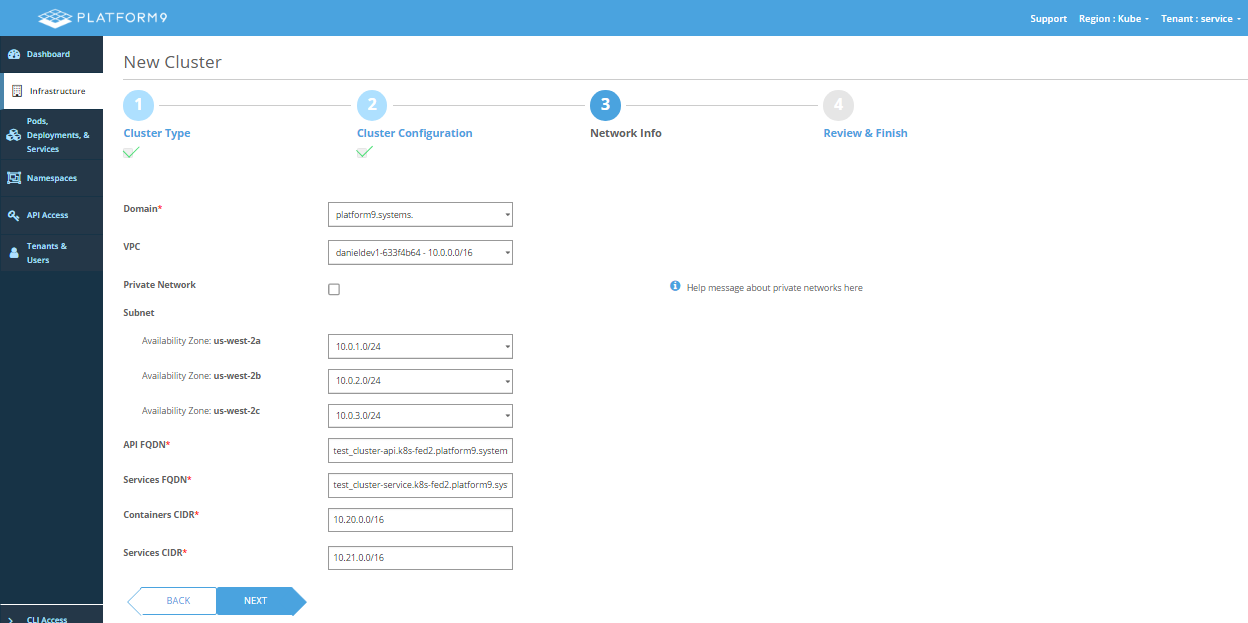
Field Description Domain The base domain that your Kubernetes cluster should use. This is required to configure the API and service FQDNs. The list of possible domains is read from the Hosted Zone resources of your cloud provider's DNS service (Route53 for AWS). VPC You can either create a new VPC or select from one of existing VPCs to use for this cluster. If you choose to create a new VPC, Platform9 auto-selects Container and Service CIDR for you. You can always customize these. Private Network Select the check box to create the cluster on a private network. Private Subnet Specify the private subnet if you have selected the private network check box. This is the private subnet for the selected availability zone, over which the Kubernetes cluster communicates. This is applicable when you want to select a pre-created subnet under a pre-existing VPC. Public Subnet The public subnet for the selected availability zone, over which the Kubernetes cluster communicates. This is applicable when you want to select a pre-created subnet under a pre-existing VPC. API FQDN The FQDN that is to be used to access the Kubernetes cluster API server from outside the VPC. This is based off the base domain name selected earlier. Services FQDN the FQDN that is to be used to access the Kubernetes services from outside the VPC. This is based off the base domain name selected earlier. Containers CIDR The IP range that Kubernetes uses to configure the Docker containers that will be deployed. Example: 10.20.0.0/16 Services CIDR The IP range that Kubernetes uses to configure services deployed by Kubernetes. Example: 10.21.0.0/16 - Click Next. Review the cluster configuration details. You may click Back to go back and make changes.
- Click Create Cluster once the review is done.
The highly available cluster is created and deployed.