Kubernetes FinOps: Elastic Machine Pool(EMP) Step-by-Step guide : Part 1
In previous blog posts and articles, we’ve laid out some of the issues operators encounter with optimizing Kubernetes utilization, and how our Elastic Machine Pool product comprehensively solves those issues without needing to constantly have a tool (or your ops team) micromanaging pod resource configurations in your cluster.
Notably, in our conversations with prospects, we’ve often encountered the mindset that a solution this powerful must be difficult to implement—but the reality is that fully implementing EMP is easier than the “quick-starts” of many other tools. In this and the next blog post, we’ll cover implementing EMP step-by-step, from the initial login to the EMP product control center to successfully running workloads (and saving money!) on EMP-managed infrastructure.
Prepare for EMP
Once you’ve signed up for EMP (which you can do as a free trial to try it out), there are a few basic concepts that are relevant to the install process, as well as prerequisite items you’ll need to take care of before beginning the install. You’ll need to establish a set of IAM credentials in AWS that EMP will use to create and configure infrastructure. You’ll also want to take stock of your existing EKS clusters and the workloads on them to decide how to deploy EMP most effectively.
Basic EMP architecture concepts for install
When planning your EMP implementation, keep in mind the high-level architecture: Bare metal is provisioned, then a virtualization environment is built on top of it, from which VMs are provisioned and joined to EKS clusters. As a result you will need to keep these general concepts in mind:
- The number and types of bare-metal nodes EMP can provision is constrained by the quotas enforced in your AWS account and actual availability in the regions you’re using.
- The relationship between EVM pools and EKS clusters is one-to-many: One EKS cluster can only be associated with one pool, but one pool can serve an arbitrary number of EKS clusters (as long as VPC peering is enabled, or all the target clusters are in the same VPC).
Credential prerequisites
EMP needs an AWS IAM credential with sufficient permissions to perform its operations in AWS – both creating infrastructure and operating on your existing EKS clusters to join EVMs to them as worker nodes. The easiest route is to create a new IAM user with the CloudFormation template linked from the IAM credential documentation page, which will automatically create the credential with the required permissions and other criteria for EMP. If you need or want to create one manually or reuse an existing one (for example, your organization restricts creation of new IAM users), you can do so; however, you will also need to make sure you grant the required permissions and follow the required criteria for the credential, and modify some additional configuration in EKS as well, as detailed in the credential documentation.
You will also need two SSH keys – one for the bare-metal instances and one for the EVMs running on them. The bare-metal key should be created as an AWS keypair. On the other hand, the EVM public key will be injected as a public key string, so make sure you have the public key file for it handy for when you get to that point in the setup.
Assessing your workloads
Because it leverages AWS bare metal, EMP has some specific best practices and limitations on how EKS clusters should be configured and workloads should be run. Some of the more important ones to be aware of are:
- Regions: EMP is currently pre-general-availability and at the moment only supports clusters running in us-east-1 or us-west-2.
- Instance types: EMP currently doesn’t support Graviton or GPU AWS instances – but these are on our roadmap for a future release.
- Networking:
- The VPCs in which your EKS clusters run must have a public subnet so the EMP configuration services hosted by Platform 9 can reach the cluster API. However, you can still configure EMP to deploy the actual bare-metal nodes it manages to private subnets, as long as the private subnet(s) have outbound Internet access (such as via a NAT gateway).
- AWS load balancers must use the IP target type to load-balance workloads running on EVMs – a similar limitation, and for the same reason, as using Fargate with EKS: if a container isn’t running on an EC2 instance, it has no instance ID to associate with instance-based targets. If your cluster is running mixed EMP and EC2 workloads, you can still use NLBs with instance-based targets, but make sure the backing Service for them selects only workloads running on your EC2 nodes. Also, the installed CNI provider for the EKS clusters you want to use EMP with must be the AWS VPC CNI (the default).
- For additional details on required networking, see the Networking Prerequisites documentation.
- Storage:
- EBS-backed volumes used by your applications should use the io2 volume type. Because VM live migration performance is dependent (in part) on particular storage features, live-migration of VMs is much faster with io2 volumes. You can still use EMP with older volume types, but VM migrations will take longer, which may impact application availability.
- You may need to change your EKS cluster’s CSI driver configuration – for details on when you may need to do this, and if so, what changes to make, see the EMP EBS CSI Config documentation.
- Workload scheduling: EMP adds a taint to the EVMs it provisions, so to run on EVMs, pods in the EKS cluster must tolerate the taint. We’ll cover this briefly in the section on testing at the beginning of part 2, and discuss it in more detail later in that post as part of migrating your applications from EC2 nodes to EMP VMs.
- For the full details of all prerequisites and supported configurations, see the Prerequisites section of the EMP documentation.
Initial login and setup on the Platform9 EMP console
EMP uses Auth0 for authentication. To log into the EMP management portal, you will need your organization’s Auth0 EMP credential – this credential will be provided to your organization’s designated administrators by Platform9.
Add a cloud provider
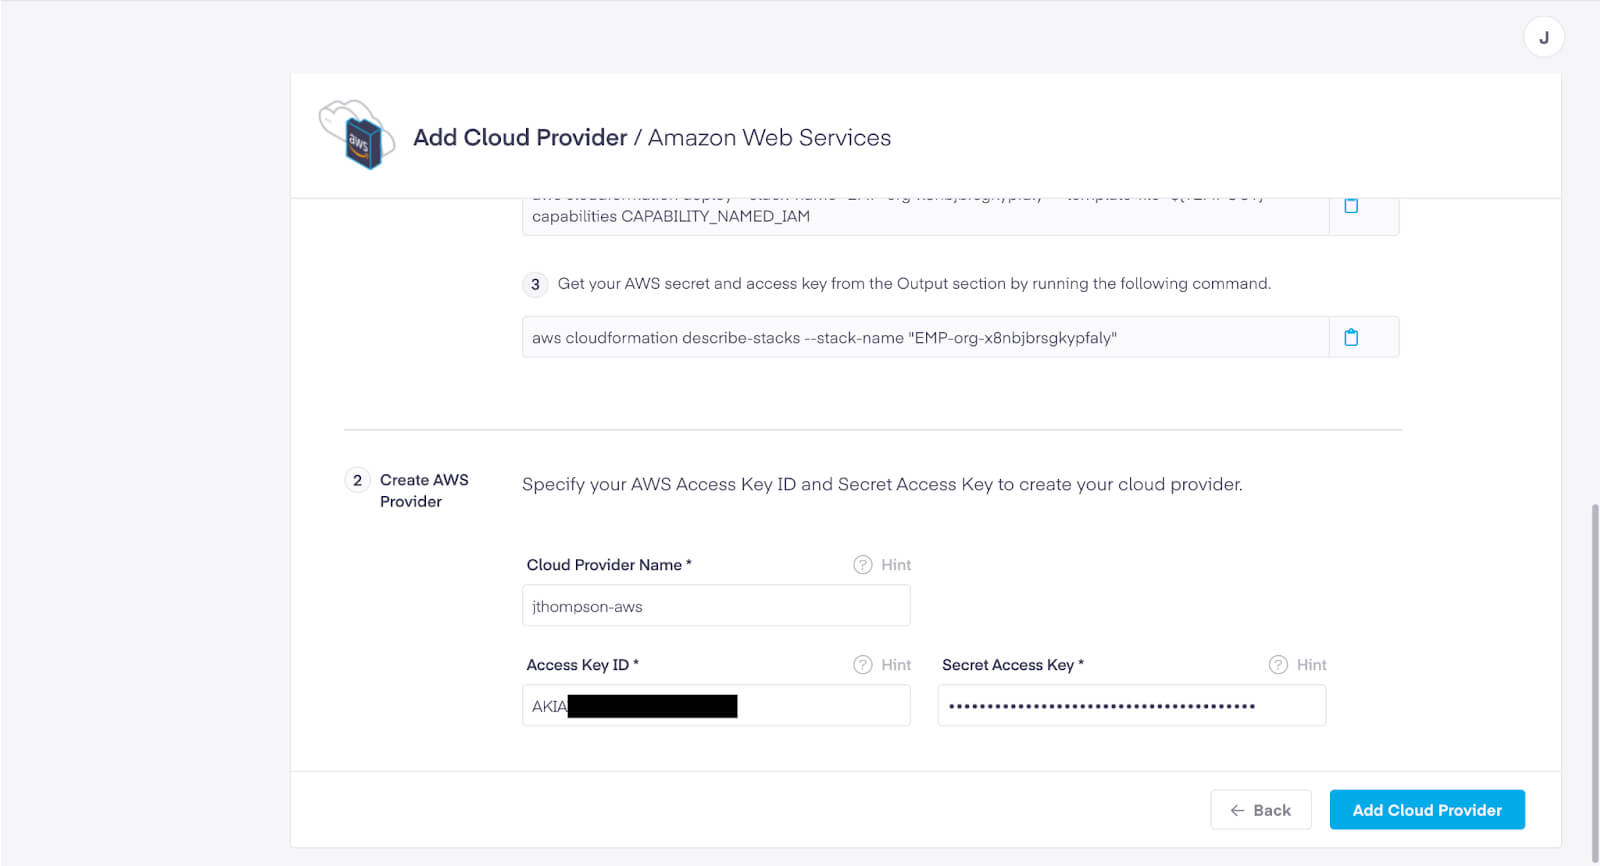
When you first log in, if a cloud provider credential hasn’t already been added to your account, you’ll be prompted to do so. When you click the Add a Cloud Provider button, you’ll be given the detailed instructions for how to create a new IAM user with the necessary permissions – if you’ve already done that, you can skip to the bottom and fill in a name you’ll use to refer to this credential elsewhere in the GUI, the access key ID, the secret access key, and click Add Cloud Provider.
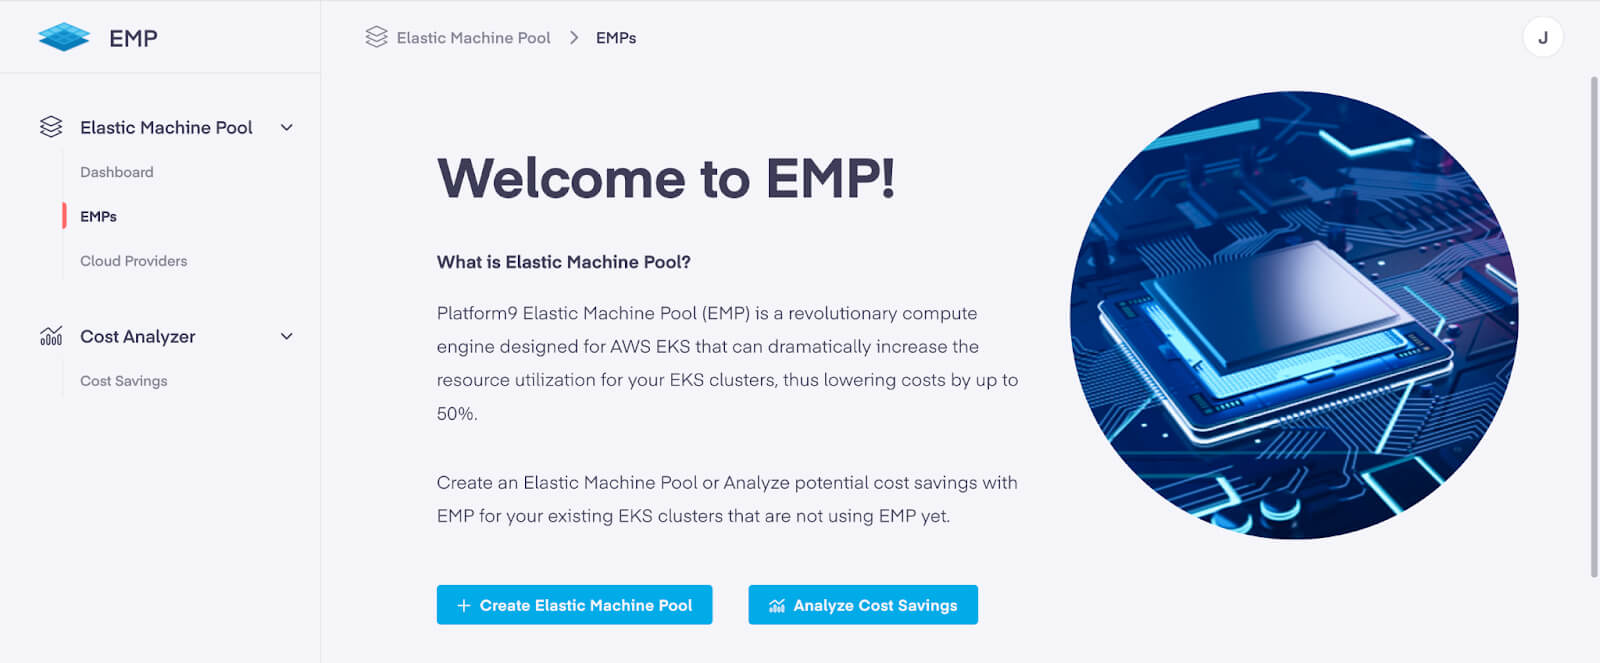
Once the console validates your IAM credential, you’ll see the Cloud Providers pane of the EMP console with a list of credentials. After verifying your credential is listed there, click on EMPs in the sidebar and then click the Create Elastic Machine Pool button.
Create an Elastic Machine Pool and add it to your EKS cluster
To create your new Elastic Machine Pool:
- First, give it a name, then select your cloud provider credential and the region your target cluster(s) are running in — you’ll notice that the console will then scan the target region for clusters that EMP can be added to. Then choose the cluster(s) you want the new Elastic Machine Pool to support. EMP can make the required security group changes to provide connectivity automatically or you can choose security groups you already configured manually (as long as they provide all of the required connectivity).
- If needed, you can also enable VPC peering and specify different CIDR subnets than the default in this step.
- In the next step, you’ll configure the characteristics of the bare-metal pool itself: give the pool a name, choose what instance family it will use, and select the availability zones that should be used for provisioning the bare-metal hosts. You’ll also choose the SSH keys to use for the bare-metal hosts, the VPCs and subnets to attach them to, and the minimum and maximum pool size.
- In the third step, you’ll configure the characteristics of the EVMs that will be created on these hosts: the specific instance type within the instance family selected for this pool, the SSH public key string to be injected into these EVMs, and the cluster linked to this Elastic Machine Pool that these EVMs can be registered as nodes for.
- If needed, you can also set some advanced options like overcommitment ratios and the root disk size. You can also specify multiple pools to be created with the same settings as this one, and linked to different clusters.
- The fourth and last step is just a review of everything you set in the previous steps. If nothing needs to be changed, click Create and the install process will begin!
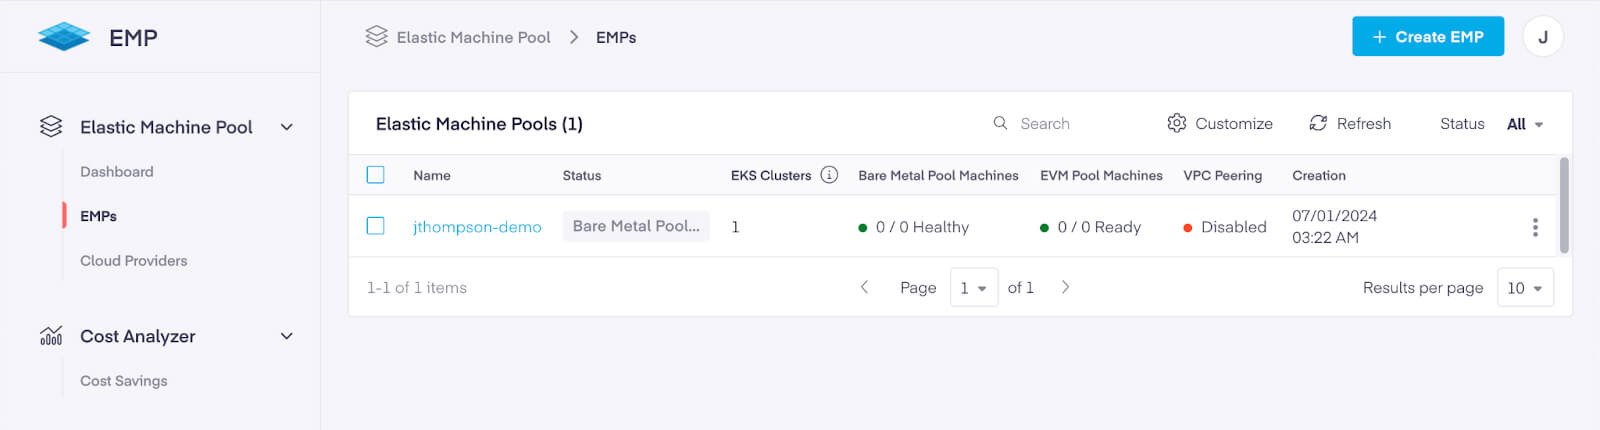
Once you’ve clicked the Create button for the EMP, the new pool will show up in the EMPs list and you’ll see the Status and health indicators change as it goes through the stages of provisioning:
What’s next
Now that you’ve got a little time to wait (about 30-45 minutes usually), this is a perfect opportunity to refill your beverage of choice, and read through part 2 of this blog post to get ready for your next steps when the install completes!
Additional reading and reference
Previous articles and blog posts by Platform9
Kubernetes FinOps: Right-sizing Kubernetes workloads
Platform9 Elastic Machine Pool for EKS Cost Optimization
Elastic Machine Pool info
- Install prerequisites
- IAM credential prerequisites
- Networking prerequisites
- Storage configuration
- Kubernetes FinOps: Elastic Machine Pool Step-by-Step guide : Part 2 - July 9, 2024
- Kubernetes FinOps: Elastic Machine Pool(EMP) Step-by-Step guide : Part 1 - July 9, 2024
- Kubernetes FinOps: Right-sizing Kubernetes workloads - April 1, 2024