

Overview
This article will cover:
What Is Kubernetes Service Discovery
One of the reasons why Kubernetes is the leading Container Orchestration platform today is because it offers a nice separation of concerns in terms of describing workloads. Essentially, Kubernetes consists of a collection of API-oriented, very fast binaries, that are well-documented and easy to contribute to and build applications upon (more on Kubernetes Architecture here).
The basic Kubernetes building block starts with the Pod, which is just a Kubernetes resource representing a collection of containers that can be created and destroyed on demand. Because Kubernetes cluster scheduler can move or reschedule a Pod to another Kubernetes cluster node, any internal IPs that this Pod is assigned can change over time.
If we were to connect to this Pod using it’s internal IP address in order to access our application, the connection would stop working as soon as the Pod moves to another node. To make a Pod reachable via external networks or other Kubernetes clusters without relying on any internal IPs, we need another layer of abstraction. Kubernetes offers that abstraction with a construct called a Service Deployment.
Kubernetes Service meshes solve challenges caused by container and service sprawl in a microservices architecture by standardizing and automating communication between services.
Services provide network connectivity to Pods that work uniformly across clusters. Service discovery is the actual process of figuring out how to connect to a service.
In this article, we are going to explore some of the fundamental principles of service discovery in Kubernetes along with some common troubleshooting issues and gotchas that can appear in large-scale application deployments.
Deploy an Application as a Kubernetes Pod
For the following examples, we assume you have a configured Kubernetes cluster. I created one using DigitalOcean with one node. For testing we are using hello-kubernetes image. Let’s get started.
Let’s first create an initial infrastructure so that we can observe the concepts of services and service discovery in Kubernetes and how they work in practice,
On your Kubernetes cluster, create two namespaces, one called develop and one called production:
$ cat << ENDL > develop-namespace.yml
apiVersion: v1
kind: Namespace
metadata:
  name: develop
ENDL

$ cat << ENDL > production-namespace.yml
apiVersion: v1
kind: Namespace
metadata:
  name: production
ENDL

$ kubectl apply -f develop-namespace.yml
namespace/develop created

$ kubectl apply -f production-namespace.yml
namespace/production created
Next we will deploy our example application on both namespaces as a Kubernetes deployment:
$ cat << ENDL > app-deployment-develop.yml
apiVersion: apps/v1
kind: Deployment
metadata:
  name: hello
  namespace: develop
spec:
  replicas: 2
  selector:
    matchLabels:
      app: hello
  template:
    metadata:
      labels:
        app: hello
    spec:
      containers:
      - name: hello-kubernetes
        image: paulbouwer/hello-kubernetes:1.5
        ports:
        - containerPort: 8080
ENDL

cat << ENDL > app-deployment-production.yml
apiVersion: apps/v1
kind: Deployment
metadata:
  name: hello
  namespace: production
spec:
  replicas: 2
  selector:
    matchLabels:
      app: hello
  template:
    metadata:
      labels:
        app: hello
    spec:
      containers:
      - name: hello-kubernetes
        image: paulbouwer/hello-kubernetes:1.5
        ports:
        - containerPort: 8080
ENDL

$ kubectl apply -f app-deployment-develop.yml
$ kubectl apply -f app-deployment-production.yml
Now we can describe the Pods corresponding to this application and gather their IP addresses:
$ kubectl describe pods –all-namespaces
…
Name:               hello-f878d7d65-qjmbp

Namespace:          production

IP:                 10.244.0.112

...
In the output above, the IPs for each Pod are internal and specific to each instance. If we were to redeploy the application, it would be assigned a new IP each time.
We now verify that we can ping a Pod within the Kubernetes cluster. Create a temporary Pod in the default namespace and ping that IP address:
$ cat << ENDL >> jumpod.yml
apiVersion: v1
kind: Pod
metadata:
name: jumpod
namespace: default
spec:
containers:
– name: busybox
image: busybox:1.28
command:
– sleep
– “3600”
imagePullPolicy: IfNotPresent
restartPolicy: Always
ENDL
$ kubectl apply -f jumpod.yml
pod/jumpod created
$ kubectl exec -it jumpod ping 10.244.0.149
PING 10.244.0.149 (10.244.0.149): 56 data bytes
Using the nslookup tool, we can get the FQDN of the Pod:
$ kubectl exec -it jumpod nslookup 10.244.0.149
Server:    10.245.0.10
Address 1: 10.245.0.10 kube-dns.kube-system.svc.cluster.local

Name:      10.244.0.149
Address 1: 10.244.0.149 10-244-0-149.hello.production.svc.cluster.local
Create a Service Deployment
Next, we use a service deployment to expose our application to the Internet. Here are examples for each namespace:
$ cat << ENDL > app-service-develop.yml
apiVersion: v1

kind: Service (1)

metadata:

name: hello

namespace: develop

spec:

type: LoadBalancer (2)

ports:

- port: 80 (3)

targetPort: 8080

selector:

app: hello (4)

ENDL
$ cat << ENDL > app-service-production.yml
apiVersion: v1
kind: Service (1)
metadata:
name: hello
namespace: production
spec:
type: LoadBalancer (2)
ports:
– port: 80 (3)
targetPort: 8080
selector:
app: hello (4)
ENDL
$ kubectl apply -f app-service-develop.yml
$ kubectl apply -f app-service-production.yml
Where:
-
-
- (1) We specify the kind of workload to be a Service.
- (2) We specify the Service type to be a LoadBalancer. This means that we expose the service externally using a cloud provider’s load balancer. Other options include ClusterIP, which makes the Service only reachable from within the cluster, NodePort, which uses the Node IP and a static port to expose the service outside the cluster, and finally, ExternalName, which maps a Service to a DNS name that we configure elsewhere.
- (3) This is the port to expose to the external network.
- (4) This is the name of the deployment that we want to connect to.
-
Verify that we can visit the public IPs of the services that we deployed:
$ kubectl get services –all-namespaces
NAMESPACE NAME TYPE CLUSTER-IP EXTERNAL-IP PORT(S) AGE
default kubernetes ClusterIP 10.245.0.1 443/TCP 150m
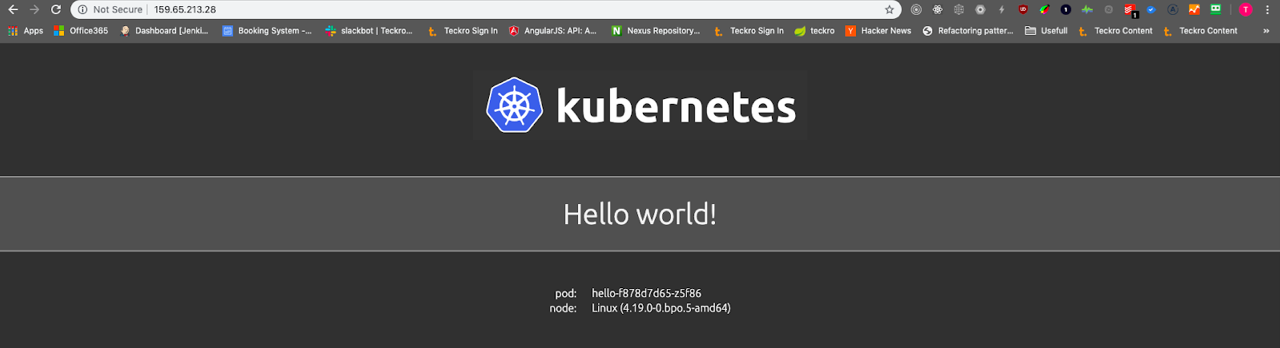
develop hello LoadBalancer 10.245.150.103 159.65.213.28 80:31129/TCP 64m
kube-system kube-dns ClusterIP 10.245.0.10 53/UDP,53/TCP,9153/TCP 150m
production hello LoadBalancer 10.245.143.177 159.65.214.225 80:31705/TCP 58m
If we visit either http://159.65.213.28 or http://159.65.214.225, we should be able to see the application running:
Note: If we were to use a NodePort Service type instead, then Kubernetes would expose the service on a random port within the range 30000-32767 using the Node’s primary IP address. For example, let’s look at the Droplet that was created when we provisioned the Kubernetes Cluster:

Here, the Node IP is 167.71.141.161, and when we create a NodePort Service, we get the following assignment:
$ kubectl get services --all-namespaces
NAMESPACE     NAME         TYPE           CLUSTER-IP       EXTERNAL-IP      PORT(S)                  AGE
default       kubernetes   ClusterIP      10.245.0.1                  443/TCP                  4h16m
develop       hello        NodePort       10.245.209.176              80:31519/TCP             17s
kube-system   kube-dns     ClusterIP      10.245.0.10                 53/UDP,53/TCP,9153/TCP   4h16m
production    hello        LoadBalancer   10.245.143.177   159.65.214.225   80:31705/TCP             164m
So, based on that information, we can visit http://167.71.141.161:31519/ and access the application again.
Also, note that the ClusterIP that was assigned here for both the develop and production namespaces is the LoadBalancer address. This means that it will balance the requests based on an algorithm (default is Round-robin) and it is only accessible within the cluster. We can verify this using the following commands:
$ kubectl exec -it jumpod nslookup 10.245.150.103
Server:    10.245.0.10
Address 1: 10.245.0.10 kube-dns.kube-system.svc.cluster.local

Name:      10.245.150.103
Address 1: 10.245.150.103 hello.develop.svc.cluster.local

$ nslookup 10.245.150.103
Server:     8.8.8.8
Address:    8.8.8.8#53

** server can't find 103.150.245.10.in-addr.arpa: NXDOMAIN
Additionally, we can access the applications from within the cluster using the following HTTP urls: http://hello.develop or http://hello.production
$ kubectl exec -it jumpod wget -- -O - http://hello.develop
Connecting to hello.develop (10.245.150.103:80)
The previous examples worked because this Kubernetes cluster automatically configures an internal DNS service to provide a lightweight mechanism for service discovery by default.
This is not, however, the only way to do it. We can use environment variables as a last resort, but they are not ideal in cases where the Pod might fail to reach a service that was created after the Pod.
In our example application, Kubernetes exports a set of environment variables on the node where the Pod gets created:
$ kubectl exec -it hello-f878d7d65-2qctb env –namespace=develop
…
HELLO_SERVICE_PORT=80
HELLO_PORT=tcp://10.245.150.103:80
HELLO_SERVICE_HOST=10.245.150.103
HELLO_PORT_80_TCP=tcp://10.245.150.103:80
HELLO_PORT_80_TCP_PROTO=tcp
HELLO_PORT_80_TCP_ADDR=10.245.150.103
HELLO_PORT_80_TCP_PORT=80
NPM_CONFIG_LOGLEVEL=info
NODE_VERSION=8.1.0
YARN_VERSION=0.24.6
HOME=/root
Below we can see the final schematic of the Node and ClusterIP layout:

Service Discovery Troubleshooting: Common Gotchas and Things to Keep in Mind
Now that you understand the basics of Service Discovery with Kubernetes, let’s look at some of the most common troubleshooting scenarios.
We cannot find the service Environmental Variables
You have created a Pod that needs to access a Service, and you discover that there are no environment variables defined other than the default ones. In this case, you may have to redeploy the Pods again, because the Service will not inject the variables after the Pod is created.
The quickest way to redeploy them is to scale them down and up again:
$ kubectl scale deployment hello --replicas=0 --namespace=develop
$ kubectl scale deployment hello --replicas=2 --namespace=develop
If you inspect the Pod environment again, you should be able to read the service variables from the environment.
DNS Service Discovery is not working
First, make sure that the DNS addon service is installed:
$ kubectl get pods --namespace=kube-system -l k8s-app=kube-dns
NAME                      READY   STATUS    RESTARTS   AGE
coredns-9d6bf9876-lnk5w   1/1     Running   0          174m
coredns-9d6bf9876-mshvs   1/1     Running   0          174m
Then, verify that the service IP address is assigned:
$ kubectl get services --namespace=kube-system -l k8s-app=kube-dns
NAME       TYPE        CLUSTER-IP    EXTERNAL-IP   PORT(S)                  AGE
kube-dns   ClusterIP   10.245.0.10           53/UDP,53/TCP,9153/TCP   176m
Since DNS is an addon to Kubernetes, it may not have been installed or configured correctly.
Now, when a new Pod is created, Kubernetes adds the following entry in /etc/resolv.conf with the nameserver option to the cluster IP of the kube-dns service and appropriate search options to allow for shorter hostnames:
$ cat /etc/resolv.conf
nameserver
search .svc. svc.
options ndots:5
If we try to nslookup the kubernetes.default name and it fails, then there is a problem with the coredns/kube-dns add-on:
$ nslookup kubernetes.default
Server: 10.32.0.10
Address 1: 10.32.0.10
nslookup: can’t resolve ‘kubernetes.default’
We also need to make sure that the server address matches the kube-dns service IP that we found earlier (for our example 10.245.0.10).
Note: DNS Configuration for multi-cloud Kubernetes (federated) environments is not yet GA. You can look at the relevant kubefed project for more information.
Conclusion
In this article, we have seen how easy it is to expose an application publicly using Kubernetes Services. We also troubleshooted a couple of common scenarios that we may encounter. While the basic concepts are easy to grasp, there is a lot more than that behind the scenes.
The road to migrate an enterprise infrastructure to using Kubernetes is long and full of surprises. If we want a painless alternative, consider using our Managed Kubernetes solution which comes built-in with fully automated day-2 operations, 99.9 SLA for bare-metal or VMs or Kubernetes running on any infrastructure, and Managed Apps for seamless integration with monitoring, logging and other critical Kubernetes services.
Further Readings
-
- Kubernetes Service Mesh: A Comparison of Istio, Linkerd and Consul
- Kubernetes Autoscaling
- Kubernetes Stateful Applications
- The Definitive Guide to Kubernetes Upgrades
- Kubernetes Multi-Tenancy Best Practices
- Kubernetes Networking Challenges at Scale
- Kubernetes Service Mesh – Top Tips for Using Service Meshes
- Best Practices for Selecting and Implementing Your Service Mesh


