I travel across the US and everywhere I go there is a buzz around Kubernetes. From Silicon Valley companies jumping in with both feet and running Kubernetes workloads in production, to East Coast finserv and retail organizations, to middle America — everyone is digging in to understand the details and how best to take advantage of Kubernetes in their companies.
Huge numbers of developers in large organizations are already actively using Kubernetes, and are now pushing their infrastructure teams — demanding that Ops quickly catch up to enable mission-critical Kubernetes applications at scale.
Taking Kubernetes to Production is the key challenge that these organizations are facing today. There are many questions that need to be answered on the Journey to Production ready Kubernetes – among them:
- How do I monitor Kubernetes?
- How do I resolve issues?
- How do I upgrade my Kubernetes installation?
- How do I secure Kubernetes?
- How do I solve Persistent Storage?
- How do I provide DR?
- How do I protect my data?
- How do I integrate a CI/CD process?
- Do I trust the big-3 public cloud providers with their Kubernetes offerings?
- Can I find the much sought after and expensive to hire Kubernetes experts? Should I/ Can I train people internally to become fluent with Kubernetes?
- If I go down the training path, can the business afford that delay while building the team?
Many of these organizations find that Platform9 Managed Kubernetes is the answer to their challenges – and time to value – around adopting and operating Kubernetes at enterprise scale.
A Recipe for Kubernetes Peace of Mind, in Production
I strongly believe that in today’s modern IT (and the operational strains on IT Ops), fully-managed services are the ONLY way to go. And i’ve seen Kubernetes journeys fail spectacularly – and costly – when implemented in any other way: From DIY snowflake initiatives that gets thrown out after a year of development with nothing to show for it, to expensive implementation of traditional installed software products that get ripped and replaced every other year because – even after a lengthy implementation – the Day2 operational overhead that the organization is stuck with are even more complex. These organizations often find they need an army of administrators and Kubernetes engineers just to keep the lights on – that is not sustainable in the long run (neither from an FTE cost, even if they could hire and train people this quickly, nor from the perspective of revenue loss caused by recurring downtime and service interruptions of critical applications that the team is struggling to support.)
Kubernetes is notoriously difficult to deploy and operate at scale, particularly with regards to the emerging technologies and patterns. A SaaS, remotely managed service is the only safe bet for enterprise Kubernetes – to ensure time to value, SLA Guarantee and smooth operations at scale, along with self service experience and flexibility to grow to different types of applications and infrastructure. You do not need to train to be a pilot to travel by airplane. Why invest in training to become a Kubernetes expert, in order to take advantage of this technology for enterprise use cases.
Platform9 is the industry’s only SaaS-managed Kubernetes service. It eliminates the operational overhead of Kubernetes at scale by delivering it as a fully managed service, with all enterprise-grade capabilities included out of the box. Upgrades, multi-cluster operations, high availability, monitoring, healing, and more — are all handled automatically and backed by a 99.9 SLA – anywhere. This enables you to easily run Kubernetes instantly, on any infrastructure: leveraging your existing on-prem datacenters, public clouds or edge deployments.
In this article, I will explore how simple it is to migrate your existing Kubernetes applications to Platform9’s rock-solid Kubernetes to benefit from the industry’s most comprehensive Kuberentes solution for operational peace of mind.
Migrating your existing Kubernetes app to Platform9 Managed Kubernetes using Portworx
I wanted to provide a detailed, technical, tutorial for how users with existing Kubernetes applications can easily migrate their clusters to use Platform9 Managed Kubernetes.
I found that using the data and application migration capabilities of Kubernetes storage platform provider Portworx greatly simplifies the migration process. This migration feature integrates with Kubernetes to automatically backup or migrate your data and workloads between clusters.
To demonstrate the “soup to nuts” migration process from your one-off Kubernetes cluster to Platform9:
- I first created my own Kubernetes sample app. To keep it simple, I created a Kubernetes cluster with a master and 2 worker nodes, deployed with kubeadm – assuming this is how your app also started its life.
- The cluster is running WordPress as an example for a stateful application, and Portworx for persistent storage and data management.
- I then deployed Kubernetes with Platform9
- Showed how to leverage Platform9 Managed Kubernetes and Portworx to migrate the existing WordPress application to its new – remotely-managed – home!
- I then demonstrate migrating the same application from its on-prem Kuberentes infrastructure to AWS – to enable DR – with both environments managed by Platform9.
This is a true story…
Below is a real example of the developer experience of the migration steps.
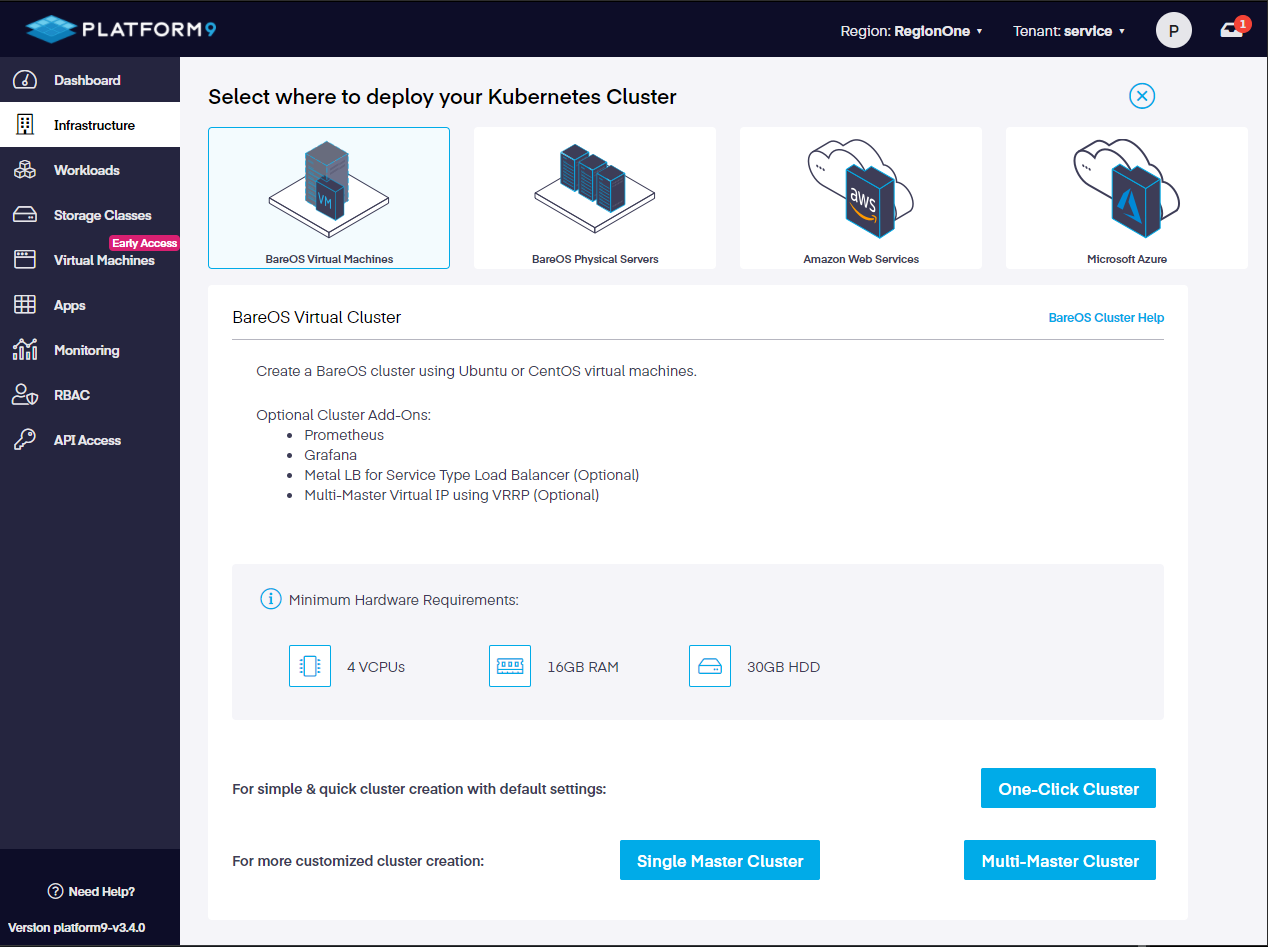
Install Platform9 Managed Kubernetes on Your Infrastructure
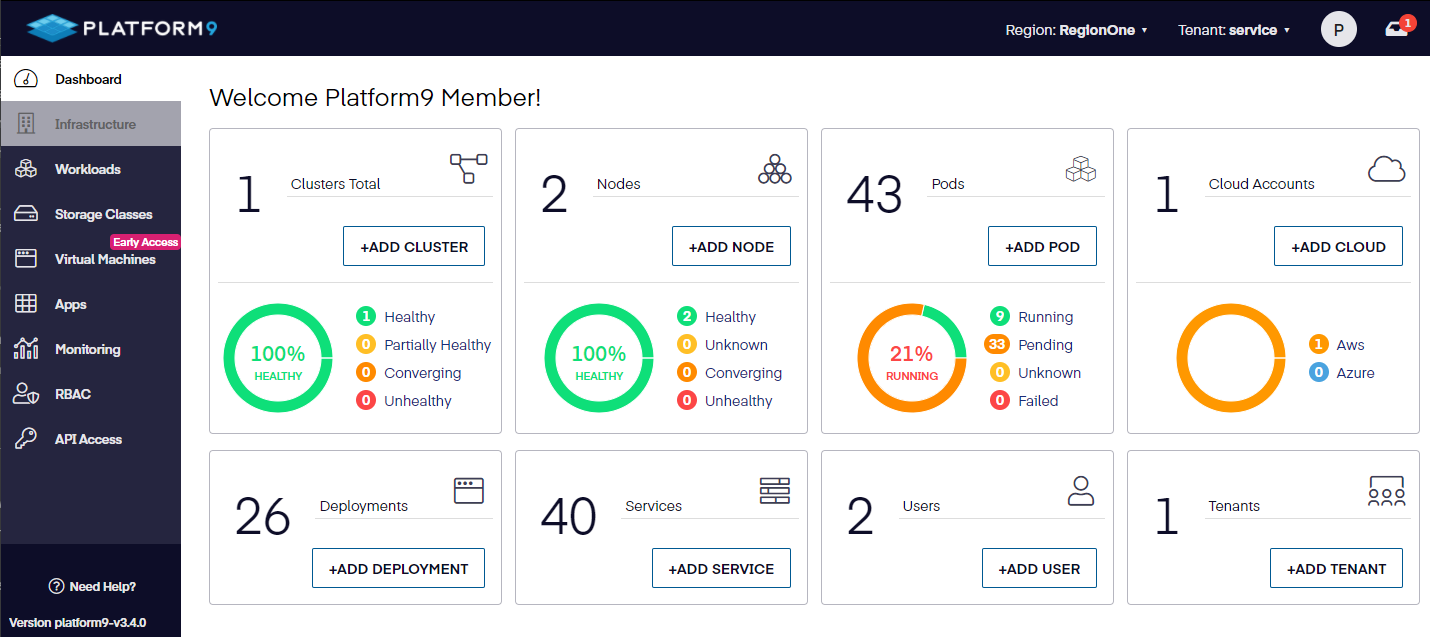
At this point I have my existing Kubernetes cluster up and running and for that I used kubeadm as the installer. For the next Kubernetes cluster I will use Platform9’s UI and deploy a Kubernetes cluster on my on-premises infrastructure. This is a 5 step process (seen in the wizard screenshot below) where I leveraged the Platform9 UI to create a Kubernetes cluster on top of Openstack (which I use to manage VMs in my datacenter)
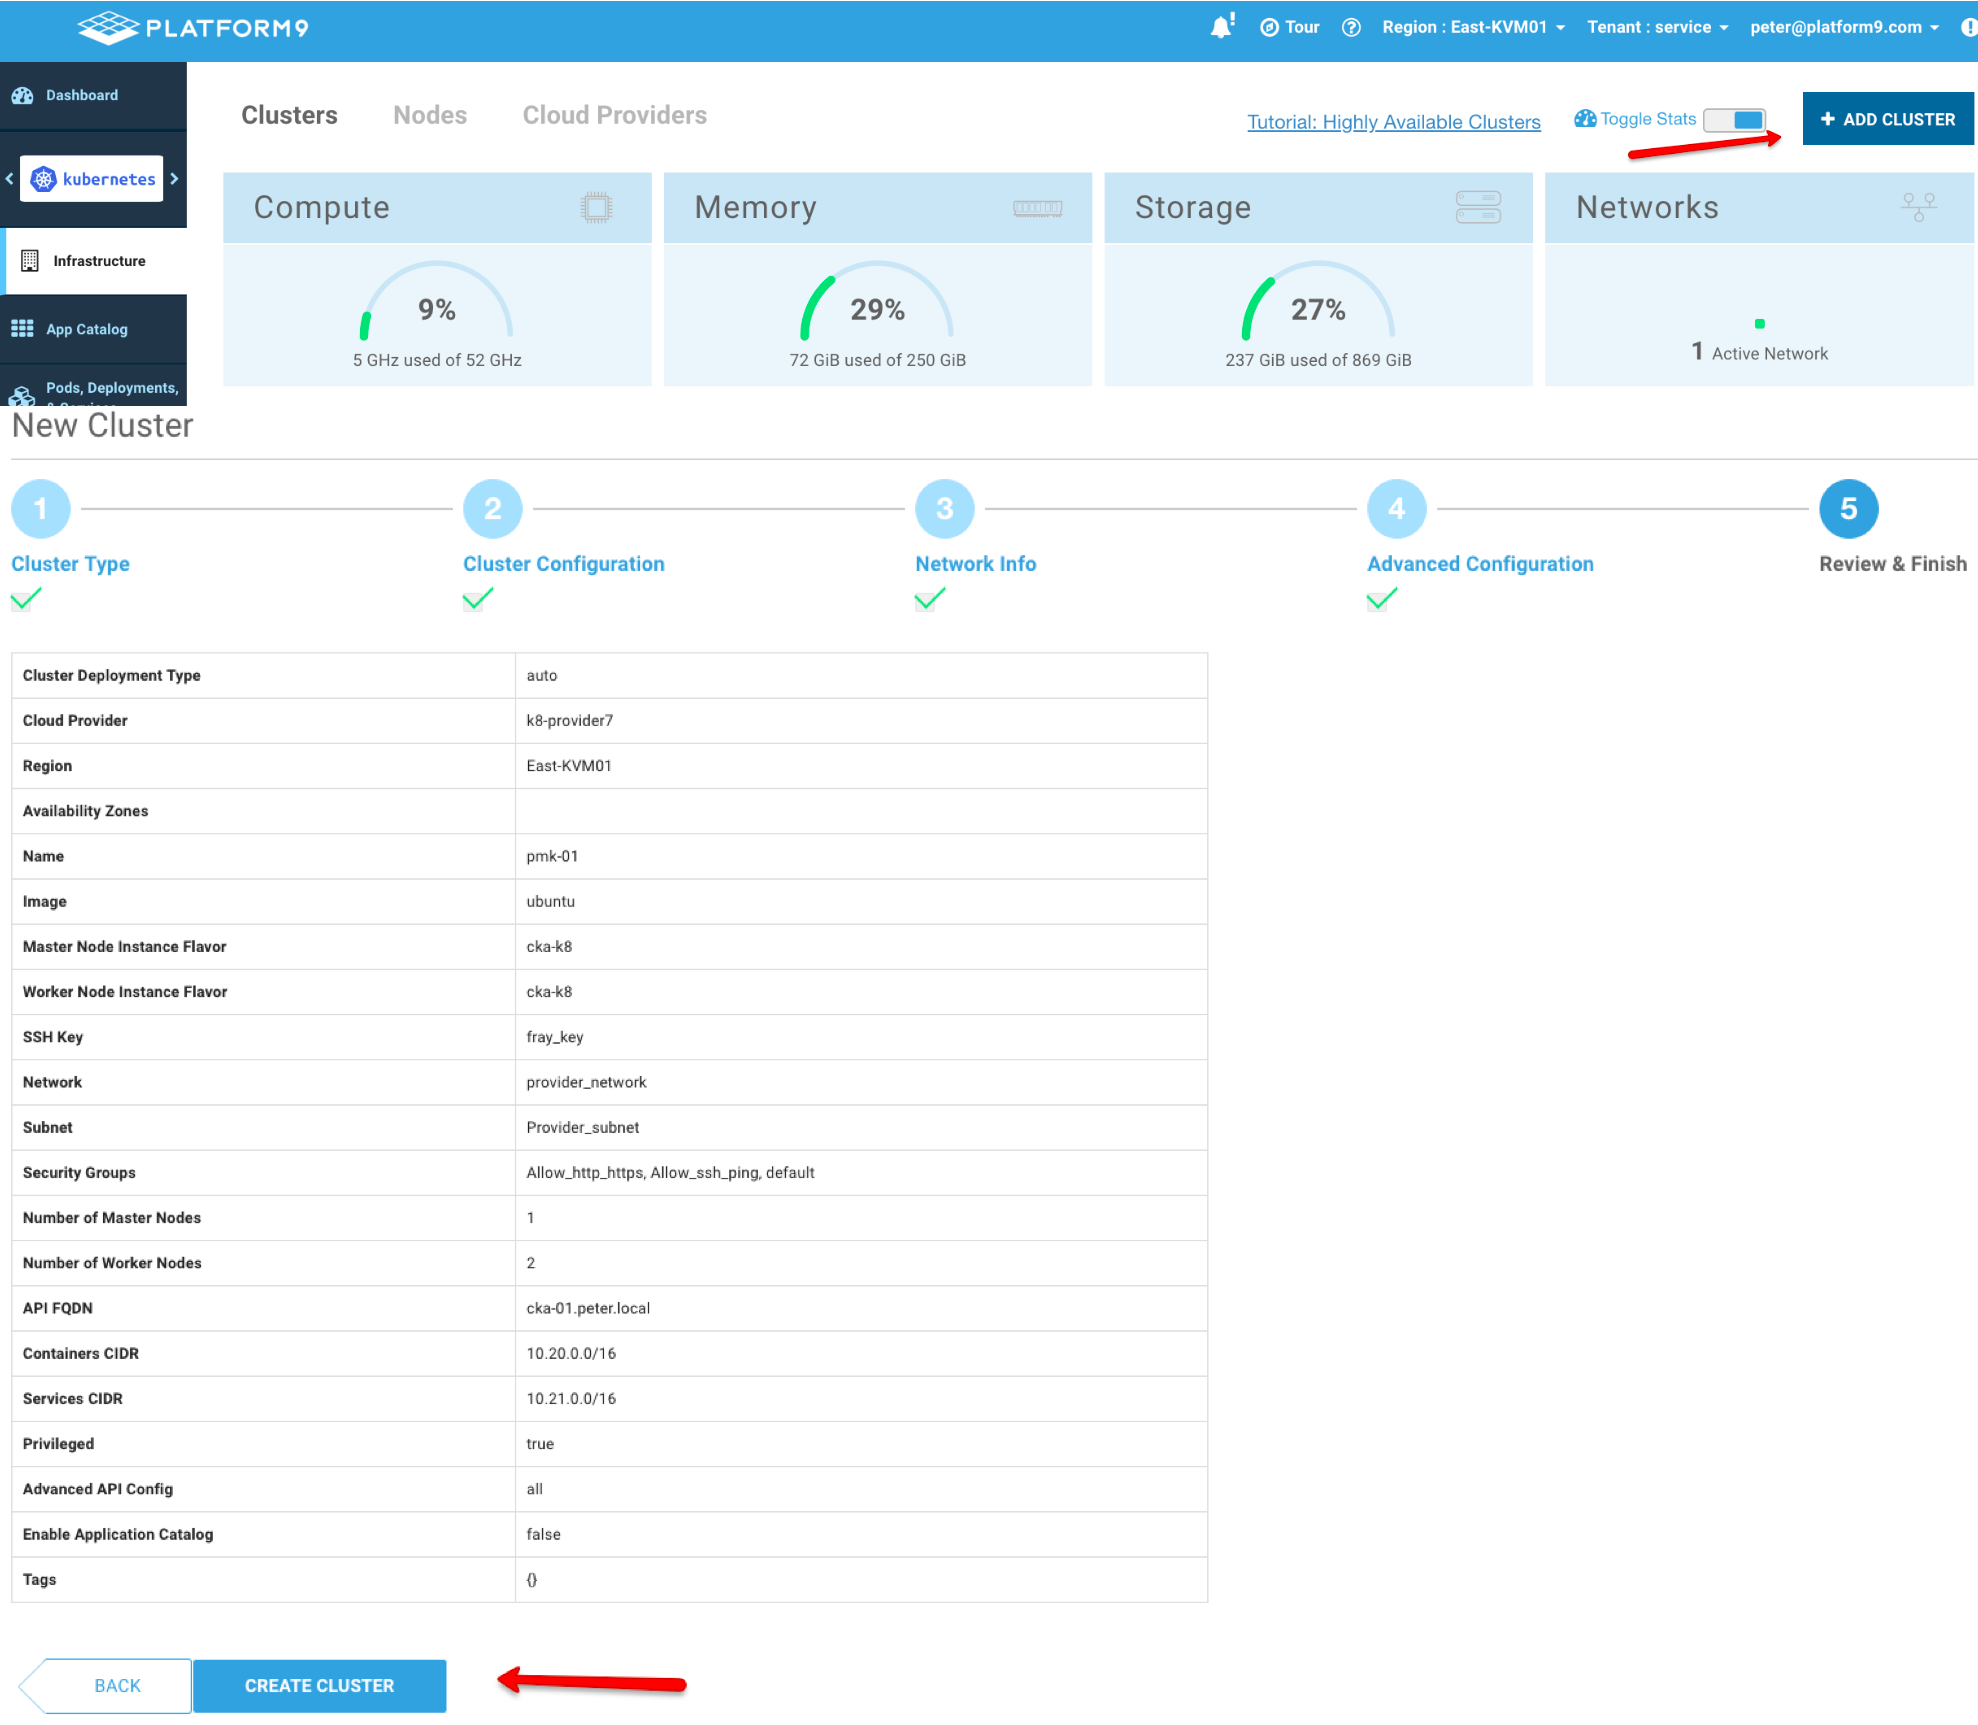
The cool part of this is that Platform9 automatically created the underlying virtual machines for my cluster to run. After about a 5 minute wait, I had 3 VM’s created and Kubernetes was deploying. Simple. No Ops required. And you can’t beat the time to market — particularly compared to all the scripting and about an hour process that a kubeadm deployment requires.
Time Invested: 5 Mins
Portworx Installation: 10 Minutes – 2 Clusters
I have written before about Portworx. Their software rocks, well, just about as rocking as Platform9’s :). Anyways, I wanted to have a default storage class for Kubernetes and Portworx makes this easy.
The Portworx installation documents are located here.
After attaching volumes to the Portworx server we need to setup that volume with LVM
fdisk /dev/vdb
pvcreate /dev/vdb1
vgcreate vol-k8 /dev/vdb1
First, start with the Portworx docs website here : and follow the instructions and generate the Portworx spec.
Then use kubectl to apply the spec.
kubectl apply -f 'https://install.portworx.com/2.0?mc=false&kbver=1.11.5&k=etcd%3Ahttp%3A%2F%2Fpx-etcd1.portworx.com%3A2379%2Cetcd%3Ahttp%3A%2F%2Fpx-etcd2.portworx.com%3A2379%2Cetcd%3Ahttp%3A%2F%2Fpx-etcd3.portworx.com%3A2379&f=true&j=auto&c=px-cluster-pmk-01-2e9f535a-fceb-4ba4-8729-1afe21a4bfa5&stork=true&lh=true&st=k8s'
After waiting for Portworx to come online I wanted to create a default storage class for both Kubernetes clusters that I have- the existing one deployed with kubeadm and the one deployed with Platform9 Managed Kubernetes.
I applied the below yaml to both clusters:
kind: StorageClass
apiVersion: storage.k8s.io/v1beta1
metadata:
  name: portworx-sc
  annotations:
    storageclass.kubernetes.io/is-default-class: 'true'
  labels:
     kubernetes.io/cluster-service: 'true'
provisioner: kubernetes.io/portworx-volume
parameters:
  repl: "1"
$ -> kubectl apply -f default-storage.yaml
storageclass.storage.k8s.io "portworx-sc" created
Let’s make sure the Storage Class was created:
$ -> kubectl get sc --all-namespaces
NAME                    PROVISIONER                     AGE
portworx-sc (default)   kubernetes.io/portworx-volume   1m
stork-snapshot-sc       stork-snapshot                  5d
Time Invested: 10 Minutes
Kubernetes Wordpress Example Installation
To demonstrate the migration to Platform9 managed Kubernetes I needed a sample application. The only requirement is that this application needs to use a Kubernetes Storage class for persistent storage. The reason for this is that I believe that many of the initial applications that get migrated to Kubernetes will require storage. I also believe that greenfield applications will start becoming more cloud native – 12 factor stateless applications.
For my sample app I chose the well documented Wordpress example, and installed it as outlined in this tutorial Kubernetes WordPress on Mysql (but I modified the storage requirement from 20Gi to 3Gi)
After following the instructions above I have a WordPress application running on mysql that leverages Portworx for persistent storage.
root@master-01:~/wordpress# kubectl get po
NAME                              READY   STATUS    RESTARTS   AGE
wordpress-5d9fbc6c57-g4jzx        1/1     Running   0          1m
wordpress-mysql-c6d888997-pw7sz   1/1     Running   0          2m
I did have a little trouble with the secret generator as described in the kubernetes.io site. I did get a secret generated but its name was as described below:
root@master-01:~/wordpress# kubectl get secret
NAME                    TYPE                                  DATA   AGE
default-token-qhx9b     kubernetes.io/service-account-token   3      1h
mysql-pass-9ckht7bgkf   Opaque                                1      1h
So I had to modify the mysql-deployment.yaml and the wordpress-deployment.yaml to reference the generated name above. Below is what I changed.
- name: MYSQL_ROOT_PASSWORD
          valueFrom:
            secretKeyRef:
              name: mysql-pass-9ckht7bgkf
              key: password
The last thing I changed was the Service Type LoadBalander to Service Type NodePort.
root@master-01:~/wordpress# kubectl get services
NAME              TYPE        CLUSTER-IP    EXTERNAL-IP   PORT(S)        AGE
wordpress         NodePort    10.97.94.82           80:31379/TCP   8m
wordpress-mysql   ClusterIP   None                  3306/TCP       9m
Wordpress is up and running. Simple!
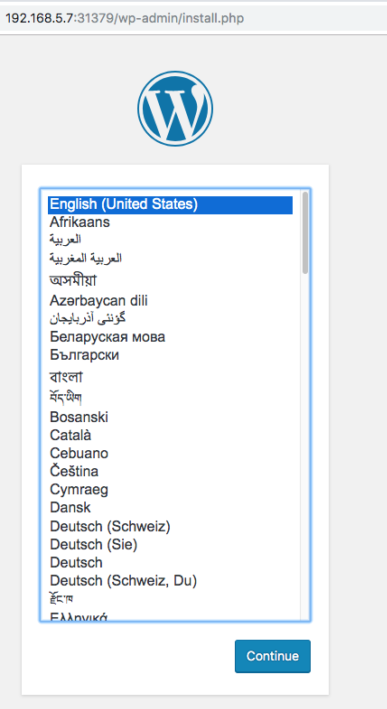
Time Invested: 15 mins
Portworx App and Data Migration – Migrating kubeadm cluster to Platform9 Managed Kubernetes
If you are following along we now have two Kubernetes clusters installed:
- The existing cluster deployed with kubeadm
- The cluster deployed with Platform9 Managed Kubernetes on-prem
Both clusters have Portworx installed. The WordPress sample app is only deployed on the existing kubeadm cluster.
It time to rock out the px-motion and move the running application to the Platform9 Kubernetes cluster.
Pairing the Clusters
I have already downloaded in install storkctl (consult the Portworx docs again if you need to)
The first step is to get the destination cluster’s token.
$ -> PX_POD=$(kubectl get pods -l name=portworx -n kube-system -o jsonpath='{.items[0].metadata.name}')
$ ->  kubectl exec $PX_POD -n kube-system -- /opt/pwx/bin/pxctl cluster token show
Token is e9a31402e81b17b8abfc4cd1d120a3591960fa05a5a12b0f2d7f312efedf6b0fd658ea4bdc81404fbfadf2029c7ac8ebcab9b4d25f72a11d74c6b550057edd9c
Creating the Cluster Pair Spec
Below is the generates and edited spec.
$ -> cat clusterpair.yaml
apiVersion: stork.libopenstorage.org/v1alpha1
kind: ClusterPair
metadata:
  creationTimestamp: null
  name: pf9-k8-cluster
  namespace: wordpress
spec:
  config:
    clusters:
      pmk-01:
        LocationOfOrigin: /Users/peterfray/.kube/config
        certificate-authority-data: LS0tLS1CRUdJTiBDRVJUSUZJQ0FURS0tLS0tCk1JSURYRENDQWtTZ0F3SUJBZ0lKQU5EblVUUlhTbTEvTUEwR0NTcUdTSWIzRFFFQkN3VUFNQ014SVRBZkJnTlYKQkFNTUdHdDFZbVZ5Ym1WMFpYTXRZMkZBTVRVMU5qTXhNREUxTnpBZUZ3MHhPVEEwTWpZeU1ESXlNemRhRncweQpPVEEwTWpNeU1ESXlNemRhTUNNeElUQWZCZ05WQkFNTUdHdDFZbVZ5Ym1WMFpYTXRZMkZBTVRVMU5qTXhNREUxCk56Q0NBU0l3RFFZSktvWklodmNOQVFFQkJRQURnZ0VQQURDQ0FRb0NnZ0VCQUtUWWFKdUI1NG1EZmM3Y1ZDMjcKNjNjZkczL1gxSTNXaGVMeFZWUWhMOVYrZjM0SlNxQUJTKzk3eStkTHh3eHY4ZEU2dHdOZVJTSkxhK3EvNm05dQo0RkpEeUx0Zm0rd3hoT3Z2aXJ6Z3B2TGc2VVNnUERWdlp4c2R3Y0VSZ2U5enBkb29OK1IyTUt4OWJaNWtzcXlkCkI4cWJUMUd4YTBxVUlWL01nWFhEdjRITVZHbGZ4dkFWOUdHQ0RORWdJMmVMU3FHUG1MelhyOWVMdkJleW5qSGwKNkxOSkcvQ3c2WmxHYzEzU3l0K2FQWTB3Nko4MUg1YjVSWXp1QU9TcUxheDhaLzhSMEVRWDk1bGxXb1BnNXpXNgpEeHBDeE5raWd6TWVuSHl3WTFEc0lORlAycGdNS0hPa0g1UjlUd0pJK3QxRFFWbm9iMlRIZkRpT0VJRUQ2V2JMCkdYOENBd0VBQWFPQmtqQ0JqekFkQmdOVkhRNEVGZ1FVTU9oNks5TThpU3NKSGl4TDZVQ1grdUI0ZlFnd1V3WUQKVlIwakJFd3dTb0FVTU9oNks5TThpU3NKSGl4TDZVQ1grdUI0ZlFpaEo2UWxNQ014SVRBZkJnTlZCQU1NR0d0MQpZbVZ5Ym1WMFpYTXRZMkZBTVRVMU5qTXhNREUxTjRJSkFORG5VVFJYU20xL01Bd0dBMVVkRXdRRk1BTUJBZjh3CkN3WURWUjBQQkFRREFnRUdNQTBHQ1NxR1NJYjNEUUVCQ3dVQUE0SUJBUUEvL1Jac2hhbUcwd2lOeHlKa2oxT1QKVkhaZ0V5ZE9EclVMcThKOHRESDZBZklvRERrSnR1VFdIR2NlbTQwNlpMTXArQ1RDVFZRdGxxK2IvMEVCV1dUSgplWkkxRzE3ejZoNm5MaXpVUHQrSVVFUjk5YUFGRTZidDhCNWQ3HdDFZbVZ5Ym1WMFpYTXRZMkZBTVRVMU5qTXhNREUxTnpBZUZ3MHhPVEEwTWpZeU1ESXlNemRhRncweQpPVEEwTWpNeU1ESXlNemRhTUNNeElUQWZCZ05WQkFNTUdHdDFZbVZ5Ym1WMFpYTXRZMkZBTVRVMU5qTXhNREUxCk56Q0NBU0l3RFFZSktvWklodmNOQVFFQkJRQURnZ0VQQURDQ0FRb0NnZ0VCQUtUWWFKdUI1NG1EZmM3Y1ZDMjcKNjNjZkczL1gxSTNXaGVMeFZWUWhMOVYrZjM0SlNxQUJTKzk3eStkTHh3eHY4ZEU2dHdOZVJTSkxhK3EvNm05dQo0RkpEeUx0Zm0rd3hoT3Z2aXJ6Z3B2TGc2VVNnUERWdlp4c2R3Y0VSZ2U5enBkb29OK1IyTUt4OWJaNWtzcXlkCkI4cWJUMUd4YTBxVUlWL01nWFhEdjRITVZHbGZ4dkFWOUdHQ0RORWdJMmVMU3FHUG1MelhyOWVMdkJleW5qSGwKNkxOSkcvQ3c2WmxHYzEzU3l0K2FQWTB3Nko4MUg1YjVSWXp1QU9TcUxheDhaLzhSMEVRWDk1bGxXb1BnNXpXNgpEeHBDeE5raWd6TWVuSHl3WTFEc0lORlAycGdNS0hPa0g1UjlUd0pJK3QxRFFWbm9iMlRIZkRpT0VJRUQ2V2JMCkdYOENBd0VBQWFPQmtqQ0JqekFkQmdOVkhRNEVGZ1FVTU9oNks5TThpU3NKSGl4TDZVQ1grdUI0ZlFnd1V3WUQKVlIwakJFd3dTb0FVTU9oNks5TThpU3NKSGl4TDZVQ1grdUI0ZlFpaEo2UWxNQ014SVRBZkJnTlZCQU1NR0d0MQpZbVZ5Ym1WMFpYTXRZMkZBTVRVMU5qTXhNREUxTjRJSkFORG5VVFJYU20xL01Bd0dBMVVkRXdRRk1BTUJBZjh3CkN3WURWUjBQQkFRREFnRUdNQTBHQ1NxR1NJYjNEUUVCQ3dVQUE0SUJBUUEvL1Jac2hhbUcwd2lOeHlKa2oxT1QKVkhaZ0V5ZE9EclVMcThKOHRESDZBZklvRERrSnR1VFdIR2NlbTQwNlpMTXArQ1RDVFZRdGxxK2IvMEVCV1dUSgplWkkxRzE3ejZoNm5MaXpVUHQrSVVFUjk5YUFGRTZidDhCNWQ3cjUxU2NSd2pwNnpTUEhUS1RGZDE0NDVLQWI4CmgyNDNOQ2hrWkpySmJpM0p5WlFGVVc1dlV4QWZSMXZOaUFNb2NoZTIyR0x5eit6MXEzVVUxSGhxVjlvUmlqSzYKWnBCTDZyZWVhcW0vZ0xLcmQxelpFMlBCVlRDTUFiM0JWUWdGS0pxQ1BFTmk2VkJnNEZHYWNyNHNUSXhwbUMydgo2L1VTRFdhdG9xS3N0a3kySDlPcHFlckxrSXZnTHZzMWxwaEZmT0EzbEF0WHVLbGZPSU10R0Q3OGJJTnFtM0NoCi0tLS0tRU5EIENFUlRJRklDQVRFLS0tLS0K
        server: https://cka01.peter.local
    contexts:
      pmk-01:
        LocationOfOrigin: /Users/peterfray/.kube/config
        cluster: pmk-01
        namespace: portworx
        user: peter@platform9.com
    current-context: pmk-01
    preferences: {}
    users:
      peter@platform9.com:
        LocationOfOrigin: /Users/peterfray/.kube/config
        token: eyJ1c2VybmFtZSI6InBldGVyQHBsYXRmb3JtOS5jb20iLCJwYXNzd29yZCI6IlZpcGVyNjQwISJ9
  options:
      ip: "192.168.5.17"
      port: "9001"
      Token: "e9a31402e81b17b8abfc4cd1d120a3591960fa05a5a12b0f2d7f312efedf6b0fd658ea4bdc81404fbfadf2029c7ac8ebcab9b4d25f72a11d74c6b550057edd9c"

status:
  remoteStorageId: ""
  schedulerStatus: ""
  storageStatus: ""
Pair the clusters:
kubectl apply -f clusterpair2.yaml
Verify the clusters are paired:
root@master-01:~/clusterpair# storkctl get clusterpair -n wordpress
NAME      STORAGE-STATUS   SCHEDULER-STATUS   CREATED
pmk01     Ready            Ready              08 May 19 19:01 UTC
kubectl describe clusterpair pmk01 -n wordpress
Name:         pmk01
Namespace:    wordpress
Labels:
Annotations:  kubectl.kubernetes.io/last-applied-configuration:
                {"apiVersion":"stork.libopenstorage.org/v1alpha1","kind":"ClusterPair","metadata":{"annotations":{},"creationTimestamp":null,"name":"pmk01...
API Version:  stork.libopenstorage.org/v1alpha1
Kind:         ClusterPair
Metadata:
  Creation Timestamp:  2019-05-08T19:01:36Z
  Generation:          1
  Resource Version:    2498780
  Self Link:           /apis/stork.libopenstorage.org/v1alpha1/namespaces/wordpress/clusterpairs/pmk01
  UID:                 b3ff0dcd-71c3-11e9-8ee8-fa163e00e200
Spec:
  Config:
    Clusters:
      Pmk 01:
        Location Of Origin:              /Users/peterfray/.kube/config
        Certificate - Authority - Data:  LS0tLS1CRUdJTiBDRVJUSUZJQ0FURS0tLS0tCk1JSURYRENDQWtTZ0F3SUJBZ0lKQUpvQ05jbVNaa0xhTUEwR0NTcUdTSWIzRFFFQkN3VUFNQ014SVRBZkJnTlYKQkFNTUdHdDFZbVZ5Ym1WMFpYTXRZMkZBTVRVMU56TXpOell6TmpBZUZ3MHhPVEExTURneE56UTNNVGRhRncweQpPVEExTURVeE56UTNNVGRhTUNNeElUQWZCZ05WQkFNTUdHdDFZbVZ5Ym1WMFpYTXRZMkZBTVRVMU56TXpOell6Ck5qQ0NBU0l3RFFZSktvWklodmNOQVFFQkJRQURnZ0VQQURDQ0FRb0NnZ0VCQU9tNGR5YVA5NXZnMHd4NEM5T28KN0FsSysyendRZklCZ1g5bzU0MHIwMWVQSFlyTUVpRjlDRlg3RVNVeXVUY1RHTk9Hd0Q4V0NWZ04rNitPV3lxQwppbHkvM2pSM25NbTRYcmVNQTF5akFGeTM3MlRyaDR6RlE2ZW9Ud254akNNYlFSc3hNR2lrK2JFRzEzZFNHakhICjNpNzFjQ1k2eTJHTnNhMVBpVHNBeWVISVpLTU5YT1o5Y0drRExkRlA3cm9KUXh4U3hoTlVOejhBN0tYc2RDR20KQmIycjhqNDBuZHV4M3A4dk9yQTRydUh2d1l5aSszRW9OUkdXWGVHWm9wZDNXdXpIYVJiQnNmamRzOFBvS2hQcQo3L2s1d3YvU3AyT2pNMlRodG8yenpFdnQ1SmJJenoza0hyUDZMb3I1RGJFc1RBcC9abzNEVWo3TmNnMTc5SnQ5Cm14MENBd0VBQWFPQmtqQ0JqekFkQmdOVkhRNEVGZ1FVcDRNRGFTU3JxY2pwVWtvY3NZNkdyZ1FZWGFBd1V3WUQKVlIwakJFd3dTb0FVcDRNRGFTU3JxY2pwVWtvY3NZNkdyZ1FZWGFDaEo2UWxNQ014SVRBZkJnTlZCQU1NR0d0MQpZbVZ5Ym1WMFpYTXRZMkZBTVRVMU56TXpOell6Tm9JSkFKb0NOY21TWmtMYU1Bd0dBMVVkRXdRRk1BTUJBZjh3CkN3WURWUjBQQkFRREFnRUdNQTBHQ1NxR1NJYjNEUUVCQ3dVQUE0SUJBUUJ2dG5oa3lhMnRzdjNpMHZYaUtUWlAKVEpZUlgzRkVBZjZ1SzhlUmhQM211ZHI0Z3RWZUxJRXNuckV0V3pTelZmYVlOV2duYkJja1h1VFZhT2g0eG53TAp2b2hUU3hPeW1aMFUzYytmNmhwZW9iclRtSThEWGI1ZGcrSjB0cmx5MmNRUW5vY1lHL2RWQUYvS2FTZFJlZVpFCnZNdlBra1I4NUZvUHdlT1l0ZkJQN3N1T3JsR2E1WjErYVhldUQ4Nkt6ZGtzajFmdiswMERhZjQzajNwZE1udkQKRHd3SVB3Vi9UOUdOQXNiTk4vMzcySE9MblpGTzNqdzZNd0x2MHgwWFJvQkgrWEp0bzEwOVl2alVhZTA5aGc5bgpuRVlVdzRTN2RJUHZGaXMremdKTVhPNS8welQ2d2xhdzlhRVhHRzY2NWRTMUd2N21wODFiYzB1M2ZsVW1KSHJ1Ci0tLS0tRU5EIENFUlRJRklDQVRFLS0tLS0K
        Server:                          https://192.168.5.4
    Contexts:
      Pmk 01:
        Location Of Origin:  /Users/peterfray/.kube/config
        Cluster:             pmk01
        Namespace:           default
        User:                peter@platform9.com
    Current - Context:       pmk01
    Preferences:
    Users:
      Peter @ Platform 9 . Com:
        Location Of Origin:  /Users/peterfray/.kube/config
        Token:               eyJ1c2VybmFtZSI6InBldGVyQHBsYXRmb3JtOS5jb20iLCJwYXNzd29yZCI6IlZpcGVyNjQwISJ9
  Options:
    Ip:     192.168.5.17
    Port:   9001
    Token:  1945d6a66ec82c3c7c2dde3bd128cbbe7fb41db25020077e1e338e32d2c7cabd6b5a02565bcc9e01477a494127d741178c3d1eed8cc2a58c65641b60a8c511b3
Status:
  Remote Storage Id:  5b93f1e4-6935-4502-9f73-c370682de0e6
  Scheduler Status:   Ready
  Storage Status:     Ready
Events:
Migrate apps and data:
root@master-01:~/clusterpair# cat migrate.yaml
apiVersion: stork.libopenstorage.org/v1alpha1
kind: Migration
metadata:
  name: mysqlmigration
  namespace: wordpress
spec:
  # This should be the name of the cluster pair created above
  clusterPair: pmk01
  # If set to false this will migrate only the Portworx volumes. No PVCs, apps, etc will be migrated
  includeResources: true
  # If set to false, the deployments and stateful set replicas will be set to 0 on the destination.
  # There will be an annotation with "stork.openstorage.org/migrationReplicas" on the destinationto store the replica count from the source.
  startApplications: true
  # List of namespaces to migrate
  namespaces:
  - wordpress
Kick off the migration:
root@master-01:~/clusterpair# kubectl apply -f migrate.yaml
migration.stork.libopenstorage.org/mysqlmigration created
Watch the migration:
storkctl get migration -n wordpress
NAME             CLUSTERPAIR   STAGE     STATUS    VOLUMES   RESOURCES   CREATED
mysqlmigration   pmk01                             0/0       0/0         08 May 19 19:40 UTC
Migration complete:
storkctl get migration -n wordpress
NAME             CLUSTERPAIR   STAGE     STATUS       VOLUMES   RESOURCES   CREATED
mysqlmigration   pmk01         Final     Successful   2/2       9/9         08 May 19 19:40 UTC
Wait for 2 mins
Time Invested: 10 mins
Thoughts on Application Portability with Kubernetes
Application portability has never been easier. Stateful and stateless applications are easily deployed in Kubernetes. Once running in Kubernetes they are portable. I demonstrated this portability by migrating a WordPress application from one Kubernetes cluster to Platform9 production-ready Kubernetes cluster.
It is amazing to me all the technology that has finally come together to make this a reality. This list includes: containers, docker, Kubernetes, linux, LVM, Portworx, Platform9.
I really can’t describe the feeling I had when I migrated a running application from my playground Kubernetes cluster to a production ready Platform9 Managed Kubernetes cluster. The combination of these two technologies is just awesome. It took me more time to learn and figure out installing Kubernetes via kubeadm then it did to install Portworx on two Kubernetes clusters, and migrating a running Kubernetes application.
Platform9 delivers a ”rock solid” production-ready Kubernetes. We provide pure upstream Kubernetes straight from the github repo, delivered as a managed service- sparing you the headache of operating Kubernetes in production.
Platform9’s monitoring technology, automated processes handled by the service, and in combination with our Certified Kubernetes Administrators (CKAs) Customer Success team all keep your Kubernetes clusters running… as a seamless extension of your staff. Platform9 Managed Kubernetes ensures everything is running 24/7/365, guaranteeing 99.9% SLA on any infrastructure of your choosing.
We have your back when it comes to managing Kubernetes clusters, allowing you to run your clusters wherever you are doing business: baremetal, VMware, Openstack, AWS, GCE and Azure. In addition, as a member of the Kubernetes Security SIG (Special Interest Group) Platform9 receives early access to information of Kubernetes vulnerabilities and patches. This gives us the ability to develop implementation strategies and have them ready for “day 0” as these vulnerabilities are announced to the general public. Then, thanks to our automatic patching service, we can quickly apply security patches to your environment with no involvement needed on your part.
Platform9 provides Kubernetes that “Just Works!”. Which is also why I love Portworx – also, ”Just Works!” . Being able to solve the persistent storage challenges with Kubernetes is a great win. What is making it even more awesome is that Portworx also enables simple migration from your test and playground Kubernetes cluster to Platform9 Production-ready Managed Kubernetes clusters.
The combination of these two great companies and two great products is just incredible!