In this article we talk about Kubernetes load balancing, specifically in the context of load balancing for your workloads that are deployed across multiple Kubernetes clusters across multiple public or hybrid cloud environments.
Multi-Cloud Kubernetes Load Balancing Background
Many organizations are moving workloads to the public cloud, and a big part of that transition involves using cloud native technologies like containers and Kubernetes to manage applications in a more agnostic way. One of the biggest benefits of an agnostic deployment model is that, from a developer’s perspective, the underpinning infrastructure is mostly abstracted. This allows infrastructure and operational teams to host multi-cloud Kubernetes clusters where they make the most sense for security, availability, and compliance reasons.
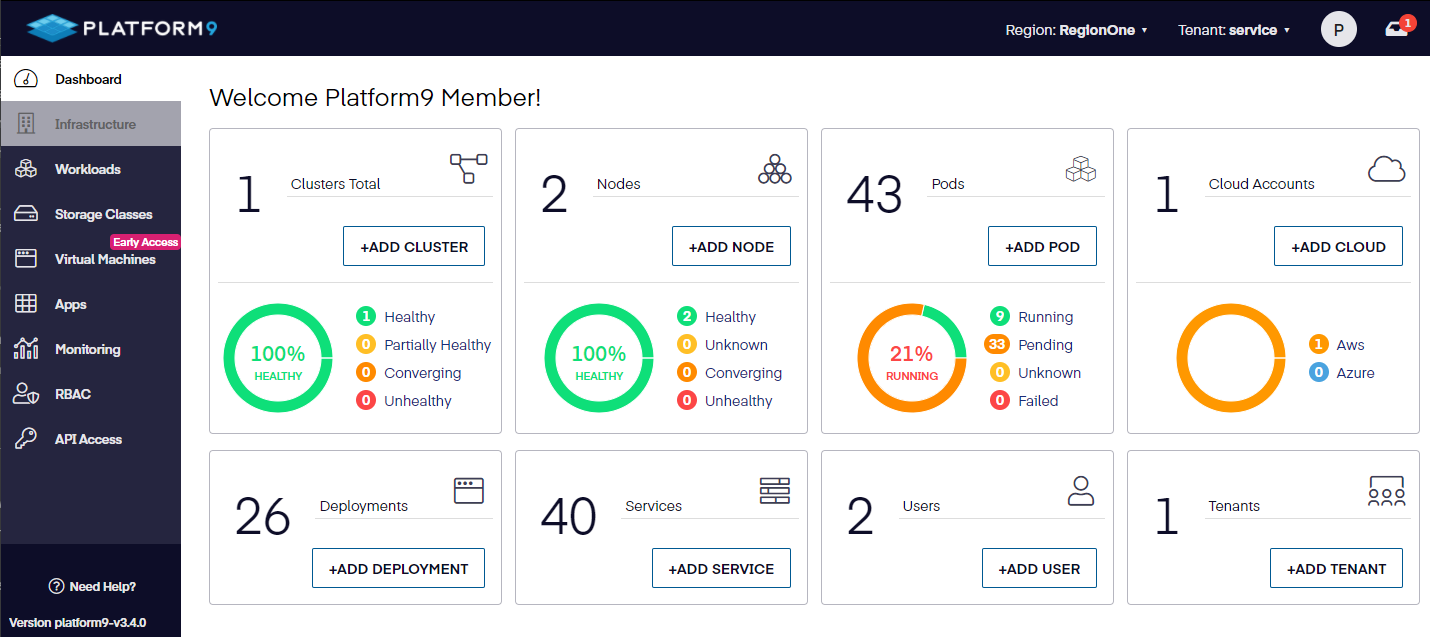
The ability to move workloads around so easily, however, comes at a cost: it means that you have to ensure proper management across multiple clusters and even multiple data centers. Even when you have a solution like Managed Kubernetes by Platform9 deployed to manage multiple clusters across multiple clouds, load balancing incoming requests across those multiple Kubernetes clusters can be challenging.
Load balancing across your workloads deployed in a single Kubernetes cluster is an easier problem to solve today. There are services within a single Kubernetes cluster that can spread traffic between multiple instances. See our comparison of various Kubernetes cluster load balancing options for more information re this. Service meshes go a step further and allow fine-grained traffic load balancing and management. If you are sending requests between Kubernetes clusters, there are solutions like Submariner that use VPN connections to map and connect services.
However, none of these solutions load balance requests from clients, partners, and employees who are trying to use your applications deployed across multiple Kubernetes clusters. Things get complicated even further when your clusters are in different regions, especially when they are spread across multiple clouds or include on-premises operations.
Solutions for load balancing across multi-cloud Kubernetes clusters
There are different levels of load balancing options available to load balance requests across workloads between your different Kubernetes clusters. If they are on-premises in the same data center, then application delivery controllers (ADC) like F5 BIG-IPs are often used with a virtual IP (VIP) to point to each cluster or even multiple clusters within the same pool behind a single VIP. This works great, but you won’t be able to route traffic back through an ADC in a single datacenter when you switch to multiple data centers without losing the resiliency you gain from having multiple sites. The same principles apply if you are moving behind a single region in a public cloud. Thankfully, multi-region load balancers like the Azure cross-region load balancer (currently available as a preview) are in the works.
Yet, as soon as you make the move to multi-cloud – whether it’s hybrid-cloud, poly-cloud, or another current buzzword – those cloud-specific dependencies start to fall apart. You could run F5 BIG-IP Global Traffic Manager (GTM) instances on-premises in each cloud, but that is very expensive, plus it’s hard to find experts with the right skills.
This is where companies like Akamai, Fastly, and Cloudflare come into play. There are also countless other providers that fall into the category of content delivery networks (CDNs), although most of them have expanded their capabilities to include web application firewalls (WAFs) and distributed denial-of-service (DDoS) protection. These GTM solutions enable dynamic traffic routing, which goes beyond the basic round-robin that everyone is familiar with; they can factor in things like geo-location based on IP, browser-provided information like device type, the network of origin, ping times, and other metrics that provide intelligent insights so that traffic is routed to the location that will best serve the end-consumer.
Akamai and Fastly have extremely large customer bases filled with the “who’s who” of the Internet, but their sales models and pricing are geared much more toward enterprise-tier customers. Once you hit the truly large-scale web sites, however, all of the pricing starts to look the same. Cloudflare, on the other hand, is more specialized, since it started with security (rather than CDNs) in mind. Cloudflare is an extremely popular global traffic management service for both personal and business usage, and there are currently over 4 million sites being run through it. It is also very easy to get up and running, so we will use it to show you how to set up multi-cloud load balancing between NGINX instances.
Setting Up Cloudflare as a GTM for Multi-Cloud Kubernetes
To follow along, you will need a Cloudflare account (they offer multiple basic services for free). You can start the sign-up process on their main page. Although you don’t need a credit card to create an account, you will need to add a payment method in order to enable the load balancer service. We will use the version that starts at $5/month for the purposes of this post.
Create a new Cloudflare site
First, you need to add a site to work with; we will use sre.qa for the domain, and since it makes you add a host entry, we’ll just add something random that we won’t use. Cloudflare requires that you use a root domain name rather than a subdomain. This can be seen as a limitation, but there’s a good reason for it: Cloudflare won’t be able to fully mitigate DDoS attacks (which is one of their most popular services) unless they control the root DNS.
To start the process, select the Add Site link near the top right corner of the page.
The service will not become active until your domain name’s DNS records are fully updated to point at Cloudflare’s DNS servers. Even after you switch them in your registrar using the DNS hostnames that Cloudflare shows on the status page of your new site, it can take up to 24 hours to become active. It usually takes less than 4 hours in my experience.
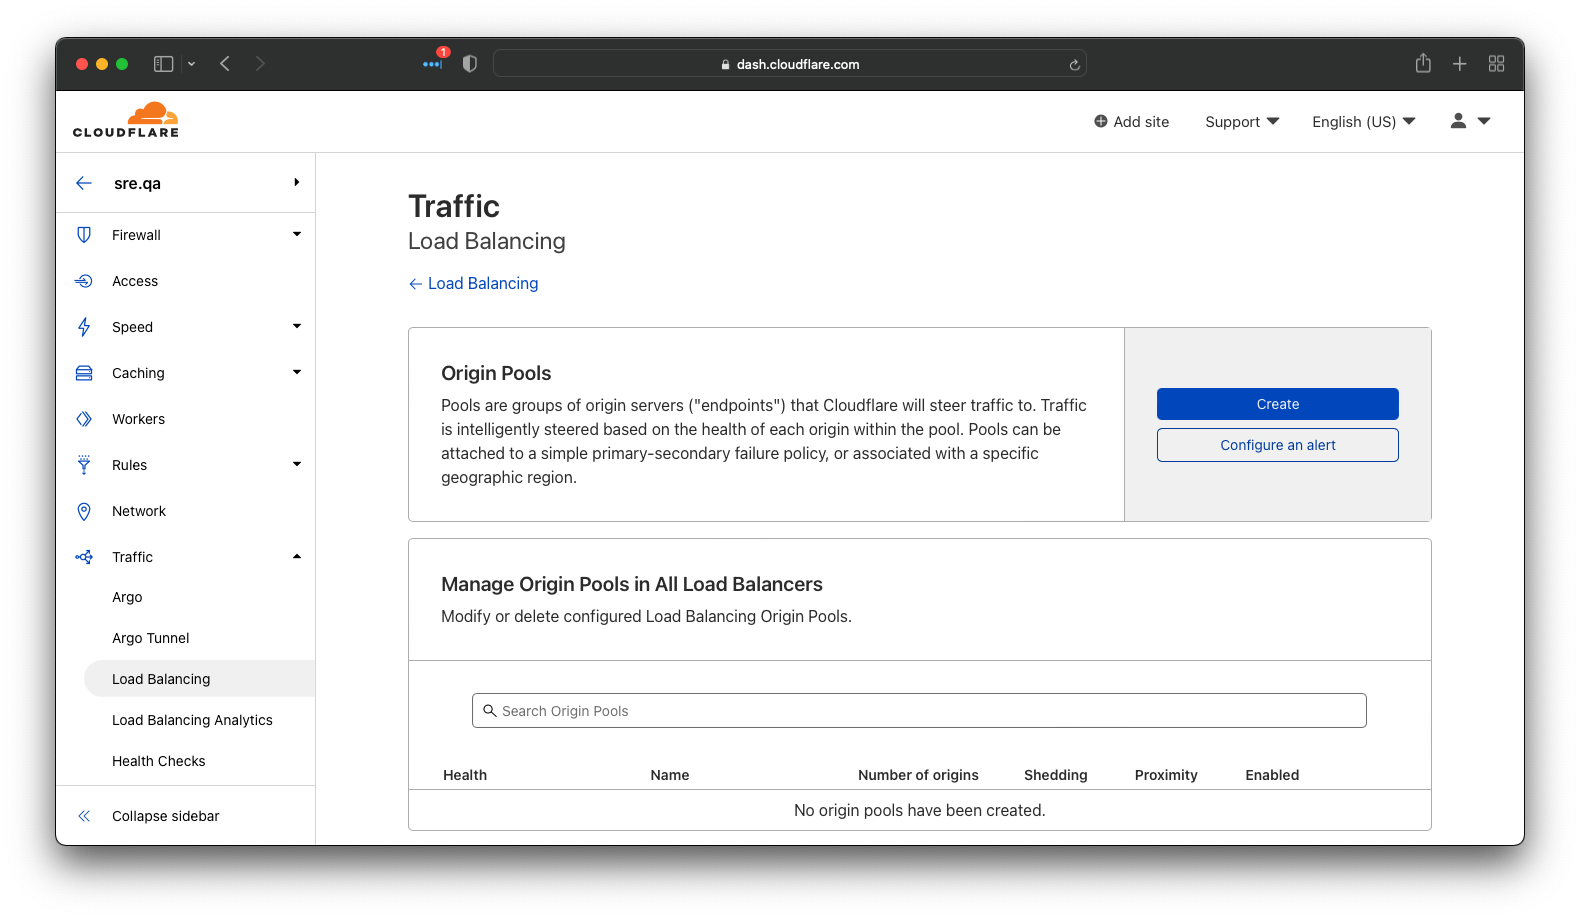
Enable load-balancing
Now, navigate to Load Balancing under the Traffic section of the menu on the left, and click on the Enable Load Balancing button.
This will launch a wizard that will prompt you to activate a subscription if you don’t have one. We are going with the cheapest subscription since we only need two origin servers to show Cloudfare’s capabilities. In fact, just one origin per cloud would show its multi-cloud capabilities just as well as a dozen endpoints would. The subscription will also ask you how many cloud regions should run health checks and whether or not you want to enable dynamic traffic management, which allows for faster response time or geographic routing (which we discussed earlier).
Now that we have an active Load Balancer subscription on Cloudflare, we can create an instance to suit our needs.
Create multi-cloud pool of clusters
The first step in setting up a service like Cloudflare is to define the pool of origin servers to which the traffic will be routed. Any and every Kubernetes cluster configured to accept incoming traffic from the Internet can be configured as an origin server within Cloudflare. It will provide the same level of service regardless of where that source is. In fact, the more distributed the Kuberntes clusters are, the more beneficial using functionality like global traffic management can become.
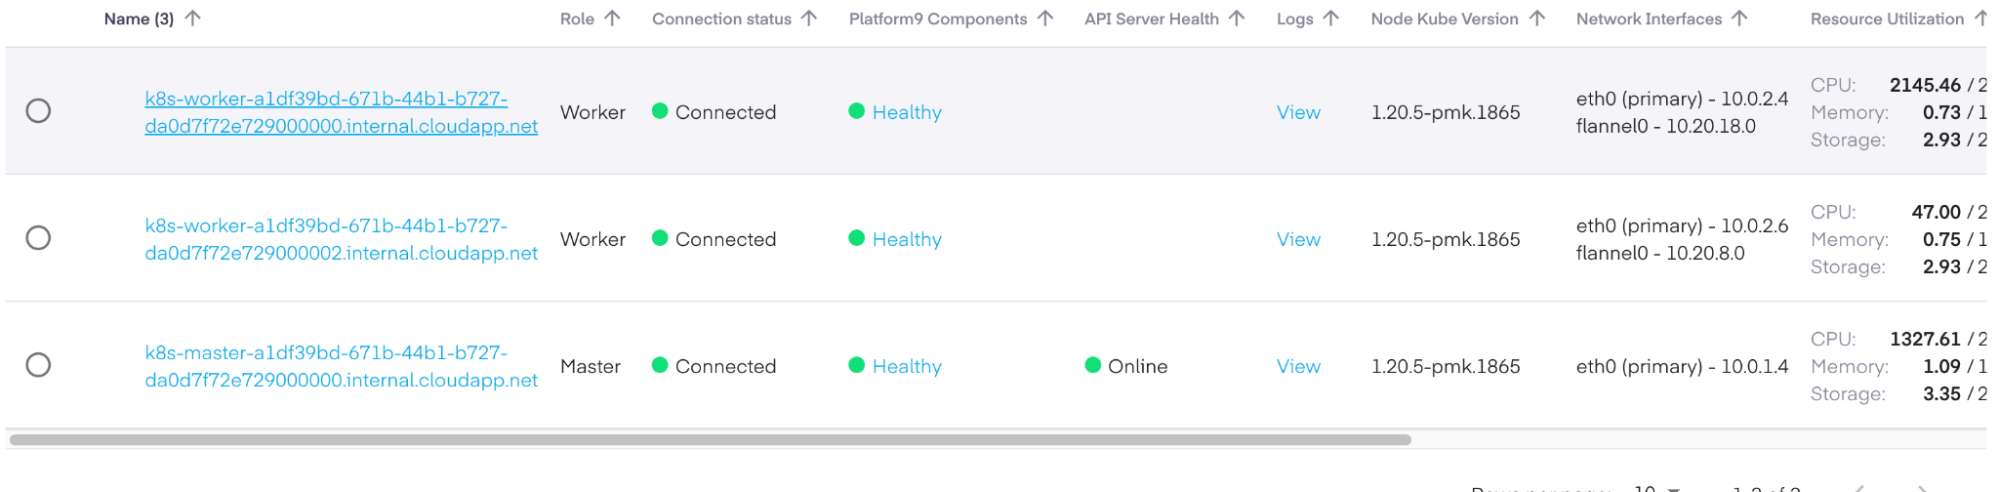
Using Kubernetes clusters as origins does require they have services configured with external IP addresses. This can be done directly with a Load Balancer service type or via an ingress controller like NGINX. For example, to get the IP address to use for a service, the command line would look like this:
$ kubectl get services my-service
The output is similar to:
NAME         TYPE           CLUSTER-IP     EXTERNAL-IP      PORT(S)    AGE
my-service   LoadBalancer   10.3.245.137   34.64.116.17     80/TCP     54s
While we are creating the pool in this example, we are using weighting to apply some traffic shaping (or traffic steering in Cloudflare’s terminology) to the incoming requests. As you can see below, we have a Kubernetes cluster in Google Cloud with a weight of 100%, and a Kubernetes cluster in Digital Ocean with a weight of 50%, meaning that twice as much traffic will go to the cluster on Google Cloud by default.
This is the simplest of use cases showing two Kubernetes clusters, each on a different cloud, to prove it works.
As detailed out in the following sections there are additional options you can consider when creating pools, including having:
- Multiple pools organized by region like a South East Asian pool and a Northern European pool, which would contain origins running out of data centers based in those areas.
- A failover pool, which would only be used in the event all clusters in the primary pool have failed.
- Pools with origins that host different major versions of the service that could be used in conjunction with something like API Management solutions to handle major breaking changes between versions.
Create monitor
Now that we have a pool, it is important to verify that the nodes within it are alive. The standard way to do this is to run health checks on a set schedule. If an endpoint fails a test, it will be marked as offline, and it won’t receive any traffic until it passes another health check successfully. There are all kinds of reasons why things might be down – from upgrades to application failures. For this tutorial, we’ll go with a very simple check that will only look to see if the NGINX instances running on each cloud are returning their default index page. For more complex applications, it’s wise to have some kind of self-test page that will connect to any data sources in use and return an “ok” message if all is well. Without that level of testing, the load balancer might think an application that’s in a failed state is alive.

Create multi-cloud load balancer
Now that we have a pool of endpoints and some health checks to watch them, it’s time to assemble the pieces and create the actual load balancer. In this case, we’ll use a full proxy so that traffic passes through Cloudflare’s servers (which is their default option). You could also choose to just have DNS redirection (which we mentioned above), but this won’t allow you to leverage the real power of these platforms to cache and secure web traffic.
We’ll use nginx.sre.qa for the hostname.
Next, we’ll select the pool that we created. There is an option to add a failover pool which will only be used if all of the primary pool endpoints are unavailable. This can be done for DR scenarios or if there’s a single static site with a “temporary service interruption” message. The infamous Twitter Fail Whale that used to be so common is an example of the latter.
Next, we’ll activate the health checks that will watch the pool used by this load balancer.
Now, we need to choose how to balance the traffic. If it’s off, it will just use the weighting and hit the servers in the order in which they were added to the pool. Proximity steering will use things like ping time to determine which site is closest to the consumer. The random option does exactly what you’d think: it randomly sends traffic to node members.

You can also custom map requests to pools using the “custom rules” option, but that isn’t necessary for most scenarios.
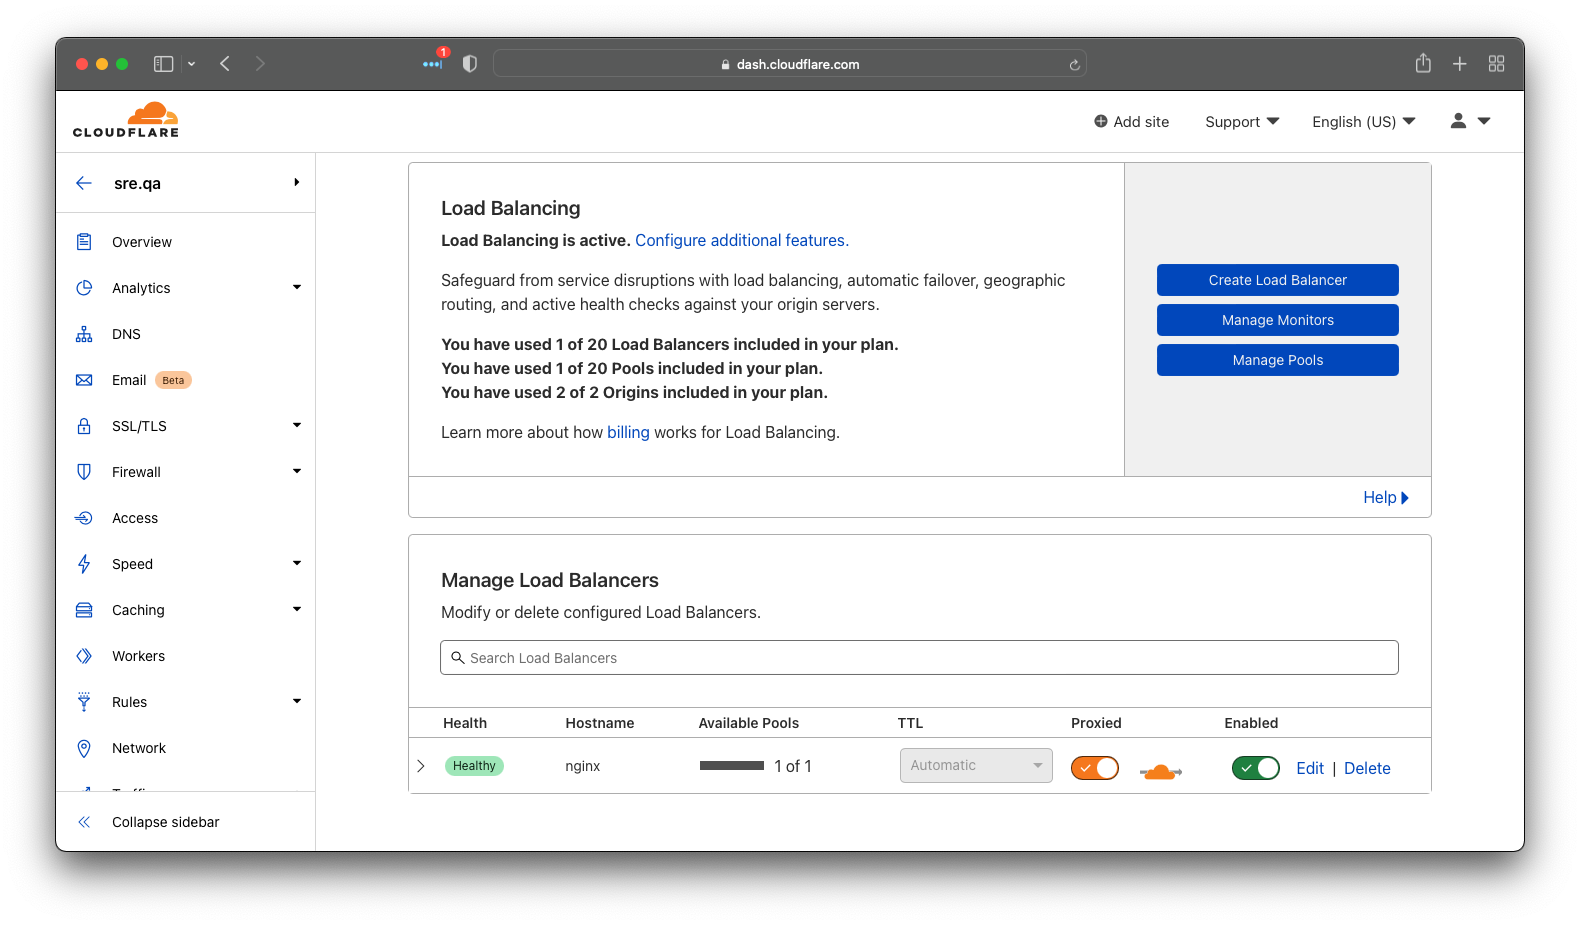
Now we’ve finished creating our load balancer.
Multi-cloud deployment is alive!
As you can see in the image below, the load balancer is healthy, which means that at least one endpoint is working. It will take a few minutes for the first health checks to pass, so don’t panic if 4 or 5 minutes go by before it shows that it’s healthy.
Validate the Kubernetes multi-cloud deployment
To prove that all of this work did what we expected, we can use a simple loop that requests the page three times. As you can see below, the third request returned a result from the second cloud. This ratio of 2:1 is exactly how we configured the weighting inside the pool.
% for x in 1 2 3 ; do echo "== request $x" ; curl -L http://nginx.sre.qa/ ; done
== request 1
<!DOCTYPE html>
<html>
<head>
<title>nginx on cloud 2</title>
</head>
<body>
<h1>nginx on cloud 2</h1>
</body>
</html>
== request 2
<!DOCTYPE html>
<html>
<head>
<title>nginx on cloud 2</title>
</head>
<body>
<h1>nginx on cloud 2</h1>
</body>
</html>
== request 3
<!DOCTYPE html>
<html>
<head>
<title>nginx on cloud 1</title>
</head>
<body>
<h1>nginx on cloud 1</h1>
</body>
</html>
Summary
As we explained above, there are several ways to manage traffic across multiple Kubenetes instances regardless of which cloud or region each cluster is deployed in. Global Traffic Management services work great with managed Kubernetes offerings to provide a hands-off operations experience. This allows developers to focus on delivering business value without the headache of building a fully operational practice.
Author