Virtual Machine
A virtual machine or a VM is a software-based representation of a physical computer. A VM allows you to run an operating system and applications using the resources of a host machine or a hypervisor, acting like a separate, isolated computer with its own virtual CPU, memory, storage, and network capabilities, all managed by the hypervisor.
You can create a virtual machine by first populating an image in the image library, then creating one or more VM flavors, and then creating a new VM.
VM Flavors
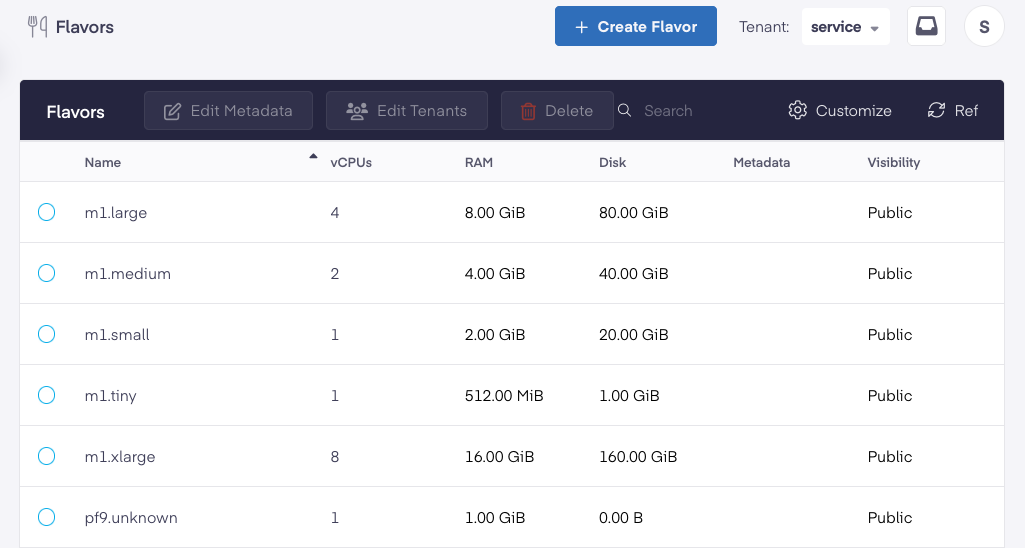
Once you have the images you would like to use, it's time to look at the resource configuration for the VMs to be deployed. Private Cloud Director uses T-Shirt sized configurations of resource allocations, called Flavors, to allow you to specify the resource allocation for VMs. Navigate to the Flavors section of the UI and create or edit flavors to suit your desired CPU and memory configuration. If you would like to specify the CPU and RAM allocation at VM creation time instead of in the flavor, you can create a hot-plug compatible flavor with no CPU and RAM allocation specified at the flavor-level.

Flavors and Host Aggregates
Flavors can also be used to specify VM placement rules, by specifying additional metadata (key-value pair) that correspond to a specific Host Aggregate. When creating a VM using this flavor, the VM will be placed on hosts in your virtualized cluster that are part the selected host aggregate (that match the specified metadata attributes).
Server Groups
Server Groups are logical groups of virtual machines, so you can specify "Affinity" or "Anti-Affinity" policies while scheduling VMs. Server group membership impacts the placement of the VM on a host in your virtualized cluster in the following manner:
- An affinity policy for a server group specifies that all the virtual machines belonging to the server group should be provisioned on a single hypervisor.
- An anti-affinity policy for a server group specifies that each virtual machine in the server group should be hosted on a different hypervisor.
To create a Server Group, follow the steps below.
- Navigate to Virtual Machines > Server Groups and click on the Create Server Group button.
- Provide a descriptive name for the Server Group.
- Select a policy: Affinity or Anti-Affinity.
- Click the Create Server Group button.
You can now add a VM to this Server Group during the Create a VM wizard.
Create a VM
By now, you have your desired VM image, your preferred Flavor, and you have previously setup at least one Network that you can use to deploy your VM. So navigate to Virtual Machines in the Navigation pane and start 'Deploy Virtual Machine'.
We will describe some of the VM creation options here.
VM source
This is an important selection that affects where your VM is stored, and whether it should be 'Ephemeral' vs 'Persistent'.
Boot VM from Image
Use this option if you would like to provision a temporary VM that doesn't need to persist upon host failure, or after the VM is terminated. The VM disk will be created using local storage on the Hypervisor it is provisioned on, and populated using the contents of the source image. If the Hypervisor were to go down or the VM were to be terminated, this VM will not be recoverable.
Boot VM from New Volume
Use this option if you would like to create a persistent VM. A VM created in this manner will persist across host failures and VM termination, unless you choose to delete the volume upon VM termination. When you choose this option, a new persistent volume is created on the block storage you have configured for your virtualized cluster, and its contents are populated with the contents from the source image.
Boot VM from Existing Volume
This option is like the previous one, except you are choosing to boot from an existing volume instead of provisioning a new volume from a base image.
SSH Key
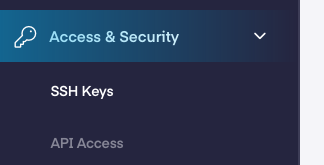
Using SSH Keys is the recommended and secure method to access your VMs. To setup your SSH Key, navigate to 'Access and Security' in the Navigation Pane, and import your SSH Keys.

Once you have the key imported, you can select that key when creating a new VM. s
Select Server Group
Optionally select a Server Group for this vm to be part of. This will impact the VM's placement on a host in your virtualized cluster.
Using cloud-init
Using cloud-init allows you to customize the Virtual Machine as it boots up, such as to provision certain additional software or customization scripts.
Assign Security Groups
Security groups allow you to limit port access to Virtual Machines. If you don't already have a Security Group configured, you can cover this later.
Specify Metadata
Metadata attributes allow you to specify additional key-value pairs of metadata, which can be used for querying and organizing your Virtual Machines.
With this information specified, you should see the VM provision within a few minutes. You can then access the VM over the network or via its console.
VM Properties
VM UUID
Each newly created virtual machine gets a unique UUID assigned to it. By default this field is not displayed in the virtual machines grid view in the UI. You can change this by clicking on 'Manage Columns' action above the virtual machines grid view and selecting the UUID field. You can also click on an individual VM to go to VM details view and see the ID property listed there for the VM. Alternatively you can get VM ID using the pcdctl CLI by running the pcdctl server list command or the pcdctl server show command and supplying the name of the VM.
VM Actions
Rebuild VM
The rebuild operation allows for the re-creation of virtual machine from a new or existing image while preserving the VM's:
- UUID
- Storage Volumes
- IP addresses (private or public)
- Network ports
If the VM utilizes ephemeral storage (local disks), rebuilding will result in the loss of data on those disks. However, if the VM uses block storage volumes or shared storage for its root disk and other data, those volumes are reattached to the rebuilt virtual machine, and data should be preserved.
Rescue / Unrescue VM
Rescue mode is a powerful operation that allows you to access and repair a non-bootable virtual machine. When activated, this action boots your virtual machine into a temporary environment using the image that was used to create the vm, with full root access to the file system. This mode is useful for:
- Troubleshooting and fixing configuration file issues
- Recovering or copying data to a remote location
- Gaining emergency access similar to single-user mode or safe mode with networking
You can optionally rescue a virtual machine using a new or different image from the one used to create it. When you select this option in the UI, the UI shows a list of images from the image catalog, so you can choose a different image to boot from.
Once your maintenance or recovery tasks are complete, you can return the vm to normal operation by unrescuing the VM. To do that using the UI, select the VM in the VM grid view, then choose the unrescue action from the power actions drop down menu.
Migrate Existing VMs from VMware
If you have existing workloads that you would like to migrate onto your Private Cloud Director cluster, Project vJailbreak can help.
Download the vJailbreak Appliance
Head over to Project vJailbreak to download the appliance image. The appliance is packaged as an OVA that you can deploy into your Private Cloud Director environment. Note that vJailbreak should have access to your storage network to efficiently migrate VM data over during the data copy phase.
Register your Source VMware Environment and Your New Virtualized Cluster
As your vJailbreak appliance loads, you'll see the instructions to access its user interface, where you can specify your source VMware environment information, as well as the information of your new Private Cloud Director cluster.
Select VMs and Schedule Migrations
With this information specified, you can now initiate migrations from vJailbreak user interface.