Create a Windows Virtual Machine from an ISO
Overview
Deploy Windows VMs directly from ISO files using Private Cloud Director (PCD)eliminating manual installation and conversion workflows. Upload the Windows ISO and VirtIO drivers, configure installation volumes with optimized VM properties, execute the Windows installation with the required drivers, and generate reusable golden images for consistent enterprise deployments.
This approach streamlines Windows VM provisioning within PCD environments while maintaining standardized configuration management and automated provisioning capabilities.
Prerequisites
Environment Requirements
- PCD access with Block Storage configured.
- Network connectivity and VLAN access.
- Image, volume, and VM creation permissions.
Required Tools
- PCD CLI (pcdctl) or OpenStack CLI version 6.3.0 and greater.
- product_acronym web interface for console access
Required Files
- Windows ISO: Server 2012, 2016, 2019, 2022, or Windows 10.
- VirtIO Driver ISO: Latest stable from Fedora VirtIO repository, better performance on a Linux (QEMU-KVM) hypervisor.
- Verify file integrity using checksums
Step 1: Upload Images
- Upload Windows Installation ISO
Run the following command to upload a Windows ISO (for example, Windows Server 2012, 2016, 2019, 2022, or Windows 10) to the PCD Image service.
openstack image create "windows-installation-iso" --os-interface admin --insecure \ --disk-format iso \ --container-format bare \ --file /path/to/windows-installation.iso \ --property hw_boot_menu=True \ --property hw_cdrom_bus=sata \ --property hw_disk_bus=scsi \ --property hw_firmware_type=uefi \ --property hw_machine_type=q35 \ --property hw_scsi_model=virtio-scsi \ --property os_secure_boot=required \ --property os_type=windows- Upload VirtIO Driver ISO
Run the following command to upload the VirtIO driver ISO to the PCD Image service.
openstack image create "virtio-driver-iso" --os-interface admin --insecure \ --disk-format iso \ --container-format bare \ --file /path/to/virtio-win.isoStep 2: Create Volumes
If you do not specify a volume type Private Cloud Director uses __DEFAULT__, and you are adding --type <volume-type> to the volume create command to store volumes on block storage.
- Create installation media volume.
This creates a bootable volume that contains the Windows installation media.
openstack volume create --image windows-installation-iso --size 10 --bootable windows-installation-volume --insecure- Create VirtIO driver media volume.
This creates a bootable volume that provides VirtIO drivers during Windows installation.
openstack volume create --image virtio-driver-iso --size 2 virtio-driver-volume --insecure- Create Windows OS Target volume.
This creates a target disk where Windows is being installed.
openstack volume create --size 30 --bootable windows-os-target-volume --insecureStep 3: Launch VM using the created volumes
This step creates a virtual machine with the previously created volumes. The VM is configured as follows:
- Booting from the Windows installation ISO (
devicetype=cdrom): __The VM is loading the Windows installer. - Attaching the VirtIO driver ISO __
(devicetype=cdrom)``: The VM is providing essential drivers during the installation. - Using the target volume as the installation disk (
device_type=disk): The VM is serving this disk as the destination for the Windows OS installation.
The properties specified in the command ensure that the VM is booting correctly and remains compatible with Windows installation requirements.
openstack server create --insecure --flavor m1.xlarge --network <NETWORK_NAME_OR_UUID> \ --block-device source_type=volume,uuid=$(openstack volume show windows-installation-volume -f value -c id --insecure),destination_type=volume,device_type=cdrom,boot_index=0 \ --block-device source_type=volume,uuid=$(openstack volume show virtio-driver-volume -f value -c id --insecure),destination_type=volume,device_type=cdrom,boot_index=-1 \ --block-device source_type=volume,uuid=$(openstack volume show windows-os-target-volume -f value -c id --insecure),destination_type=volume,device_type=disk,boot_index=1 \ --property hw_firmware_type=uefi --property hw_machine_type=q35 --property os_secure_boot=disabled \ --property hw_boot_menu=True --property hw_video_model=qxl <vm-name>Replace <NETWORK_NAME_OR_UUID> with the appropriate network name or UUID in your environment.
Replace <vm-name> with the desired name for your VM.
The openstack volume show commands are referencing the previously created volumes to ensure correct attachment.
Step 4: Configure the VM
- Initial Boot Process
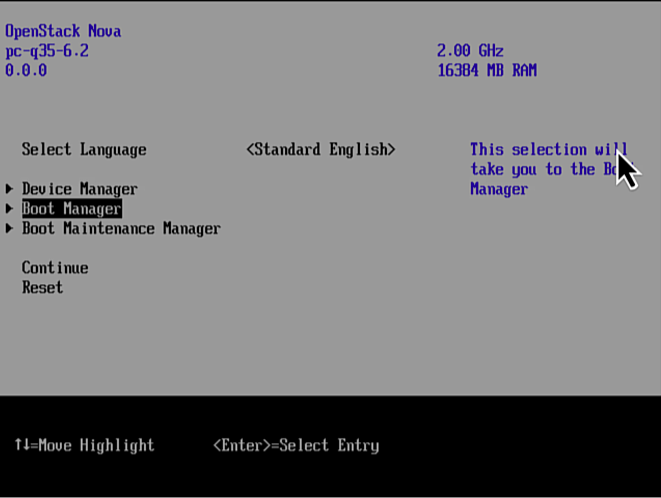
Access the VM console from the PCD UI.
- Press Enter at boot prompt
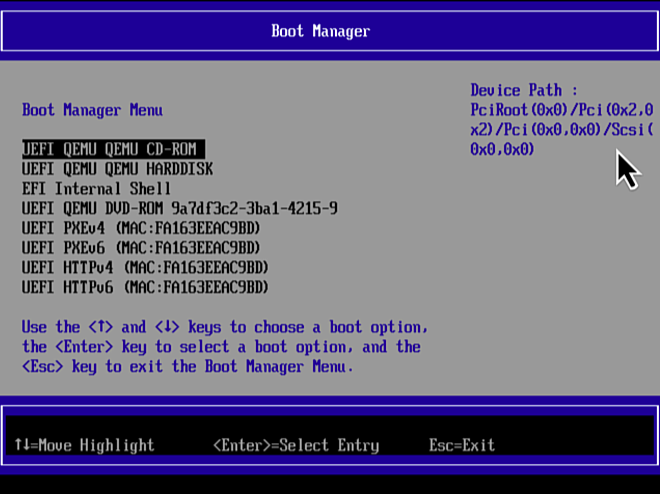
- Select Boot Manager and then press Enter.
- Select UEFI QEMU QEMU CD-ROM and then press Enter.
- Press any key to boot from CD.
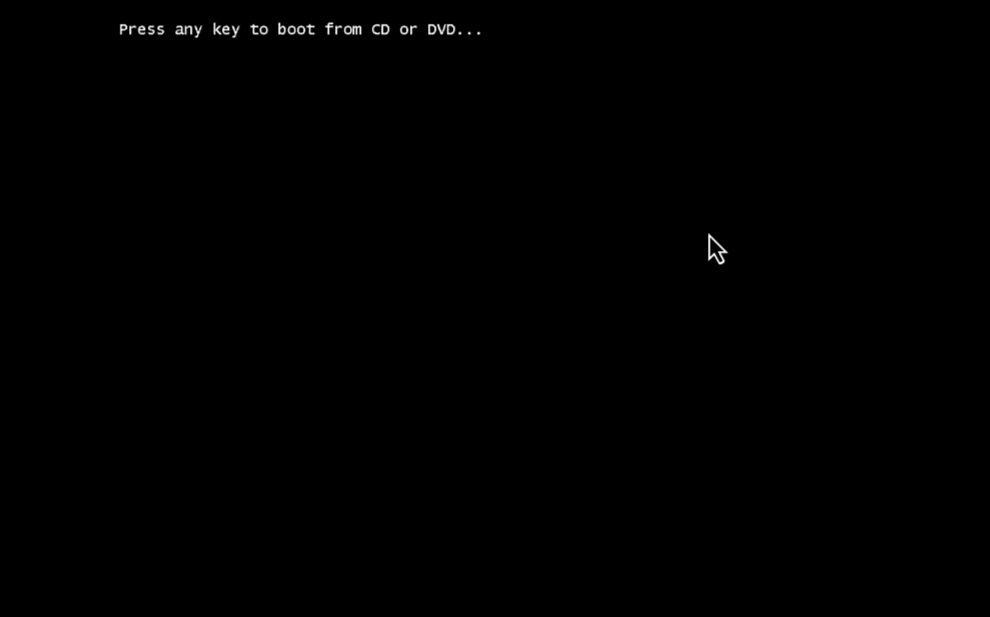
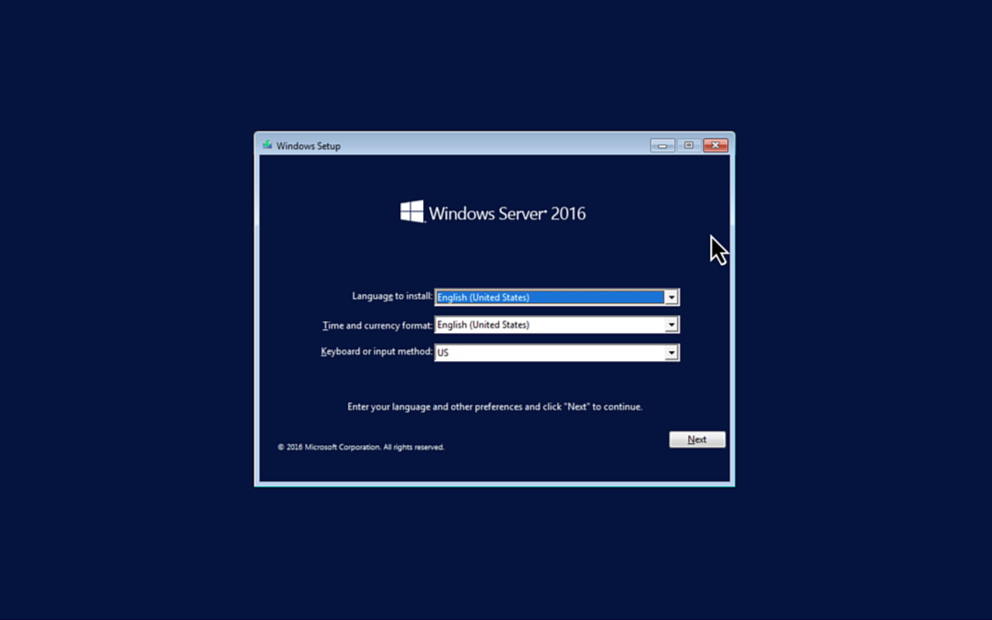
The Windows installer is loading. This occurs only during the first boot.
- Install VirtIO Drivers
During Windows installation:
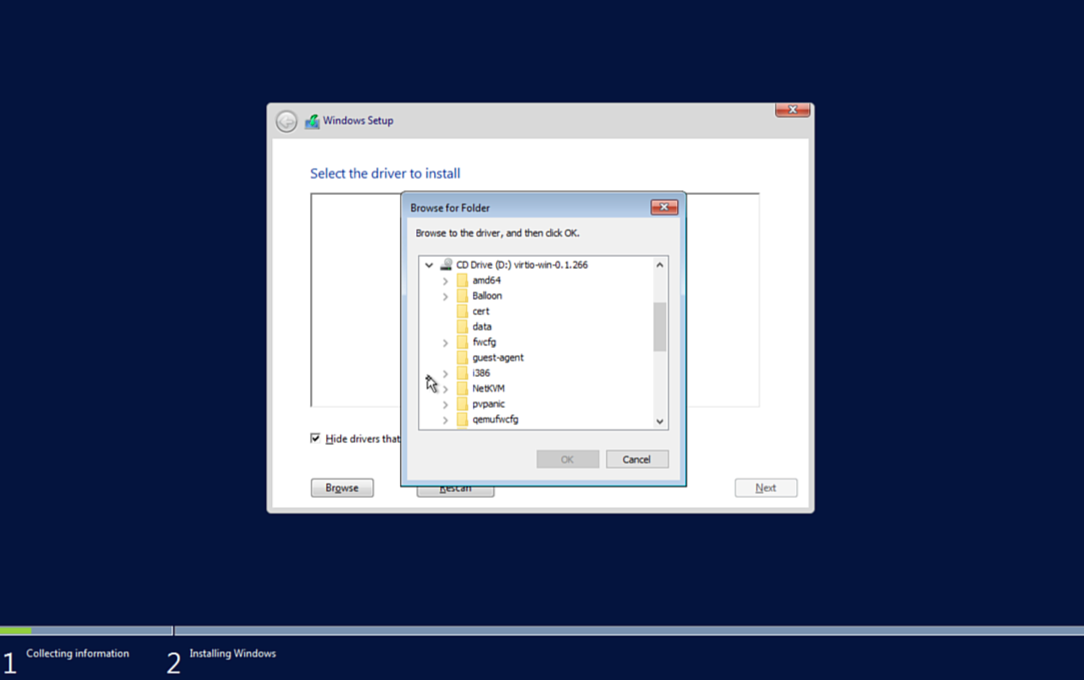
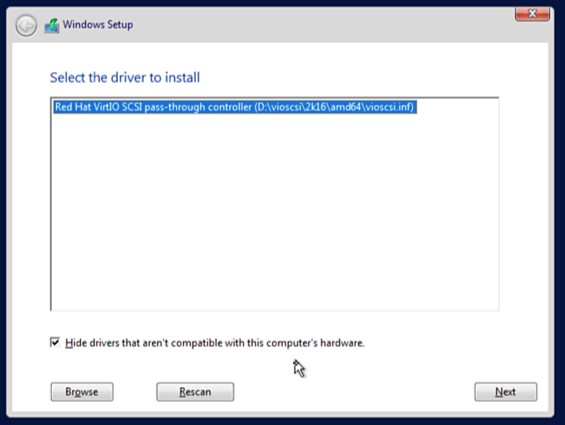
- Select Browse when prompted for storage drivers.
- Navigate to VirtIO driver ISO identified by the Windows version you are installing, for example
D:\amd64\2k19for Windows Server 2019. - Select and install VirtIO SCSI driver.
VirtIO drivers required for optimal performance.
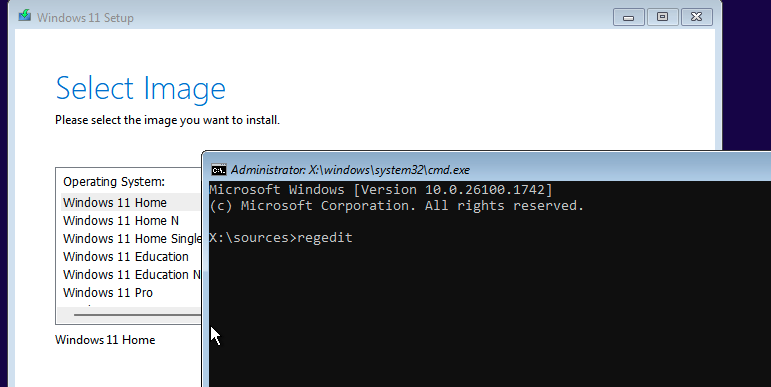
- Disable Secure Boot and vTPM (mandatory for Windows 11 and later)
Windows 11 requires Virtual TPM during installation. To bypass these checks and continue the installation, follow these steps:
On the OS selection page, press Shift+F10 to open a command prompt.
In the command prompt, type regedit and press Enter to launch the Registry Editor.
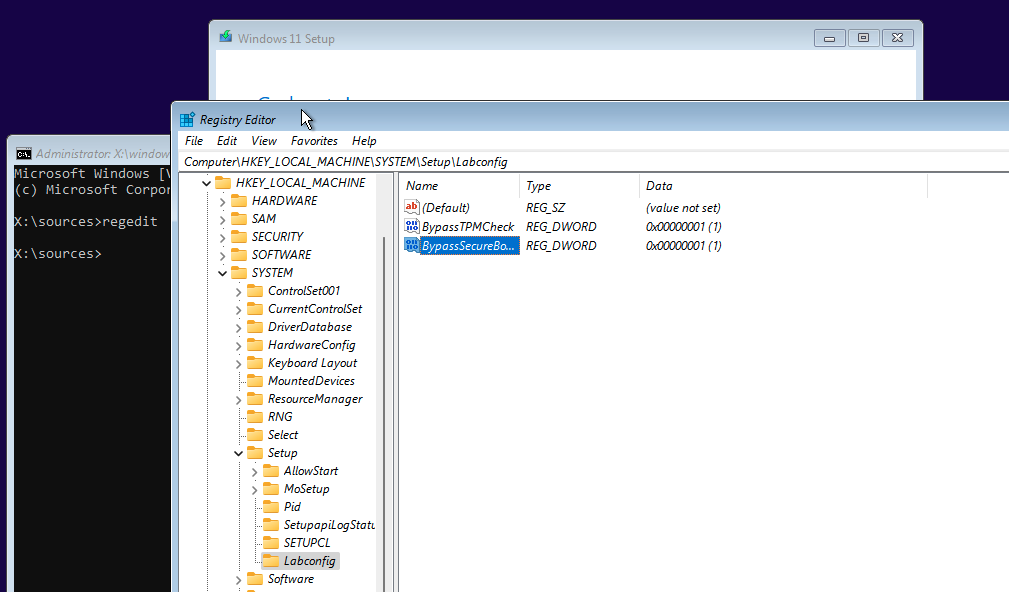
On the Registry Editor, navigate to HKEY_LOCAL_ MACHINE > SYSTEM > Setup folder.
Create a new key named LabConfig as a part of the Setup folder.
Within the LabConfig key, create two new REG_DWORD entries and set the values to
1:- BypassTPMCheck
- BypassSecureBootCheck
Close the Registry Editor and the command prompt and continue with the Windows installation.
- Install Network and Other Required Drivers
After Windows installation completes, install the necessary drivers to enable network connectivity and other devices.
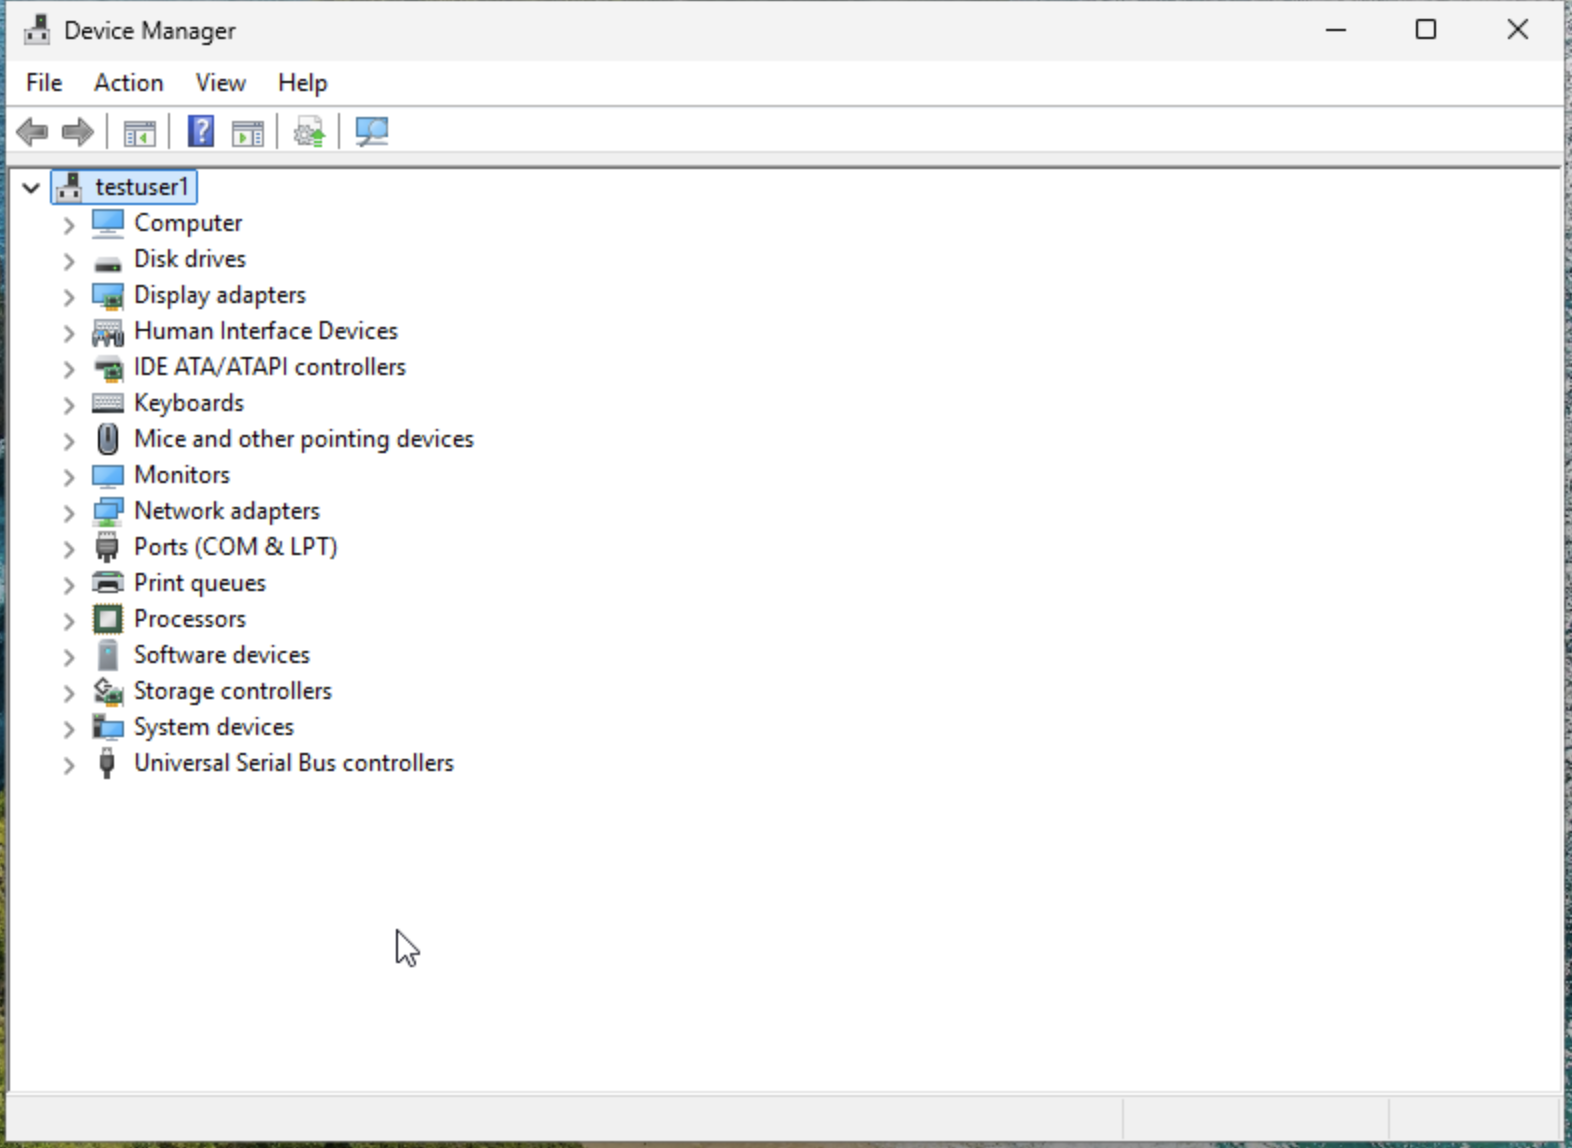
- Access Device Manager.
- Right-click Ethernet Controller and select Update Driver Software.
- Browse to the VirtIO path (for example,
E:\NetKVM\2k16\) and complete the installation. - Repeat the process for any remaining devices listed in Device Manager.
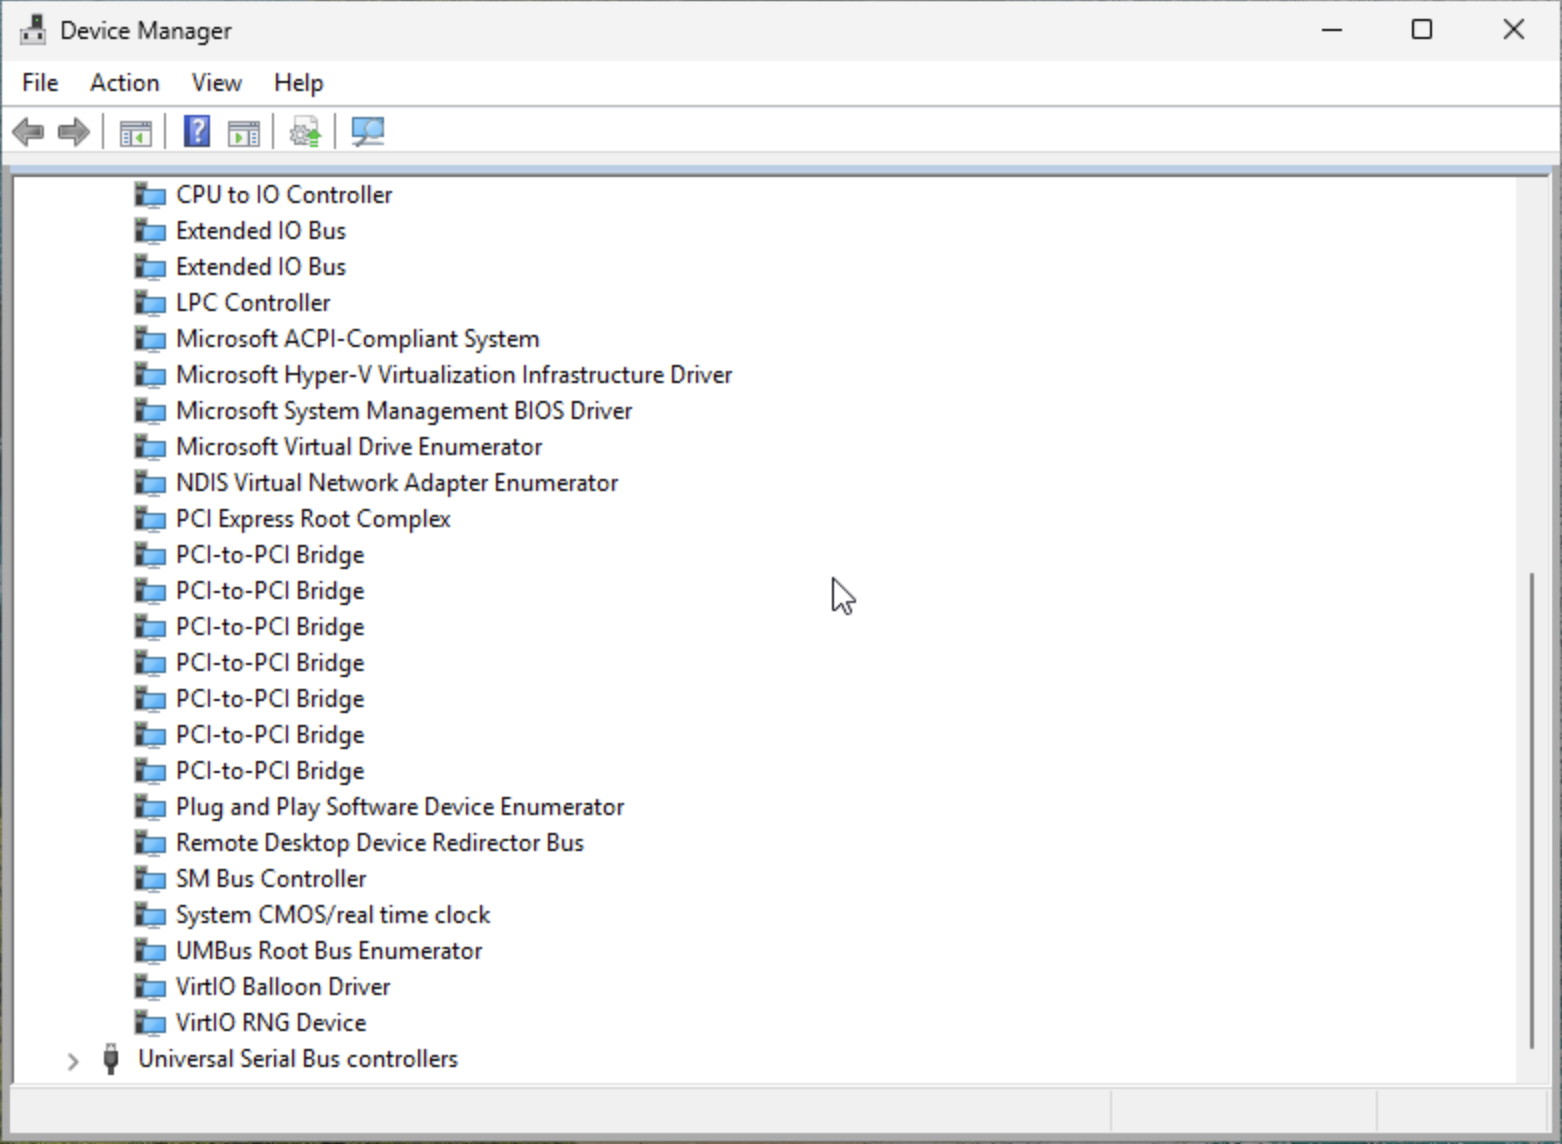
- Verify VirtIO Driver Installation
- Access Device Manager and then navigate to System devices > VirtIO driver.
- If the VirtIO driver appears in the list, the driver is already installed.
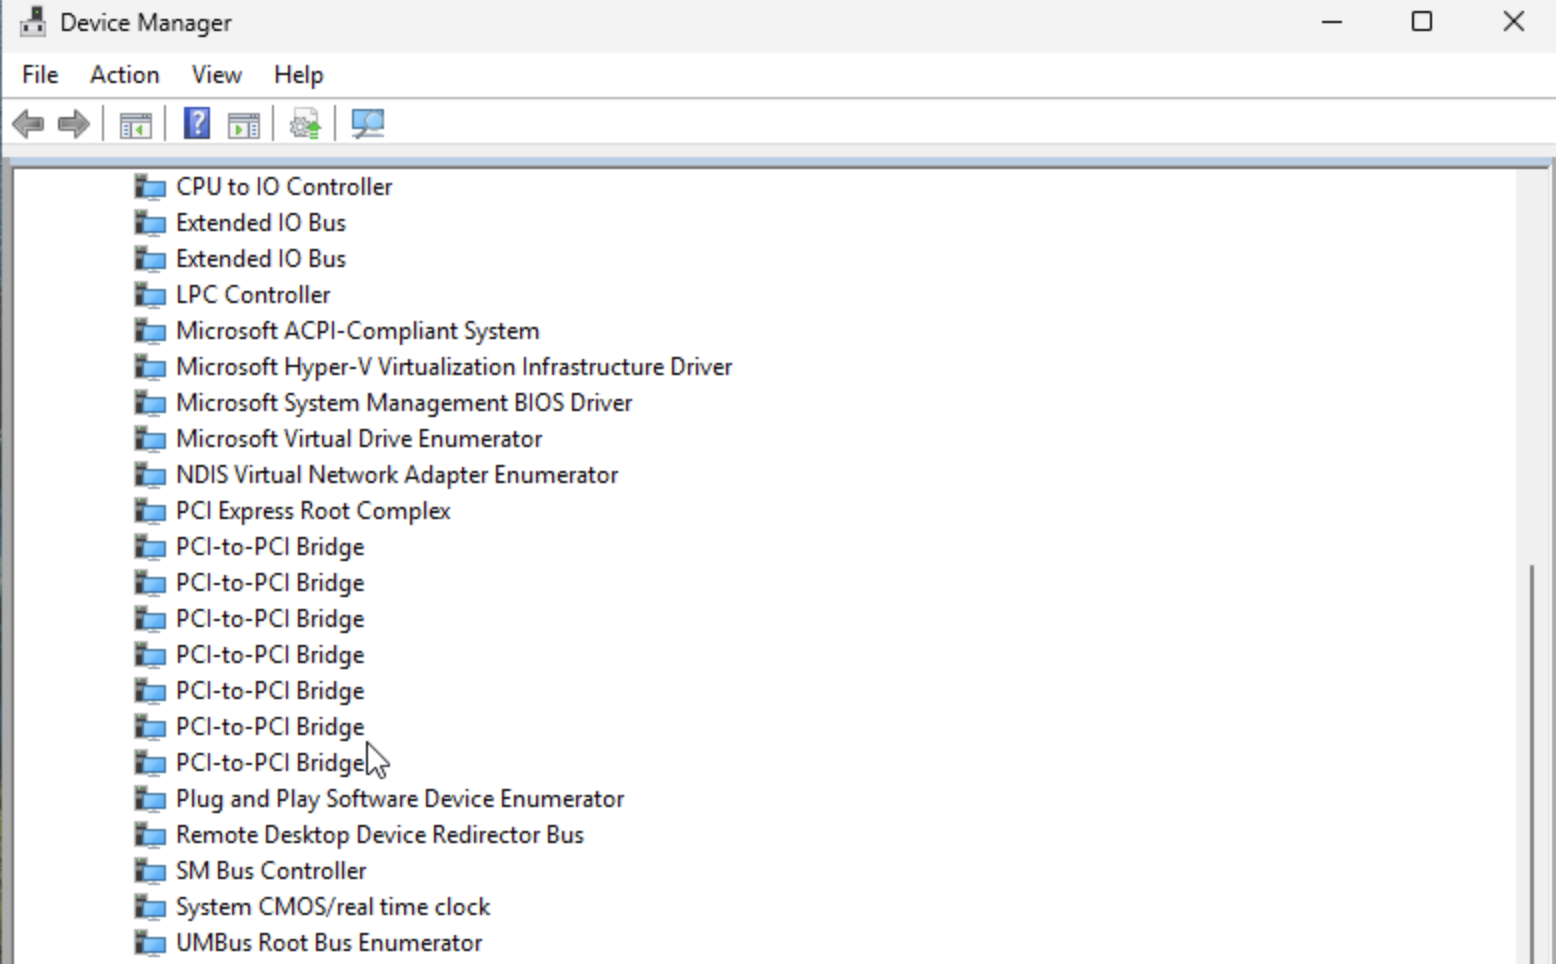
- If it does not appear, continue with the following steps.
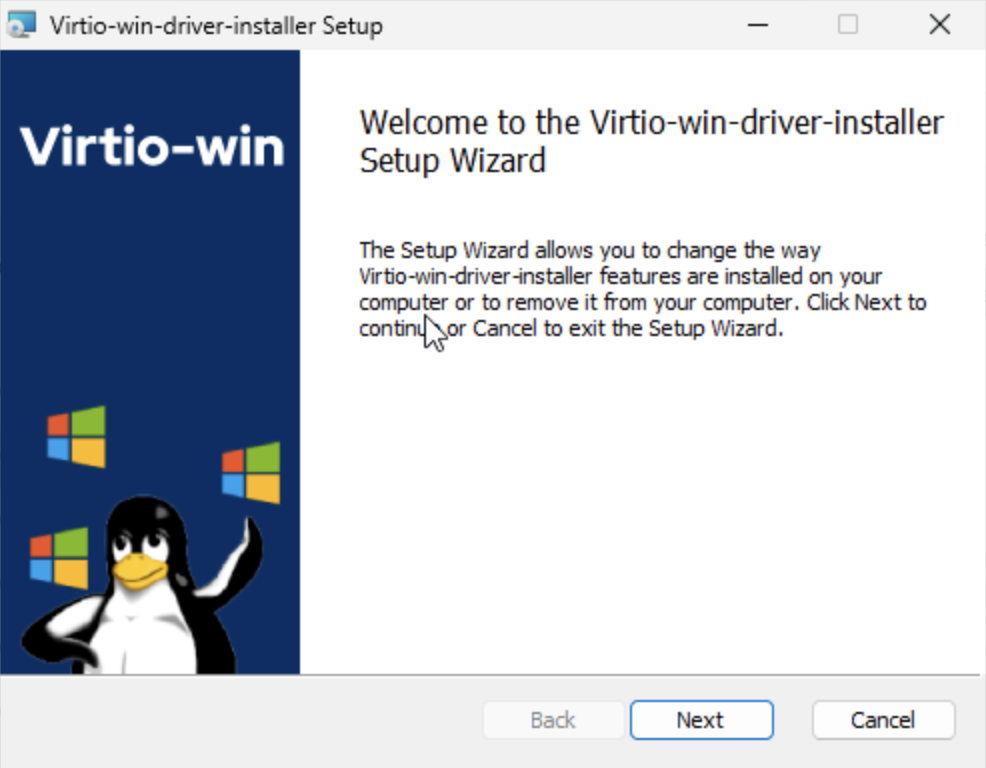
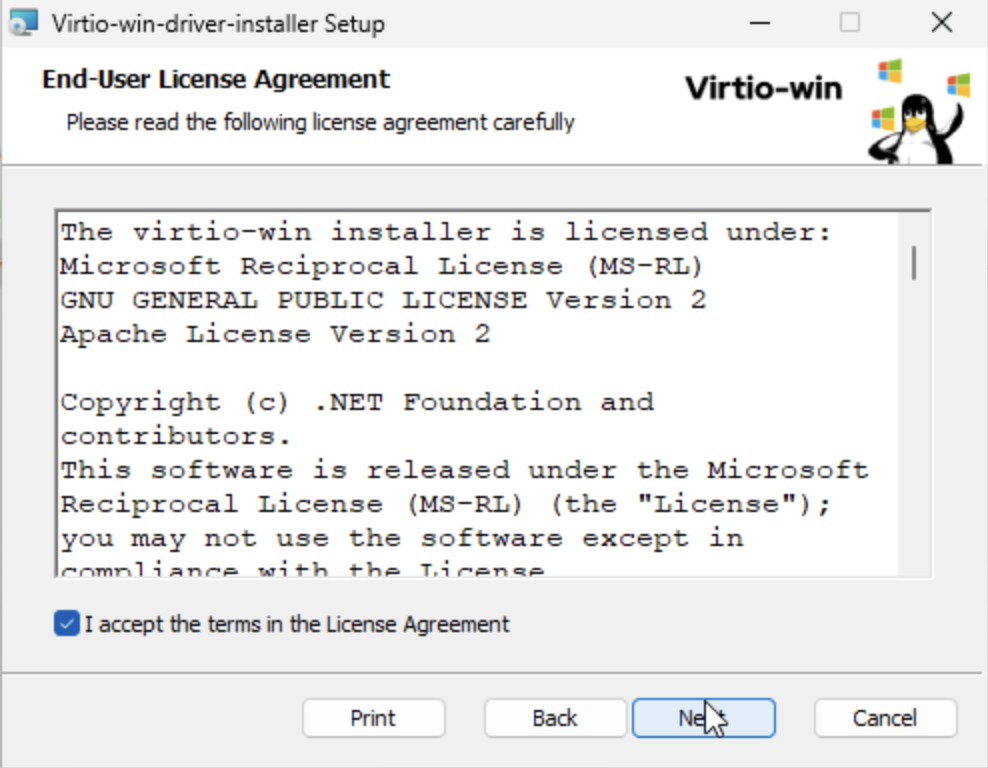
- Download the VirtIO setup package from Index of /groups/virt/virtio-win/direct-downloads.
- Run virtio-setup to install the drivers.
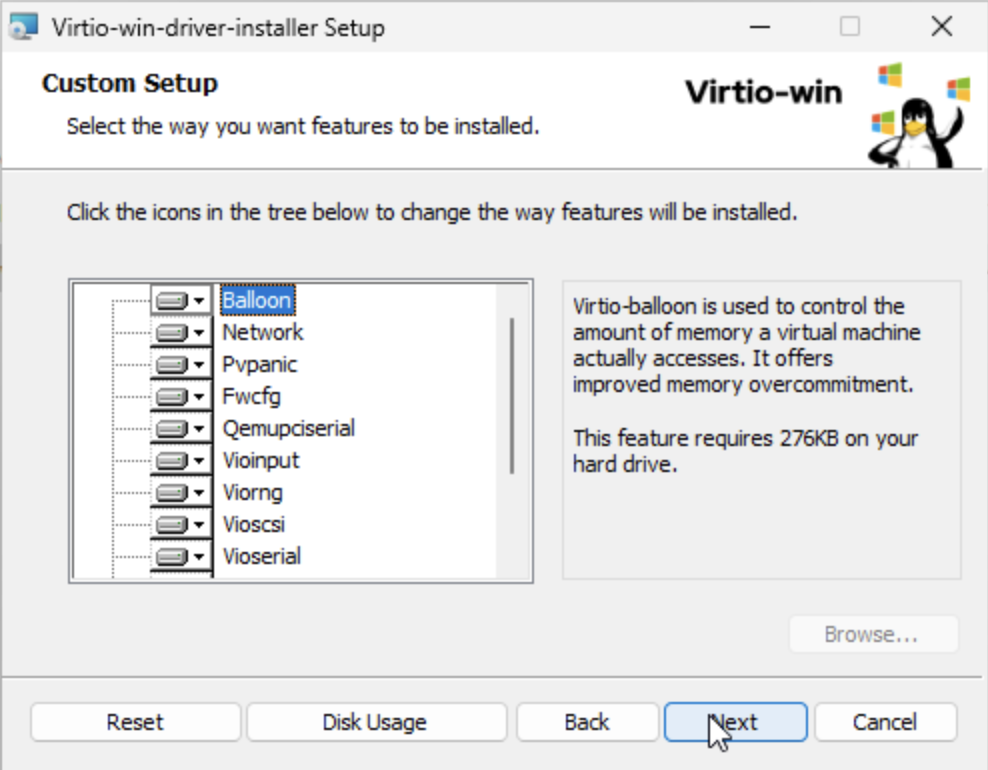
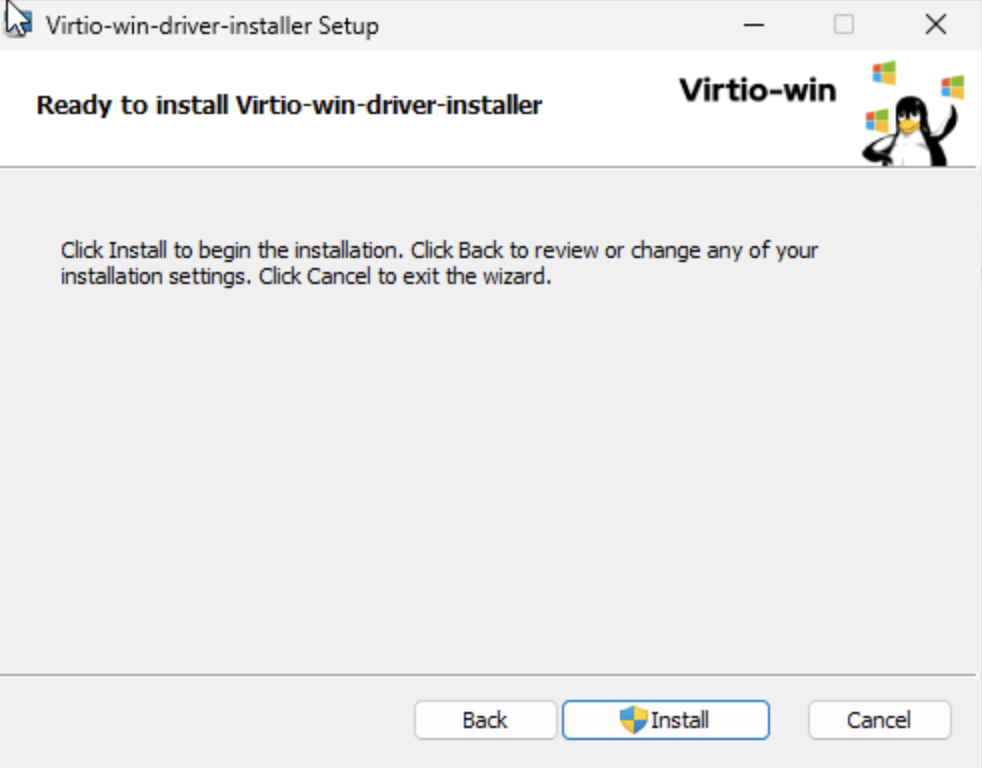
- After installation is complete, navigate back to Device Manager > System devices to verify that the VirtIO driver is listed.
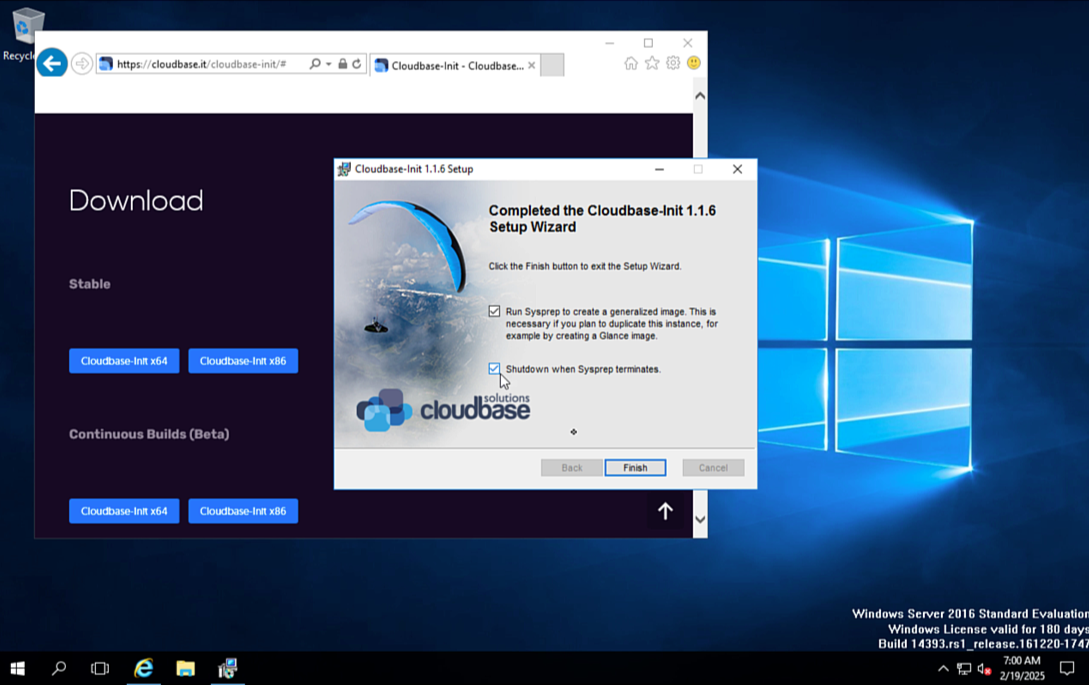
- Install Cloudbase-Init
- Download and run Cloudbase-Init to enable automated configuration for future VMs. PCD uses Cloudbase-Init to set the initial Administrator password during VM deployment.
- Select the option to run Sysprep to create a generalized golden image.
- Allow the VM to power off automatically once the process is complete.
Step 5: Create Golden Image
- Detach the Target Volume
Detach the
windows-os-target-volumethat contains the installed operating system. This prepares it for upload as a Glance image.
openstack server remove volume <vm-name> windows-os-target-volumeAfter detaching the target volume, you can delete the VM. Its primary purpose is to prepare the Windows image.
- Create a Glance Image from the Installation Volume
Run the following command to create a Glance image from the windows-os-target-volume:
openstack --os-interface admin --insecure image create "<windows-image-name>" --disk-format raw --volume windows-os-target-volume- Set Image Properties
Set the required properties to ensure the VM boots correctly:
openstack --os-interface admin --insecure image set <windows-image-name> \ --property hw_boot_menu=True \ --property hw_cdrom_bus=sata \ --property hw_disk_bus=scsi \ --property hw_firmware_type=uefi \ --property hw_machine_type=q35 \ --property hw_scsi_model=virtio-scsi \ --property os_secure_boot=required \ --property os_type=windowsA reusable golden image is now created and can be used for future Windows VM deployments, allowing you to quickly provision new VMs without having to repeat the installation process.
Step 6: Deploy a VM from the golden image
Refer to the Deploy VMs on your Virtualized Cluster guide to deploy a VM with the new golden image.