This tutorial is the first part of a two-part series where we will build a Multi-Master cluster on VMware using Platform9.
Part 1 will take you through building a Multi-Master Kubernetes Cluster on VMware with MetalLB for an Application Load Balancer. Part 2 focuses on setting up persistent storage using Rook and deploying a secured web application using JFrog ChartCenter and Helm.
Building a single master cluster without a load balancer for your applications is a fairly straightforward task, the resulting cluster however leaves little room for running production applications. The cluster and applications that are deployed within can only be accessed using kubectl proxy, node-ports, or manually installing an Ingress Controller. Kubectl Proxy is ideally used for troubleshooting issues when direct access is required to the cluster remotely and isn’t recommended for running applications. Node-ports enable clients or applications access to applications within the cluster; however, they naturally introduce manual management of ports which greatly impacts scaling access to your applications. Deploying an ingress controller is a great option that can work alongside a load balancer; however, it is another piece to set up once your cluster is running.
The Alternative is to let Platform9 install and manage a load balancer, MetalLB, that runs alongside the cluster, enabling you to instantly deploy applications as soon as the cluster is up. This means you can create a production-ready, multi-master with an application load balancer in just a few clicks. The catch? A small amount of preparation to ensure you have some reserved IP addresses and no network security is going to block any packets.
The first item to plan for an elastic IP (Virtual IP) to act as a proxy in front of the multiple master. The Virtual IP is used to load balance requests and provide high availability across master nodes. The Virtual IP must be reserved. If any other network device is provisioned and claims the IP, the cluster will become unavailable.
Second, when running in a virtual or cloud environment, port security may block IP traffic that is not from the ‘known’ interface attached to the VM. This is unlikely to be an issue in a VMware environment; however, it is worth checking with your VMware and/or network administrator to ensure that the virtual network will allow all traffic to a VM, irrespective of the IP Address.
Third, is a reserved IP range for the Application Load balancer MetalLB. MetalLB can operate in 2 modes: Layer-2 with a set of IPs from a configured address range, or BGP mode. This tutorial will walk through MetalLB in a Layer-2 configuration.
To deploy MetalLB, you will need to create a reserved IP Address Range on your network. MetalLB will use the IP Range and make it available to any Pod that is deployed with a “Service Type: Load Balancer” configuration. Although MetalLB is optional, creating a cluster with a load balancer significantly simplifies deploying applications from public registries such as JFrog Chart Center via Helm.
To simplify setting up the cluster, use the checklist below to ensure you have all the required elements ready before you start the cluster creation wizard.
Check List: Multi-Master with Application Load Balancer
- Reserved IP for the Multi-Master Virtual IP
- Reserved IP range for MetalLB
- 1, 3 or 5 Virtual Machines for Master Nodes
- 2 CPUs
- 8GB RAM
- 20GB HDD
- Single Network Interface for each VM
- Identical interface names across all Master Node VMs
- Example: ens03
- At lease 1 VM for Worker Nodes
- 2 CPUs
- 16GB RAM
- 20GB HDD
- Firewall: Outbound 443 to platform9.io (platform9.net for Enterprise Plan)
- VMware Network Security: Allow unknown IP traffic
Network Setup
To simplify setting up your cluster, it is worthwhile noting all the required network configurations. For this tutorial, I’m using 10.128.159.240-253 as a Reserved IP range for all components, Workers, Masters, Virtual IP and MetalLB
- Master Virtual IP 10.128.159.240
- Master 01 10.128.159.241
- Master 02 10.128.159.242
- Master 03 10.128.159.243
- Workers
- Worker01 10.128.159.246
- Worker02 10.128.159.247
- Worker03 10.128.159.248
- MetalLB Range
- Starting IP 10.128.159.250 – Ending IP10.128.159.253
vCenter Settings
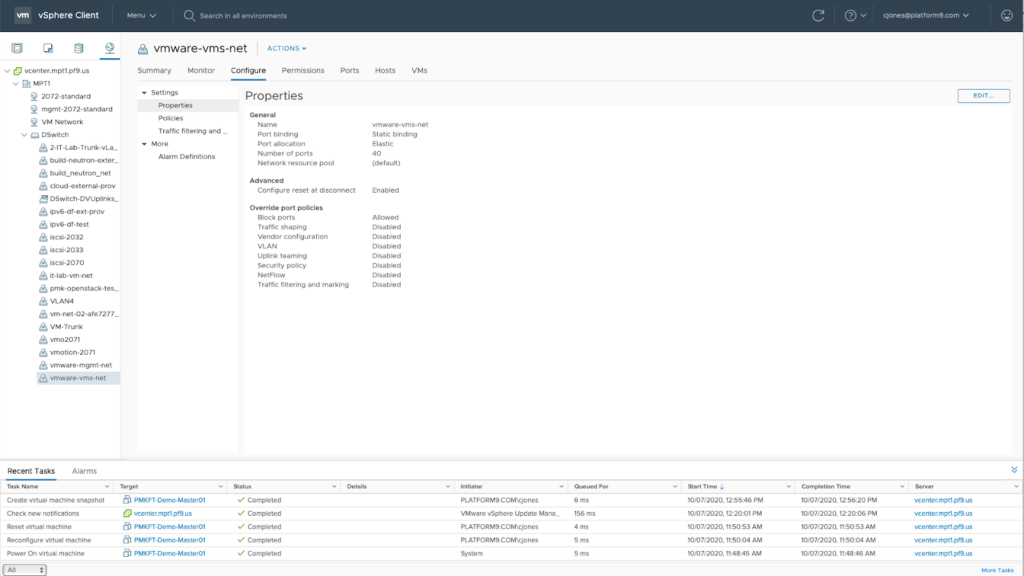
The vCenter used in this tutorial is running standard ESXi licensing using distributed virtual switches for networking. The supporting storage is PureStorage which can be directly attached using the CSI or via vCenter’s CSI Driver. This is not covered in this tutorial.
For simplicity, all VMs have been created in a single folder in vCenter and are running Ubuntu 18 each with static IP Addresses.
Step-by-Step Guide
This tutorial assumes that you are running Ubuntu 18.04 on 6 virtual machines running on VMware vSphere 6.7 Update 2 and that each VM has a Static IP.
Pre-requisite:
PMK Account
Step 1: Cluster Create
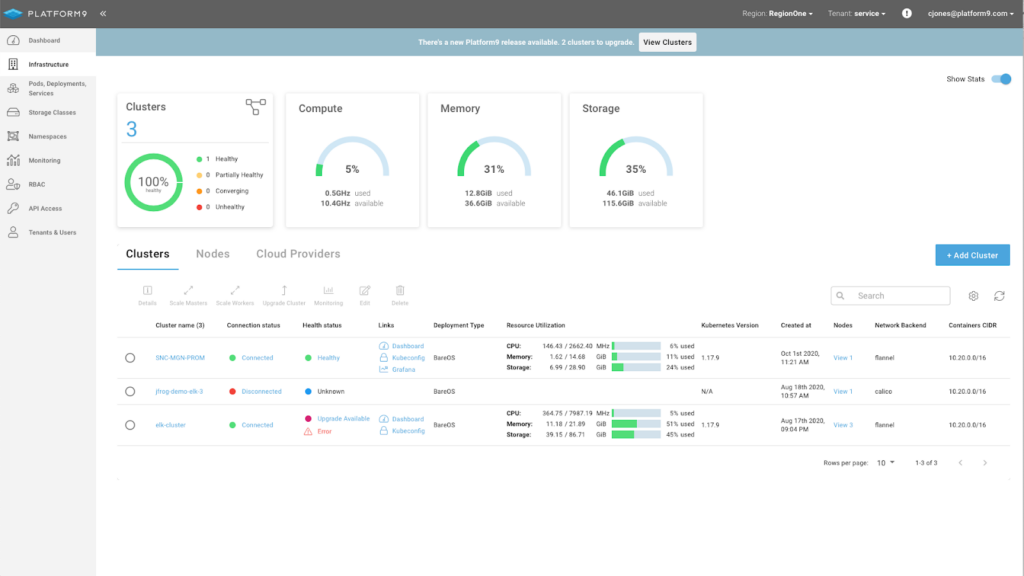
Log into your Platform9 SaaS Management Plane and navigate to Infrastructure. On the Infrastructure dashboard click on ‘ + Add Cluster”
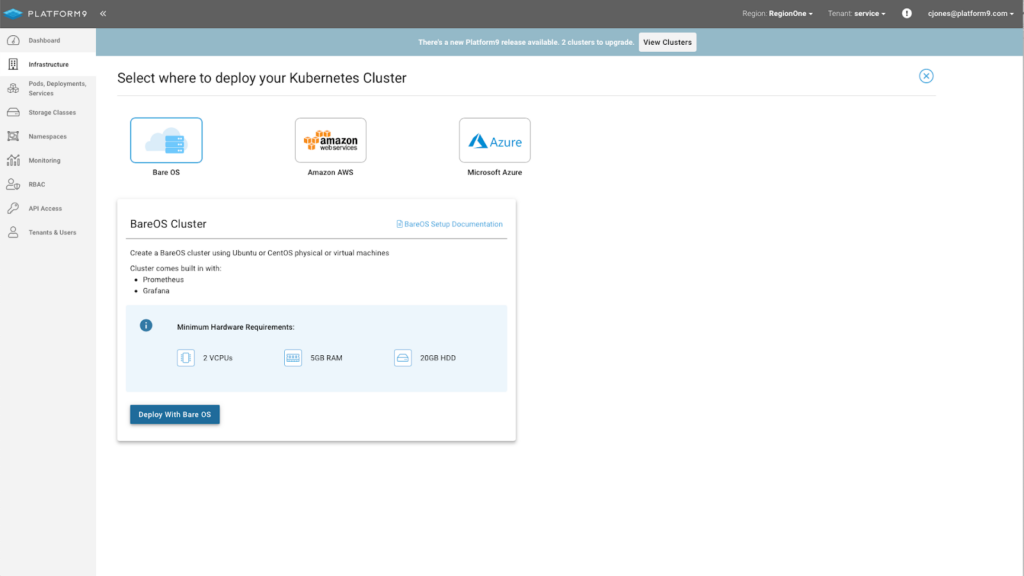
Step 2: Select BareOS as the cluster type and click ‘Deploy Cluster.’
Step 3: Enter a Name for your cluster and follow the steps to connect each of your virtual machines using the Platform9 CLI.
The CLI needs to run on each node and consists of two steps: 1st to install the CLI and 2nd to run the command ‘pf9ctl cluster prep-node’. Prep-node completes all the required OS-level prerequisites and attaches the node to the Platform9 SaaS Management Plane. Once all the nodes are connected, you will be able to progress to the next step.
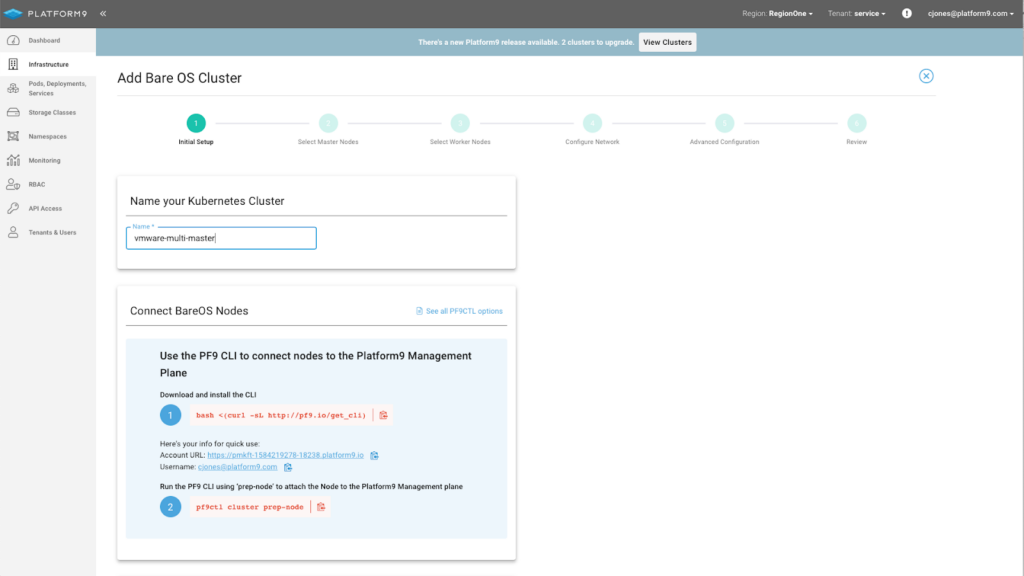
Image: Platform9 CLI Installation
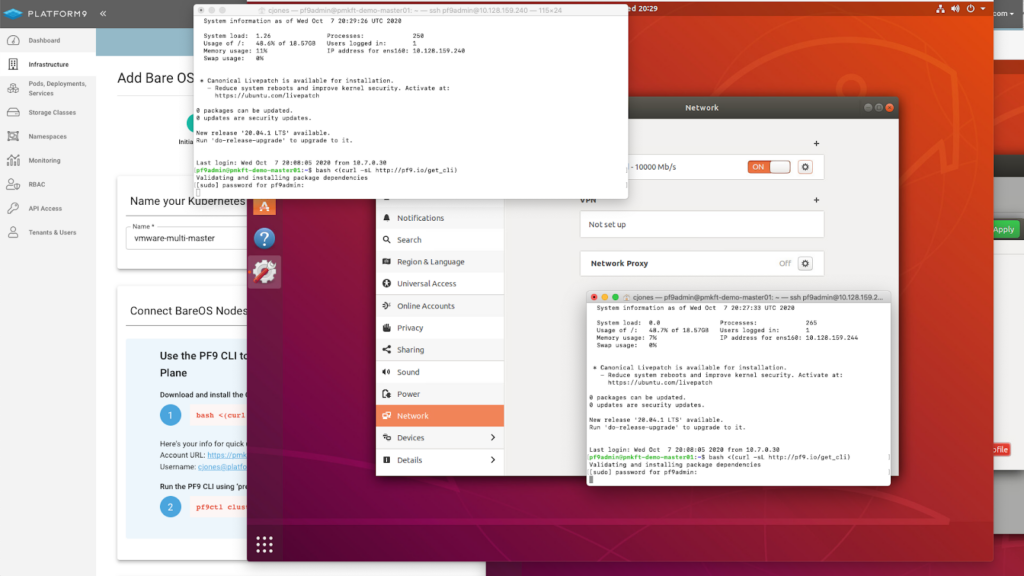
Image: CLI Installation Platform9 Details

Image: CLI Installation Tenant and Region Selection
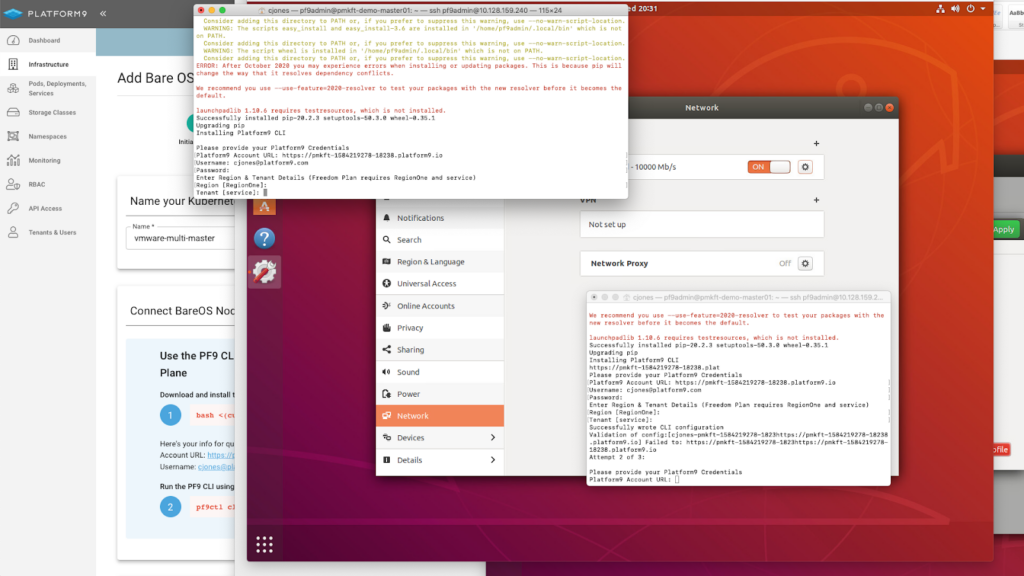
Image: Platform9 CLI – Prep-node Command

Image: Platform9 CLI – Prep-Node Complete
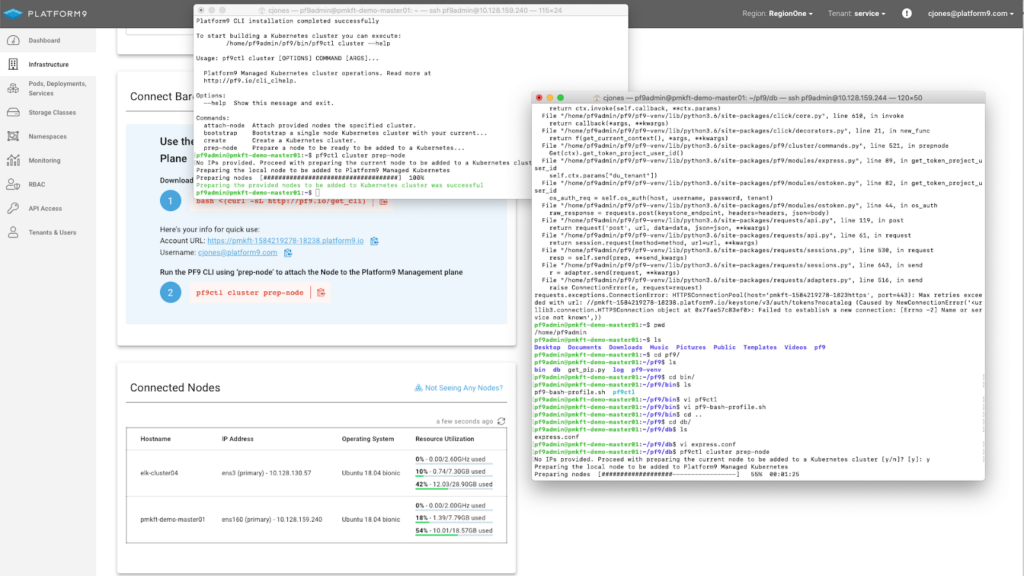
Once all of the nodes have been attached, they will appear.
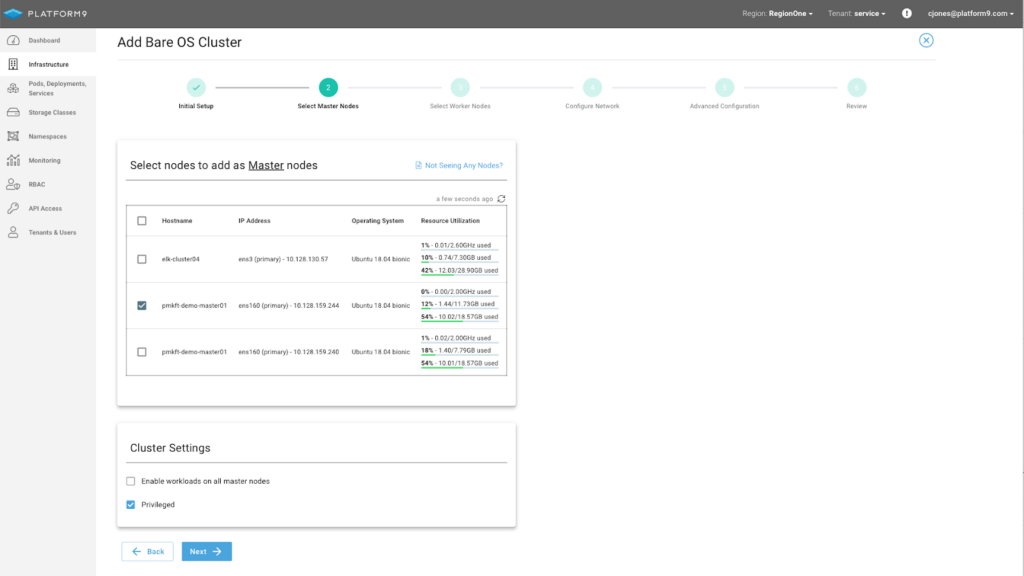
Step 4: Select your Master Nodes and enable Privileged Containers
In this tutorial, only a Single Master is configured with a Virtual IP. Additional Master Nodes are attached after cluster creation using the Platform9 CLI.
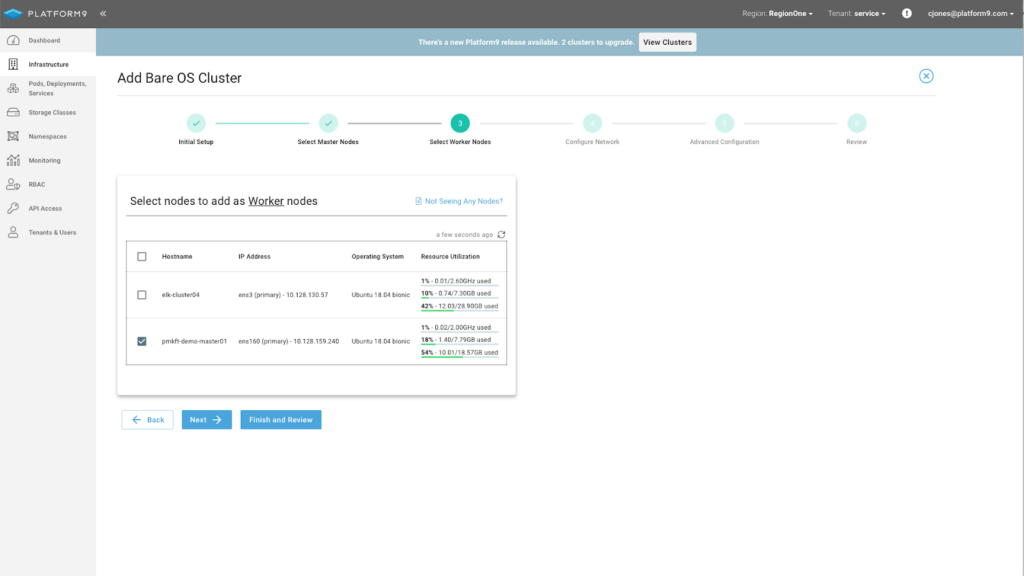
Step 5: Select your worker nodes.
In this tutorial only a single worker is connected, the remaining 2 nodes are attached after the cluster is created using Worker Node Scaling.
Step 6 – [IMPORTANT] Cluster networking must be configured with a Cluster Virtual IP – the virtual IP and the associated Physical Network Interface provide load balancing and high availability across master nodes. If a Virtual IP isn’t provided, the cluster’s master nodes cannot be scaled beyond 1.
** Ensure the Virtual IP is a reserved IP within your network.
For example, Master Virtual IP 10.128.159.240
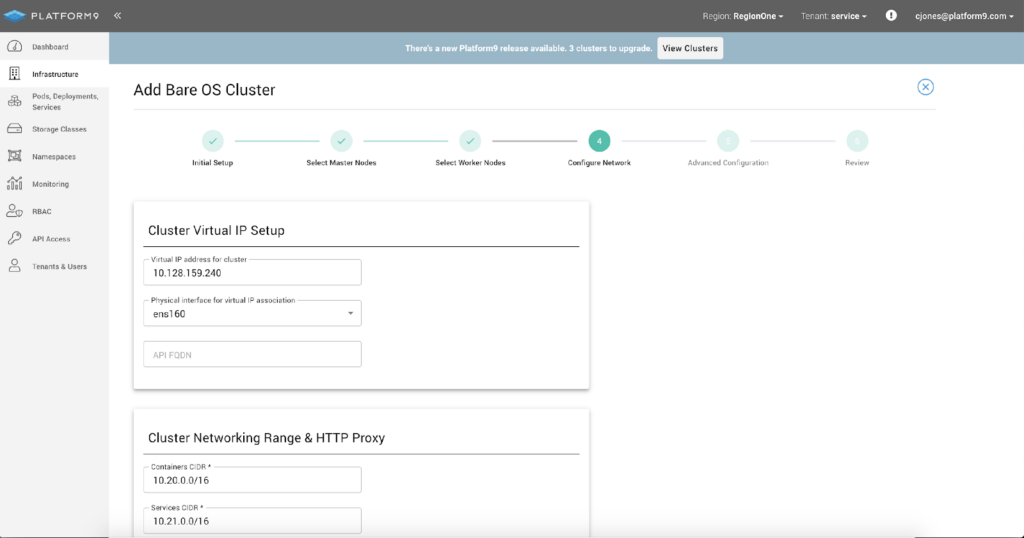
Network Configuration (Cont.)
Once the Virtual IP and Interface have been setup configure the Cluster CNI using Calico with all defaults.
MetalLB Setup –
To enable MetalLB provide an IPv4 IP Range. For example: 10.128.159.250-10.128.159.253
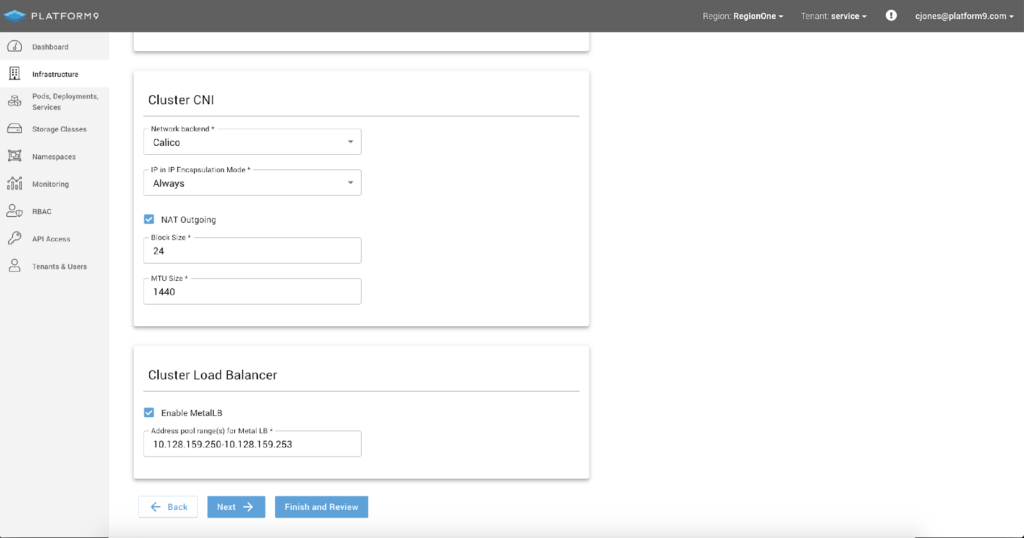
Step 6 (cont.): For final tweaks ensure both etcd backup is enabled and Monitoring.

Step 7: Review the cluster configuration and ensure that MetalLB is enabled and a Cluster Virtual IP is set.
Once all the settings are correct, click Complete and the cluster will be created.
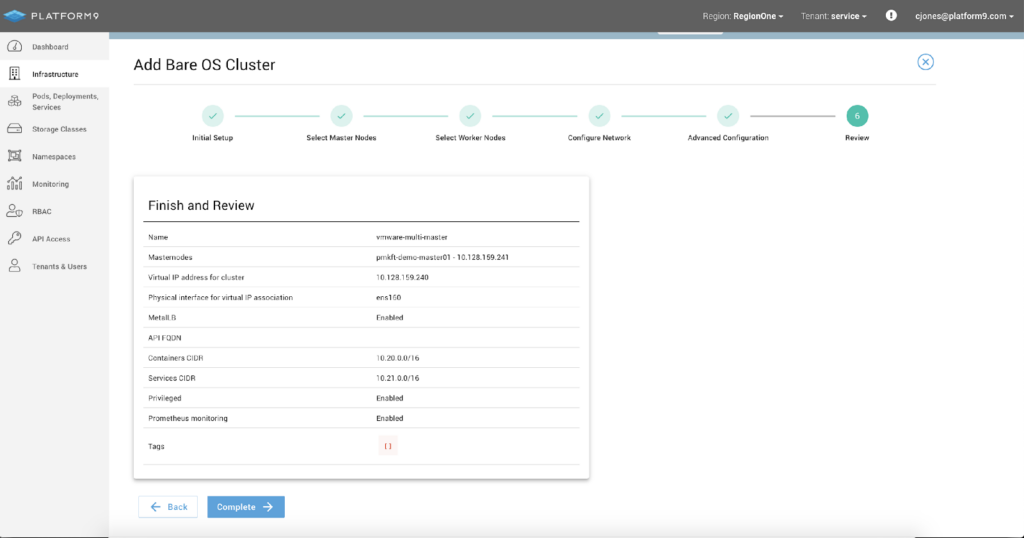
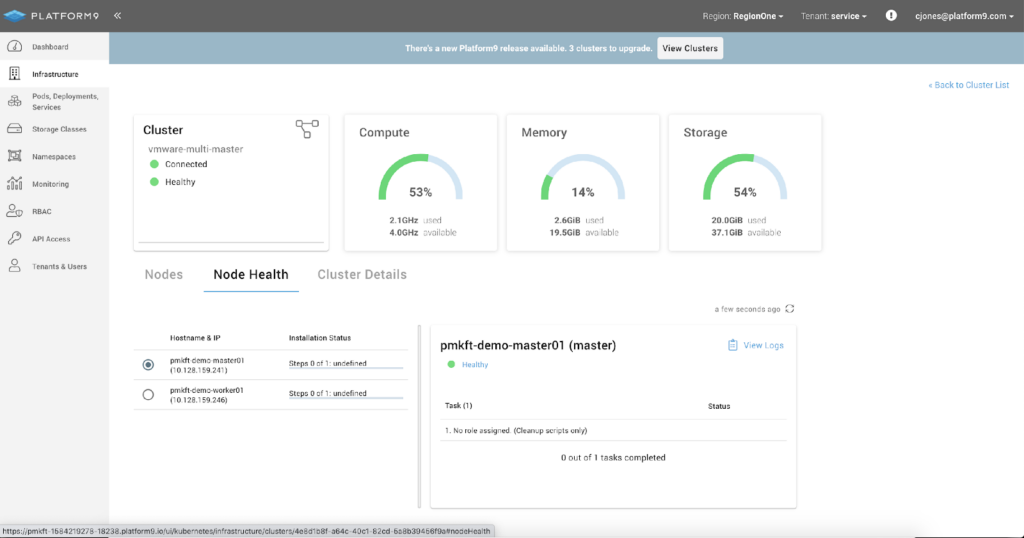
The cluster will now be built. Once clicking complete, you will automatically be redirected to the Cluster Details – Node Health Page where you can watch the cluster be built.
Image: Cluster Details – Node Health Waiting for nodes
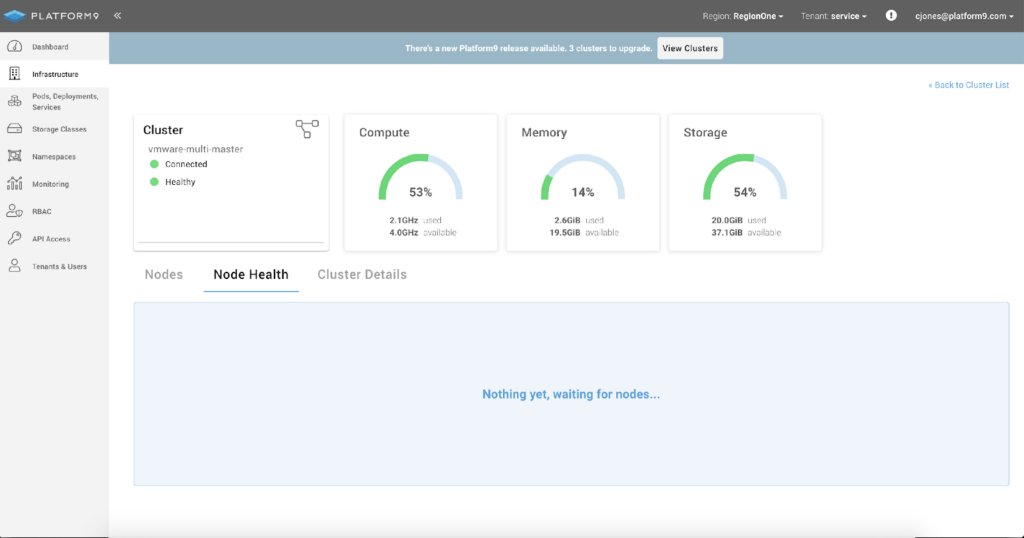
Image: Cluster Details – Node Health Cluster Creation Underway
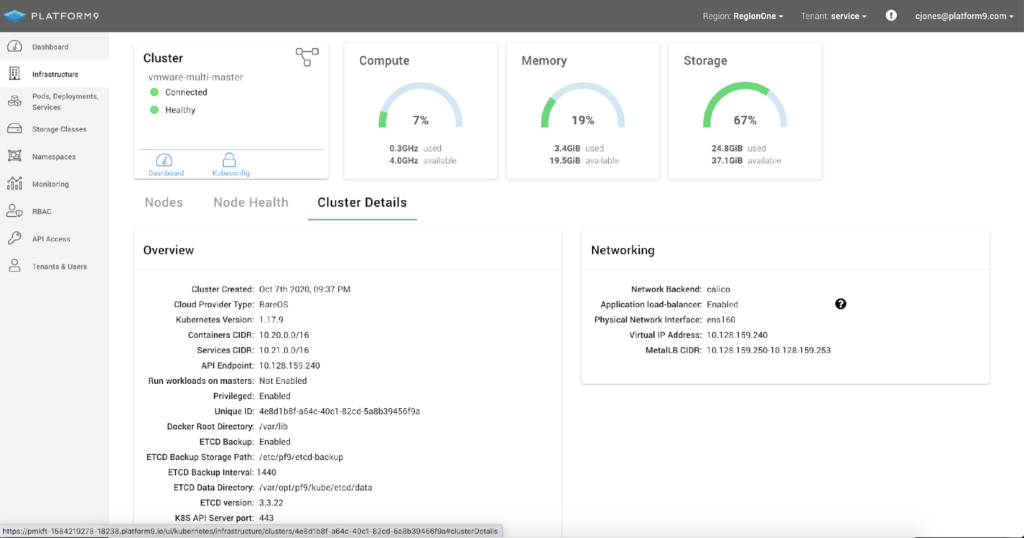
At any time you can review the clusters configuration on the Cluster Details page.
Scale Master Nodes Using the Platform9 CLI
Once the cluster is built with a Virtual IP, you can scale the number of master nodes from 1 to 3. This can be done by using the Platform9 CLI using the command:
Pf9ctl cluster attach-node <clusterName> -m <master-node-ip>
Support for scaling masters in the UI is coming soon!
If you have not already, install the CLI and run prep-node to attach the nodes to platform9 first.
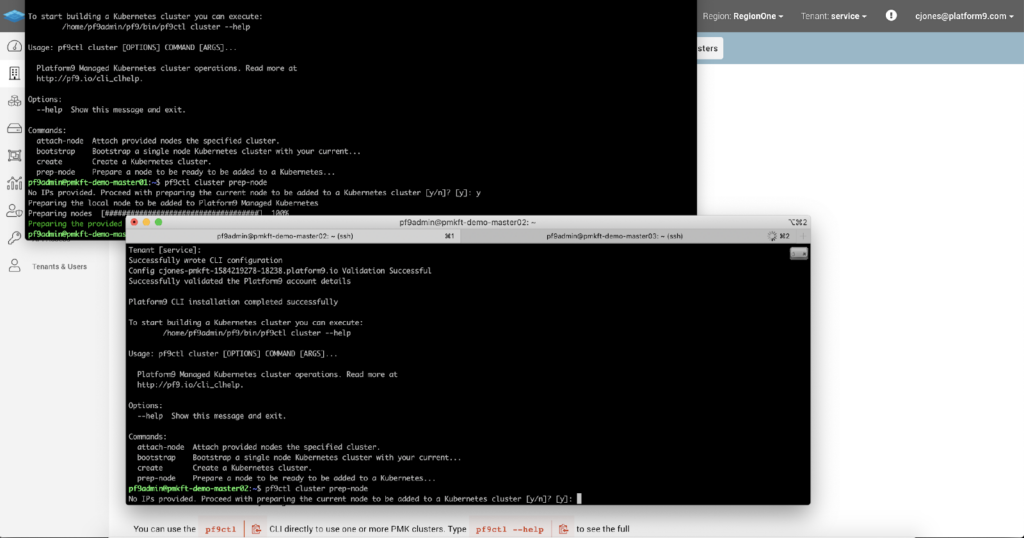
Once both nodes have been attached you can review their status on the Infrastructure – Nodes Tab.
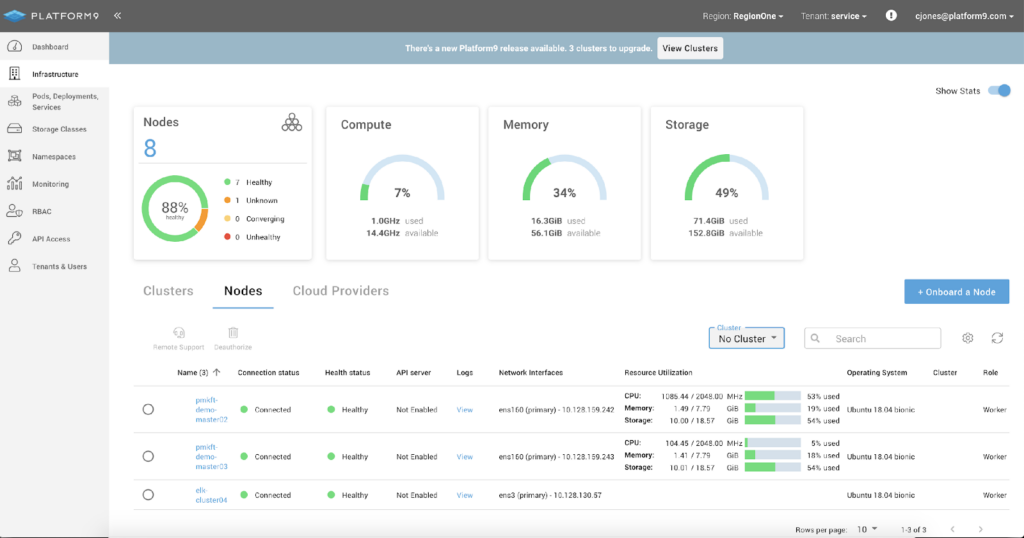
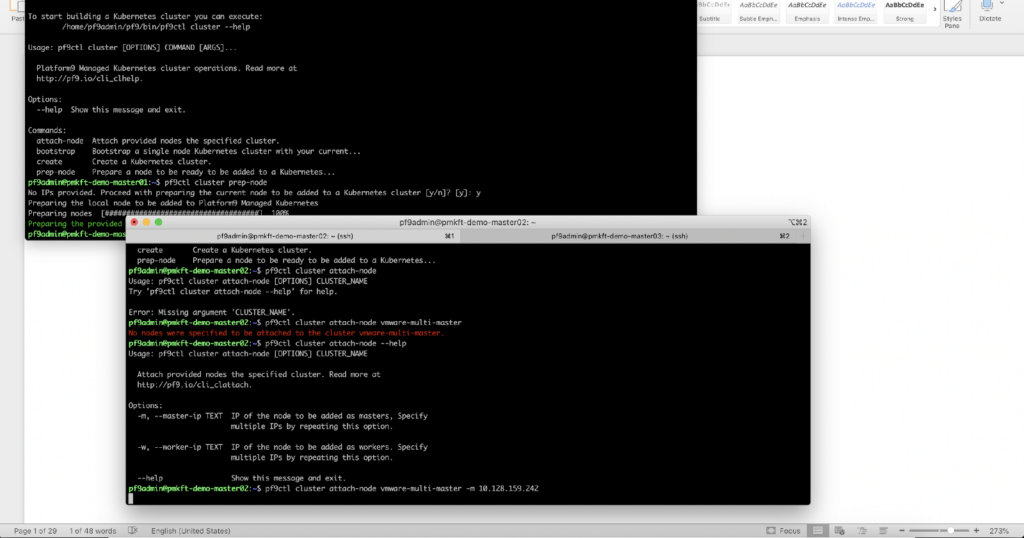
Once both nodes are attached to Platform9, use the CLI and run the Attach-Node command. Each node must be added one by one to ensure that quorum amongst the master control plane isn’t lost.
Pf9ctl cluster attach-node VMware-multi-master -m 10.128.159.242
Scale Worker Nodes Using the Scale Nodes
To scale your worker nodes ensure that the CLI has been installed and the ‘Prep-node’ command has been completed.
Once your nodes are attached navigate to Infrastructure, select your cluster and click ‘Scale Workers’ in the table header.
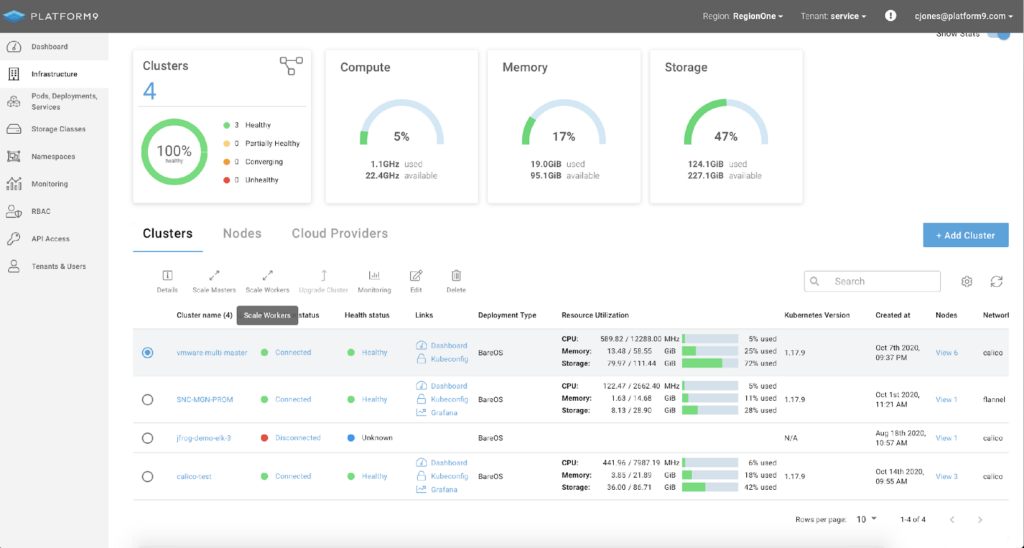
On the ‘Scale Workers’ screen click ‘Add.’

On the next step, select the nodes to be added as worker nodes and click ‘Add Workers.’
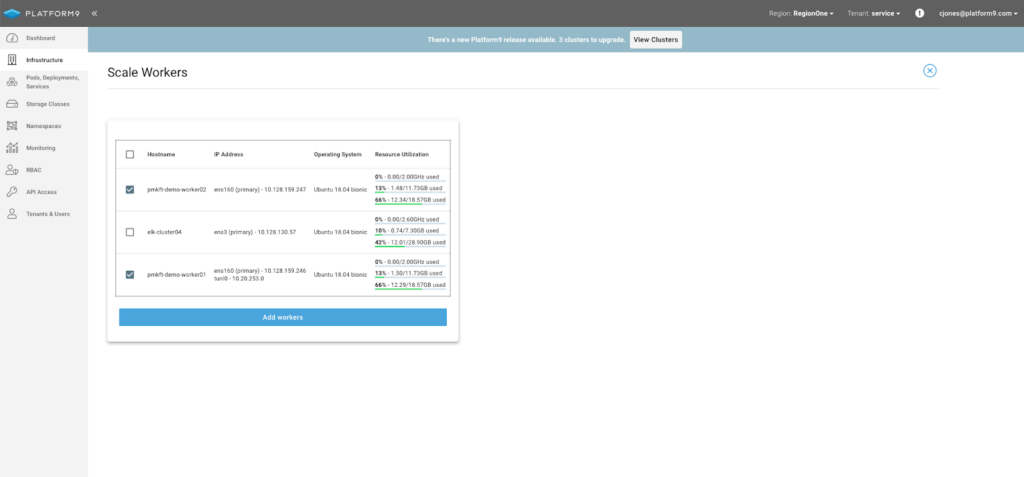
Once the nodes are added, you can view each of the completed clusters on the ‘Nodes’ details page.
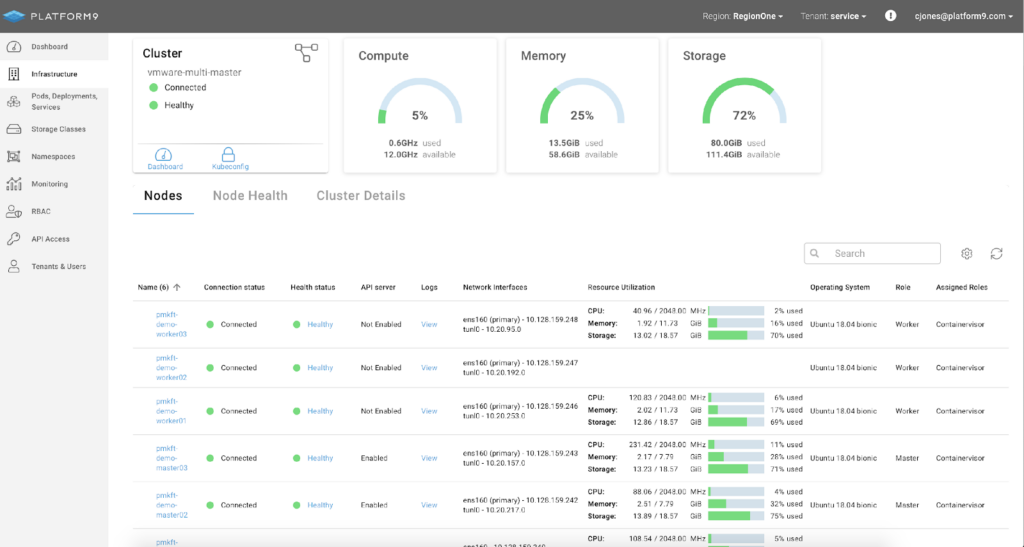
Done! You now have a highly available, multi-master Kubernetes cluster with a built-in application load balance on VMware.
Deploy an App to Use the Load Balancer
There are many applications that can be deployed using Helm which leverages a load balancer by default. Having MetalLB installed on your BareOS cluster means you can make use of those Helm charts with little to no changes. The only catch is most web applications require persistent storage!
Stay tuned for Part Two of this tutorial series where we will go through deploying Rook to solve the persistent storage, Cert Manager for secure access, and an example Web App using JFrog ChartCenter and Helm.


