Create VMs
Virtual Machines
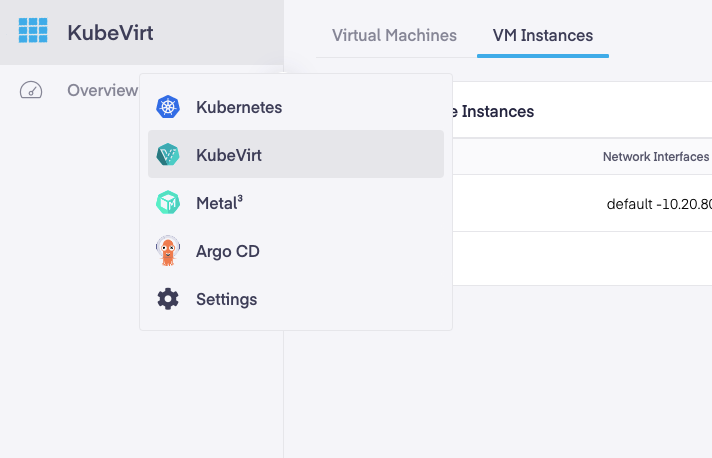
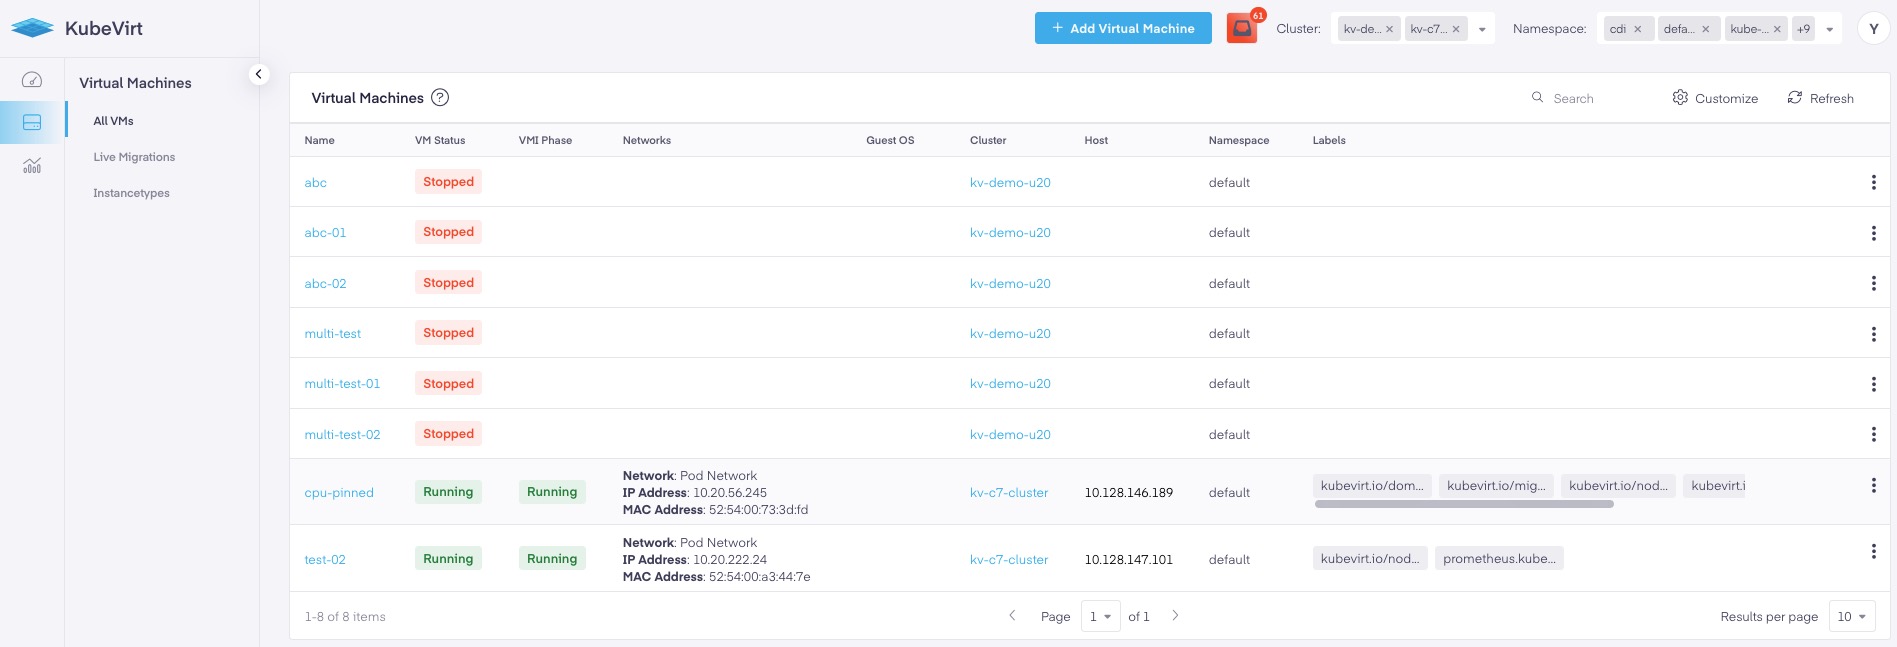
Once you've enabled KubeVirt in your Kubernetes cluster, let's begin creating your first VM. We begin by navigating to the Virtual Machines section in the console by selecting KubeVirt from the App Switcher.
Configure VM
In the next step, we have two options; we can create the VM using a YAML file, or use the new Add Virtual Machine Wizard wizard.
- Using the Add Virtual Machine wizard - With this option, you have the flexibility to input all the info specific to your needs using our UI.
- YAML file - Users can now use a YAML file to define the predetermined VM configuration settings included in the file. This makes for more reliable replication, better readability and increased reliability.
Create a New VM Using the Add Virtual Machine Wizard
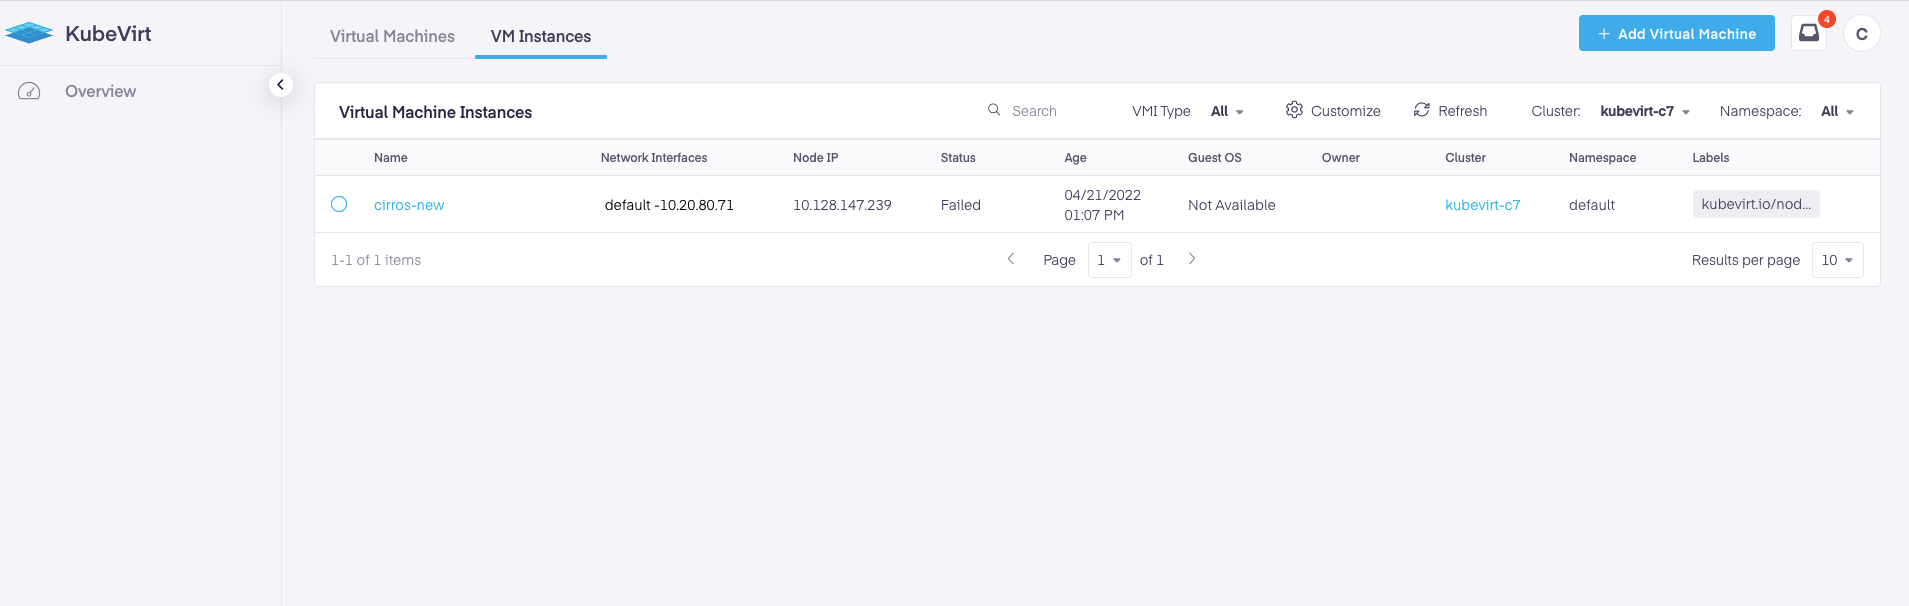
Virtual Machines provide management functions for VirtualMachineInstances in the cluster, such as powering VMIs, ensuring the startup state of VMIs, and have a 1:1 relationship with VMIs. Note: This is the most common type of instance created in KubeVirt.
Virtual Machine Instances are the minimum resource for managing VMs. A VirtualMachineInstance object represents a running instance of a VM and all of its configuration.
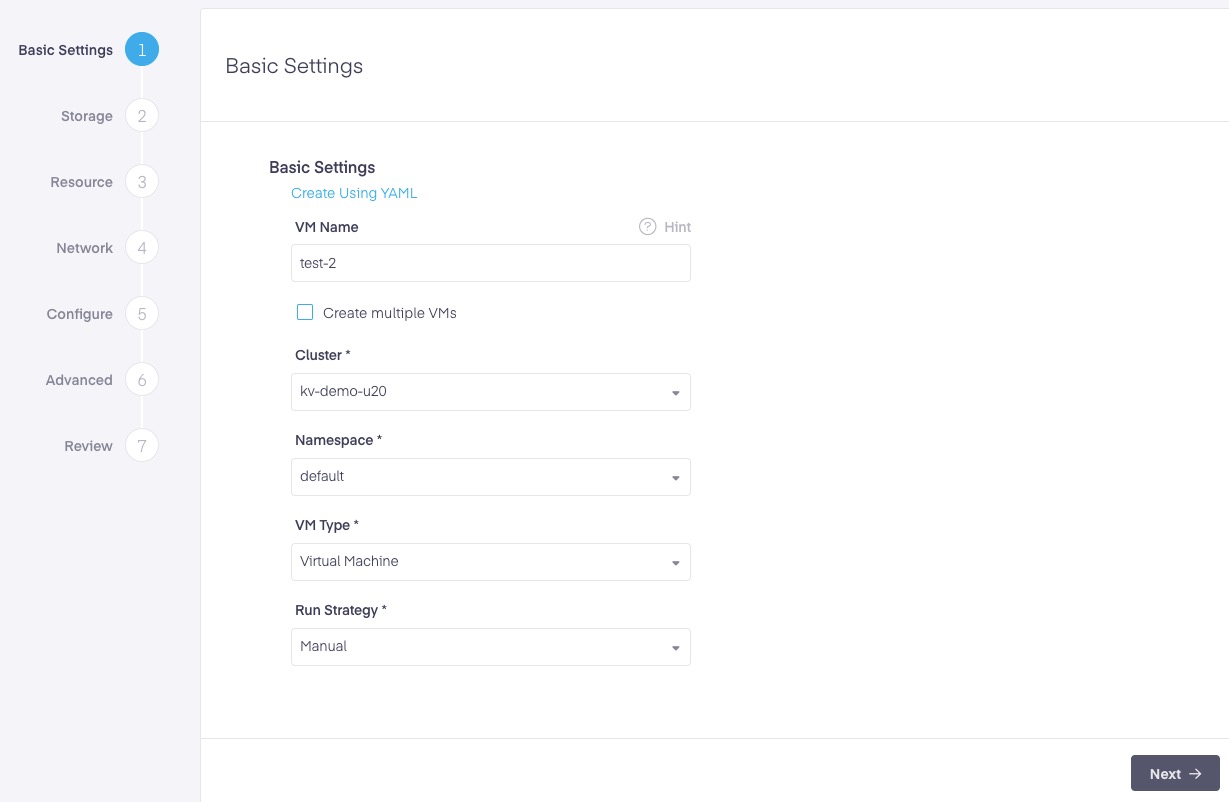
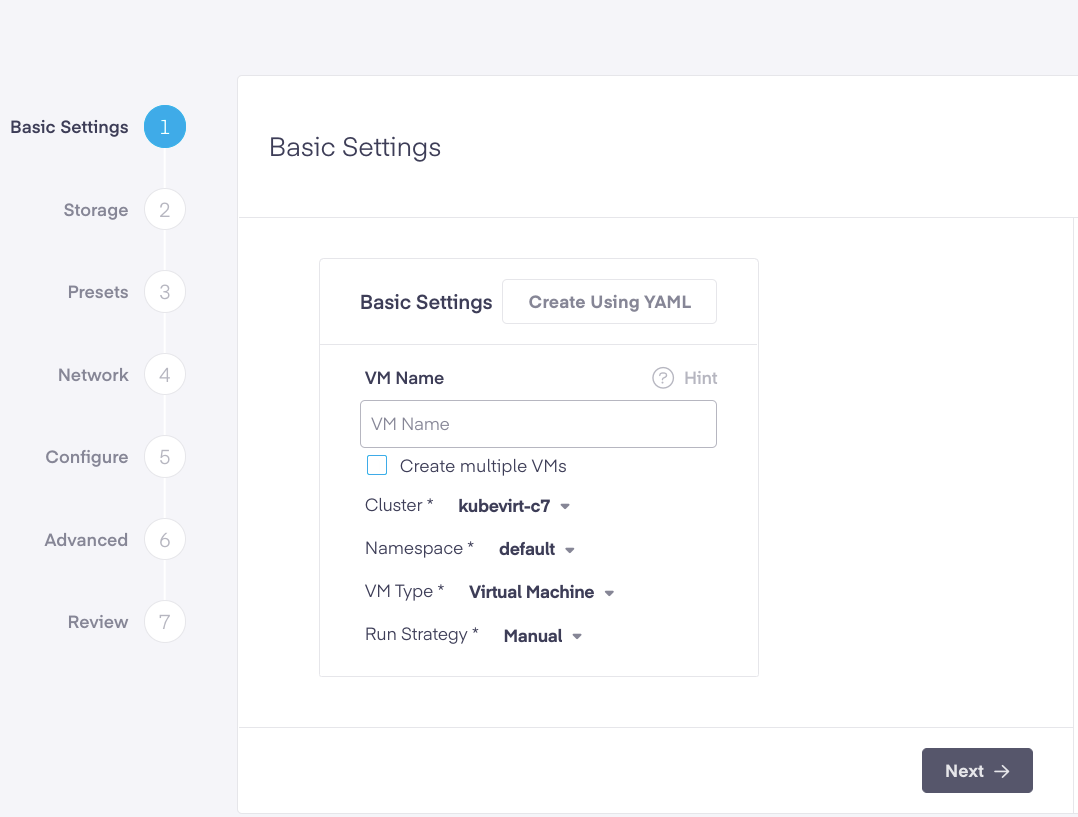
Step 1. Basic Settings
We begin by naming our VM. Next, choose whether you will be creating a single or multiple VMs. If multiple, click the Create multiple VMs check box. Next, select the cluster and namespace the instance will be connected to, as well as the Run Strategy. There are four run strategies to choose from:
- Always - In this state, an instance will always exist. If it crashes, a new one will be created.
- RerunOnFailure - Here, an instance will be respawned if the former instance fails out in an error state. It will not be re-created unless it was shut down from inside the guest.
- Manual - The existence of an instance is limited exclusively to a start/stop/restart value in the VM subresource endpoint
- Halted - No instance will exist. If a guest is already running, it will be stopped.
For this tutorial, we have chosen Manual.
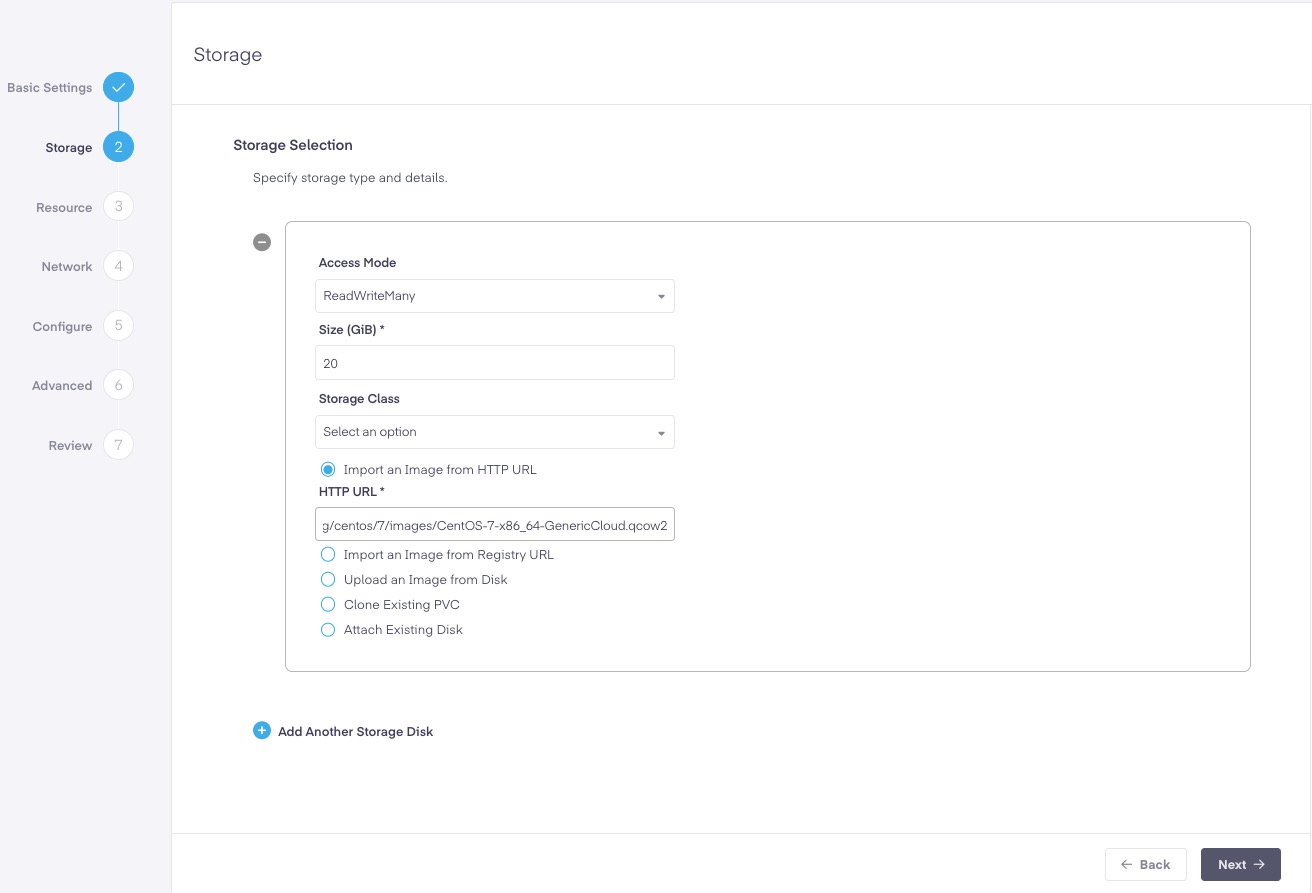
Step 2. Storage Selection
Here, users define the specific storage type and other details. The options for Virtual Instances are:
- ReadWriteMany or ReadWriteOnce Note: LiveMigration requires a disk configured with ReadWriteMany
- The size in GiB
- Storage Class
User also have the option to Clone an Existing PVC or Attach an Existing Disk.
The Options for Virtual Machines are:
- ReadWriteMany or ReadWriteOnce Note: LiveMigration requires a disk configured with ReadWriteMany
- The size in GiB
- Storage Class
Admins have the option from selecting from:
- Import an Image from HTTP URL
- Import an Image from Registry URL
- Upload an Image from Disk
- Clone existing PVC
- Attach Existing Disk
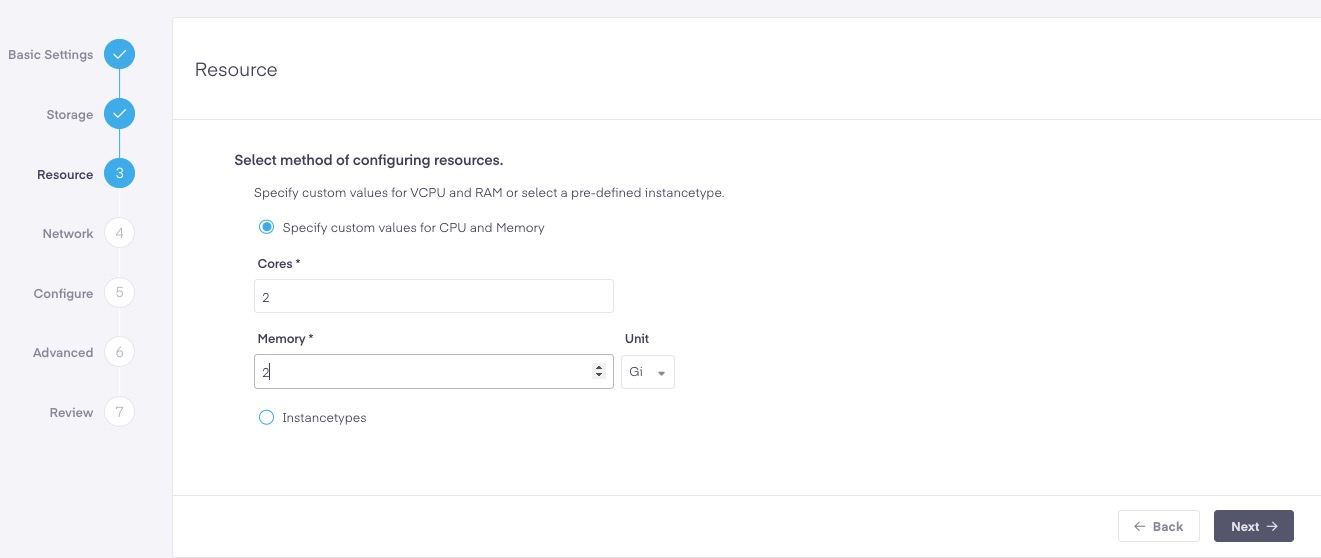
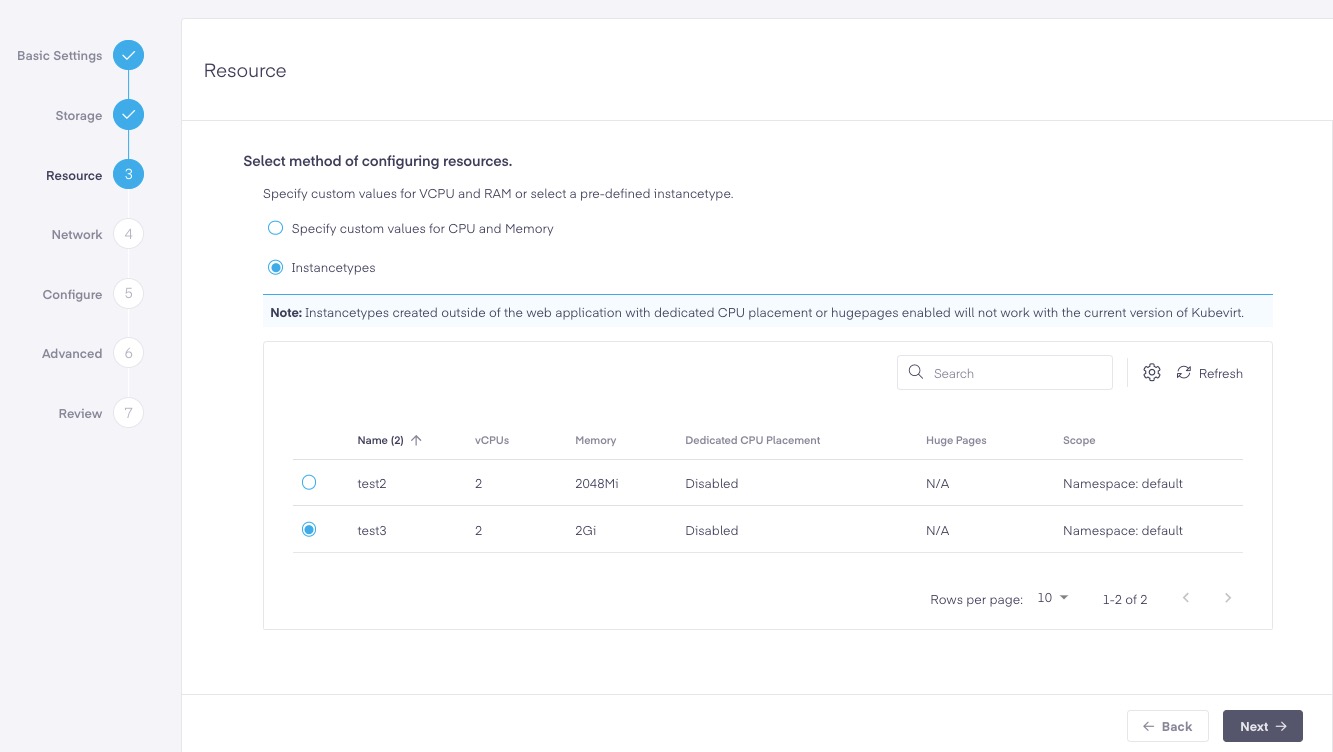
Step 3. Resource
In this step, users select one of two options; either specify a value for the number of Cores and amount of Memory. Or users can select an InstanceType with predefined Cores & Memory configured.
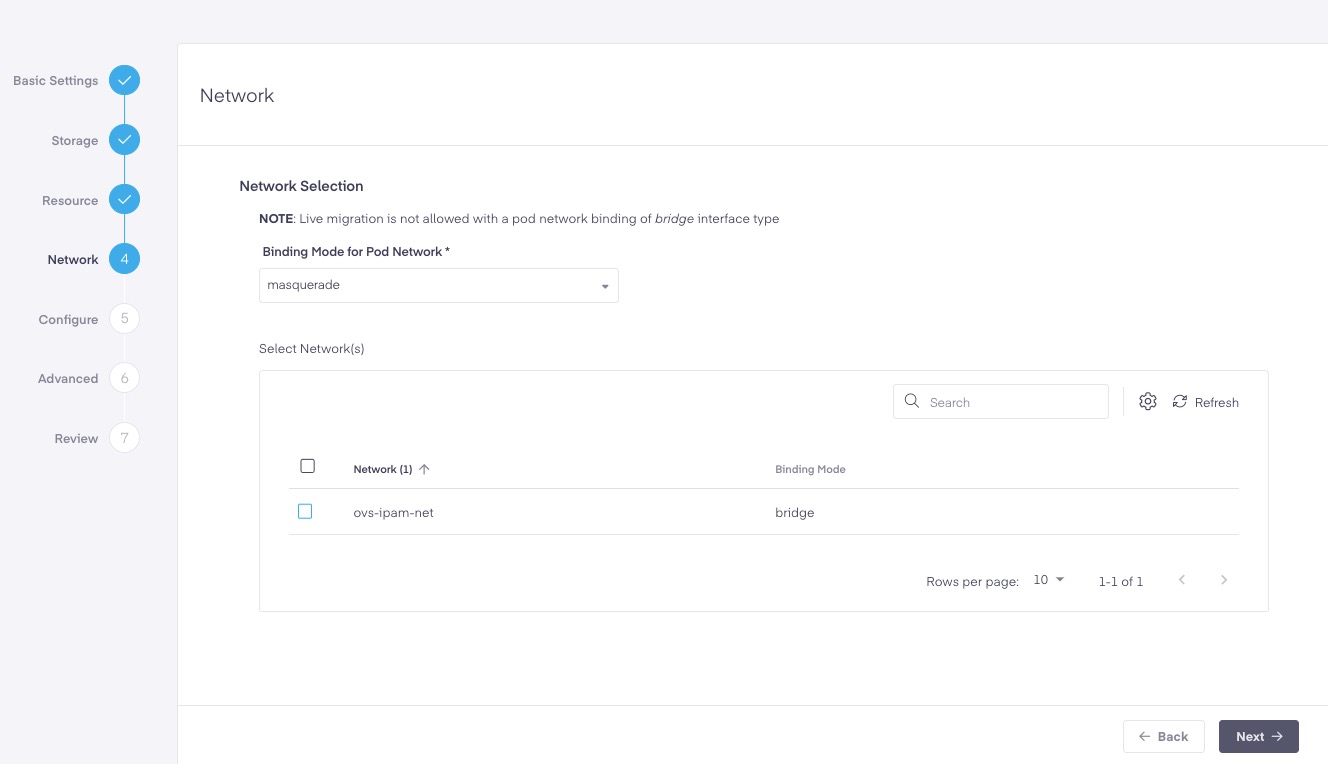
Step 4. Network Selection
You have two options when selecting the Binding Mode for Pod Network:
- Masquerade - In this mode, KubeVirt allocates internally NAT'd IP addresses to the image
- Bridge - Here, virtual machines are linked to the network backend via a linux "bridge"
Live migration is not allowed with a pod network binding of bridge interface type
Additional Networks
Any Network Attached Definitions configured and available to the cluster will appear in the Select Network(s) section. When selected each additional Network will appear as an additional Nic for the VM and visible in the VM details view.
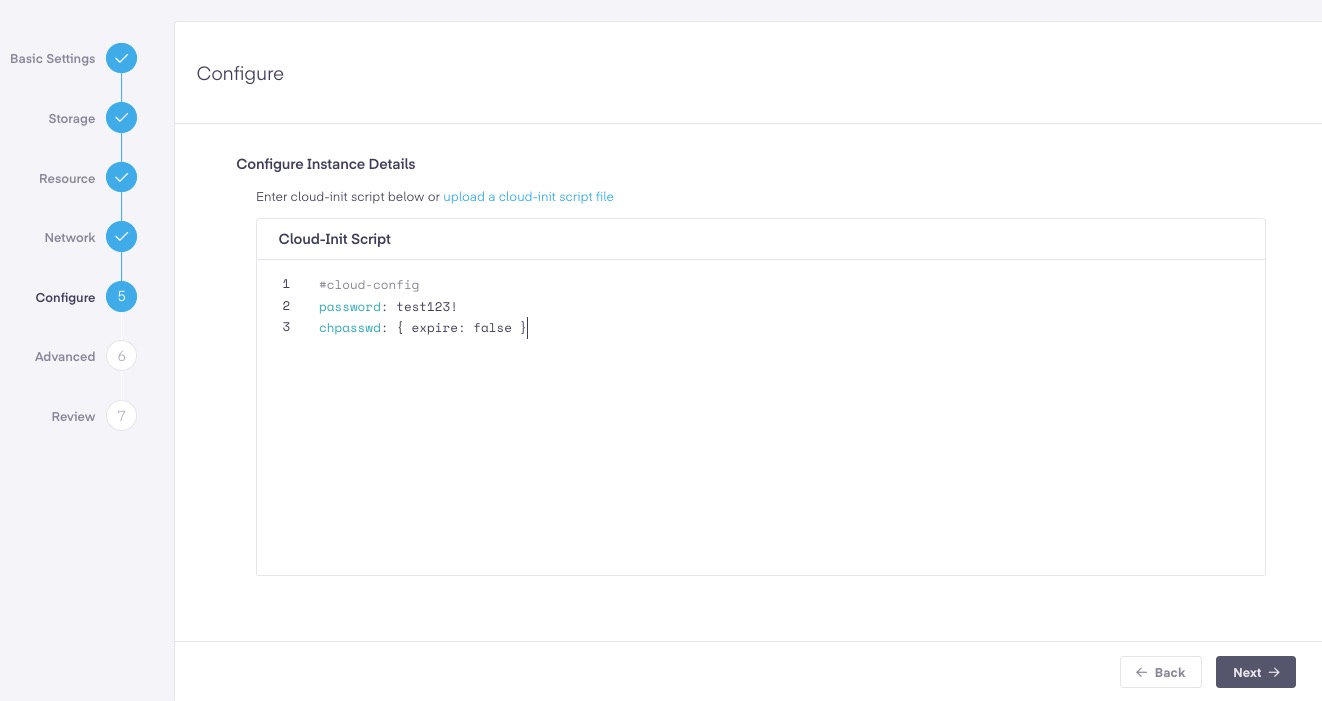
Step 5. Configure Instance Details
Kubevirt utilizes cloud-init as a sort of template, similar to a kubevirt VM or VMI yaml config. These can be a useful tool, especially when debugging test cases. Here, users can either enter a cloud-init script or upload a cloud-init file. More examples of cloud-init configurations can be found at https://cloudinit.readthedocs.io/.
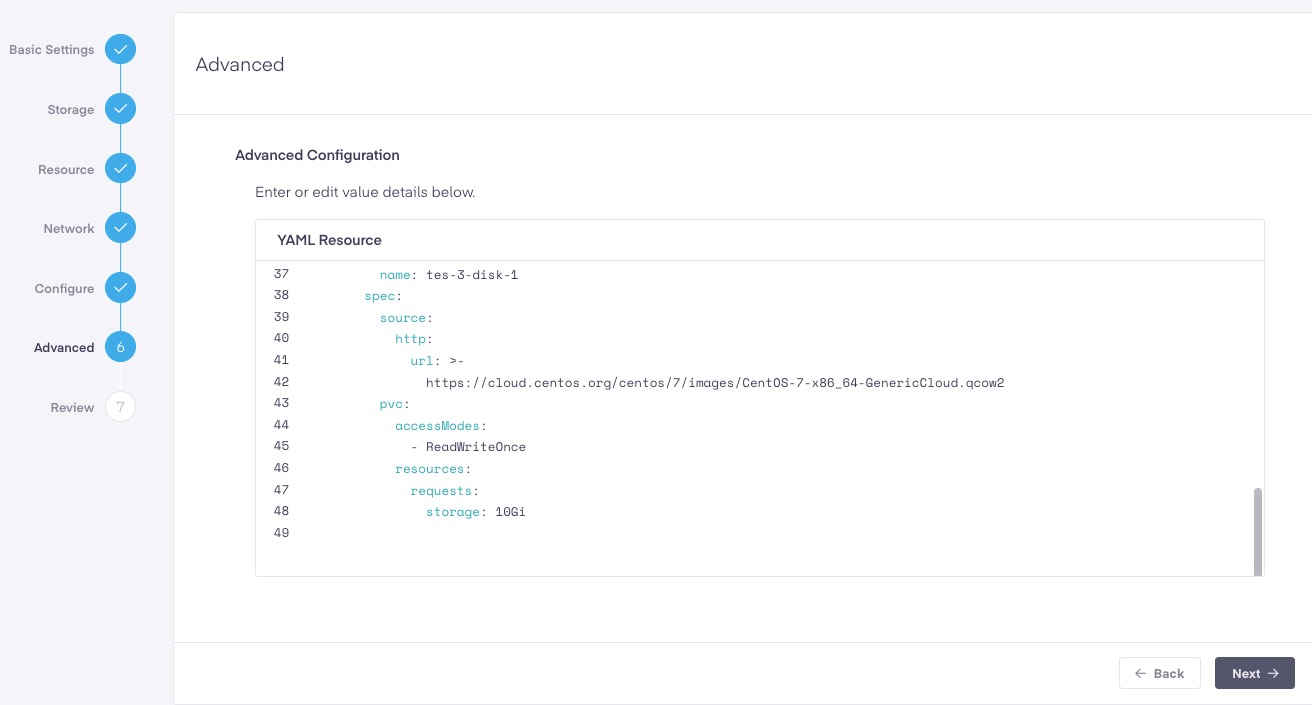
Step 6. Advanced Options
In this section, further details can be added via a YAML file. Below, we appended an additional dataVolume.
Step 7. Review and Create
In the final step, we analyze our choices to ensure they are correct. If a value needs to be corrected, we can still go back using the
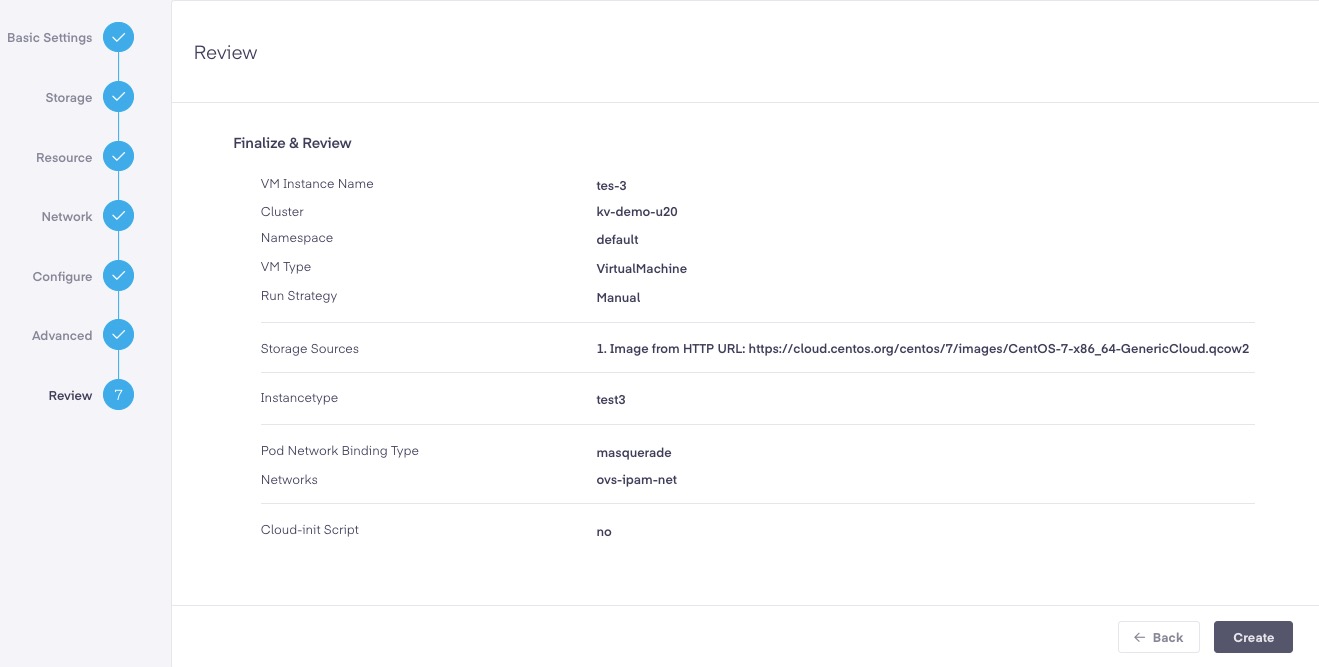
If satisfied with the settings, click the
Create VM using YAML File
After clicking on the
Next, click on the
Be sure to set the "VM Type" field to the correct value (i.e. VirtualMachine or VirtualMachineInstance), based on the resource type specified in your YAML.
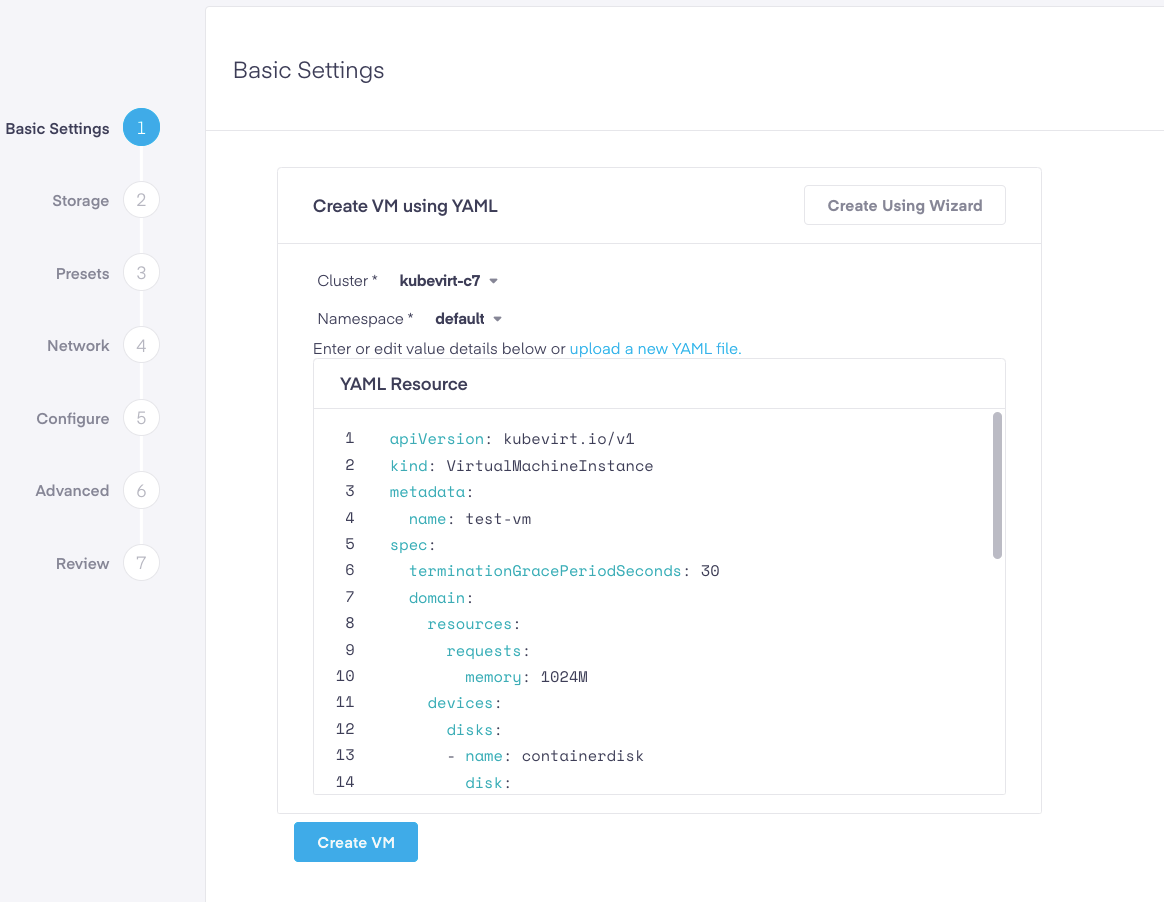
Below is a copy of the default YAML file we used. This can be utilized for testing in this environment. This example uses a fedora cloud image with cloud-init. To understand the details and more advanced options, refer to this section of the official KubeVirt User Guide. Add this sample Fedora VirtualMachine YAML into the VM creation wizard box.
apiVersionkubevirt.io/v1kindVirtualMachineInstancemetadata nametest-vmspec terminationGracePeriodSeconds30 domain resources requests memory1024M devices disksnamecontainerdisk disk busvirtionameemptydisk disk busvirtiodisk busvirtio namecloudinitdisk volumesnamecontainerdisk containerDisk imagekubevirt/fedora-cloud-container-disk-demolatestnameemptydisk emptyDisk capacity"2Gi"namecloudinitdisk cloudInitNoCloud userData- #cloud-config passwordfedora chpasswd expireFalse Your YAML file must be syntactically correct, or it will throw an error message stating: Provided YAML code is invalid.
Next, click the
Should you have thoughts, questions or issues with this process, please do not hesitate to reach out to our support team for more information.