Prepare Images from Scratch in Platform9 vCenter Environment with cloud-init
Cloud-init has emerged to the be de-facto multi-distribution package that handles early initialization of a cloud instance. For more information on cloud-init, refer here: https://cloudinit.readthedocs.org/en/latest/
This tutorial describes the steps to prepare Ubuntu and Centos images with cloud-init in Platform9 vSphere environment.
Step 1: Download iso
Download the iso for the preferred operating system from the links below.
Ubuntu
Centos
Step 2: Upload iso to datastore
Upload the iso to vSphere datastore using the Datastore browser. Note the location to use it in next step.
Step 3: Connect VM to datastore iso
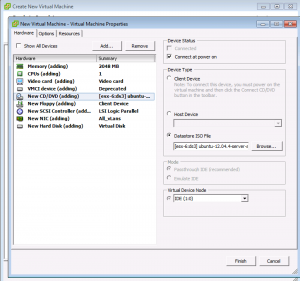
Create a Virtual Machine and edit VM settings before completion. Edit the CD ROM to point to the uploaded iso from Step 2. Check the option for connecting it at power on.
Step 4: Power on VM and install OS
Power on the VM and follow the steps for installation. Install vmware tools.
Step 5: Install the Platform9 Cloud-init Package
- Ubuntu:
apt-get install cloud-init - Centos:
yum install cloud-init
Step 6: Create an image
- Power off the VM
- Remove NIC and CD ROMs attached to the VM
- Image can be created as a template or as a vmdk
- Template:
Convert the VM to a template and save it on a datastore that is authorized for Platform9 nova compute. The template will be available for provisioning in 10 mins. - vmdk:
Download the VM’s vmdk from the datastore and upload it to glance as an image using glance command line client.
Optional – Download and deploy Prebuilt Images
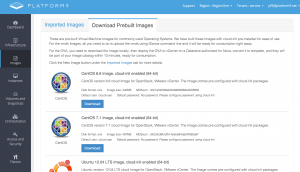
- Prebuilt images are available in your Platform9 UI under Images -> Download Prebuiltimages.
- The prebuilt images are available in 2 formats, OVA and vmdk.
- The vmdk can be added to Platform9 images by uploading it using glance command line client.
- The OVA can be deployed to vCenter using “Deploy OVF template” option. Once deployed, it can be converted into template or the VM’s vmdk can be uploaded to glance.

