How to create a PMK Bare Metal Kubernetes Cluster on Equinix Metal
Introduction
In this guide we will go over each of the steps required to set up and configure a highly available Platform9 Managed Kubernetes deployment on Equinix Metal.
Creating a production ready cluster on Equinix Metal using Platform9 Managed Kubernetes is an easy 5 step process that will create a fully managed, highly available cluster that includes a managed MetalLB load balancer, Prometheus external monitoring and more.
Building Platform9 SaaS managed clusters on Equinix Metal combines the best of SaaS Managed Kubernetes and high performance dedicated hosting providing 24/7 support for every aspect of your environment.
What is Equinix Metal?
Equinix Metal provides on demand and reserved bare metal servers. To find out more: https://metal.equinix.com/product/.
What is Metal Gateway?
An Equinix Metal Metal Gateway provides a single IPv4 Gateway for a subnet. This allows you to deploy a group of servers in a Metro which are all on the same subnet and that can all connect to each other or the Internet through the Metal Gateway.
Platform9 leverages the Metal Gateway for two functions, first to enable each Kubernetes Control Plane node to communicate providing a highly available cluster, and second, to manage an available block of public IPs for MetalLB.
Learn more about the Metal Gateway here: https://metal.equinix.com/developers/docs/networking/metal-gateway/
What is MetalLB?
MetalLB is a software load balancer that can provide Kubernetes Load balancer services in environments that do not operate managed load balancer services. In Equinix Metal, where no load balancers are operated, Platform9 installs, configures and manages MetalLB.
You can learn more about MetalLB here: https://metallb.org and read the Platform9 documentation on using MetalLB here.
Production Cluster Prerequisites
PMK Production Requirements
We recommend that all production clusters be built with three control plane nodes and at least one worker node. Resource requirements will vary based on your applications needs, however as a guide we suggest each node meet the following:
- OS: Ubuntu 20.04
- CPU: 4
- RAM: 16GB
- HDD: 30GB
For a full overview of the Platform9 Managed Kubernetes requirements visit: Prerequisites for On-Premises PMK Kubernetes Cluster
In our configuration we are using three master nodes and a single worker node to set up a HA control plane. The number of worker nodes can be expanded for larger cluster requirements, however you will want at least three master nodes for HA.
Equinix Metal Instance Type
In our configuration we are using On Demand Small instances. The Small instance type will meet our minimum requirements and still provide room to grow.
- CPU: 1 x Intel® Xeon® E-2278G
- Cores: 8 cores @ 3.40 GHz
- Boot: 2 x 480 GB SSD
- Memory: 32 GB RAM
- Network: 2 x 10 Gbps
The full details can be found here: https://metal.equinix.com/product/servers/c3-small/
For a full list of instance types visit: https://metal.equinix.com/product/servers/
Equinix Network
Platform9 HA clusters leverage a reserved Virtual IP and VRRP to nominate an active control plane node, and in the event of a failure, transfer the Virtual IP to another available control plane node. To run within Equinix Metal the following items must be created:
At least one VLAN
- A single VLAN will be needed to attach the Metal Gateway to so that we can operate and configure VRRP.
At least one Metal Gateway
IP Range of at least /29, or 8 IP addresses. This is the smallest network that can be used with Metal Gateway.
- There will need to be a large enough network associated with Metal Gateway to allow for an IP address per instance as well as space for MetalLB
Deploy Kubernetes on Equinix Metal
Step 1 - Configure VLAN Network
There are a few requirements to get a cluster running on Equinix Metal. To get started we need to set up a VLAN for communication between the nodes in the cluster. The VLAN will also serve as a target for our Metal Gateway configuration.
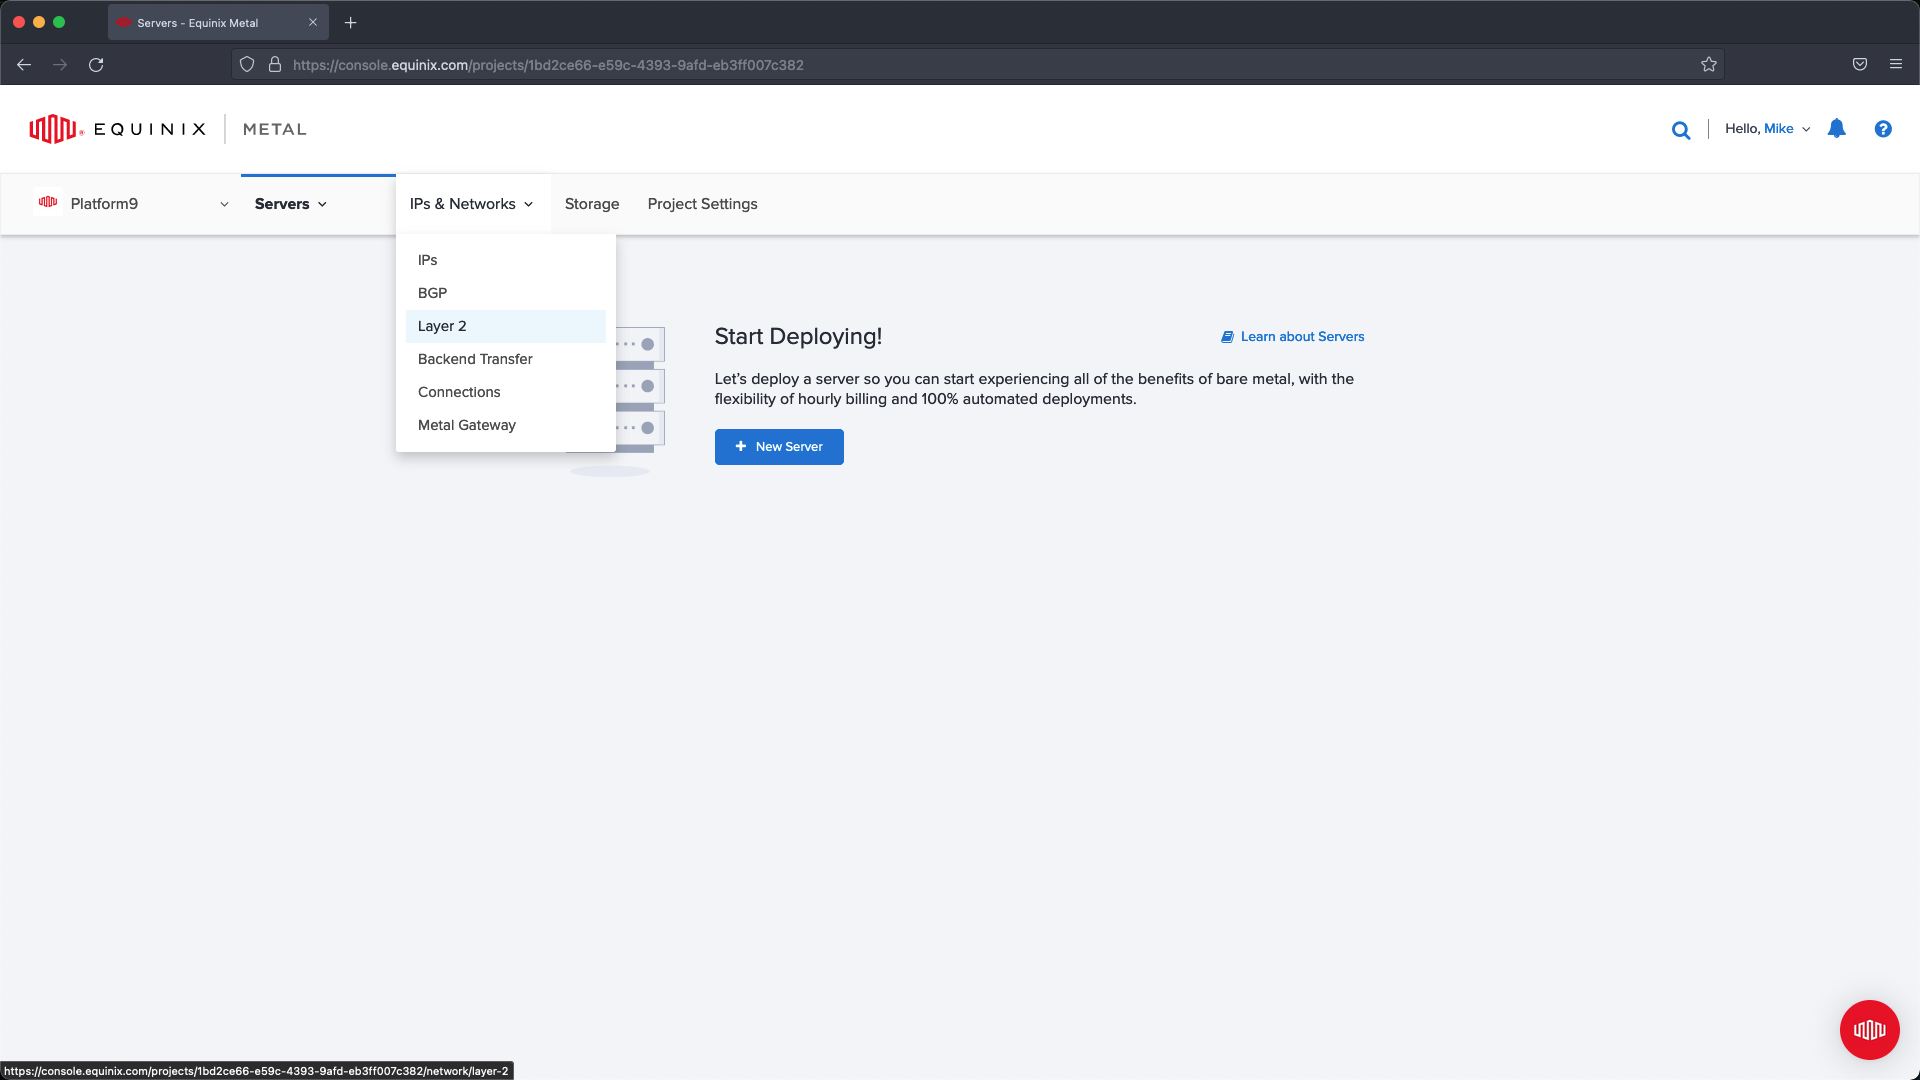
To create the VLAN select IPs & Networks menu and from the dropdown then click Layer 2 .
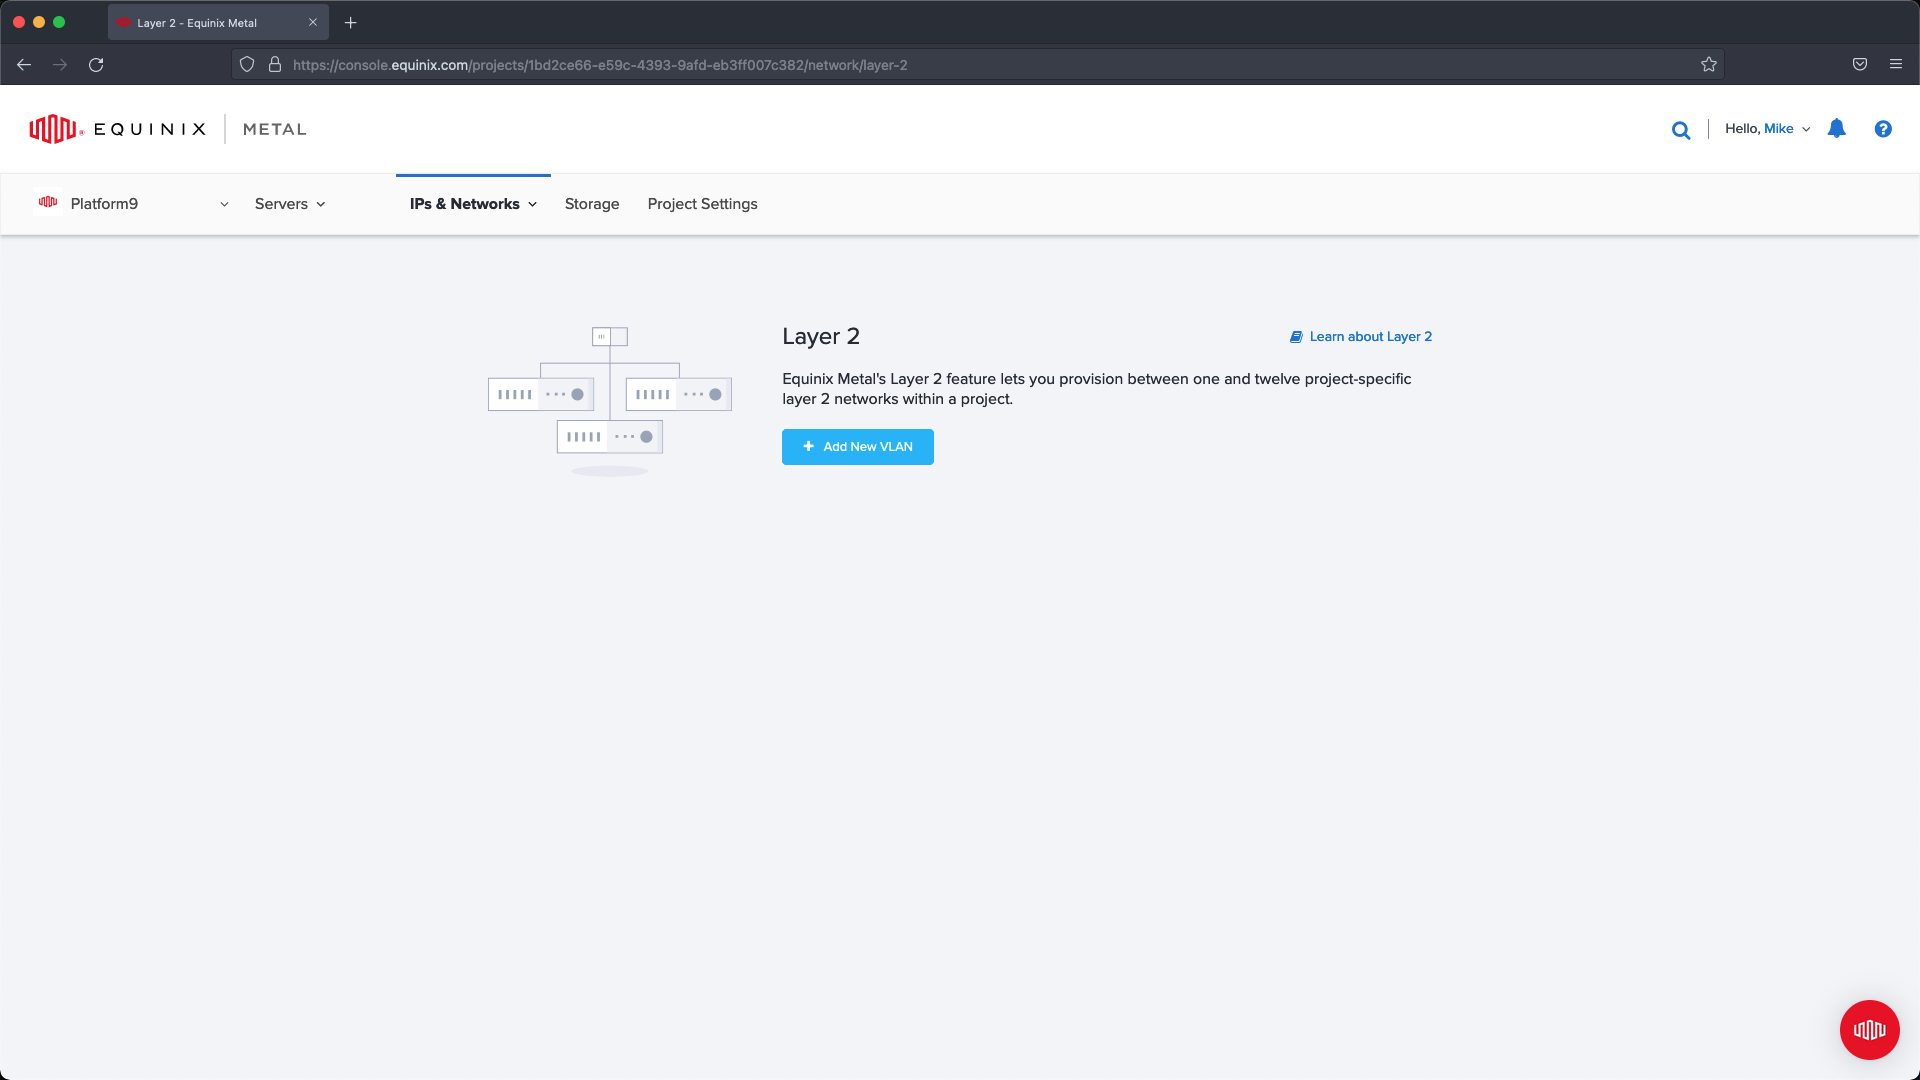
From within the Layer 2 management page select Add New VLAN.
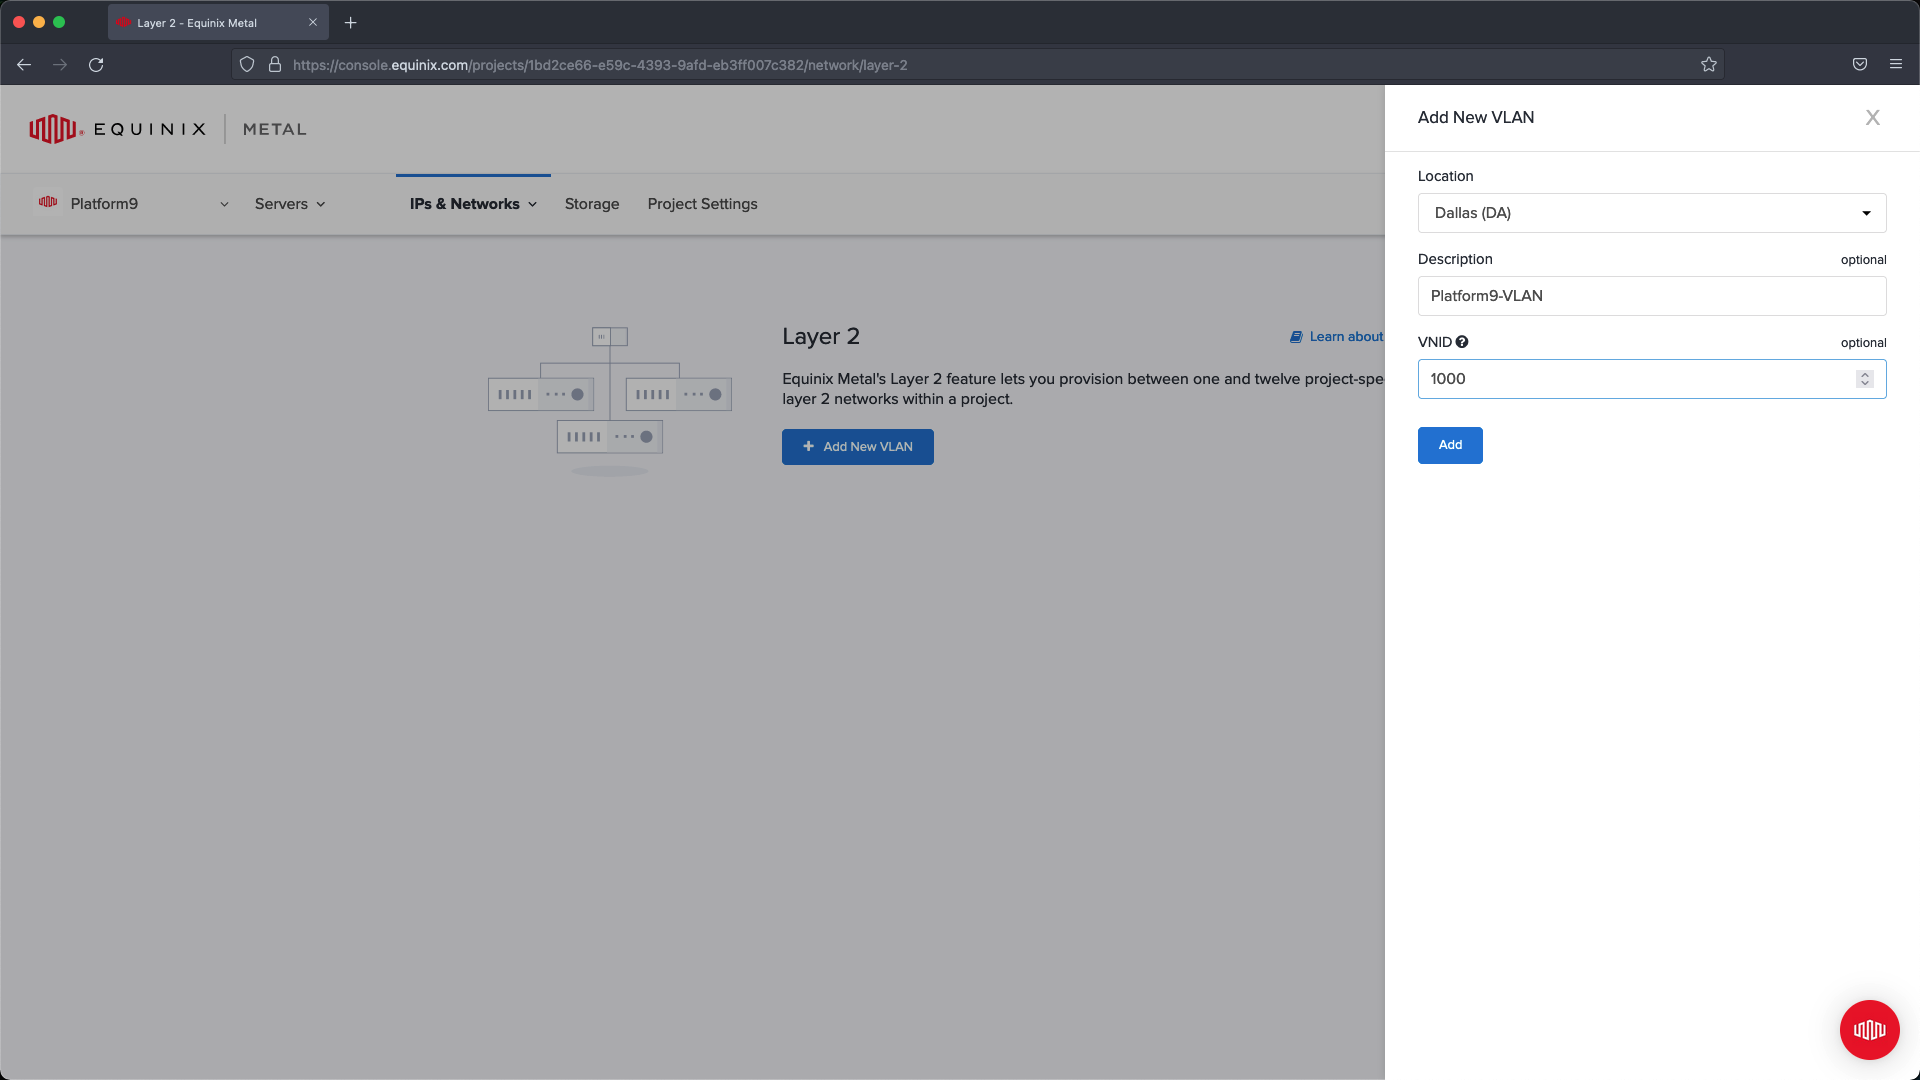
Select a location that matches where you are going to deploy servers. Provide a description and VLAN ID, then select Add. In our example we’re going to set up Platform9-VLAN with VLAN ID 1000 .
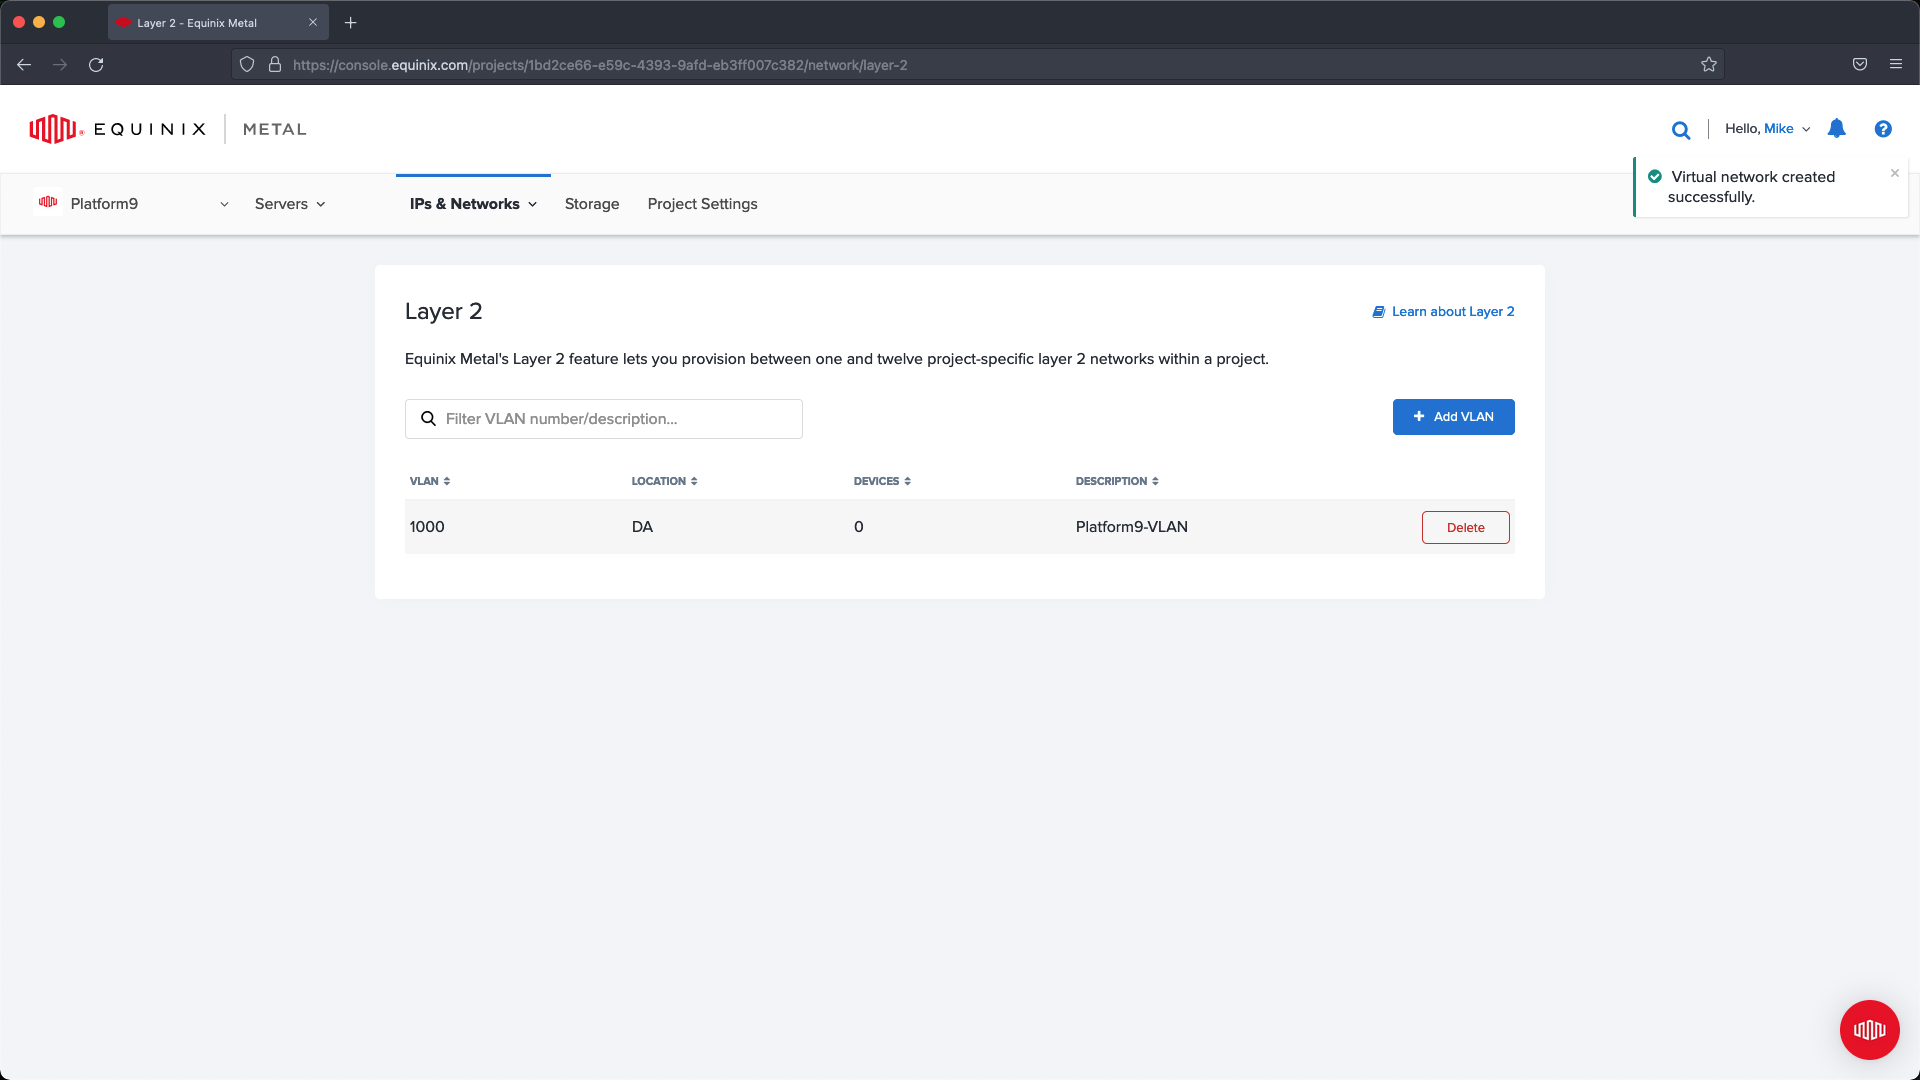
Verify the information after the VLAN has been added, then move on to the next steps.
For additional information about setup, reference:
https://metal.equinix.com/developers/docs/layer2-networking/vlans/
Step 2 - Configure IP Range & Metal Gateway
After setting up the VLAN we are going to need to configure a block of Public IP addresses that we can use with Metal Gateway. As this cluster will operate with IPv4 we are going to provision a block of Public IPv4 addresses. We need enough addresses to assign each of the Kubernetes Control Plane nodes an address, a single IP that will be used as the Virtual IP for the active API Server endpoint , and then a few addresses for our MetalLB block to serve up our Load Balancer services in Kubernetes
For example:
- 5 IPs for the Kubernetes Control Plane Nodes
- 1 IP for the Virtual IP
- 10 IPs for MetalLB
To create the IP block follow these steps.
From the main navigation click IPs & Networks and click on the IPs menu option.
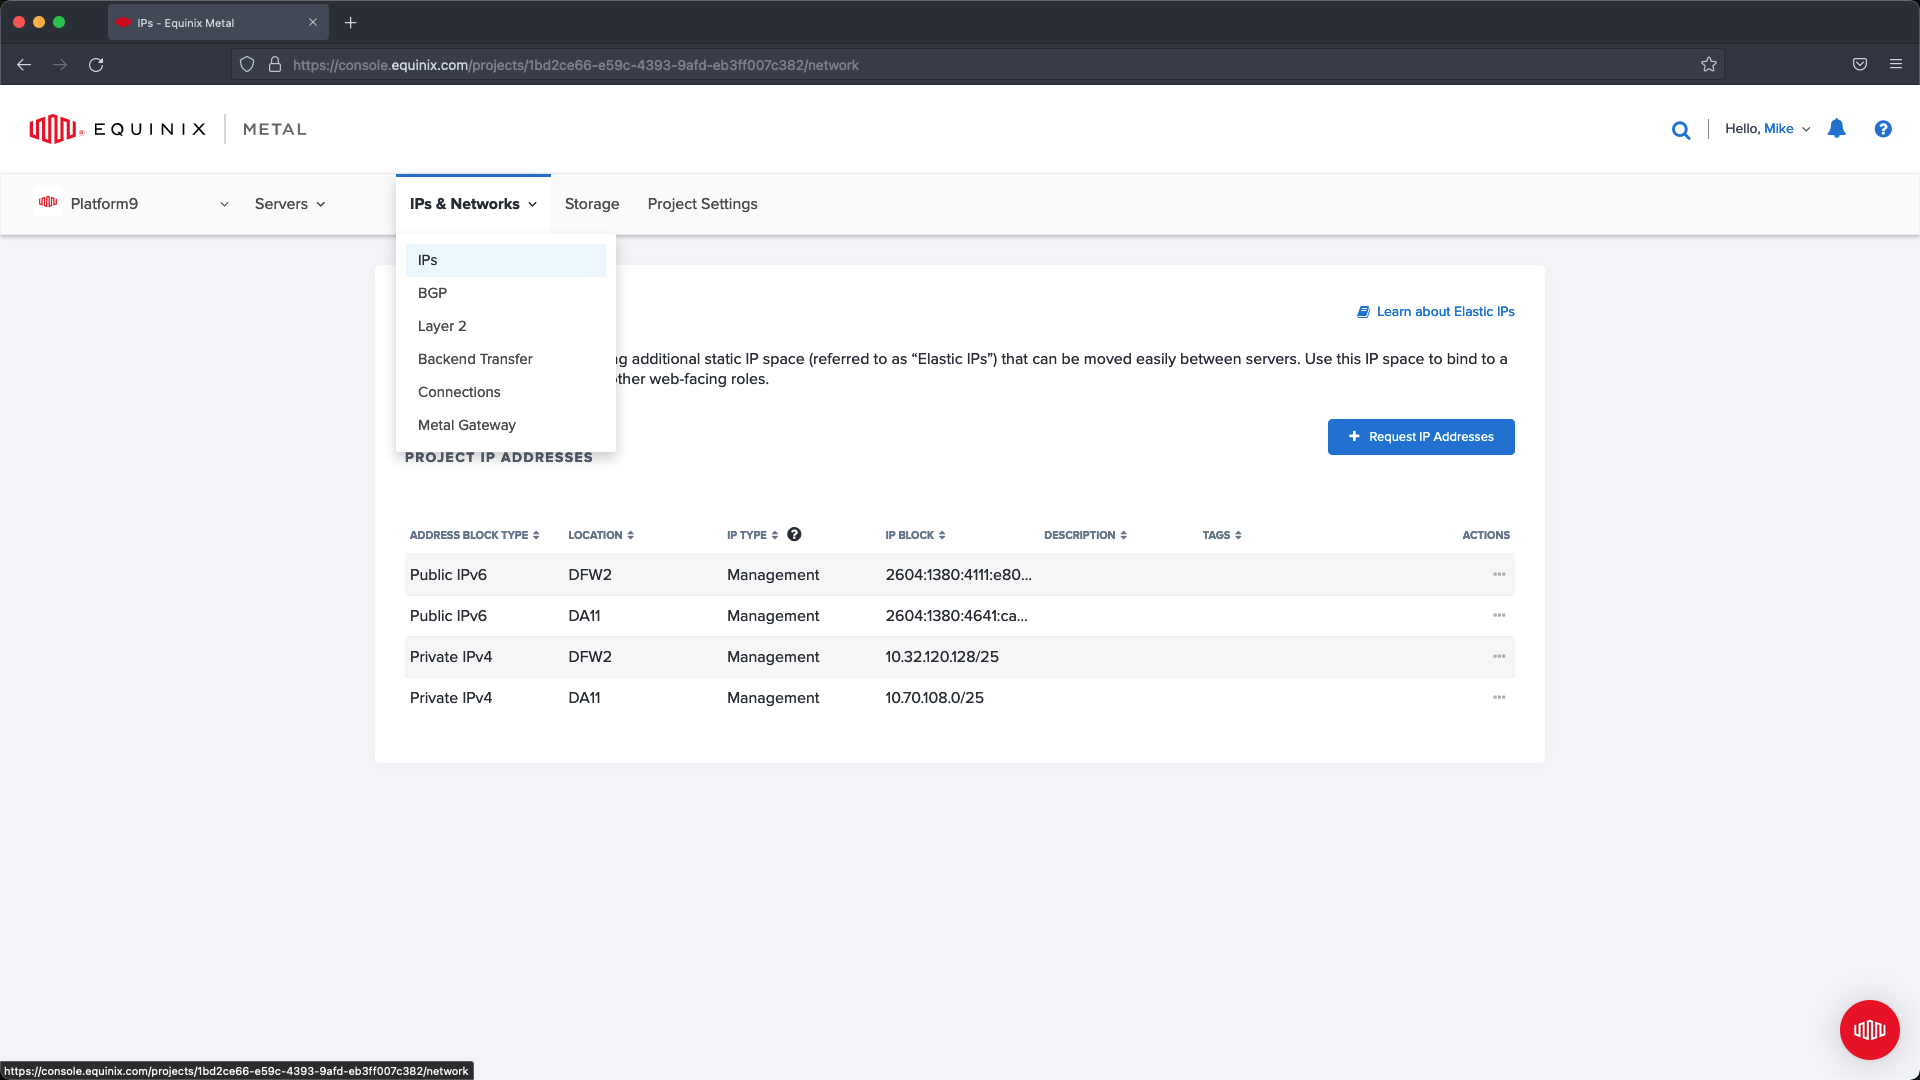
Within the slide out menu select your datacenter location and then the CIDR that will provide enough IP address for the Control Plane and MetalLB. In this example I create a /28 (16 IP addresses) and tag it with MetalGateway (optional) and add a description.

From the slide out menu select the datacenter region and the required number of IP Addresses.

Click submit request to complete the configuration.
Next we can configure the Metal Gateway.
To do this follow these steps.
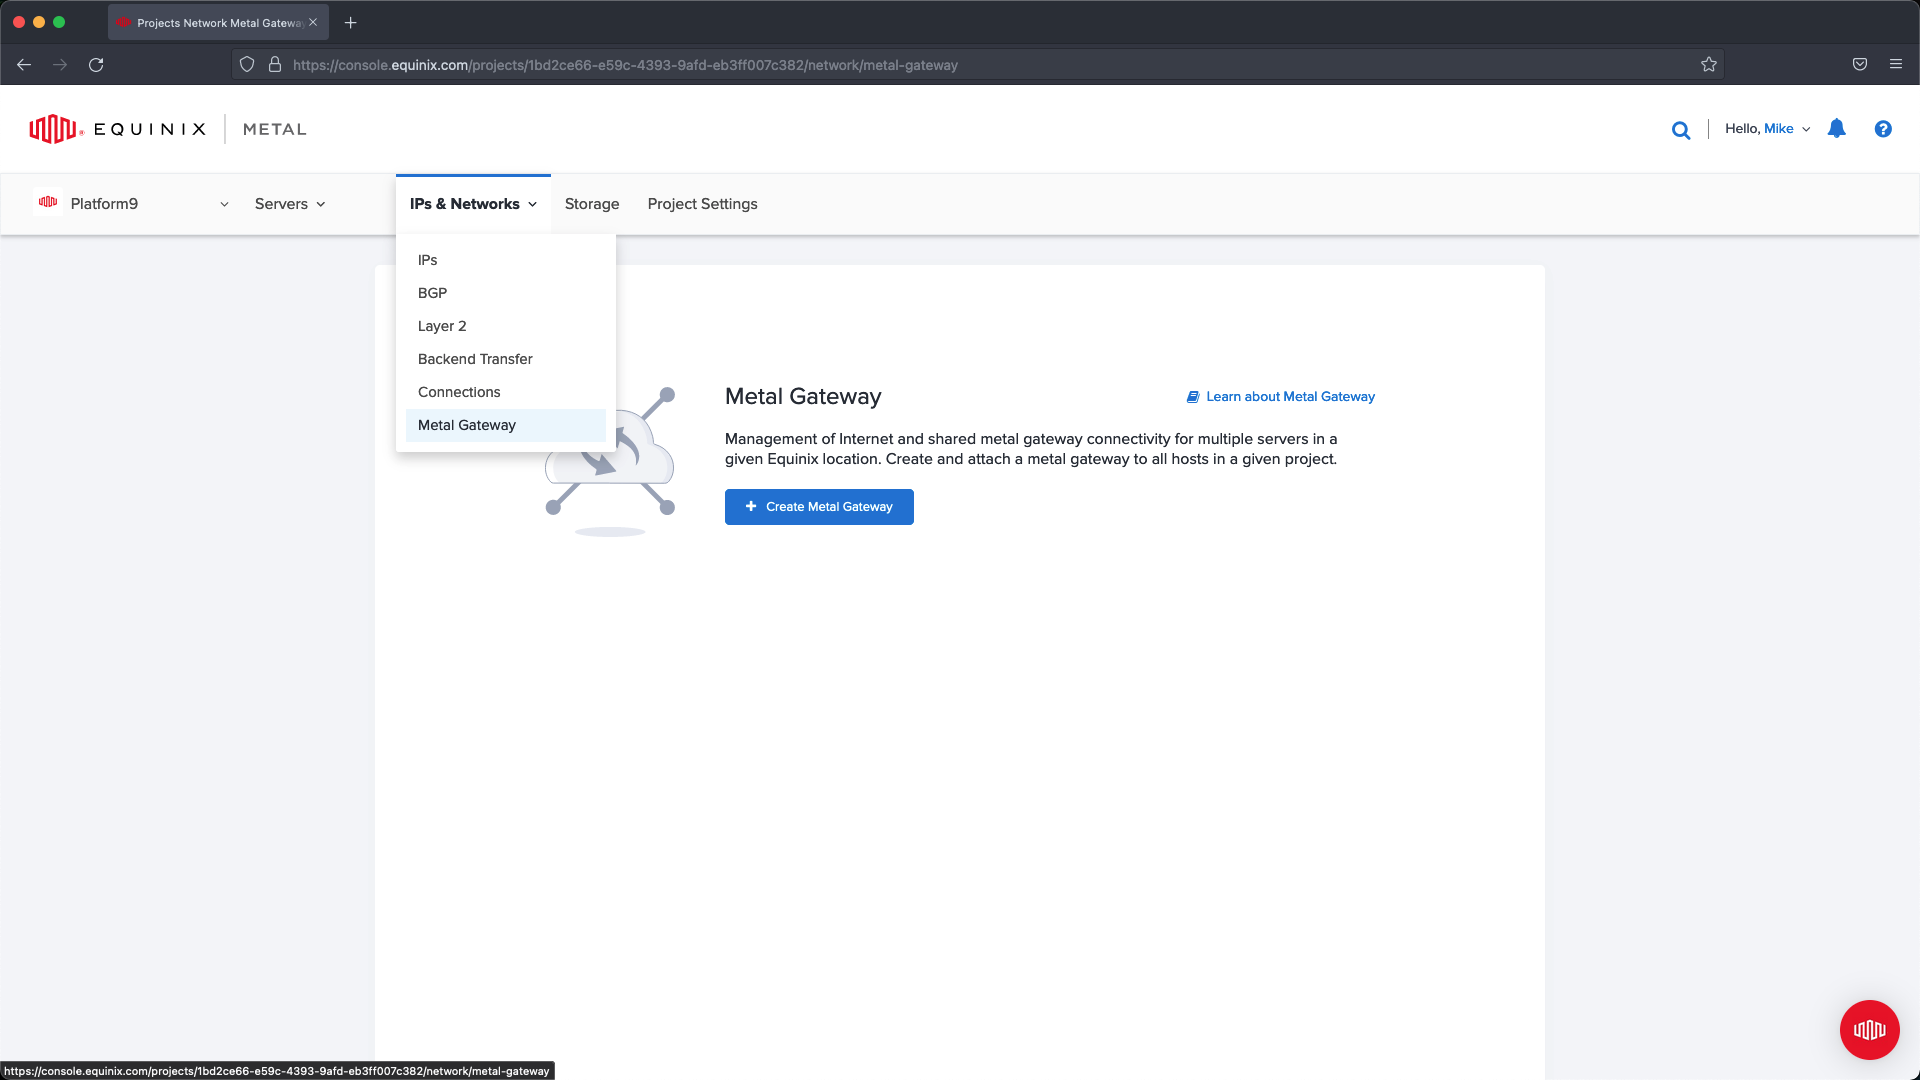
Select IPs & Networks from the main navigation and choose the Metal Gateway menu option. On this page, if you have no existing Metal Gateways click the ’Create Metal Gateway’ button. From within the slide out menu we are going to set up a new Metal Gateway using the VLAN created previously and the Public IP address block we created in the previous step.
Choose the VLAN and the IP address block and click Create Metal Gateway .
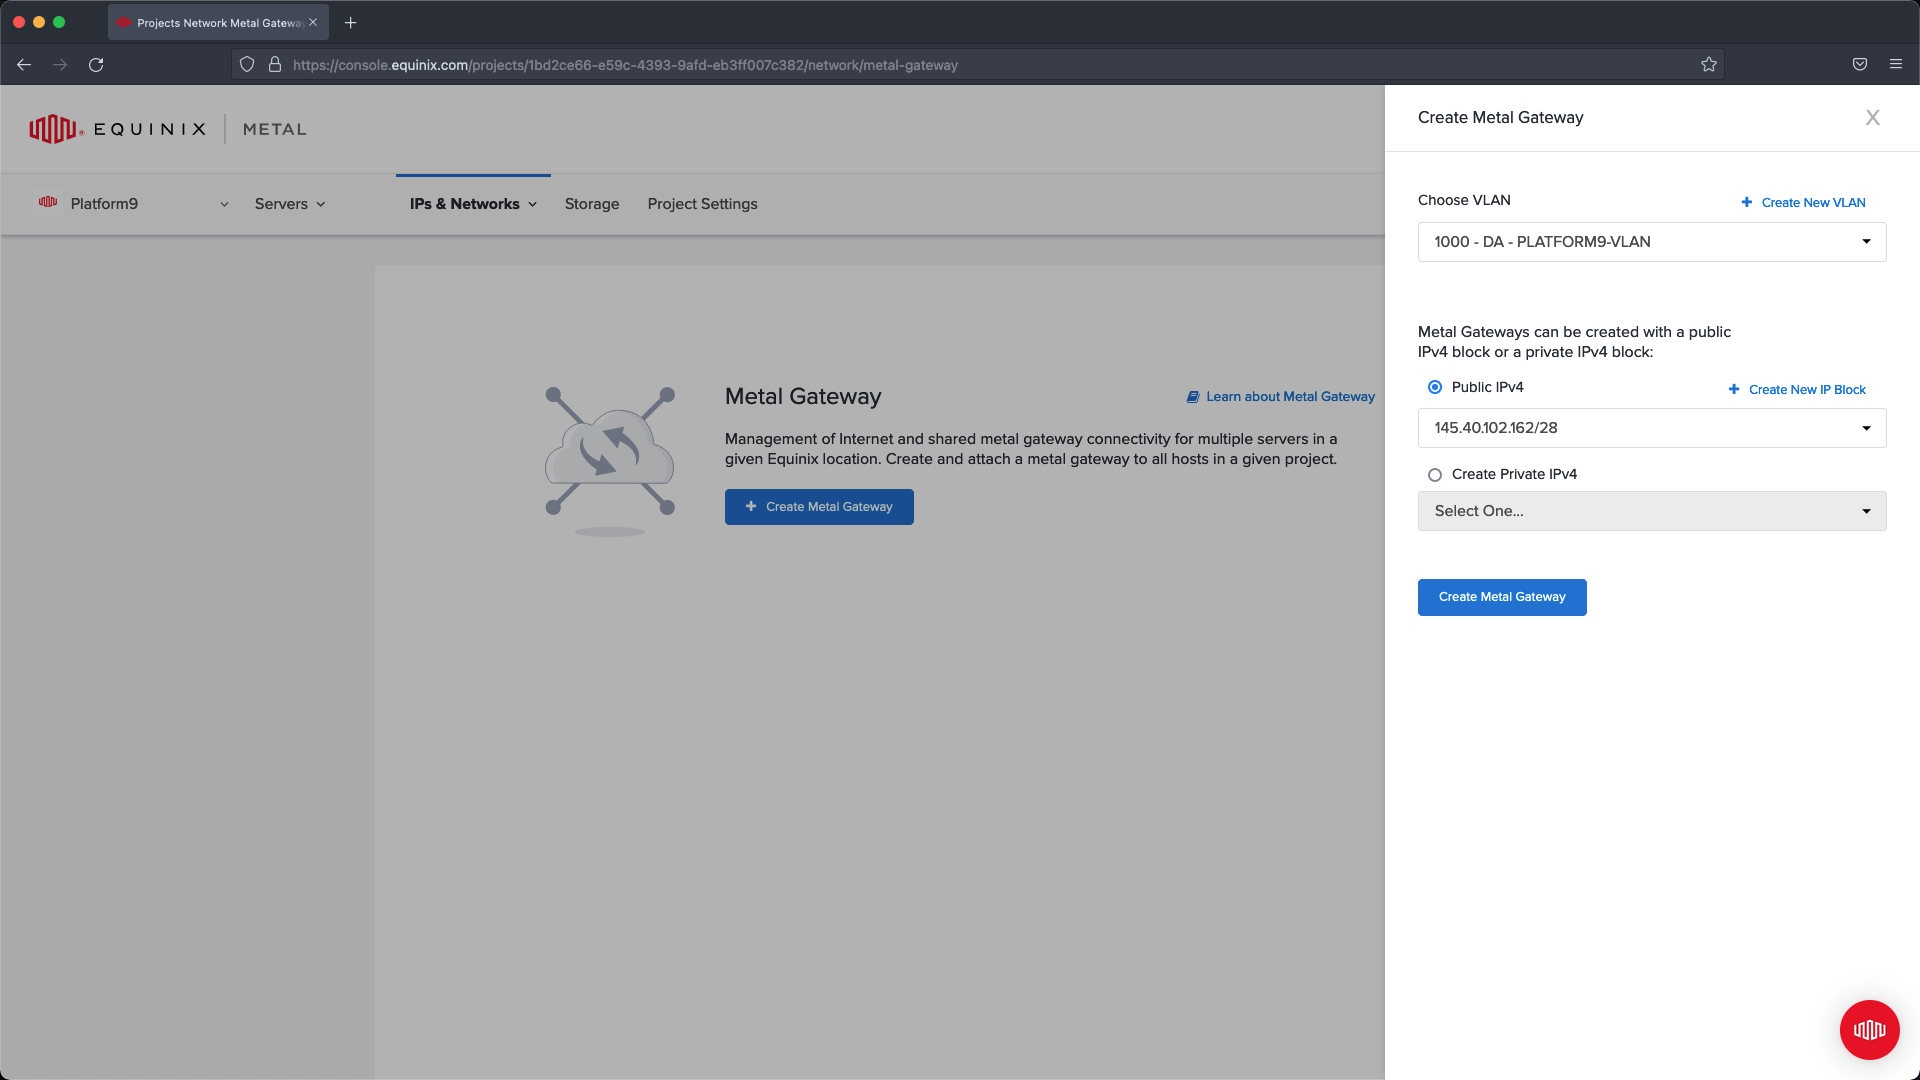
This will create a public network that will connect traffic into our Platform9-VLAN.
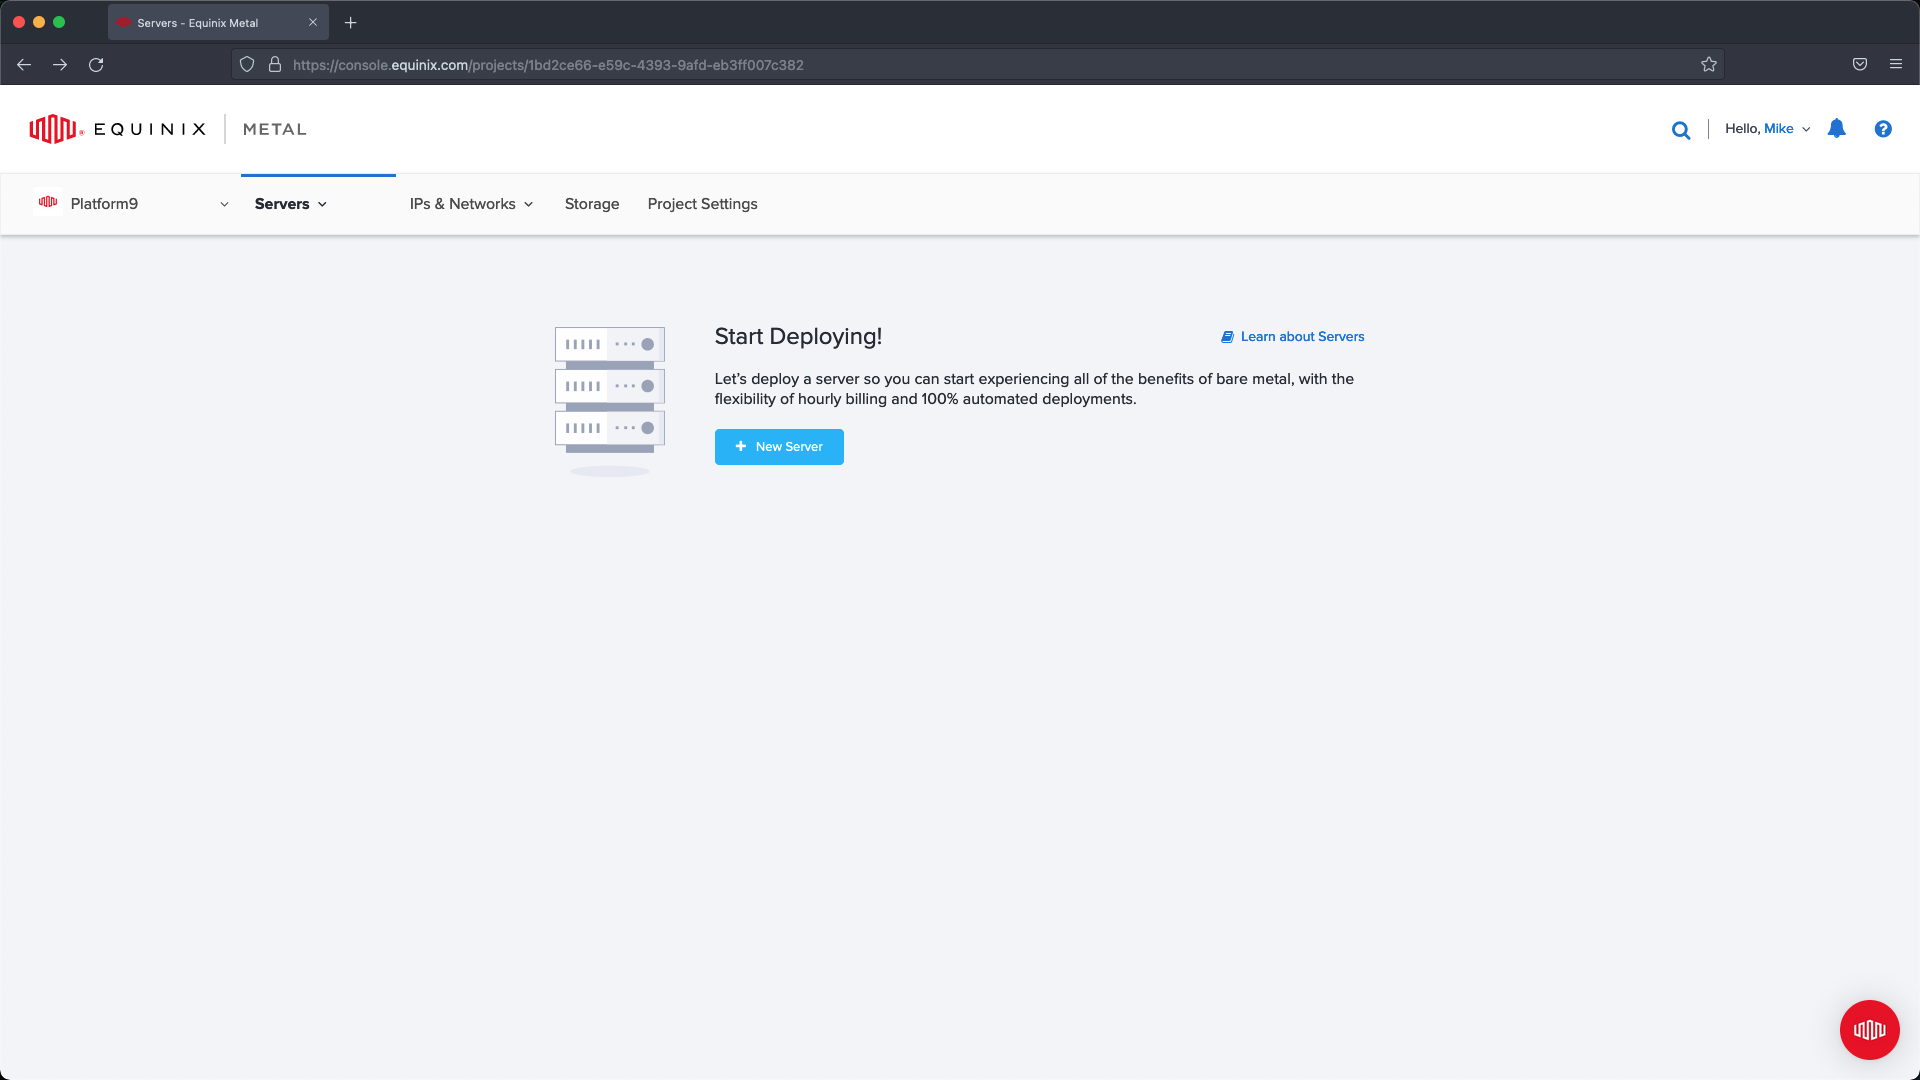
Step 3 - Deploy Servers
After we have configured the networking we can deploy our servers. For our example we are going to have three Master Nodes and one Worker node. Your configuration may require additional worker nodes, however this guide is going over HA Master node configuration.
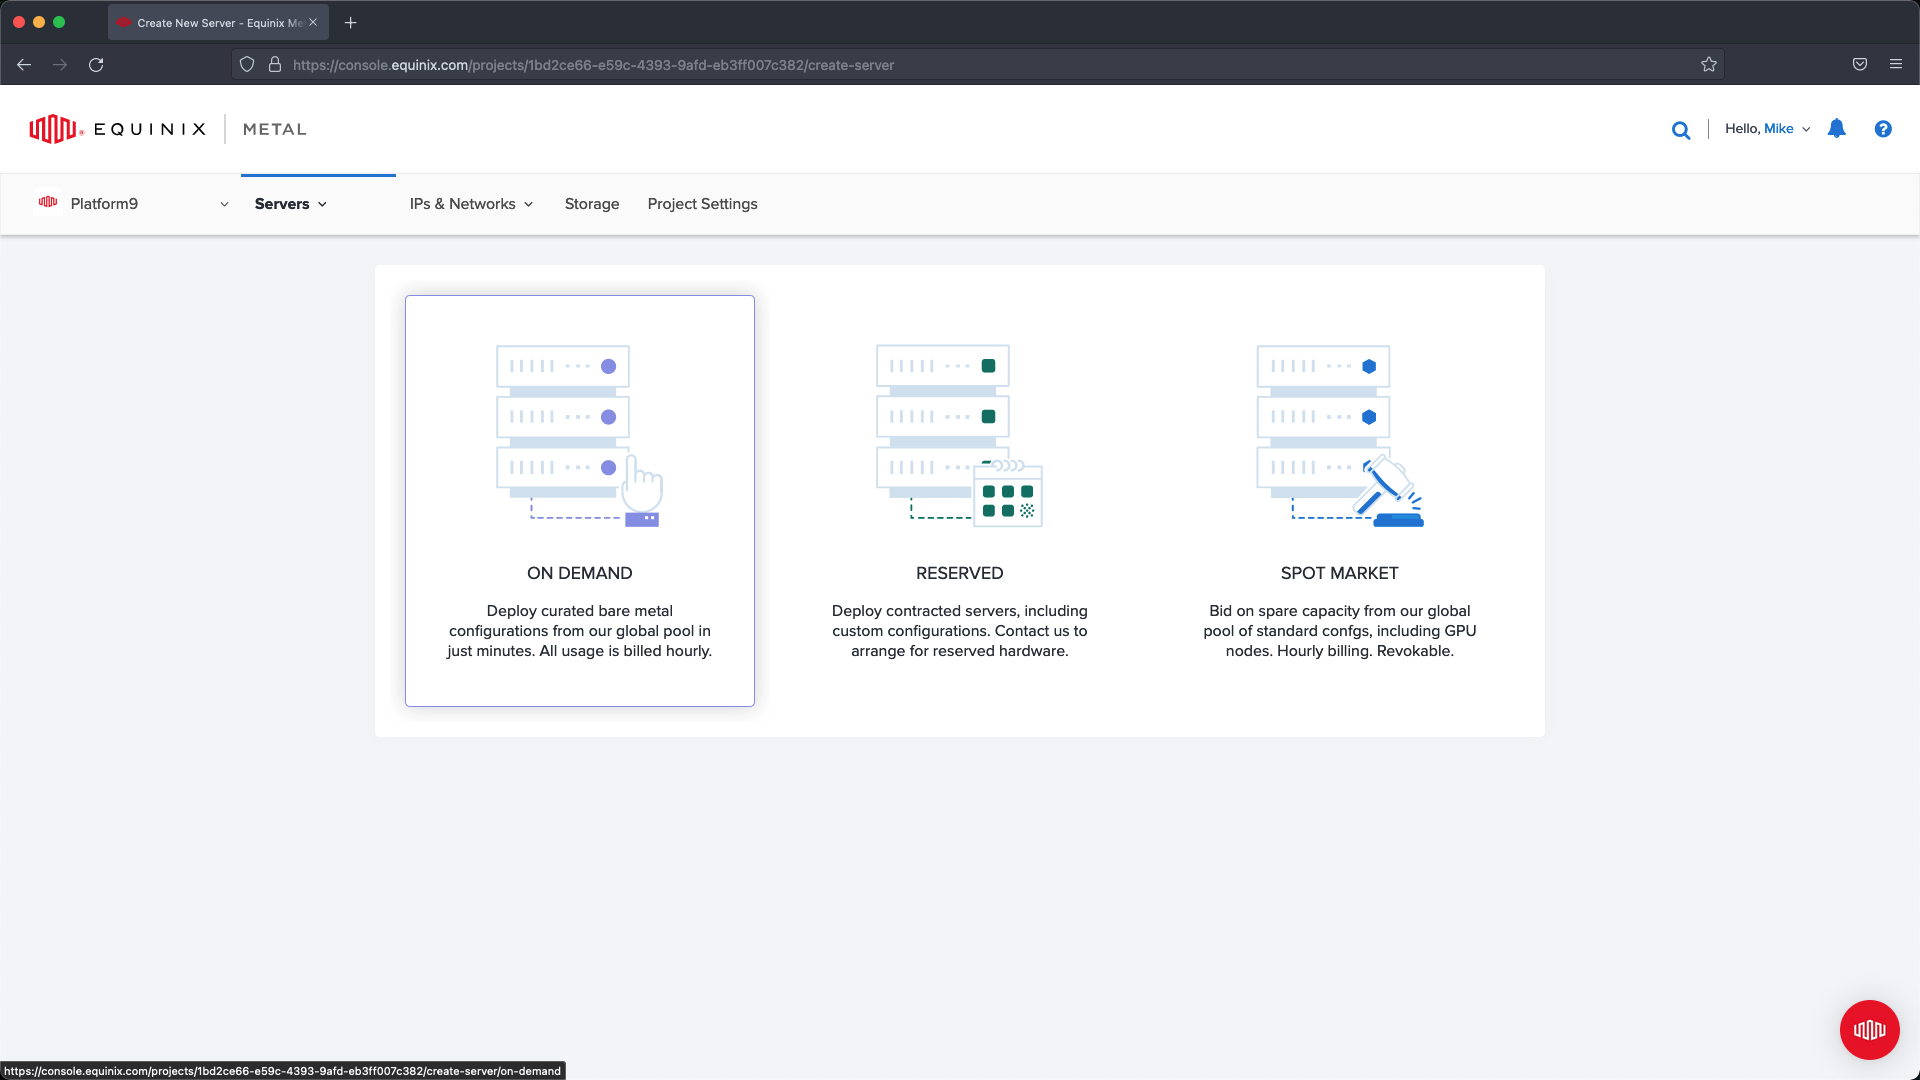
Begin by navigating to Servers and select New Server :
Select On Demand :
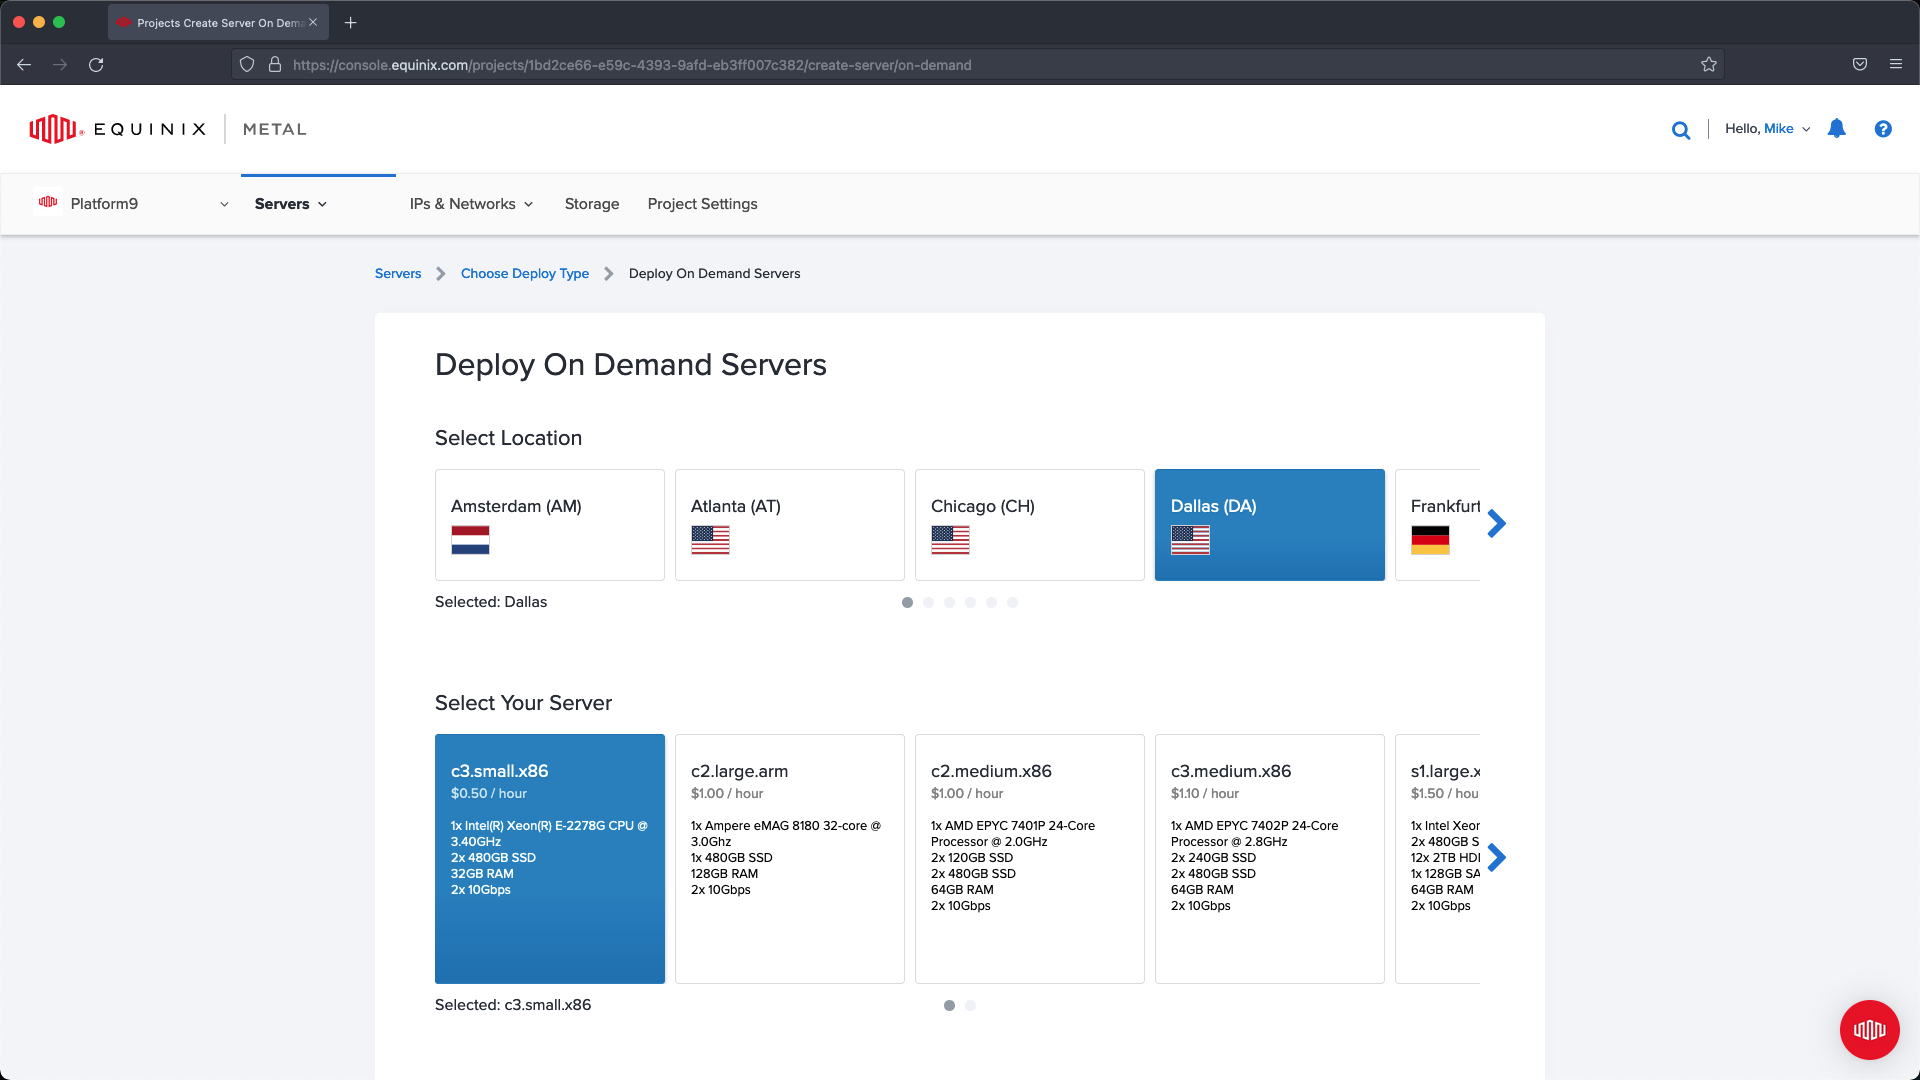
Select the location where you would like to deploy your servers. In our example we are deploying everything in Dallas. Select your server size, in our case we are going to use Small so that we meet the requirements for a BareOS server.
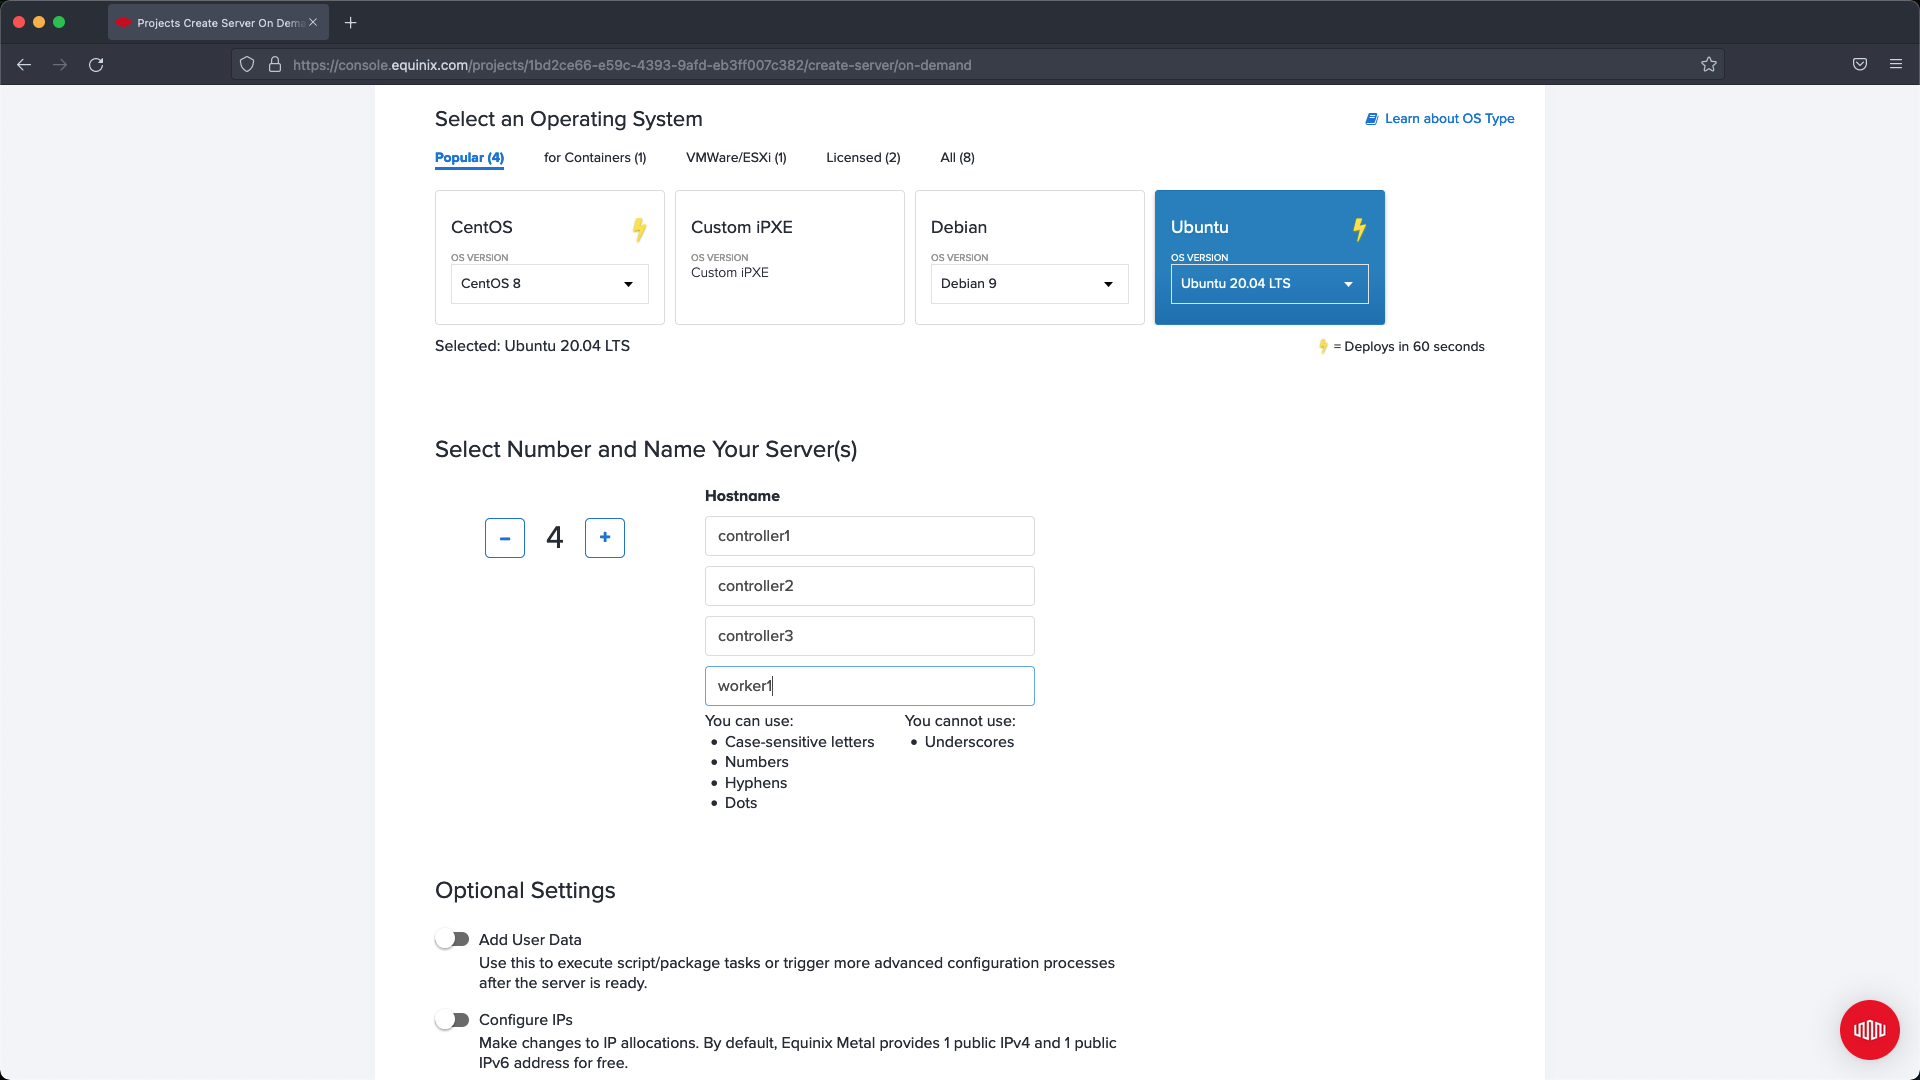
Select an operating system that is supported, in our example we are using Ubuntu 20.04. Keep in mind if the version is not supported then you may run into issues when deploying Kubernetes using PMK. If deploying more than one server at a time then select the number you want to deploy and name each server. In our example we name the controllers and the worker in a way that makes it easier to identify their purpose for later configuration updates.
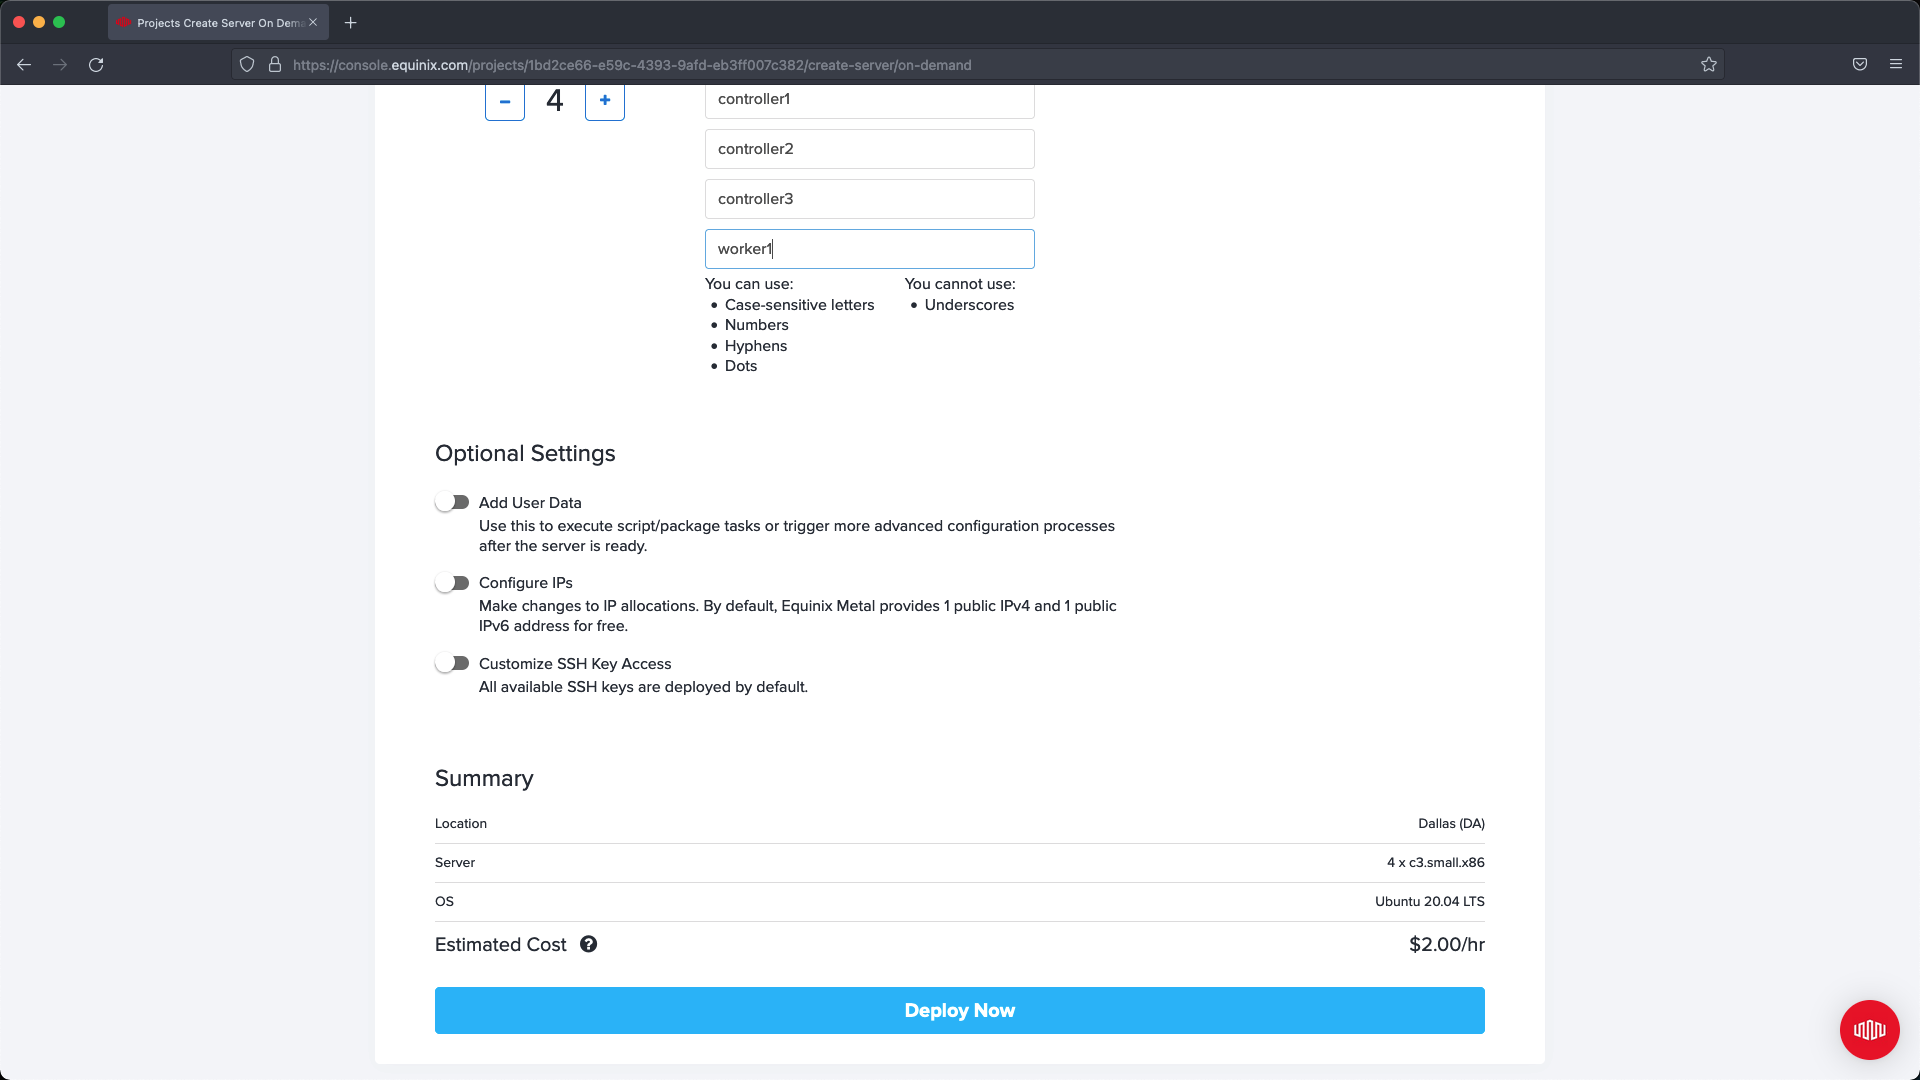
If needed, expand Customize SSH Access and add additional SSH Keys to your servers, or remove SSH Keys that are not required. In our example we are not making changes and are allowing the defaults to be applied.
Select Deploy Now and then wait for the servers to finish out their setup then proceed to next steps: Server Networking.
Step 4 - Modify Server Networking
After creating the four servers we need to configure networking on each node so that the Metal Gateway can be used to access the Control Plane nodes.
Within the Network Section for each node we are going to convert the network type to Hybrid - Bonded and select the VLAN we are using for Metal Gateway.
To do this you need to click Convert to Other Network Type.
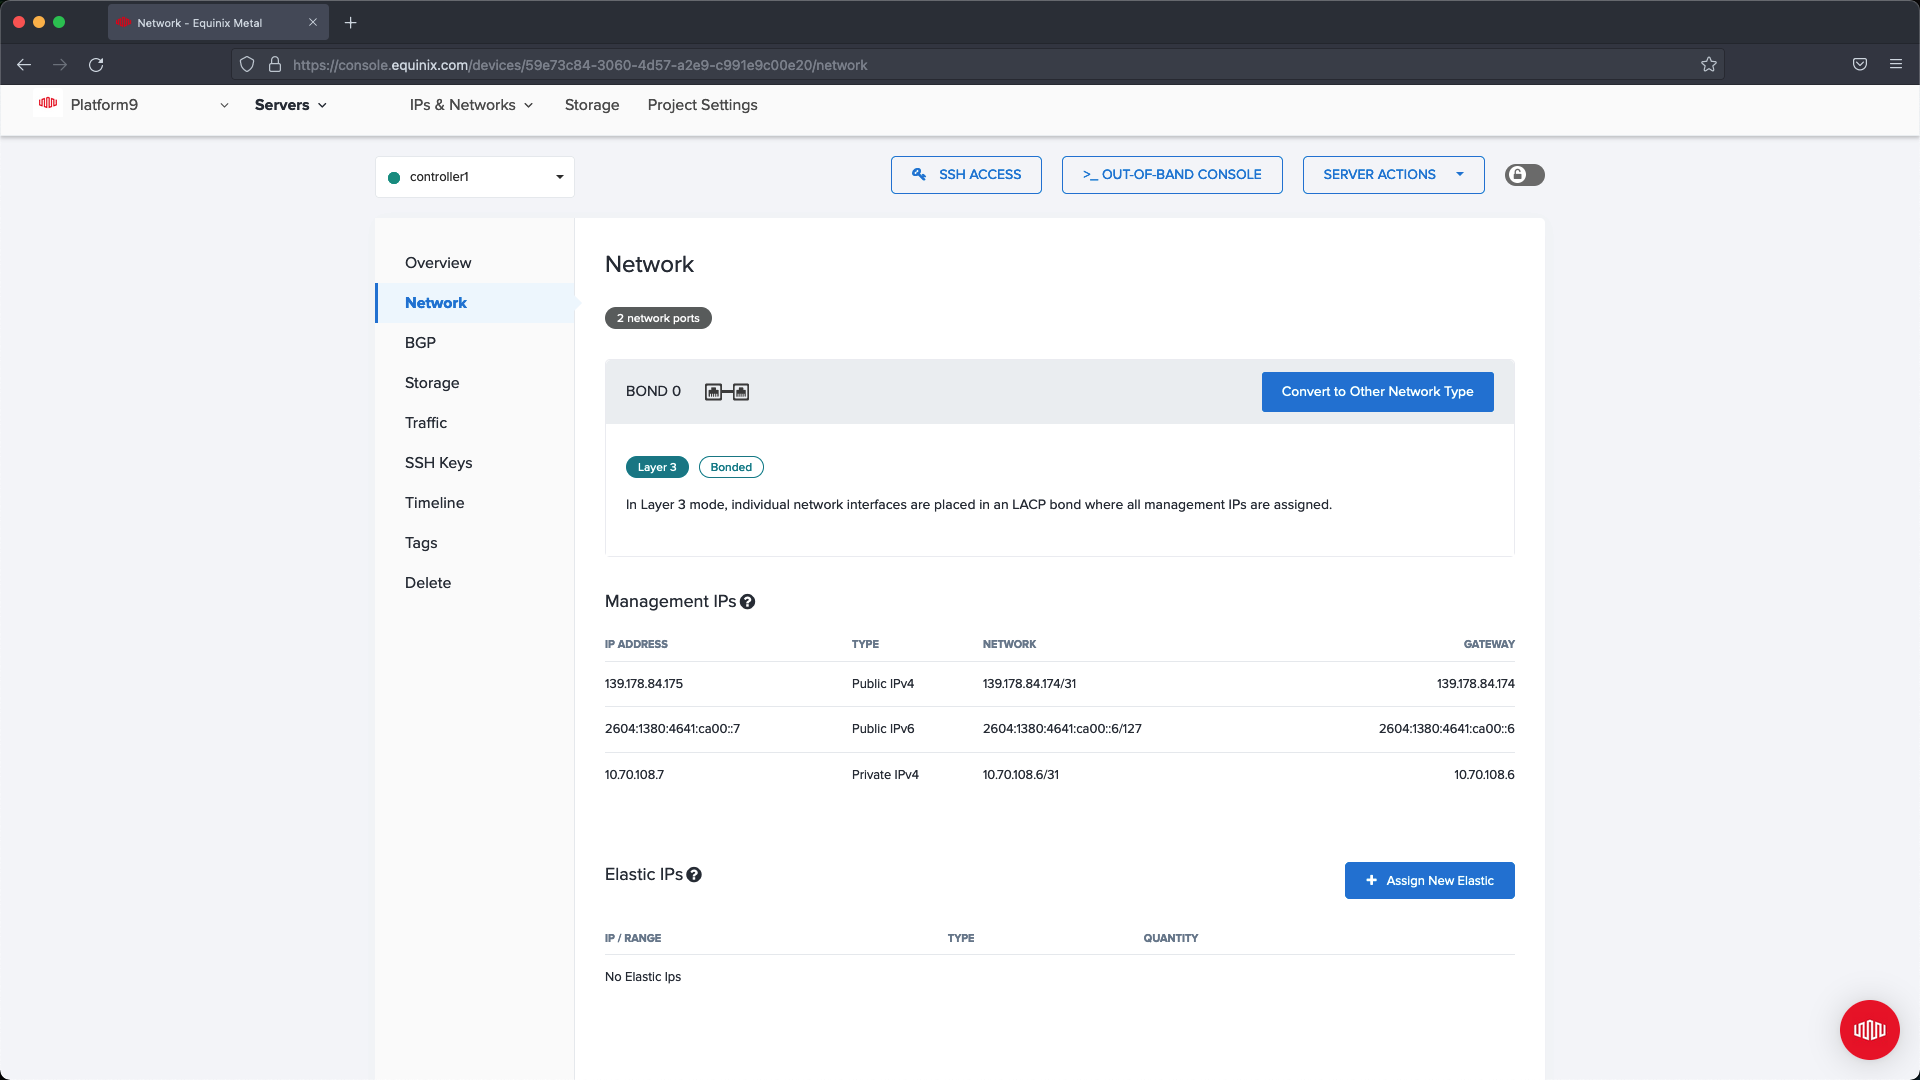
From the slide out menu choose Hybrid with a Bonded configuration, from the Bonded dropdown select the VLAN created in the previous steps.
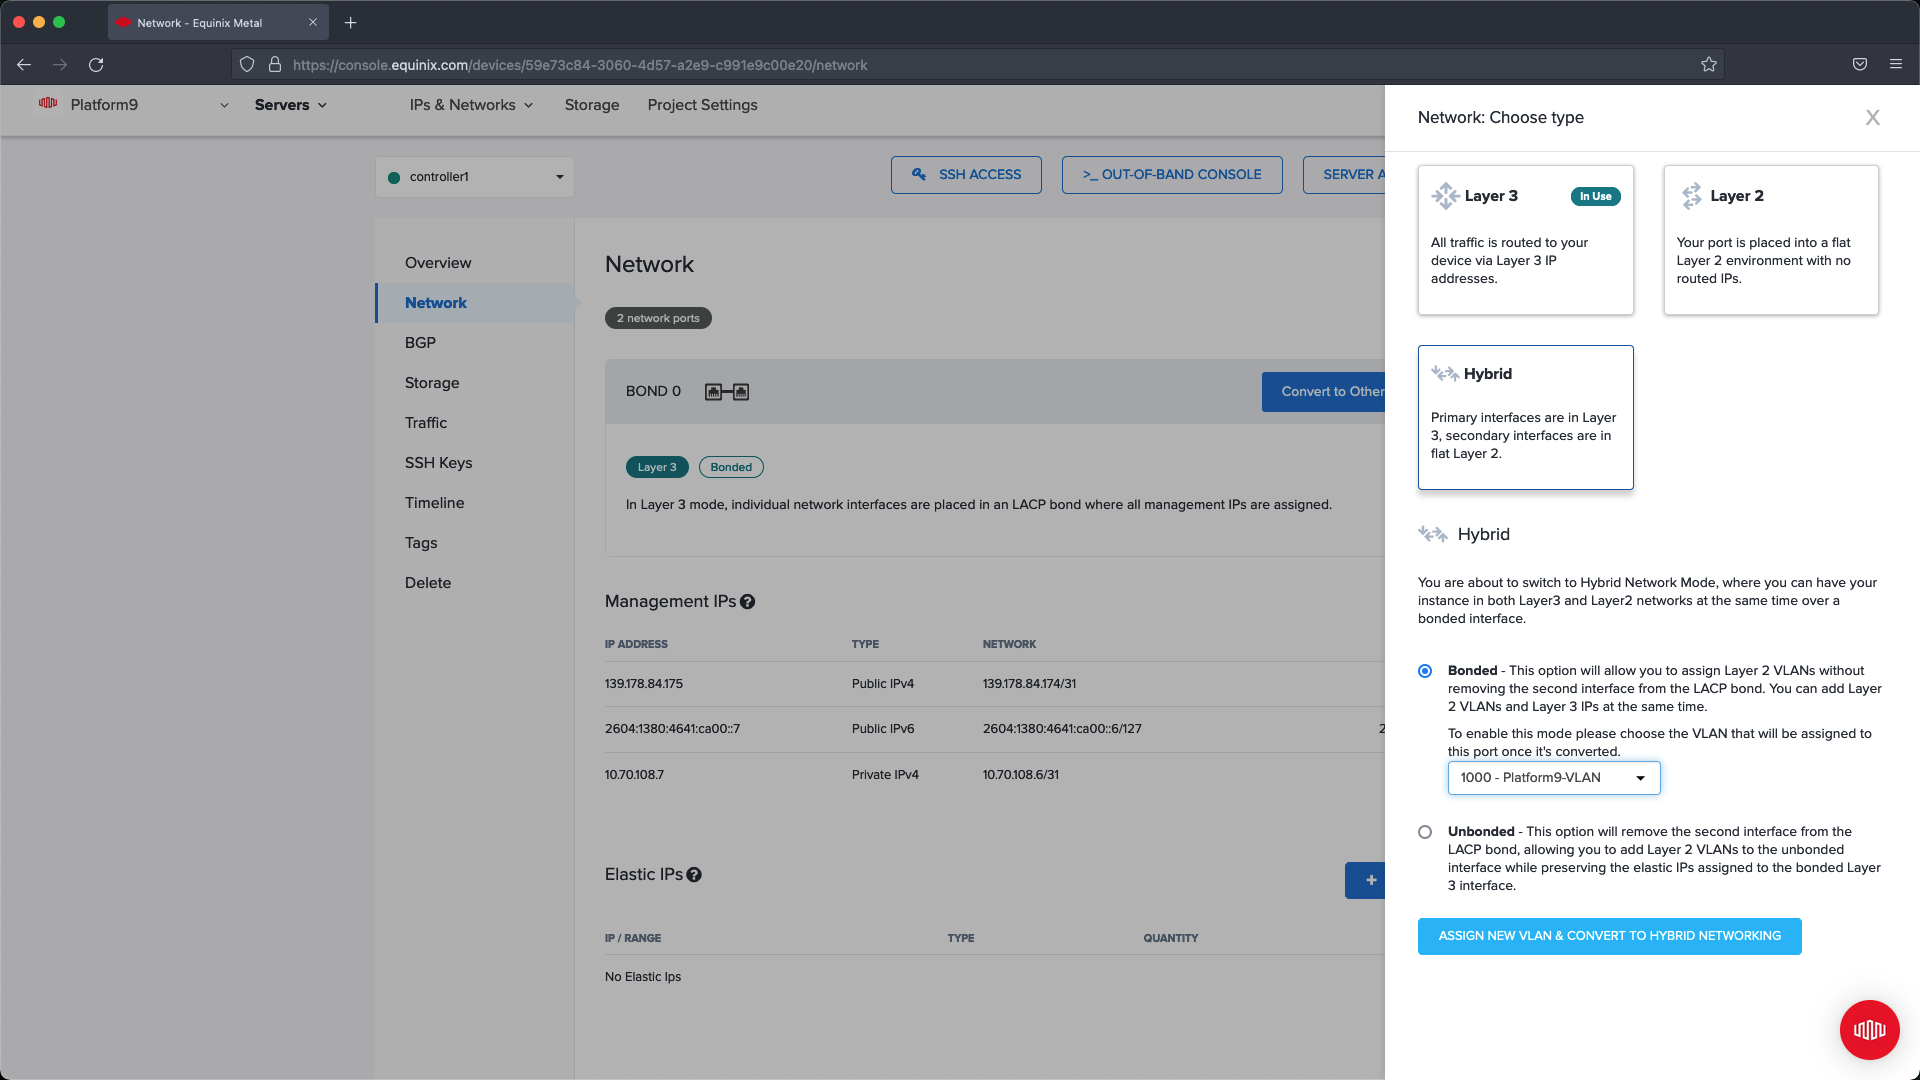
Complete this change on each of the nodes (master nodes and worker nodes.)
Step 5 - Connect Servers to the Metal Gateway Network
Now that we have set up networking for each of the servers we need to create a sub interface that communicates over the Metal Gateway network. To do this you will need to be able to SSH to the node.
Note: The configuration change will break connectivity. If you are using the current Public IP associated with your server your session will be terminated. |
For each server we will need to collect the required information to SSH to the node. Click the Out of Band Console button the Server management dashboard and note the connectivity information. You will also need to collect the server password which can be obtained from the Overview dashboard of the server management screen.

For each server you need to select an IP address from the IP Address block created in the prior step. You can access the list of available IPs by navigating toIP & Networks >IPs.
Note: Do not use the first IP listed within the Gateway IP address list for the Metal Gateway., use the next IP in the sequence after the gateway. |
In our example the gateway is 145.40.102.161, so our first server will start with 145.40.102.162 and our last server will use 145.40.102.165.
Note: The IP addresses that you assign to each server, will be used for SSH access after configuration. |
The guide below explains how to set up networking for Metal Gateway. Follow the steps for each of the nodes. Below you can find additional information related to our configuration if you need examples on which VLAN ID to use, and other configuration options.
https://metal.equinix.com/developers/docs/networking/metal-gateway/
Sub Interface Configuration Example:
xxxxxxxxxxauto bond0.1000iface bond0.1000 inet staticpre-up sleep 5address 145.40.102.162netmask 255.255.255.240vlan-raw-device bond0To complete the change restart the network service by running:.
xxxxxxxxxxservice networking restartOnce the network interface is up we can remove the current default gateway and replace it with the gateway from our Metal Gateway configuration.
xxxxxxxxxxip route del defaultip route add default via 145.40.102.161 dev bond0.1000Deploy PMK
After completing the Equinix configuration we can move on to the deployment step using Platform9 Managed Kubernetes. In this section we will onboard the nodes, setup the deployment configuration, and then deploy.
Step 1 - Add Nodes to PMK
We will need to add each of the servers as an available node so that it can be assigned to a new cluster deployment. We are going to onboard the nodes that we created.
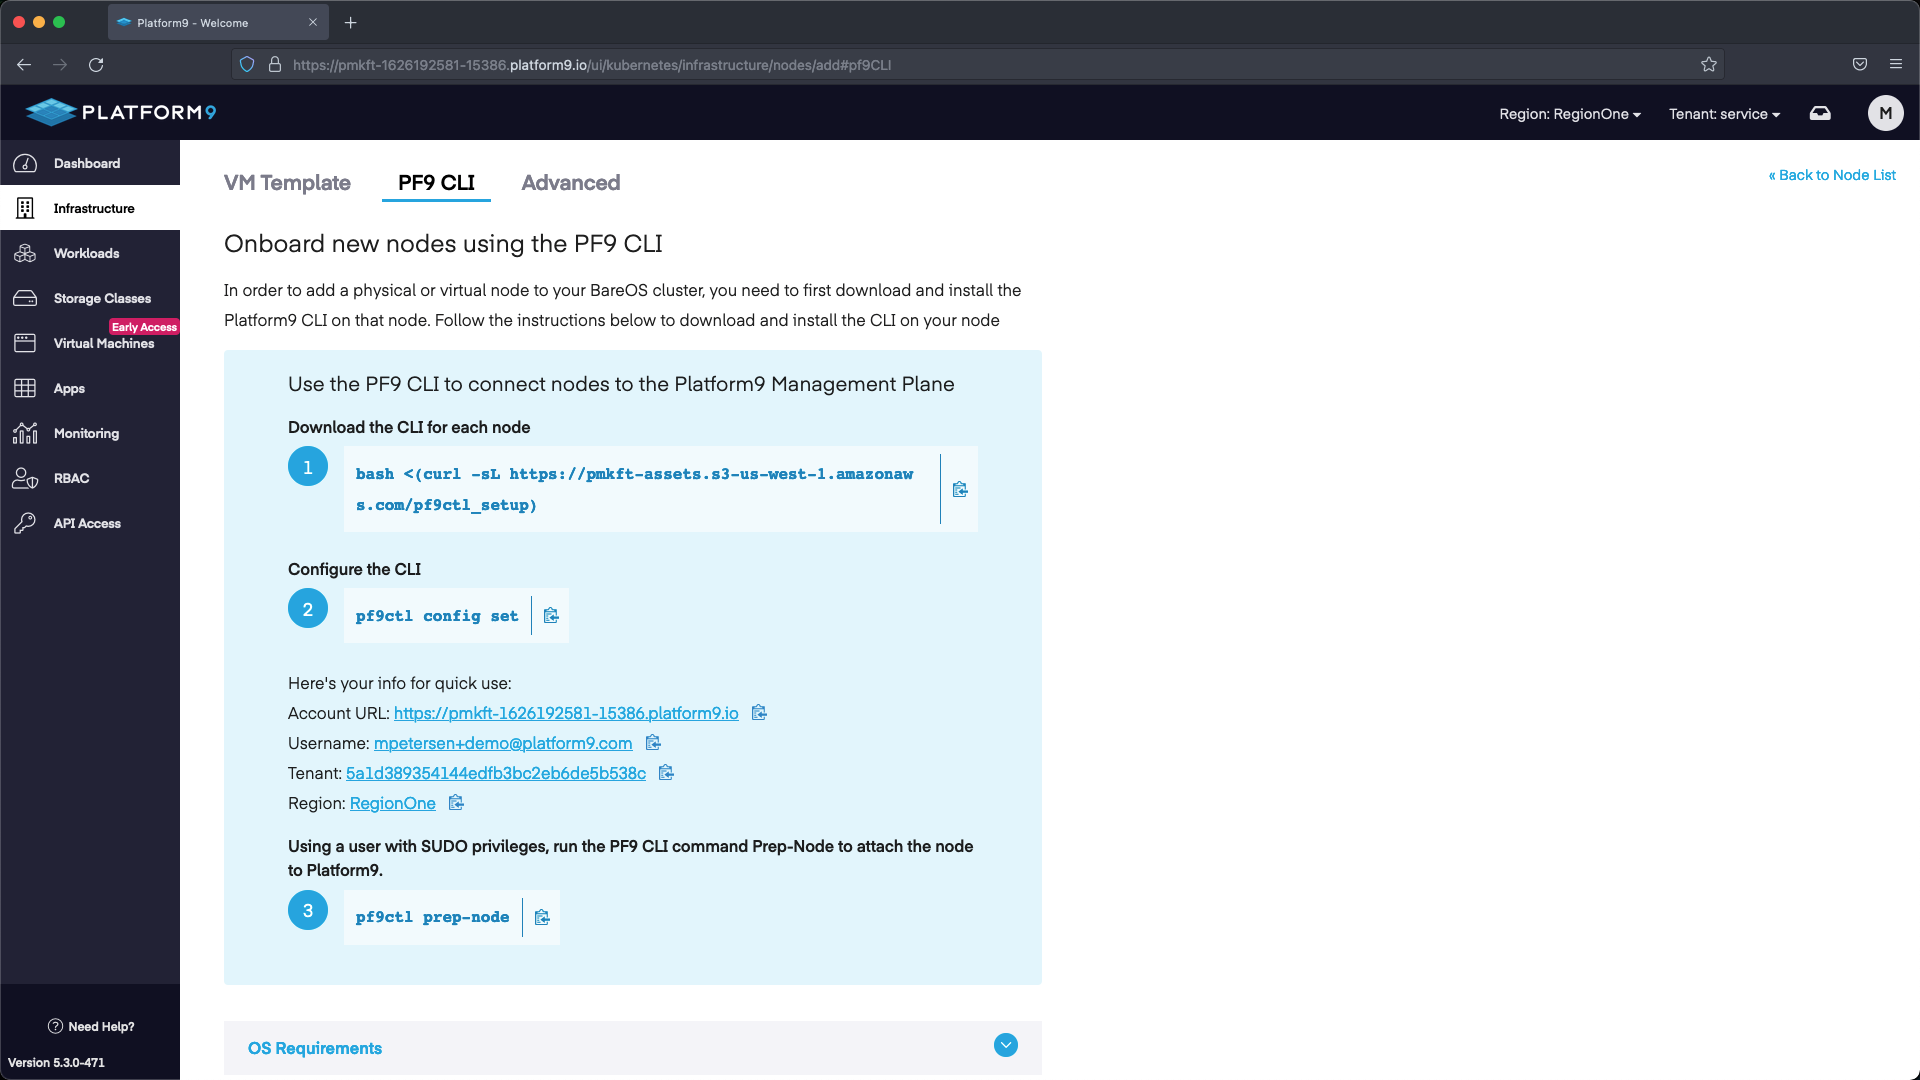
To do so select +ADD Node under Nodes.
Next select PF9 CLI, which will give us information about installing the CLI + the steps needed to onboard a node.
Open a terminal session to each node and follow the steps on the Onboard a Node PF9 CLI page and then wait a few moments while the nodes check in.
Step 2 - Deploy Cluster
After the nodes have checked in we can go ahead and deploy a cluster.
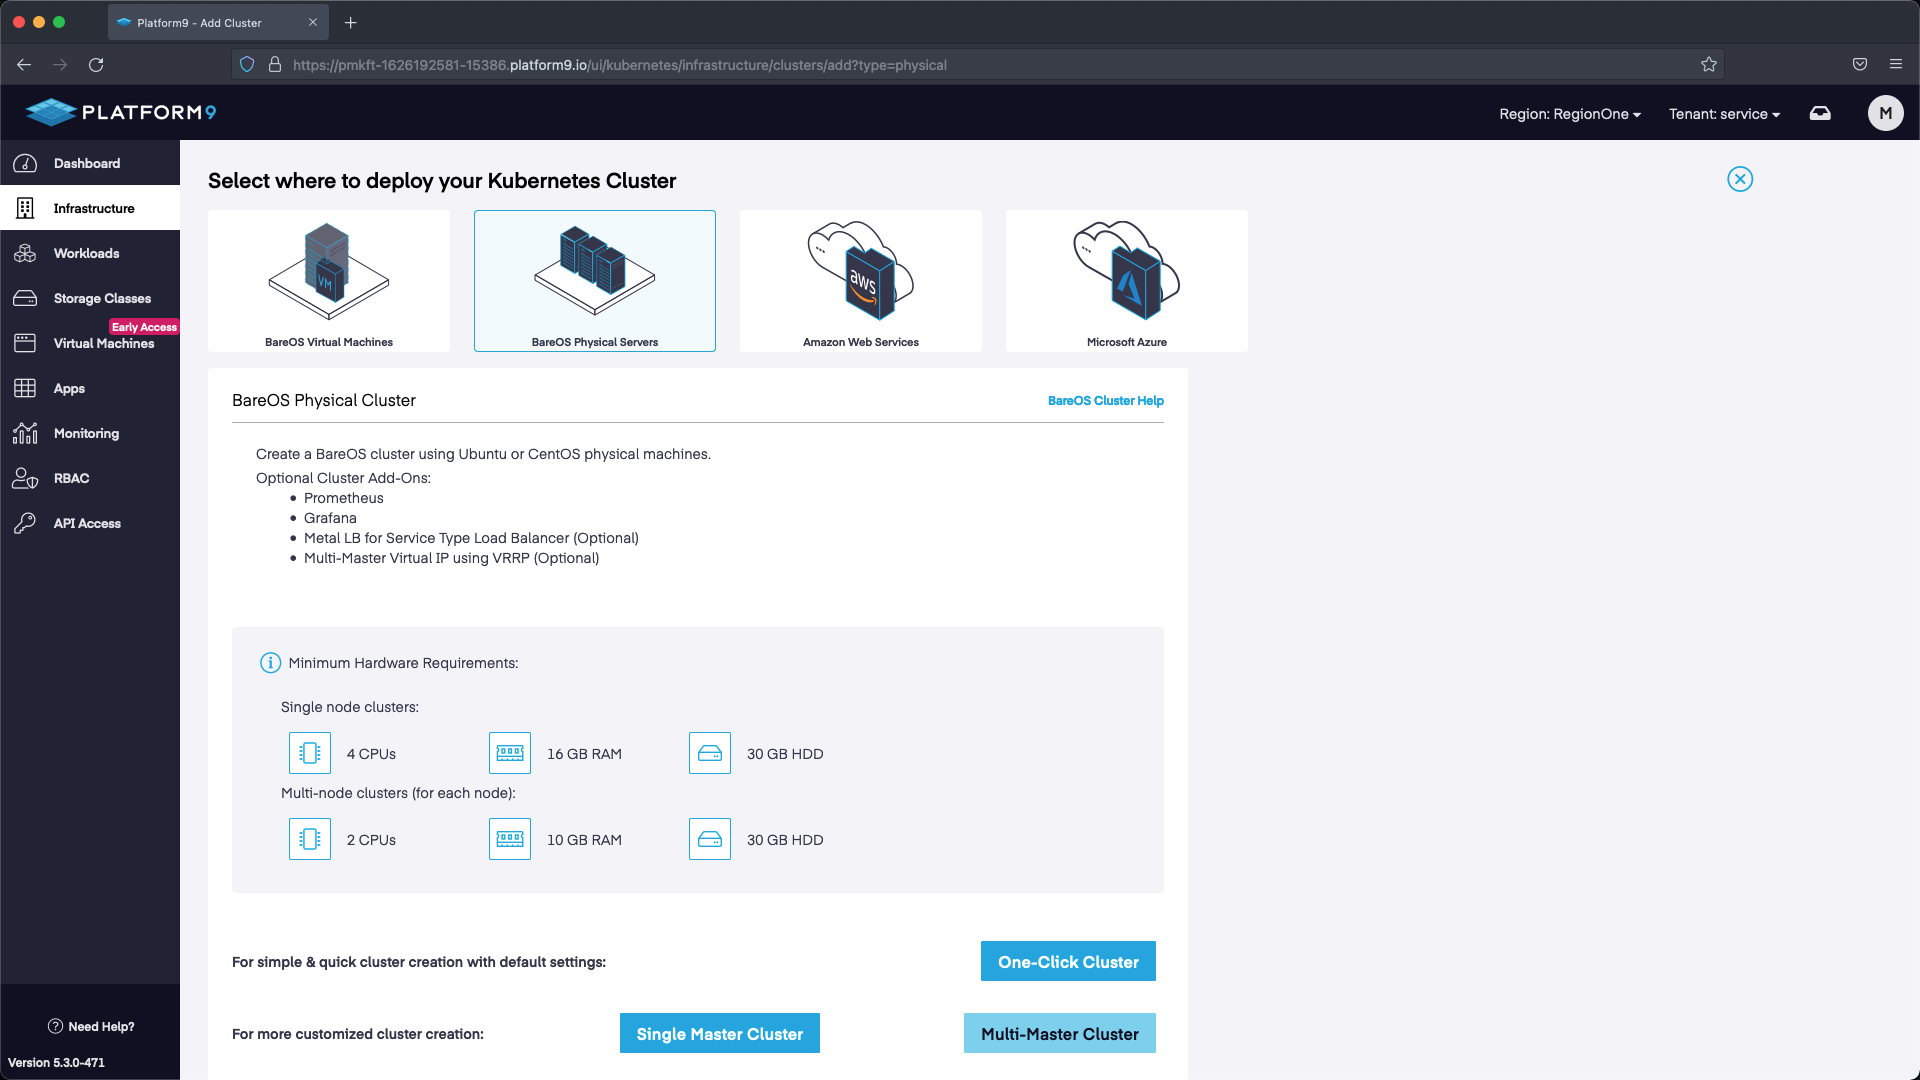
Select +Add Cluster:
Select BareOSPhysical Servers`` > Multi-Master Cluster.
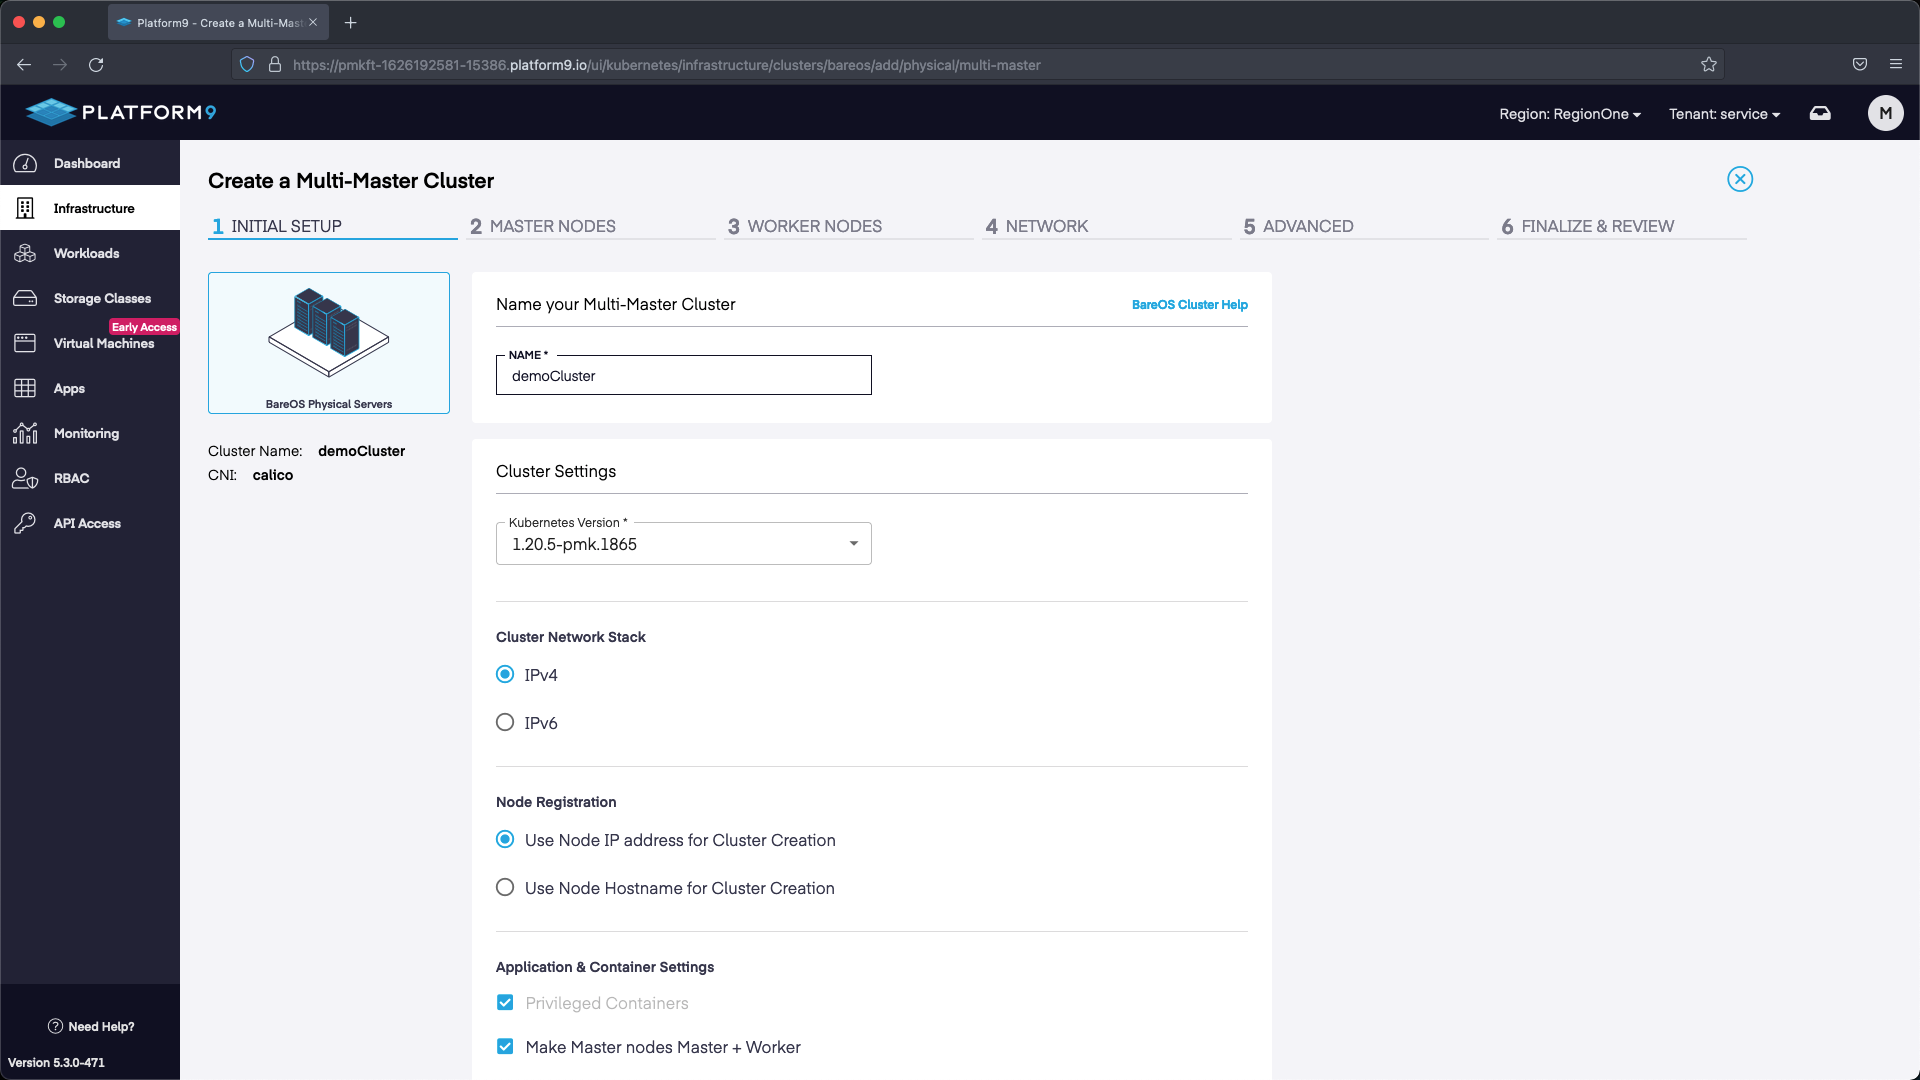
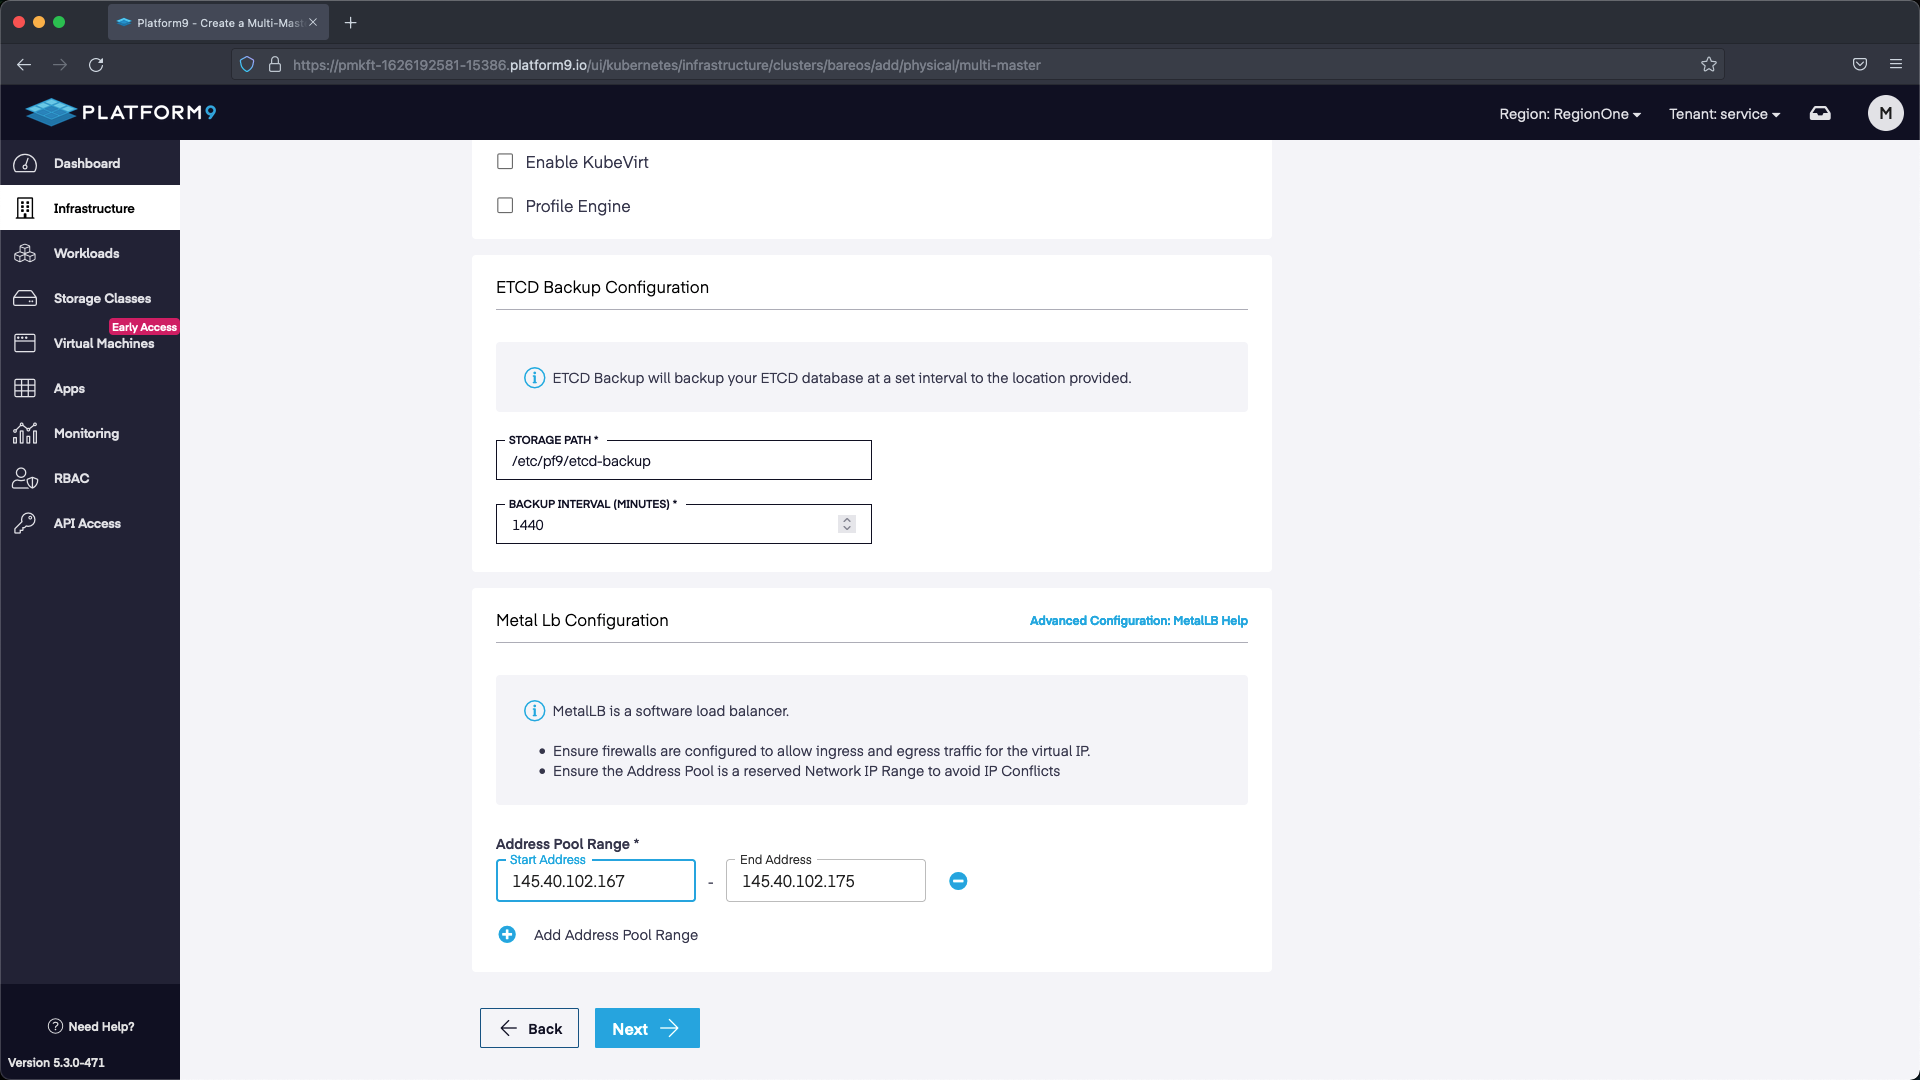
For the cluster configuration we are going to set a name, then select the version of Kubernetes we want to deploy. We are also going to deploy with MetalLB so that we can use the LoadBalancer service in K8s. The range we are going to use will start with the first IP after the address we’ve allocated for our API. Our API IP is 145.40.102.166, so our MetalLB range starts at 145.40.102.167 up until the last IP in the block 145.40.102.175. This will give us multiple IP addresses to use as LoadBalancers.
*Note - in the screenshots “Make Master nodes Master + Worker” is selected since we only have a single worker. With multi-worker clusters you will probably want to make sure this isn’t selected so that the Master nodes are not operating as Workers in addition to being the control plane. |
The next step is to pick our Master nodes. If the hostname doesn’t show up relative to the server that was created then we can reference the IP address we associated with the server from the Metal Gateway addresses and use that as a guide to figure out which nodes to select as Masters. Select three master nodes and hit next.
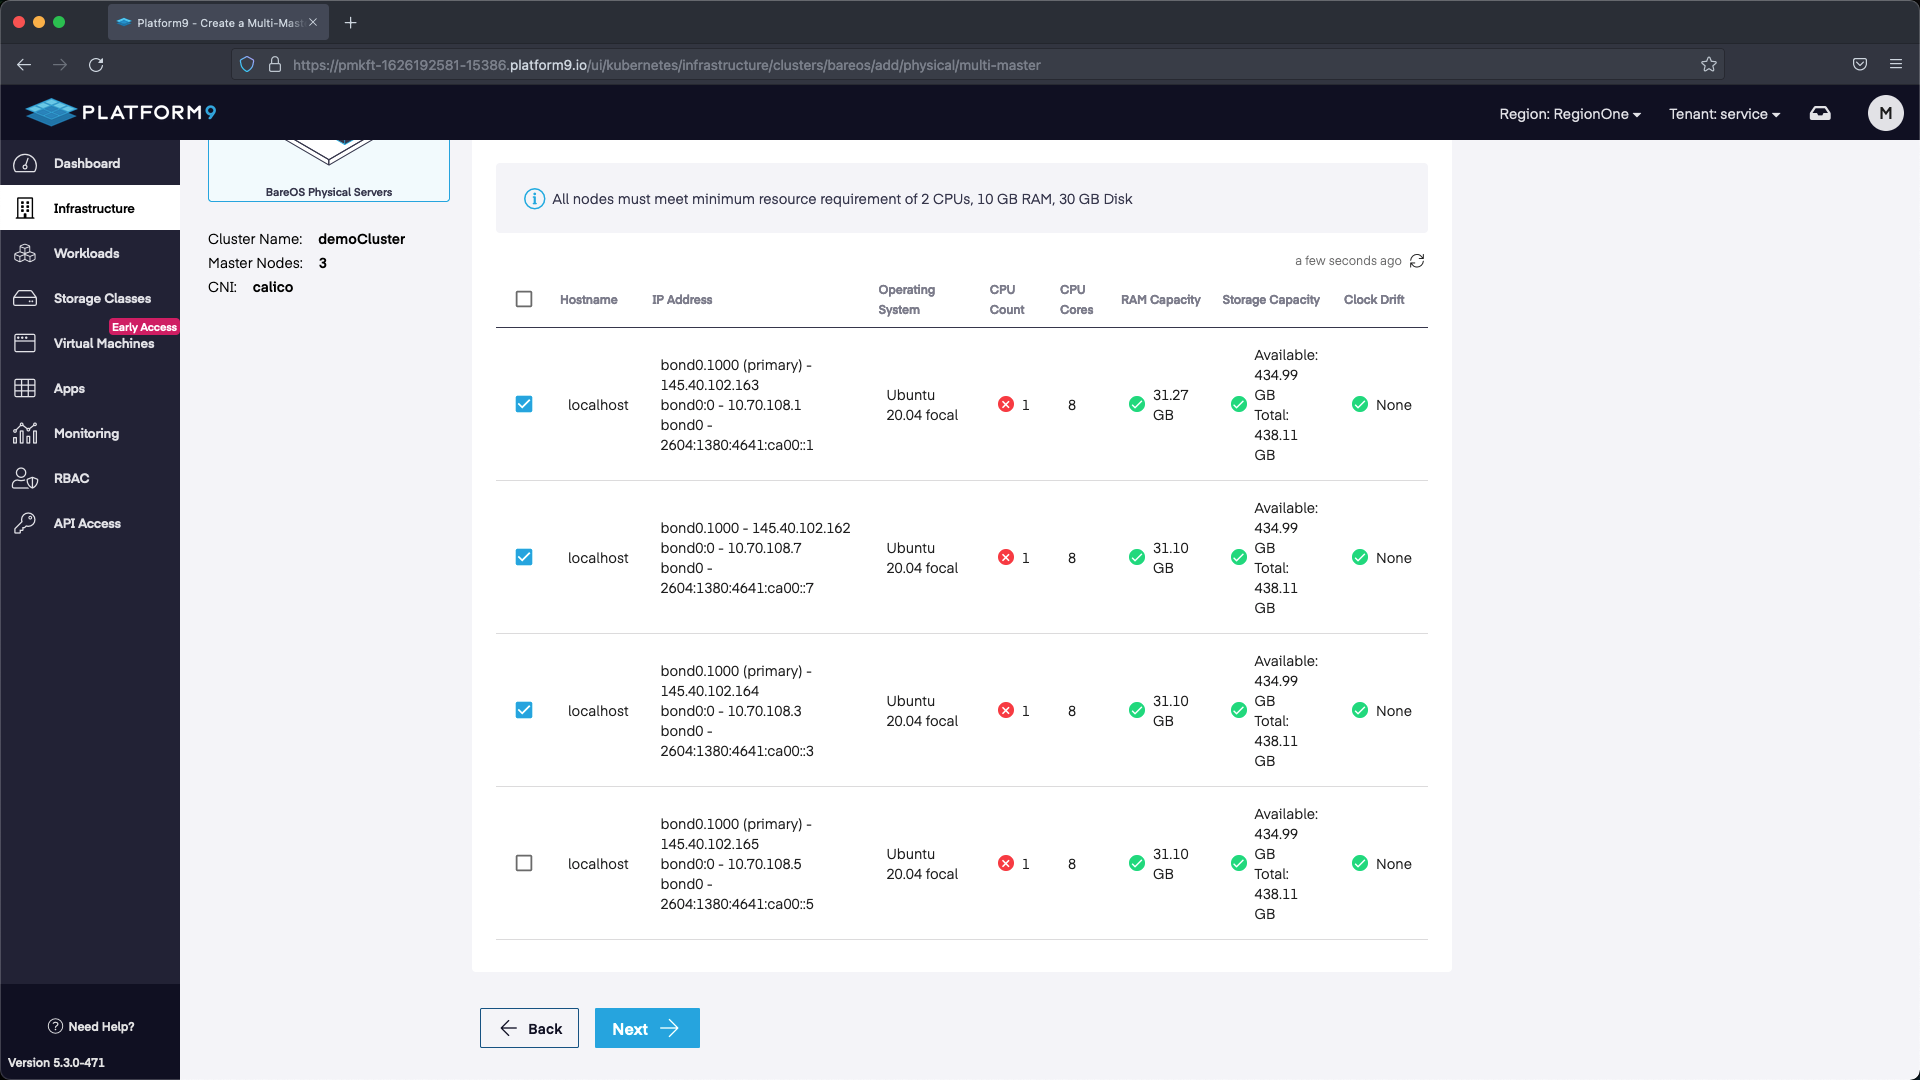
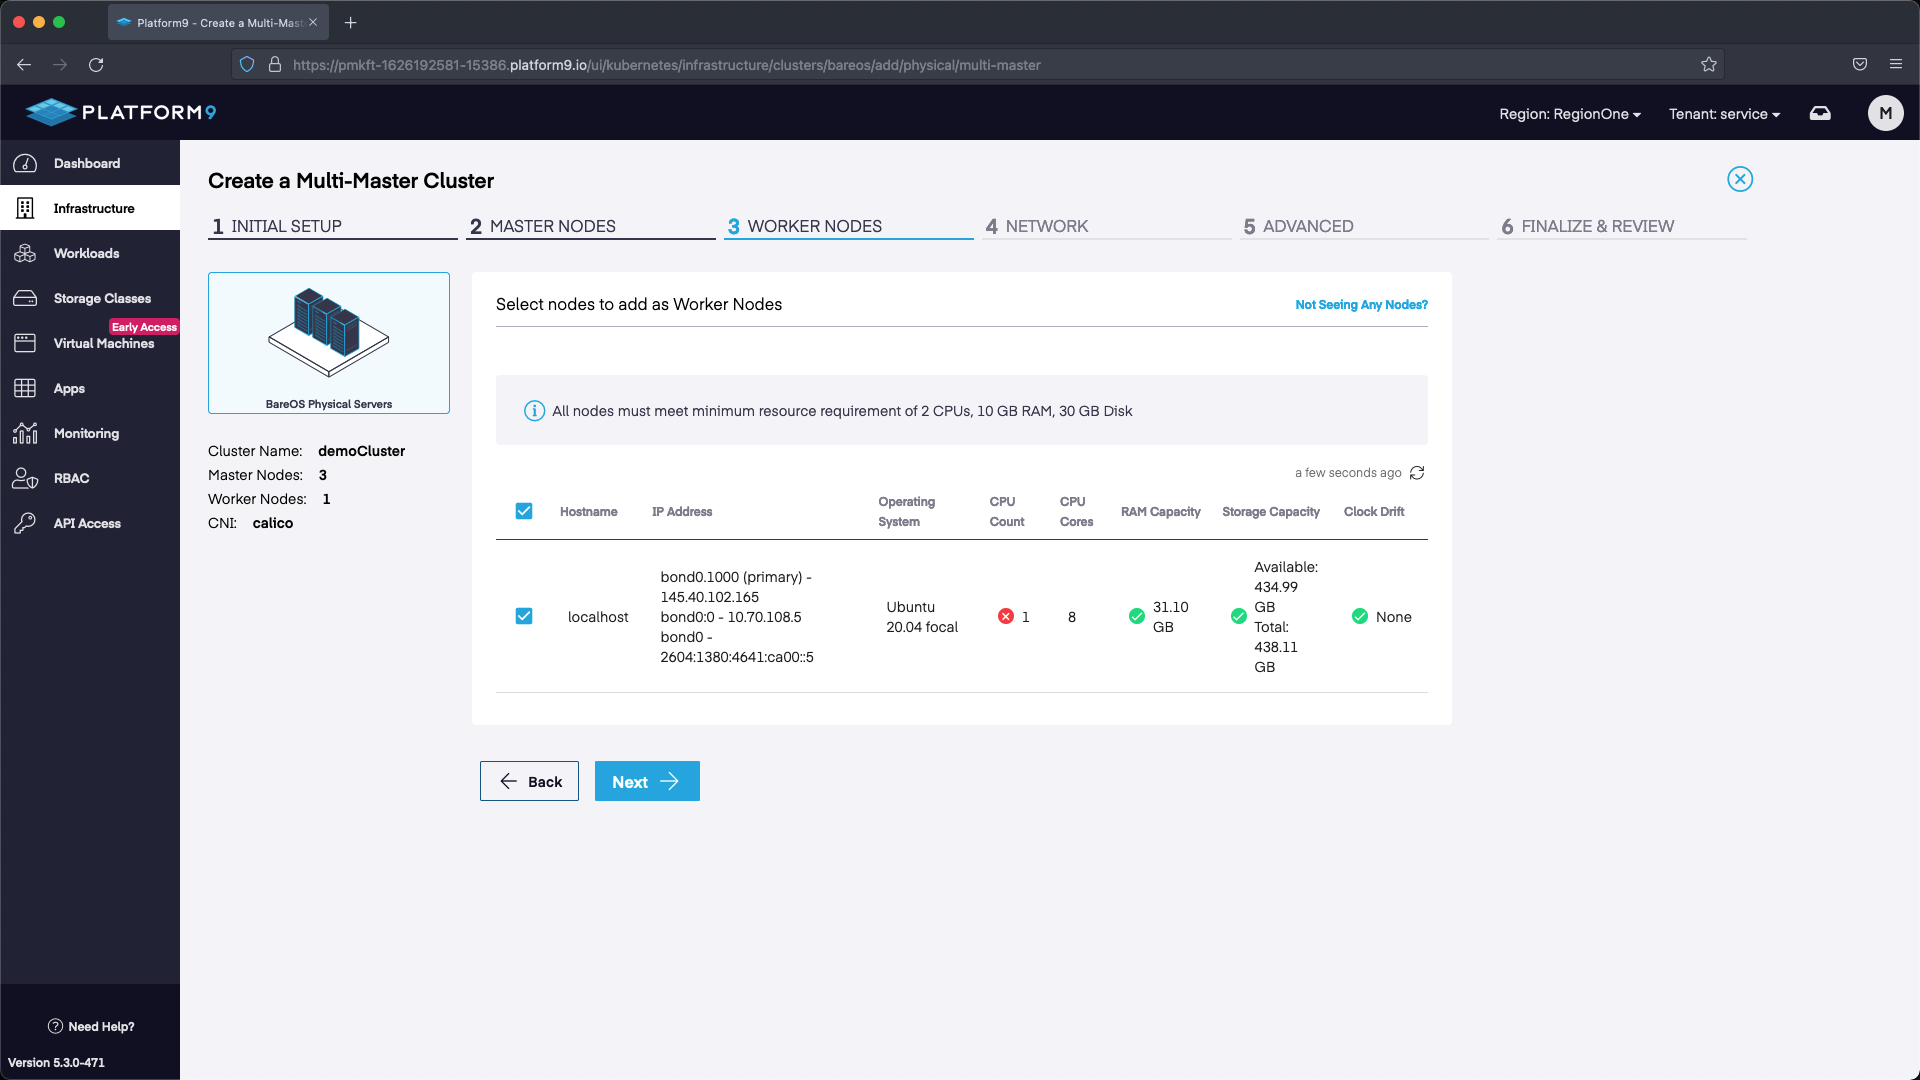
Next up we will select our worker nodes. In this example we only have one, however with your deployment you may have multiple.
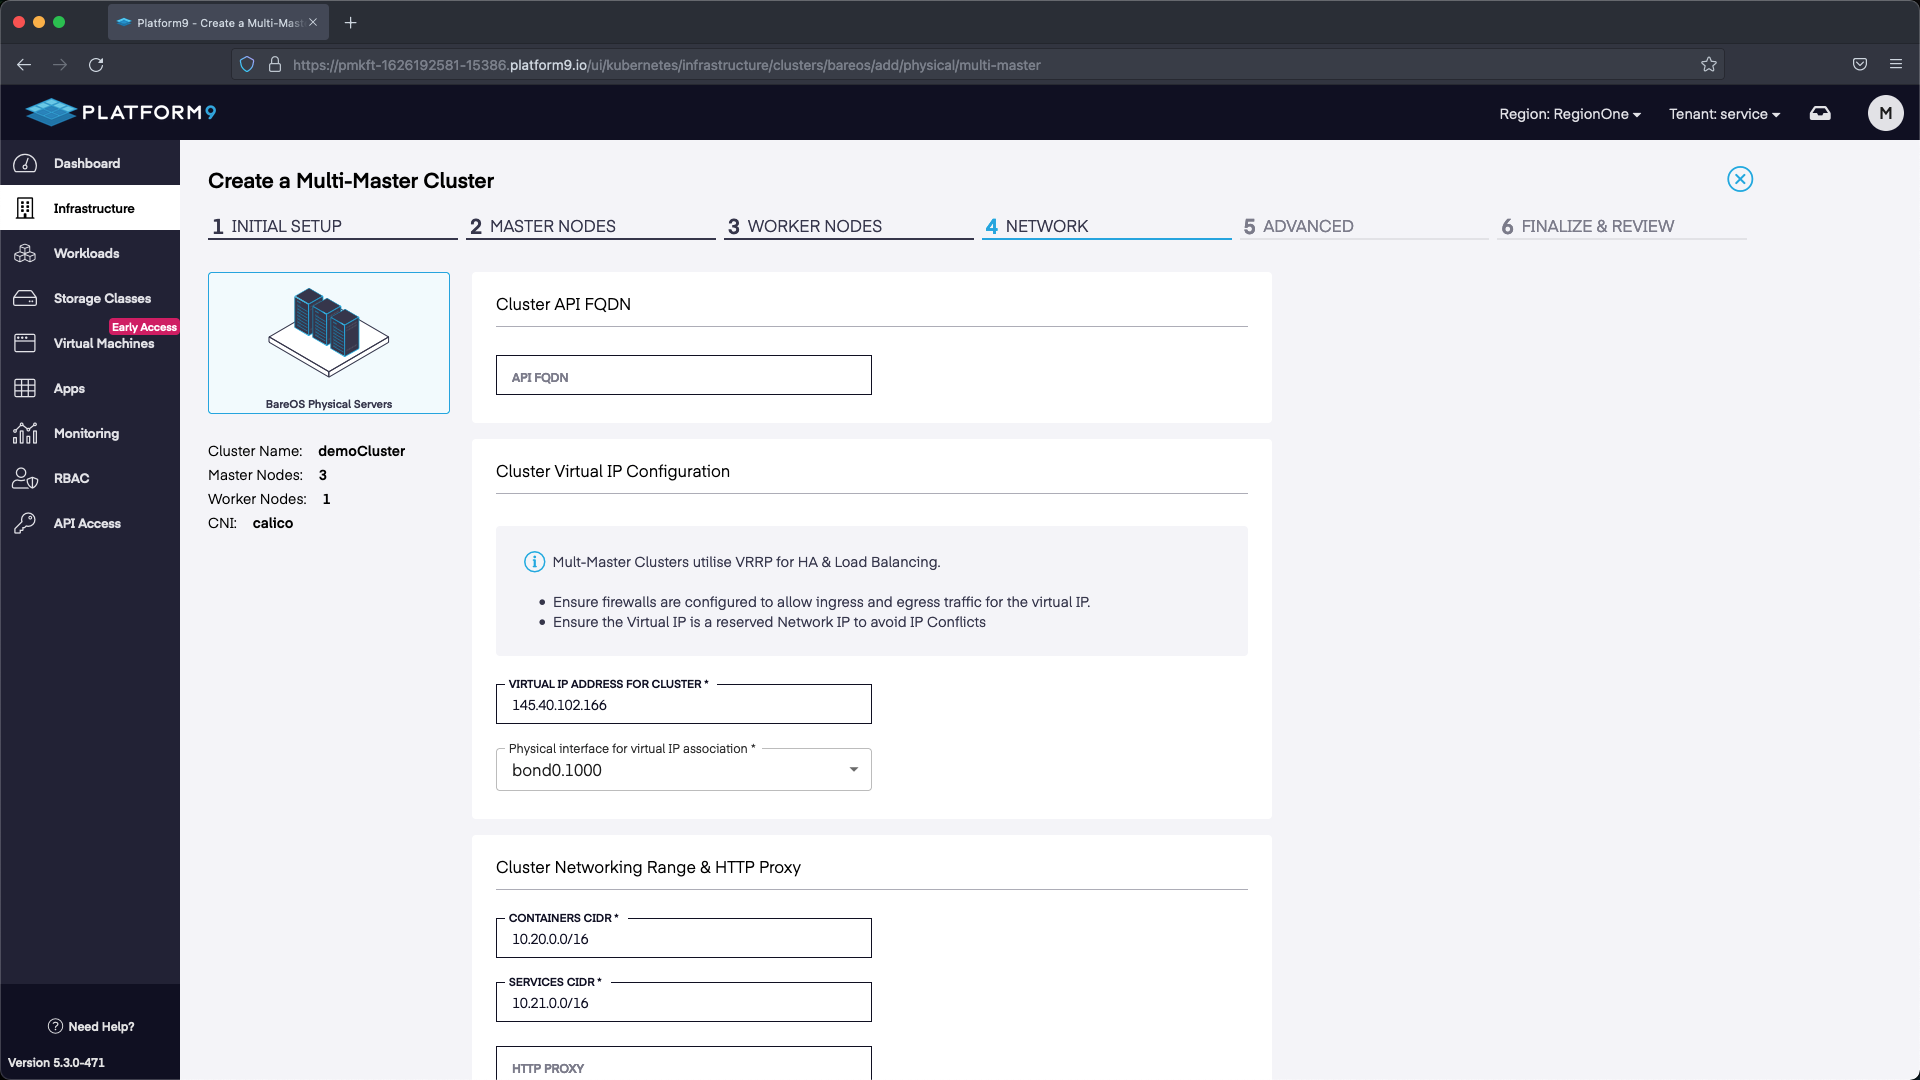
Next we need to configure our HA API endpoint. In this example I selected the next available IP address after the IP addresses that were associated with our Servers in the Metal Gateway /28 pool. Any unassigned IP address within the Metal Gateway network but outside of the ones used for MetalLB and the nodes will work. We use 145.40.102.166 in our example. After we set the IP we can select Next and proceed to the next section.
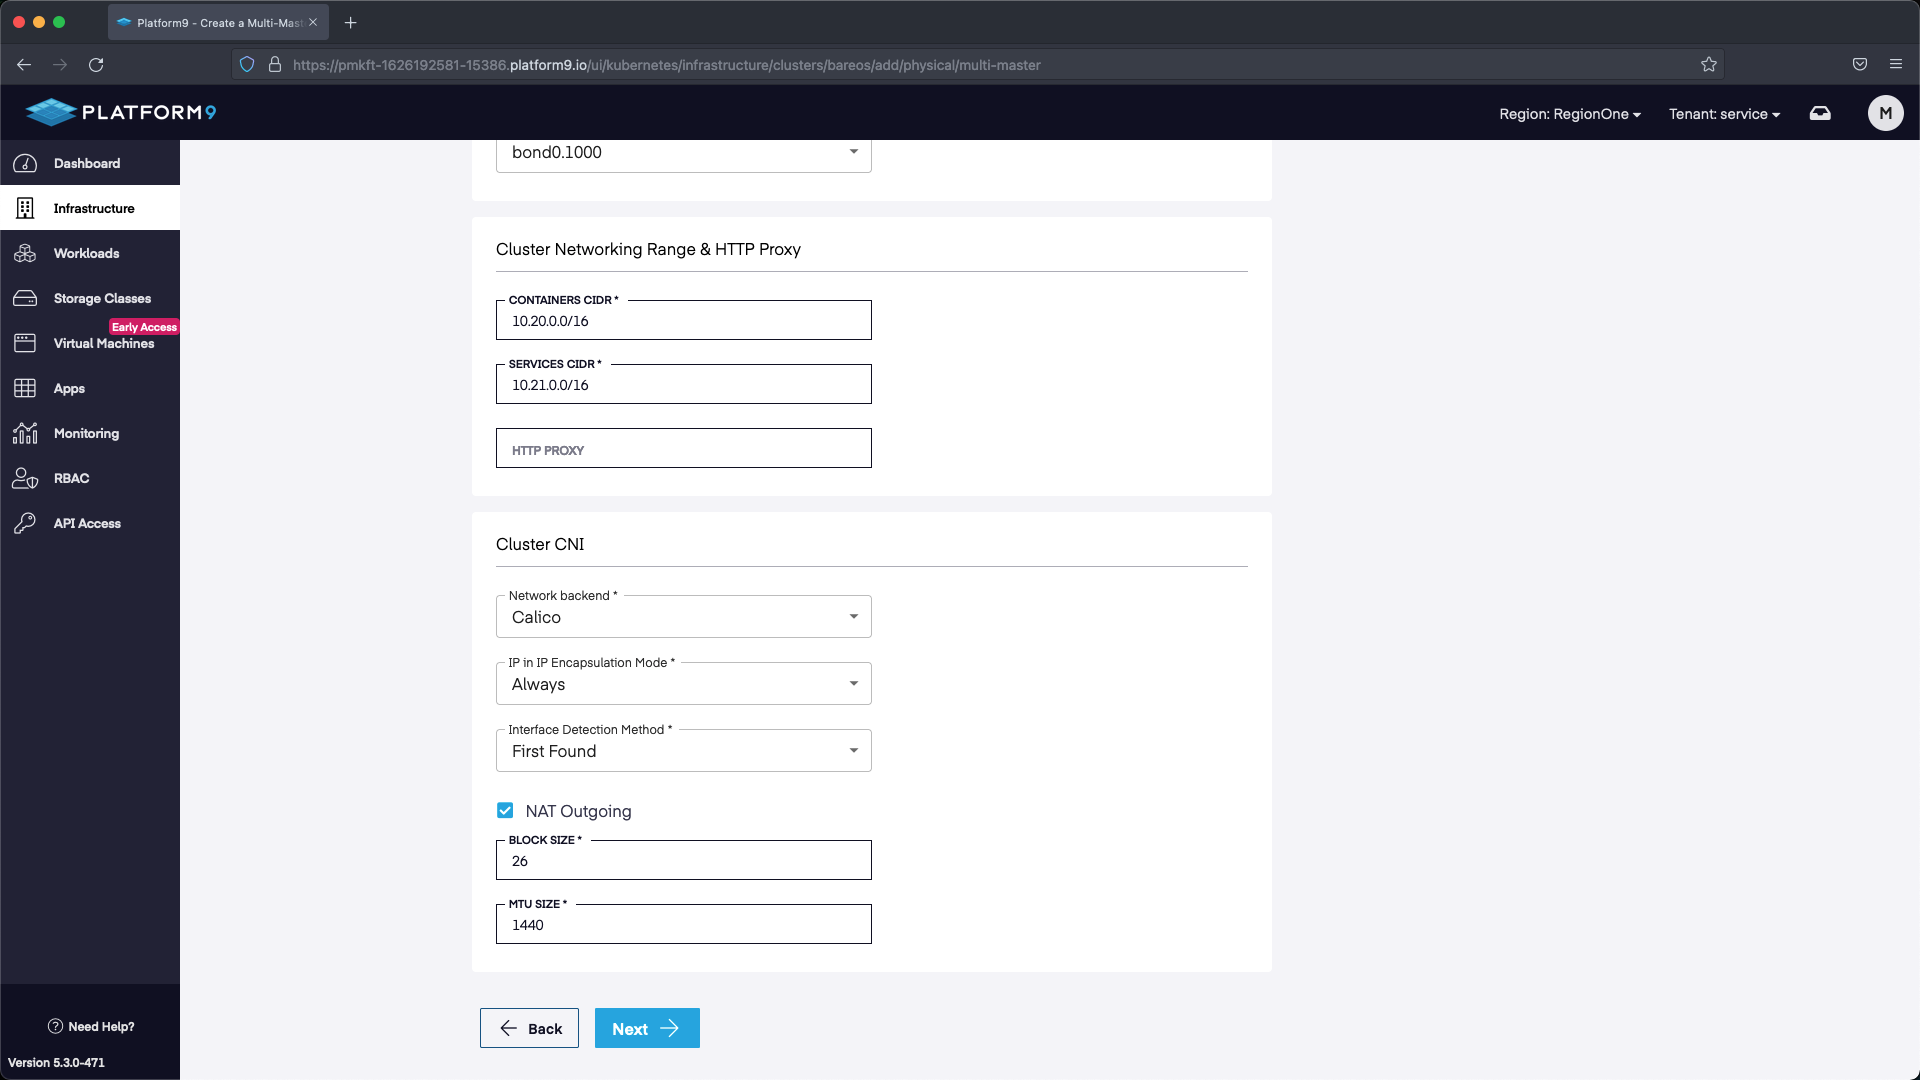
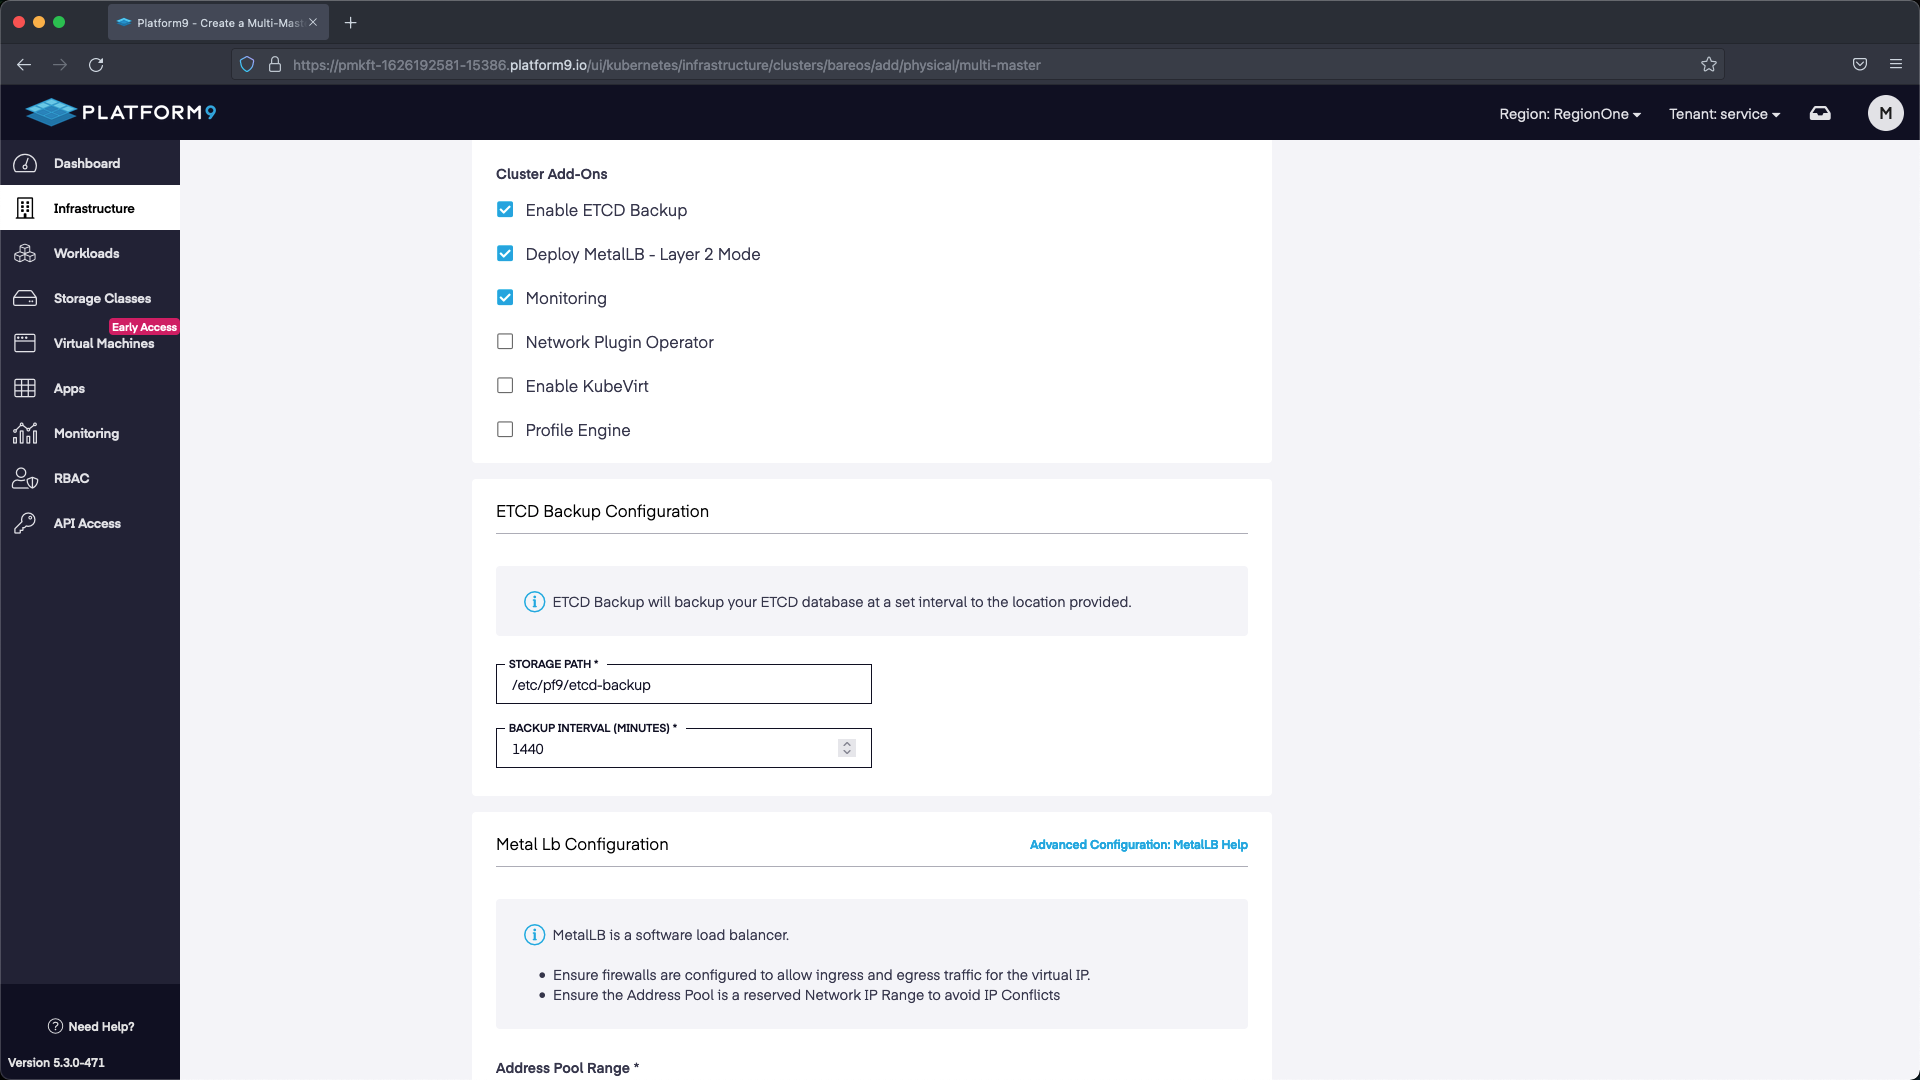
In this section we can select Next without making any modifications.
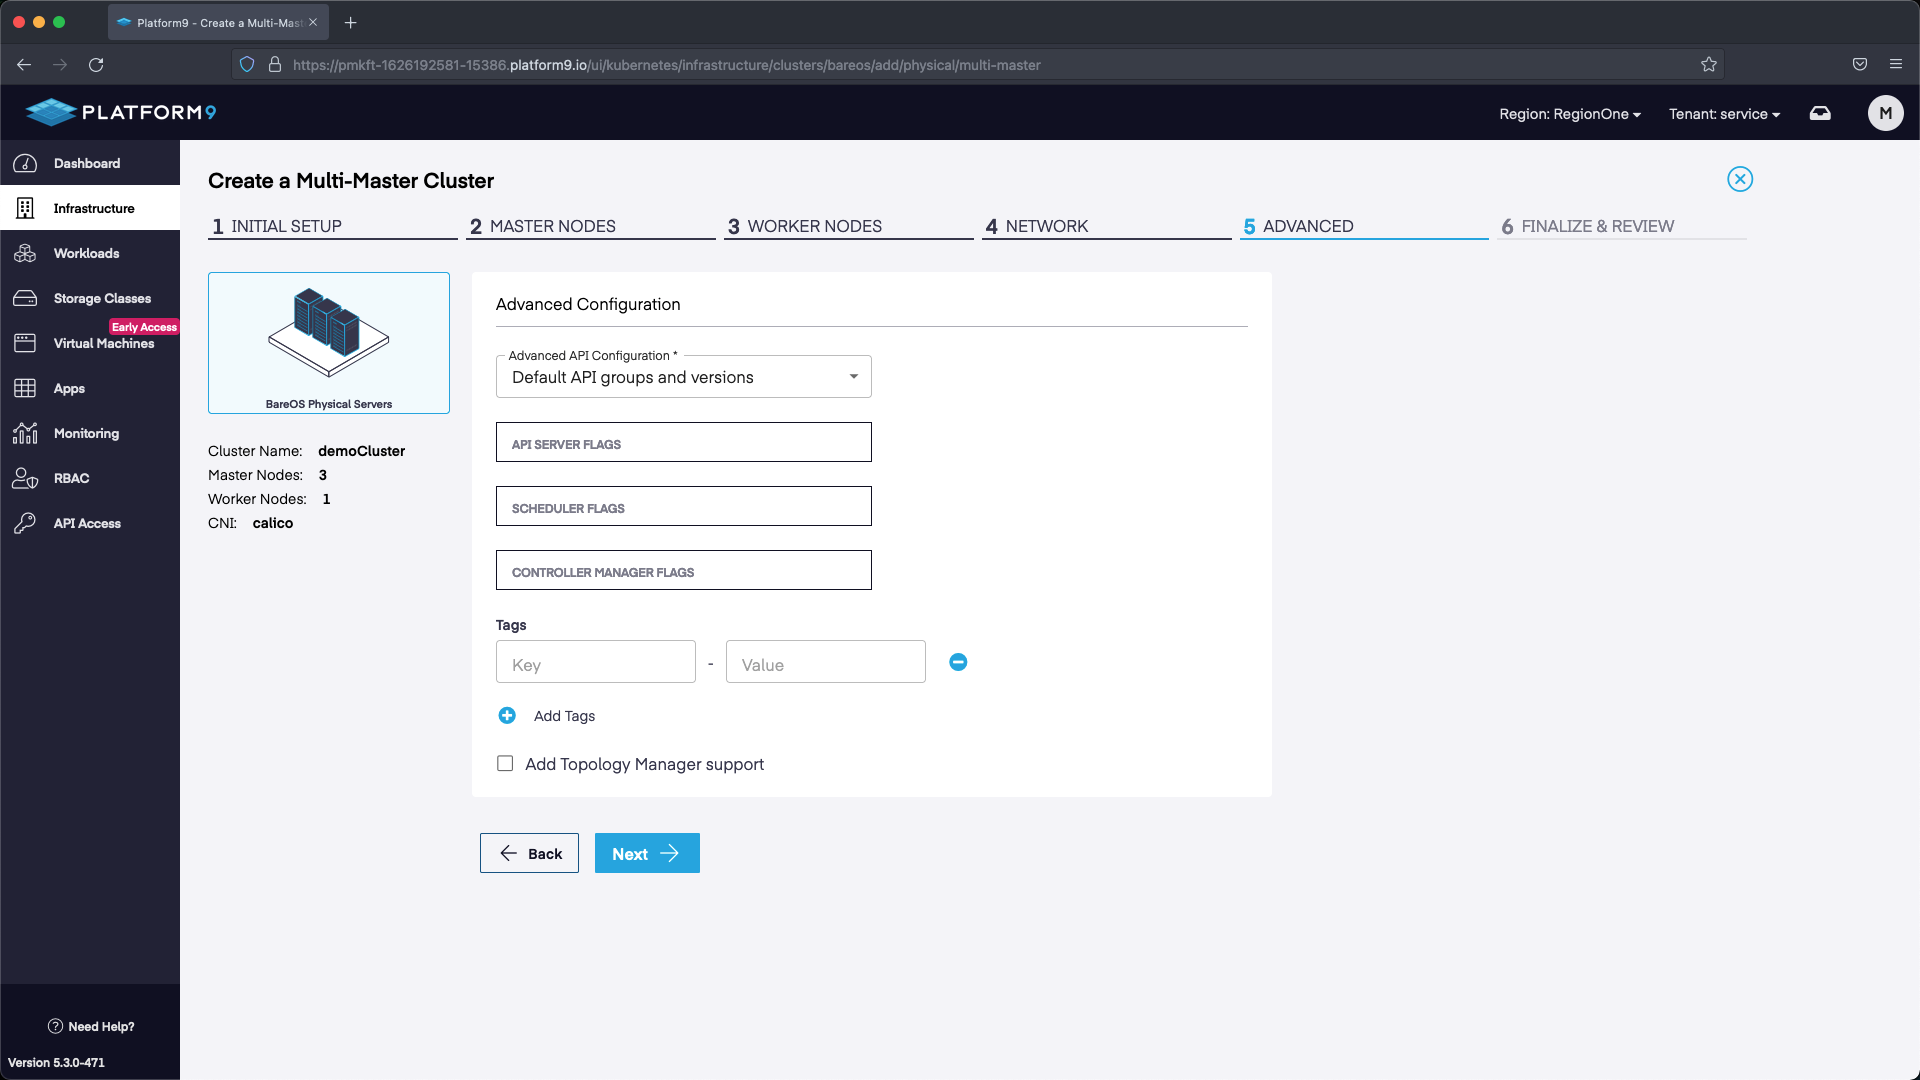
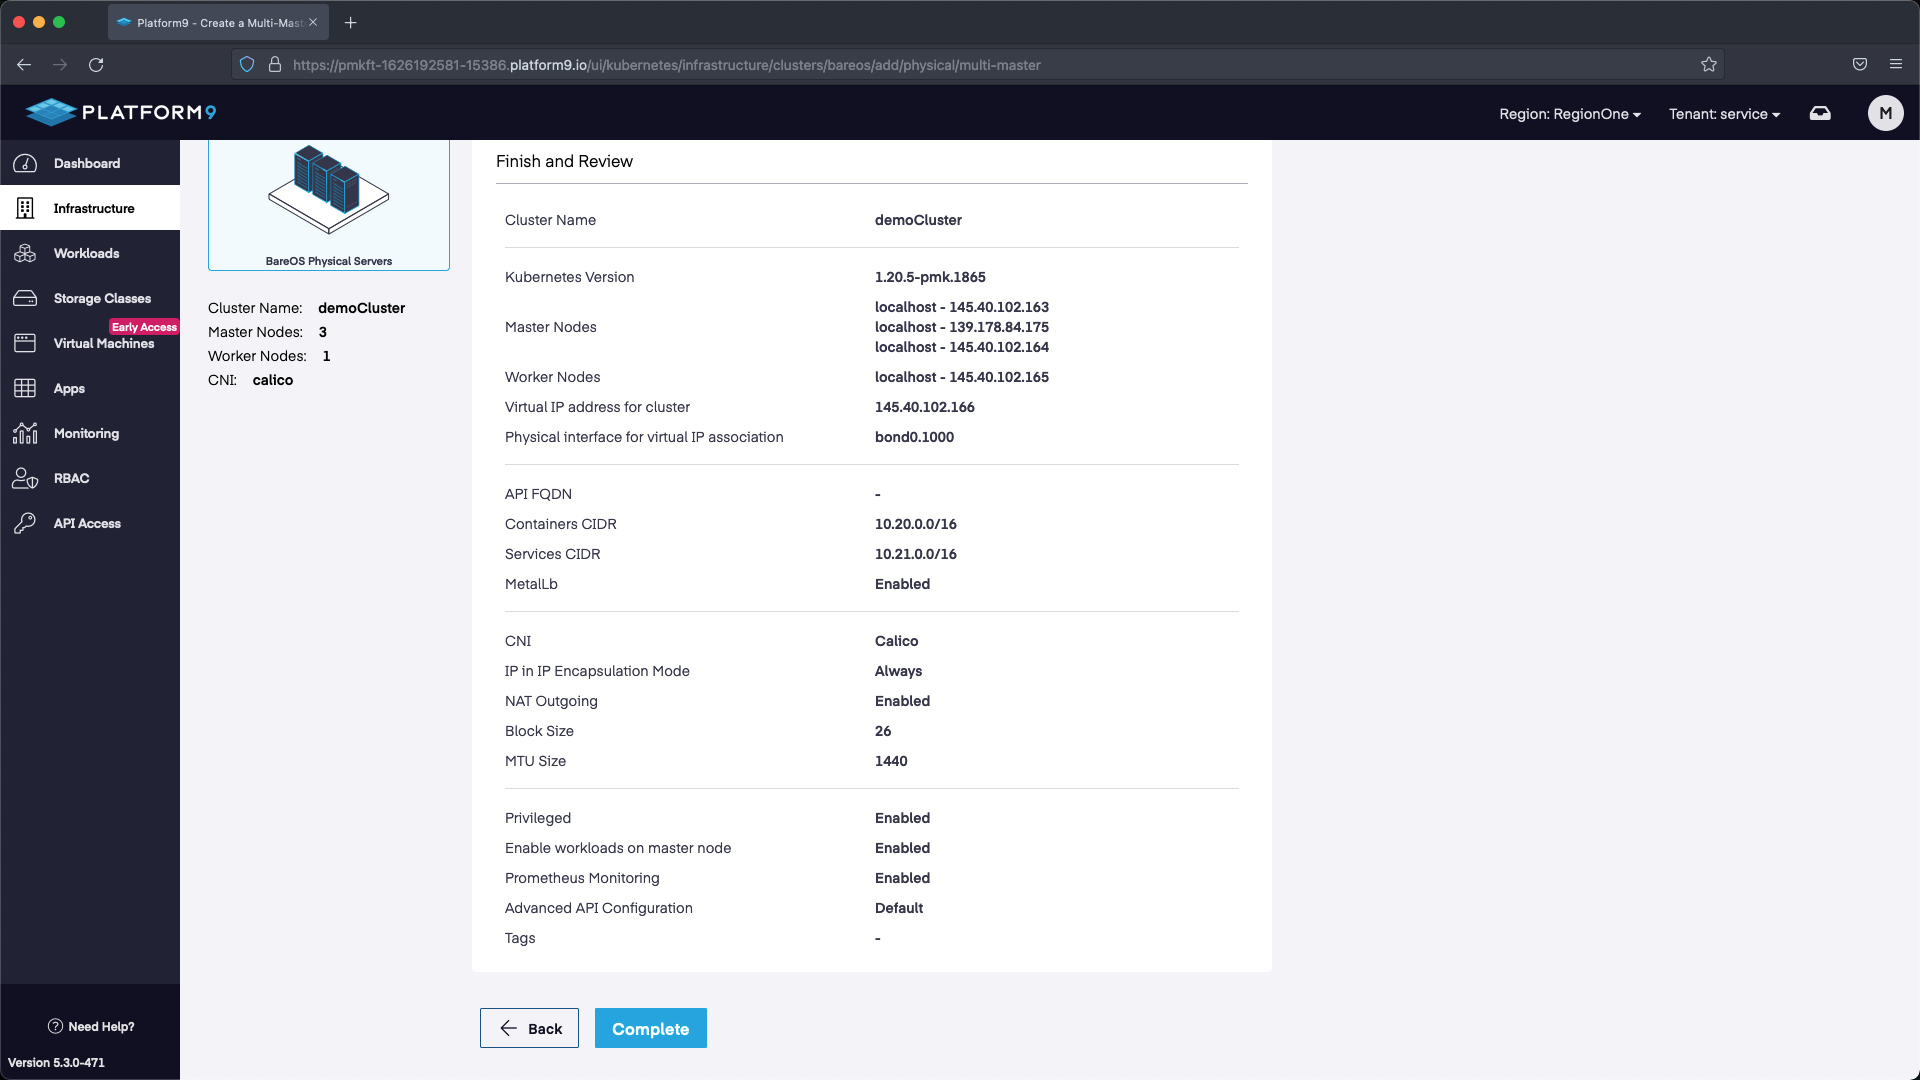
The final step is to review the configuration and select Complete. Our cluster will deploy with the configuration we specified.
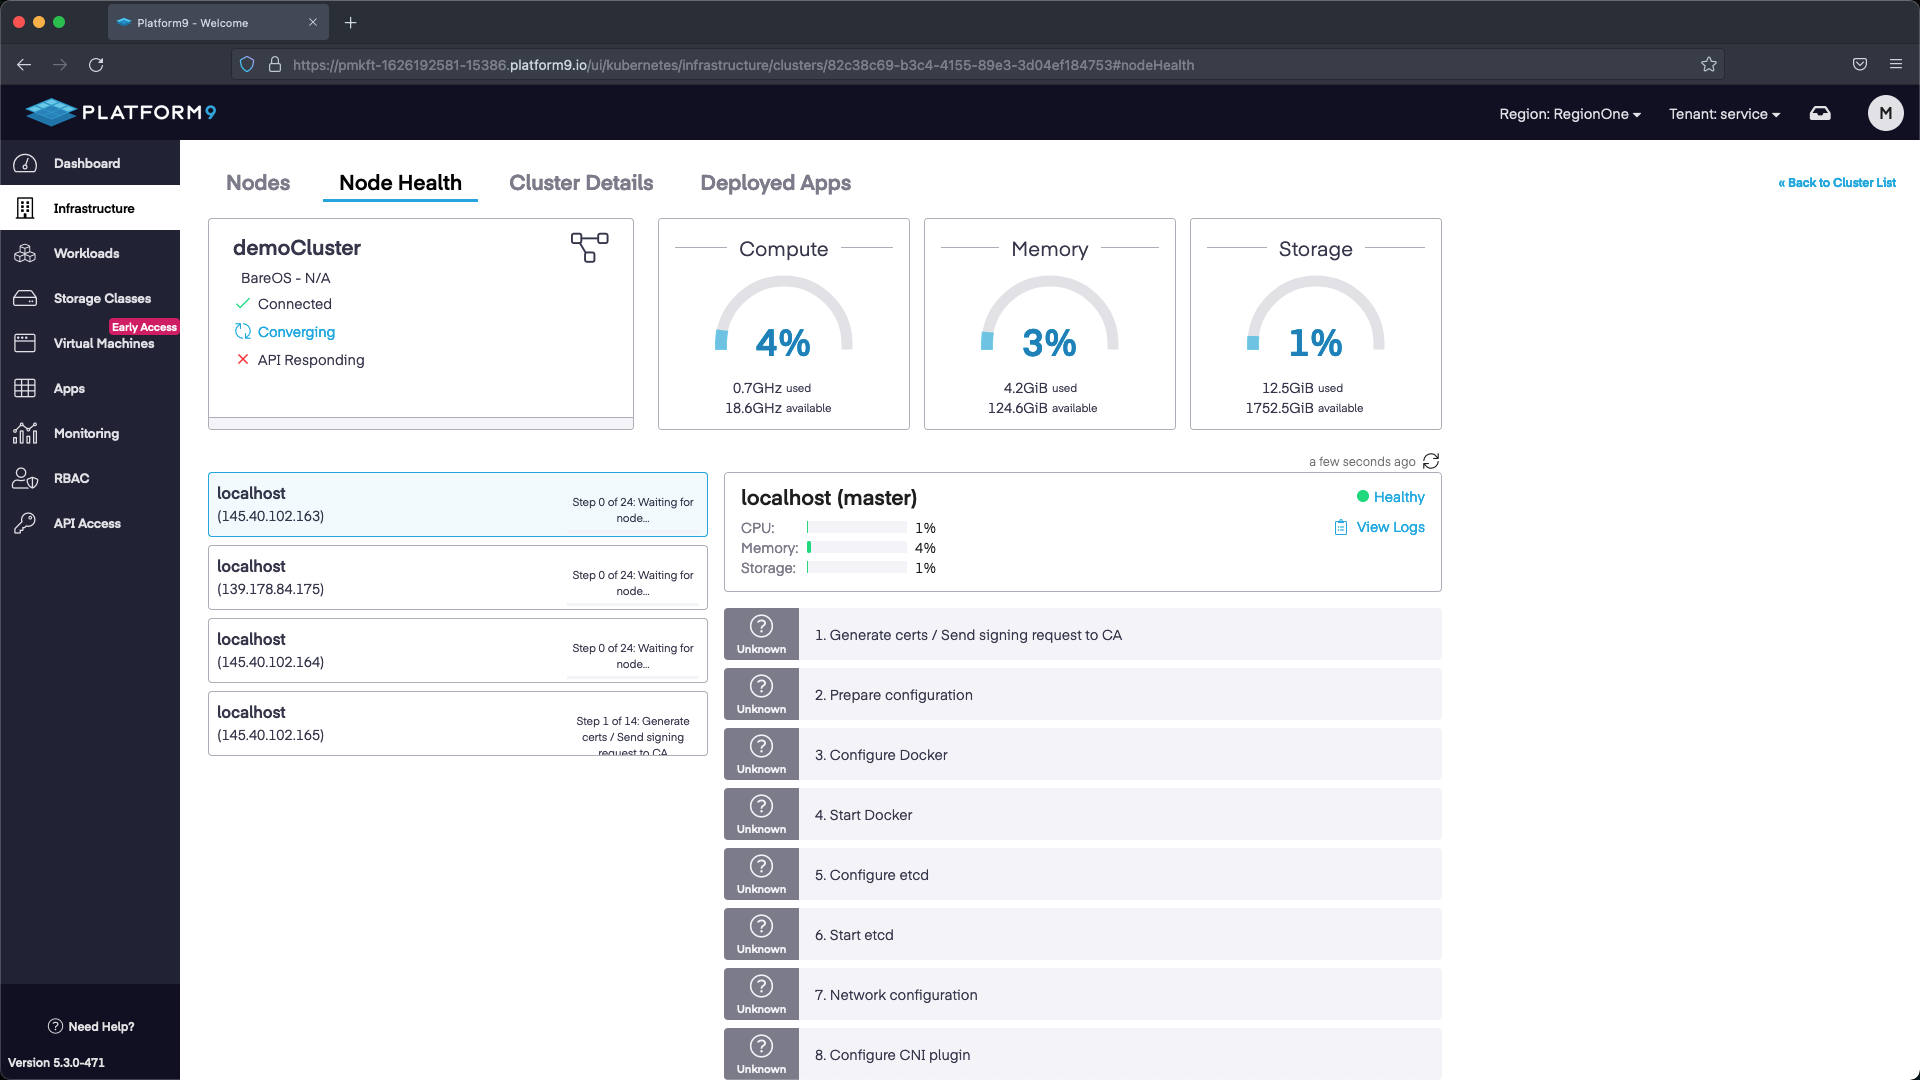
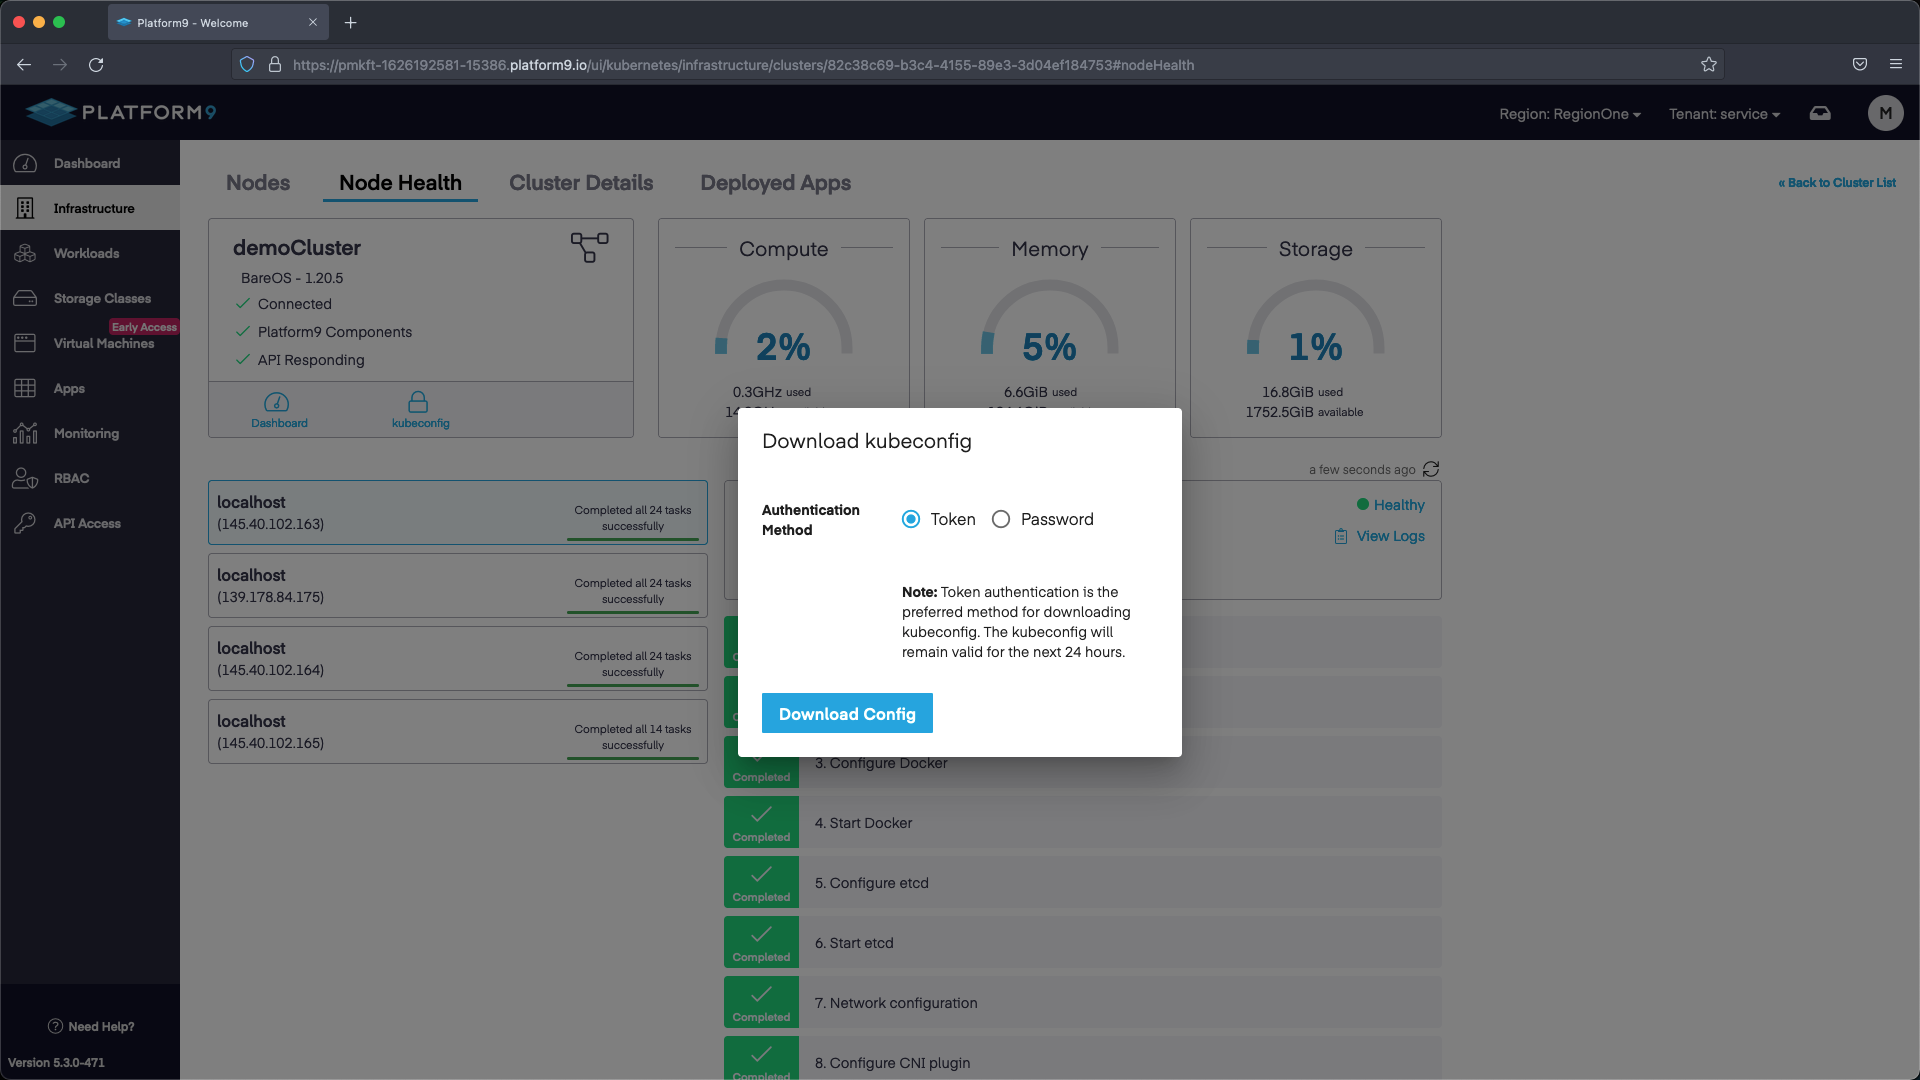
Step 3 - Download the KubeConfig
Once the cluster has been configured you can download the KubeConfig and start interacting with K8s!
Next Steps
Now that we have a working cluster we can deploy applications. Check out our our App Catalog Guide to quickly deploy an application using a Helm Repository.