Redis Cache Guestbook
During the last tutorials, we’ve explored the Platform9 Managed Kubernetes Dashboard, created some clusters and installed some example applications.
In this tutorial, we are going to expand our examples by deploying a more complex microservice. The idea is to make you more comfortable with the platform and to show you how you can leverage it for more advanced scenarios.
In this example, we are going to see the deployment of:
- A Redis master
- Multiple Redis slaves
- A sample guestbook application that uses Redis as a store
We assume that you have already set up a Platform9 cluster with at least one node, and the cluster is ready.
Let’s start with the Redis parts.
Deploying and exposing a Redis Cluster
Redis is a key-value in-memory store that is used mainly as a cache service. To set up Clustering for Data Replication, we need a Redis instance that acts as Master, together with additional instances as slaves. Then the guestbook application can use this instance to store data. The Redis master will propagate the writes to the slave nodes.
We can initiate a Redis Master deployment in a few different ways: either using the kubectl tool, the Platform9 UI or the Kubernetes UI. For convenience, we use the kubectl tool as it’s the most commonly understood in tutorials.
First, we need to create a Redis Cluster Deployment. Looking at their documentation here, to set up a cluster, we need some configuration properties. We can leverage kubernetes configmaps to store and reference them in the deployment spec.
We need to save a script and a redis.conf file that is going to be used to configure the master and slave nodes.
Create redis-cluster.config.yml file with the following configuration:
xxxxxxxxxx---apiVersionv1kindConfigMapmetadata nameredis-cluster-configdata update-ip.sh #!/bin/sh sed -i -e "/myself/ s/[0-9]\{1,3\}\.[0-9]\{1,3\}\.[0-9]\{1,3\}\.[0-9]\{1,3\}/${IP}/" /data/nodes.conf exec "$@" redis.conf+ cluster-enabled yes cluster-config-file /data/nodes.conf appendonly yesWe define a script that will insert an IP value to the node.conf file. This is to fix an issue with Redis as referenced here. We use this script every time we deploy a new Redis image.
Then, we have the redis.conf, which applies the minimal cluster configuration.
Apply this spec into the cluster:
xxxxxxxxxx$ kubectl apply -f redis-cluster.config.ymlThen verify that it exists in the list of configmaps:
xxxxxxxxxx$ kubectl get configmapsNext, we need to define a spec for the Redis cluster instances. We can use a Deployment or a StatefulSet to define three (3) instances:
Here is the spec:
redis-cluster.statefulset.yml
xxxxxxxxxx---apiVersionapps/v1kindStatefulSetmetadata nameredis-clusterspec serviceNameredis-cluster replicas6 selector matchLabels appredis-cluster template metadata labels appredis-cluster spec containersnameredis imageredis5.0.7-alpine portscontainerPort6379 nameclientcontainerPort16379 namegossip command"/conf/update-ip.sh" "redis-server" "/conf/redis.conf" envnameIP valueFrom fieldRef fieldPathstatus.podIP volumeMountsnameconf mountPath/conf readOnlyfalsenamedata mountPath/data readOnlyfalse volumesnameconf configMap nameredis-cluster-config defaultMode0755 volumeClaimTemplatesmetadata namedata spec accessModes "ReadWriteOnce" resources requests storage1GiIn the above step, we defined a few things:
- The environment variable
IPwe need in theupdate-ip.shscript that we defined in theconfigmapearlier. This is the pod-specific IP address using the Downward API. - Some shared volumes including the
configmapthat we defined earlier. - Two container ports (6379 and 16379) for the gossip protocol.
With this spec, we can deploy the Redis cluster instances:
xxxxxxxxxx$ kubectl apply -f redis-cluster.statefulset.ymlOnce we have the deployment ready, we need to perform the last step, which is bootstrapping the cluster. Consulting the documentation here for creating the cluster, we need to ssh into one of the instances and run the redis-cli cluster create command. For example, taken from the docs:
xxxxxxxxxx$ redis-cli --cluster create \ 127.0.0.1:7000 127.0.0.1:7001 \ 127.0.0.1:7002 127.0.0.1:7003 \ 127.0.0.1:7004 127.0.0.1:7005 \ --cluster-replicas 1To do that in our case, we need to get the local pod IPs of the instances and feed them to that command.
We can query the IP using this command:
xxxxxxxxxx$ kubectl get pods -l app=redis-cluster -o jsonpath='{range.items[*]}{.status.podIP}:6379 'So, if we save them in a variable or a file, we can pipe them at the end of the redis-cli command:
xxxxxxxxxx$ POD_IPS=$(kubectl get pods -l app=redis-cluster -o jsonpath='{range.items[*]}{.status.podIP}:6379 ')Then, we can run the following command:
xxxxxxxxxx$ kubectl exec -it redis-cluster-0 -- redis-cli --cluster create --cluster-replicas 1 $POD_IPSIf everything is OK, you will see the following prompt. Enter yes to accept and continue:
Can I set the above configuration? (type 'yes' to accept): yes>>> Nodes configuration updated>>> Assign a different config epoch to each node>>> Sending CLUSTER MEET messages to join the clusterWaiting for the cluster to join........[OK] All nodes agree about slots configuration.>>> Check for open slots...>>> Check slots coverage...[OK] All 16384 slots covered.Then, we can verify the cluster state by running the cluster infocommand:
xxxxxxxxxx$ kubectl exec -it redis-cluster-0 -- redis-cli cluster infocluster_state:okcluster_slots_assigned:16384cluster_slots_ok:16384cluster_slots_pfail:0cluster_slots_fail:0cluster_known_nodes:6cluster_size:3cluster_current_epoch:6cluster_my_epoch:1cluster_stats_messages_ping_sent:28cluster_stats_messages_pong_sent:34cluster_stats_messages_sent:62cluster_stats_messages_ping_received:29cluster_stats_messages_pong_received:28cluster_stats_messages_meet_received:5cluster_stats_messages_received:62Before we continue deploying the guestbook app, we need to offer a unified service frontend for the Redis Cluster so that it’s easily discoverable in the cluster.
Here is the service spec:
redis-cluster.service.yml
xxxxxxxxxx---apiVersionv1kindServicemetadata nameredis-masterspec typeClusterIP portsport6379 targetPort6379 nameclientport16379 targetPort16379 namegossip selector appredis-clusterWe expose the cluster as redis-master here, as the guestbook app will be looking for a host service to connect to with that name.
Once we apply this service spec, we can move on to deploying and exposing the Guestbook Application:
xxxxxxxxxx$ kubectl apply -f redis-cluster.service.ymlDeploying and exposing a GuestBook Application
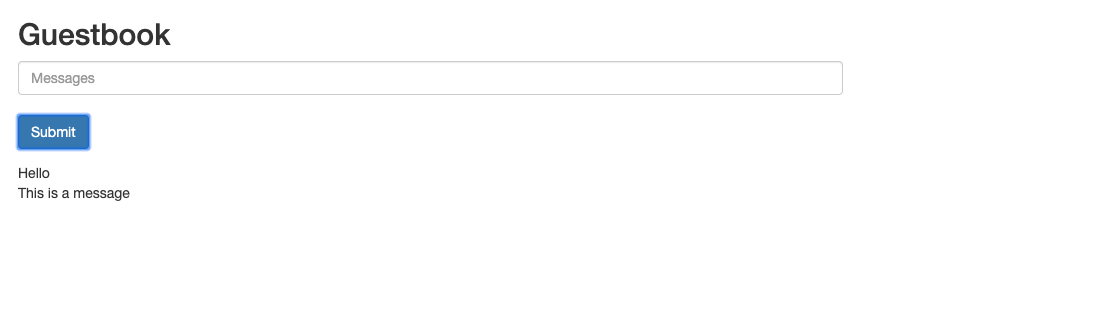
The guestbook application is a simple PHP script that shows a form to submit a message. Initially, it will attempt to connect to either the redis-master host or the redis-slave hosts. It needs the GET_HOSTS_FROM environment variable set pointing to the file with the following variables:
REDIS_MASTER_SERVICE_HOST: of the masterREDIS_SLAVE_SERVICE_HOST: of the slave
First, let’s define the deployment spec:
php-guestbook.deployment.yml
xxxxxxxxxx---apiVersionapps/v1kindDeploymentmetadata nameguestbookspec replicas1 selector matchLabels appguestbook template metadata labels appguestbook spec containersnamephp-redis imagegcr.io/google-samples/gb-frontendv6 resources requests cpu150m memory150Mi envnameGET_HOSTS_FROM valueenvnameREDIS_MASTER_SERVICE_HOST value"redis-master"nameREDIS_SLAVE_SERVICE_HOST value"redis-master" portscontainerPort80The code of the gb-frontend image is located here.
Next is the the associated service spec:
xxxxxxxxxx---apiVersionv1kindServicemetadata nameguestbook-lbspec typeNodePort portsport80 selectorappguestbookNote: NodePort will assign a random port over the public IP of the Node. In either case, we get a public host:port pair where we can inspect the application.
Here is a screenshot of the app after we deployed it:
Cleaning up
Once we have finished experimenting with the application, we can clean up the resources and all the servers by issuing kubectl delete statements. A convenient way is to delete using labels. For example:
xxxxxxxxxx$ kubectl delete statefulset redis-cluster$ kubectl delete service redis-master$ kubectl delete deployment guestbook$ kubectl delete service guestbook-lb$ kubectl delete configmap redis-cluster-config$ kubectl delete pvc -l app=redis-cluster