How to deploy Linkerd as a Service Mesh for your Kubernetes Cluster
In this tutorial, we will walk you through the step by step process to set up Linkerd as a service mesh for your Kubernetes cluster.
Introduction
Linkerd is a light-weight service mesh for Kubernetes. It adds observability, reliability, and security to Kubernetes applications without code changes. For example, Linkerd can monitor and report per-service success rates and latencies, can automatically retry failed requests, and can encrypt and validate connections between services, all without requiring any modification of the application itself.
Linkerd is fully open source, licensed under Apache v2, and is a Cloud Native Computing Foundation incubating project. It is developed in the open in the Linkerd GitHub organization.
Linkerd has three basic components: a UI, a data plane, and a control plane. You run Linkerd by:
- Installing the CLI on your local system
- Installing the control plane into your cluster
- Adding your services to Linkerd’s data plane
Once a service is running with Linkerd, you can use Linkerd’s UI to inspect and manipulate it.
This tutorial deploys Linkerd on a Platform9 Managed Kubernetes Free Tier cluster, however you can use it to deploy Linkerd on any Kubernetes cluster of your choice.
Prerequisites
- A valid Kubernetes cluster. You can create one quickly for free using Platform9 Managed Kubernetes. Signup for a Free PMK Account Here and create your Kubernetes cluster using PMK. You can also use this guide on any other Kubernetes cluster you may have.
- A Kubectl installation with your Kubernetes cluster from the step above configured as the primary cluster.
- Minimum Kubernetes version required is 1.13. This can be checked by running the command –
kubectl version --short
Step 1 - Install Linkerd as a Kubernetes Service Mesh
In order to install Linkerd as a Kubernetes Service Mesh, you need to download the Linkerd CLI. This CLI interacts with Linkerd, including installing the control plane onto your Kubernetes cluster.
Here’s the command to download the Linkerd CLI manually
xxxxxxxxxxcurl -sL https://run.linkerd.io/install | shYou can also download a CLI directly from the Linkerd releases page if you want to install a specific version.
Add the Linkerd to your path and also consider adding it to your .bashrc file.
xxxxxxxxxxexport PATH=$PATH:$HOME/.linkerd2/binIf you are using Homebrew, the command to install it is as follows:
xxxxxxxxxxbrew install linkerdOnce installed, you can verify the version of linkerd by running the command:
xxxxxxxxxxlinkerd versionStep 2 - Validate Linkerd CLI Installation
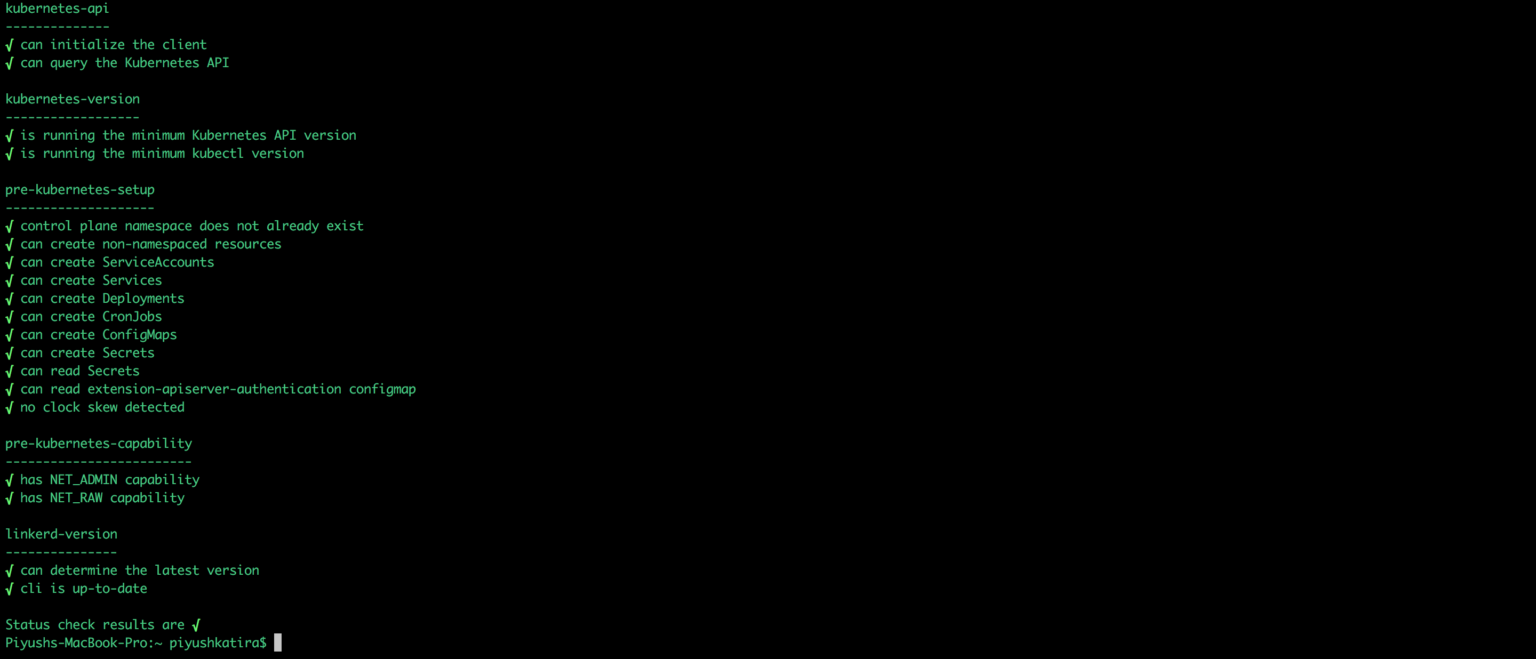
To ensure that Linkerd’s CLI has been successfully installed and all the pre-requisites like namespace Linkerd not being present etc., run the following command:
xxxxxxxxxxlinkerd check --preAll the checks in the above command should complete successfully, before proceeding.
Step 3 - Installing Linkerd’s Control plane
xxxxxxxxxxlinkerd install | kubectl apply -f -you can change configuration options like choosing a custom namespace for Linkerd Control plane by running the command:
xxxxxxxxxxlinkerd install -l | kubectl apply -f -For eg.
xxxxxxxxxxlinkerd install -l linkerdtest | kubectl apply -f -To explore all the available options while installing, run the command –
xxxxxxxxxxlinkerd install --helpOnce the installation is complete, you can run the following command to verify if all the Linkerd components are running successfully.
xxxxxxxxxxlinkerd checkStep 4 - Explore Linkerd Dashboard
You can explore the Linkerd Dashboard by running the following command:
xxxxxxxxxxlinkerd dashboard &If you are running this command from a Linux machine and would like the dashboard to listen on a specific interface instead of localhost by default, run the following command:
xxxxxxxxxxlinkerd dashboard --address &This command sets up a port forward from your local system to the linkerd-web pod.
Here’s the simple command to install the Linkerd’s Control plane with all the default configuration.
NOTE: If you cannot access browser from the machine you are running the above linkerd command, you can make Linkerd dashboard listen on a specific interface IP instead of localhost by default, you’ll have to edit the enforced-host container argument and set it to an empty string. Detailed instructions are here under Tweaking Host Requirement Section.
Step 5 - Install Demo Application
Install the emojivoto application in the corresponding namespace by running the command –
xxxxxxxxxxcurl -sL https://run.linkerd.io/emojivoto.yml \| kubectl apply -f -You can take a look at this application by using a port forward for the web-svc service associated with the emojivoto application by running the command:
xxxxxxxxxxkubectl -n emojivoto port-forward svc/web-svc 8080:80Then, access the application using – http://localhost:8080/
NOTE: If you cannot access browser from the machine you are running the above kubectl command, you can make use the –address switch so you can reach it from your local machine and access it via a browser. The complete command is:
xxxxxxxxxxkubectl -n emojivoto port-forward svc/web-svc 8080:80 --addressYou might notice that that some parts of emojivoto app are broken. this is intentional and you can debug it further by checking out this link.
Step 6 - Inject Linkerd into the Demo Application
You can inject Linkerd into the newly deployed Demo application by running the command –
xxxxxxxxxxkubectl get -n emojivoto deploy -o yaml \| linkerd inject - \| kubectl apply -f -The first part of the command gets all the manifests from the emojivoto namespace; second part injects it with linkerd related metadata and then reapplies the configuration.
There will be no downtime associated with this operation as it would be a rolling deploy.
You can check if the above operation was successful by running the following command:
xxxxxxxxxxlinkerd -n emojivoto check --proxyDemo app has an included load generator so you can observe the live metrics associated with the traffic flowing:
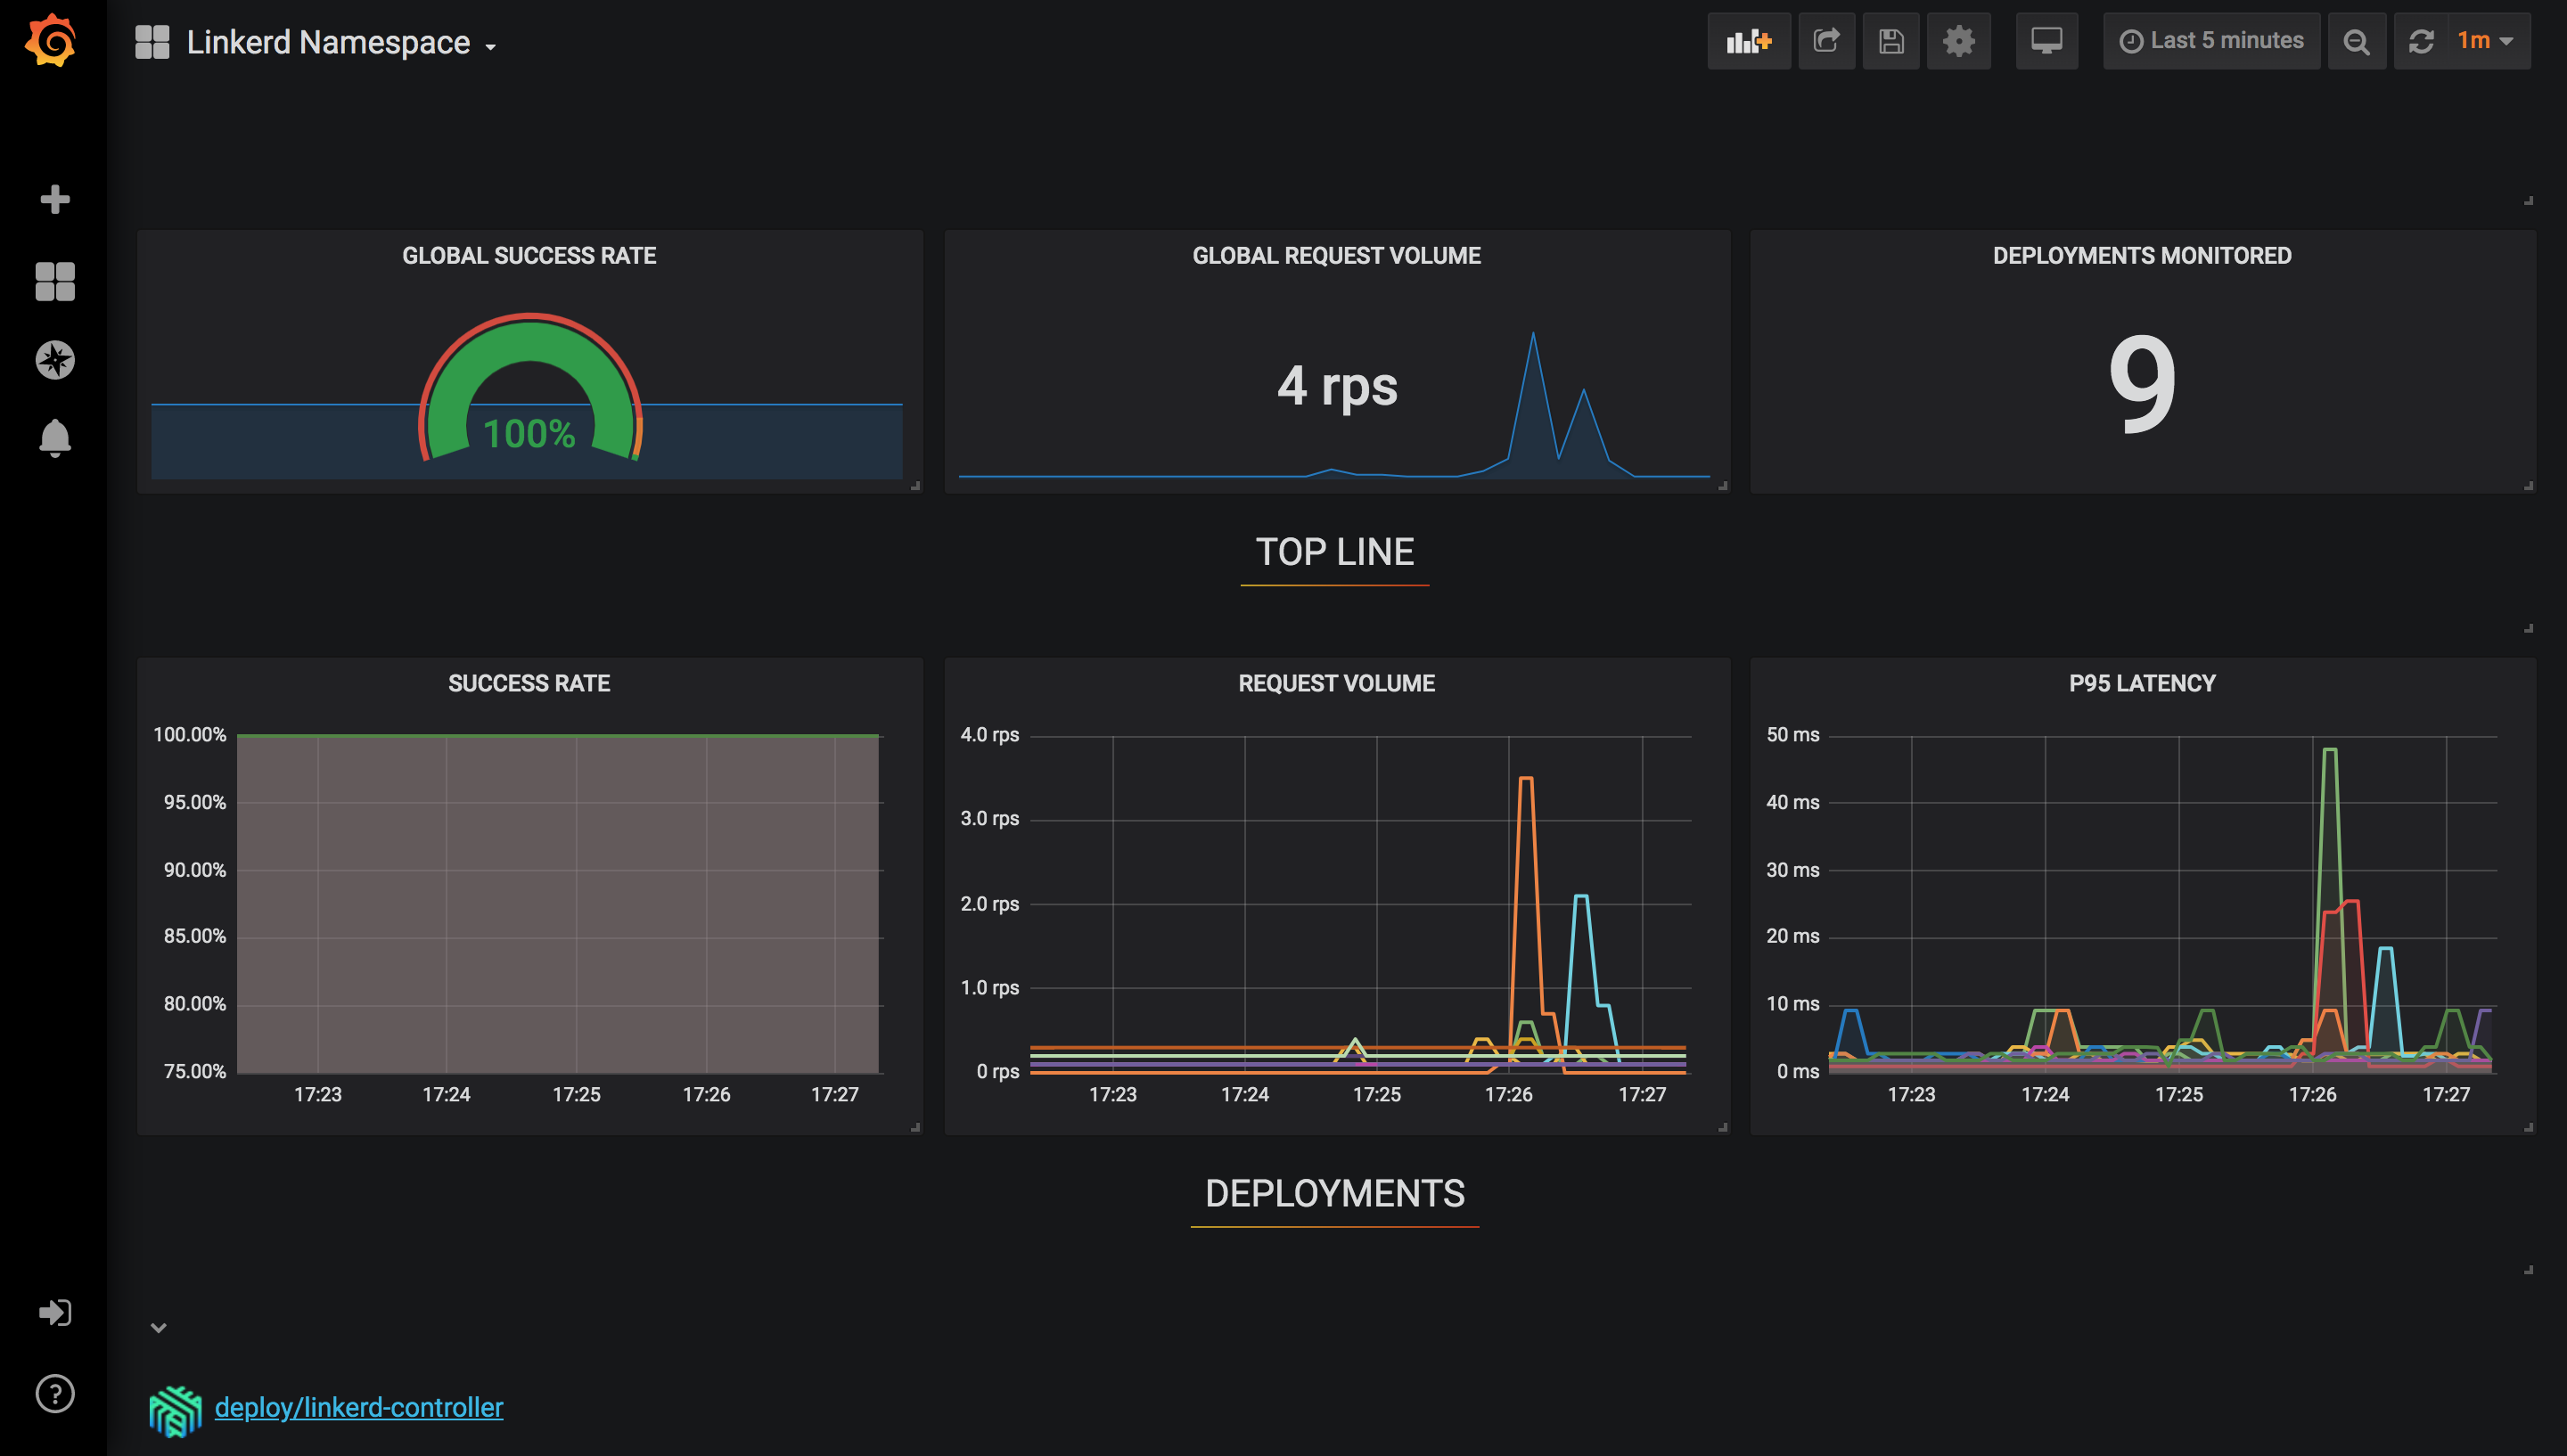
xxxxxxxxxxlinkerd -n emojivoto stat deployStep 7- Monitor Linkerd Metrics
There’s a Grafana instance that comes prebuilt that shows metrics collected by Prometheus such as latency, request volume and success rate.