PMK VM OVA
Platform9 has a purpose-built Ubuntu 20.04 virtual machine OVA/Template that can be used to simplify creating non-production clusters.
What is an OVA Image?
An OVA Image is a virtual machine template that includes an OS and application components. OVA files can be imported into VMware Fusion, Oracle VirtualBox and other popular virtual machine tools.
Why Ubuntu 20.04?
Ubuntu 20.04 is a market leading open source operating system that can run Kubernetes without issue.
Is the OVA Supported by Platform9?
Platform9 creates, packages and tests the OVA for use in non-production environments only. We do not support the OS or the OVA for use in any form other than testing.
Downloading & Launching the OVA
The OVA can be downloaded here
Once the OVA has downloaded, you can open the file using:
- VMware Fusion
- Oracle VirtualBox
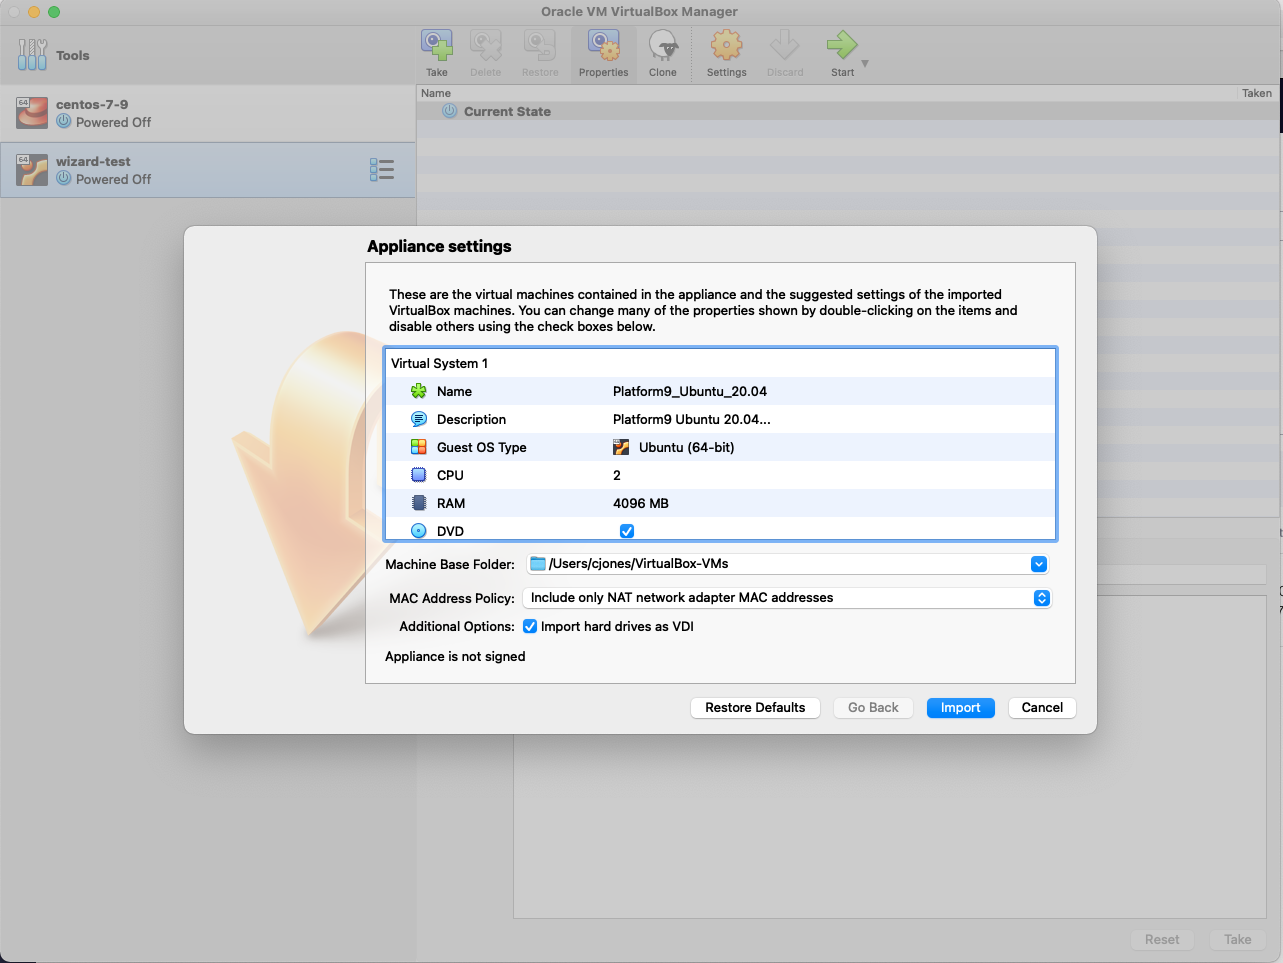
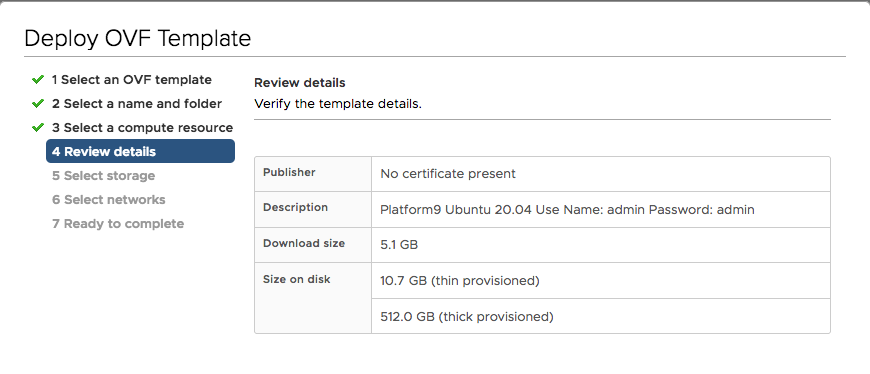
When the OVA image is opened, a screen will appear that enables customization of the image. The image is preconfigured to use 4 GB of RAM, but we recommend increasing the RAM to at least 8 GB if your environment supports this.
To start the OVA select "Import" and the image will be added to your environment, once the image has been imported boot the VM.
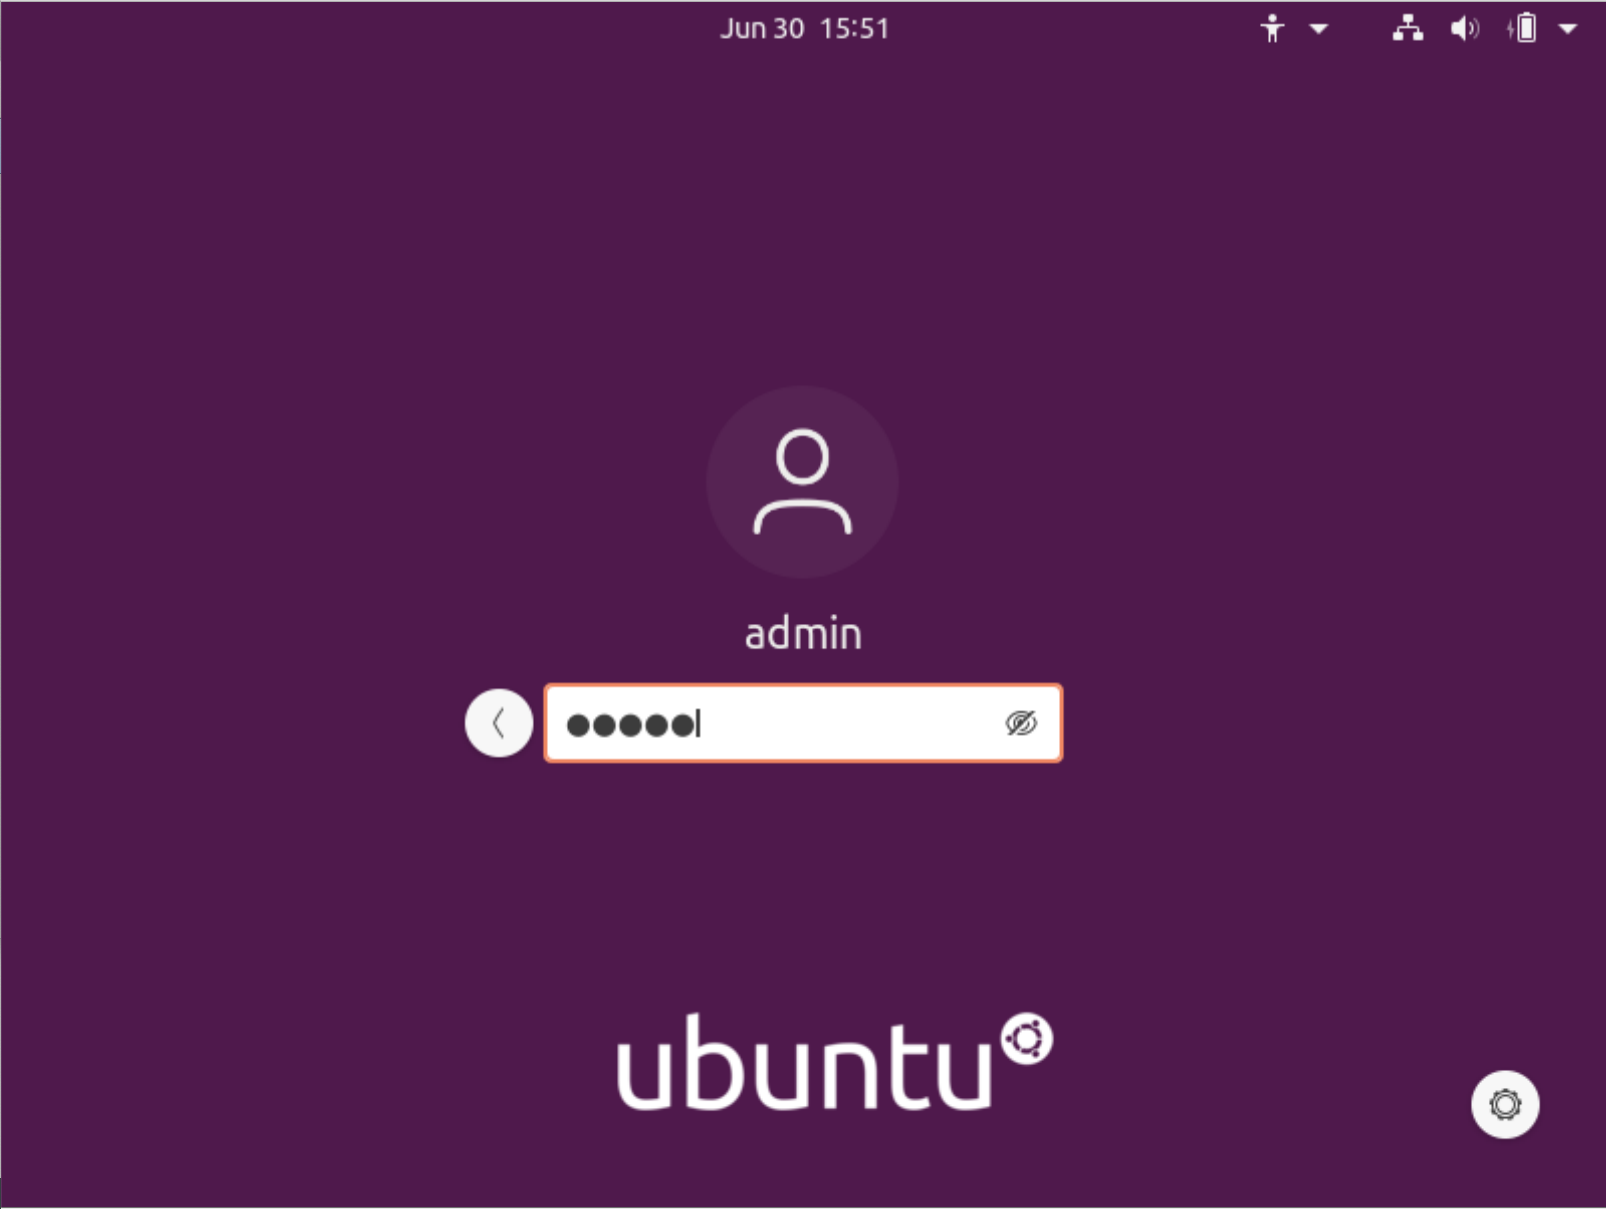
Once the VM has started, use the default credentials to login:
User: Admin
Password: Admin
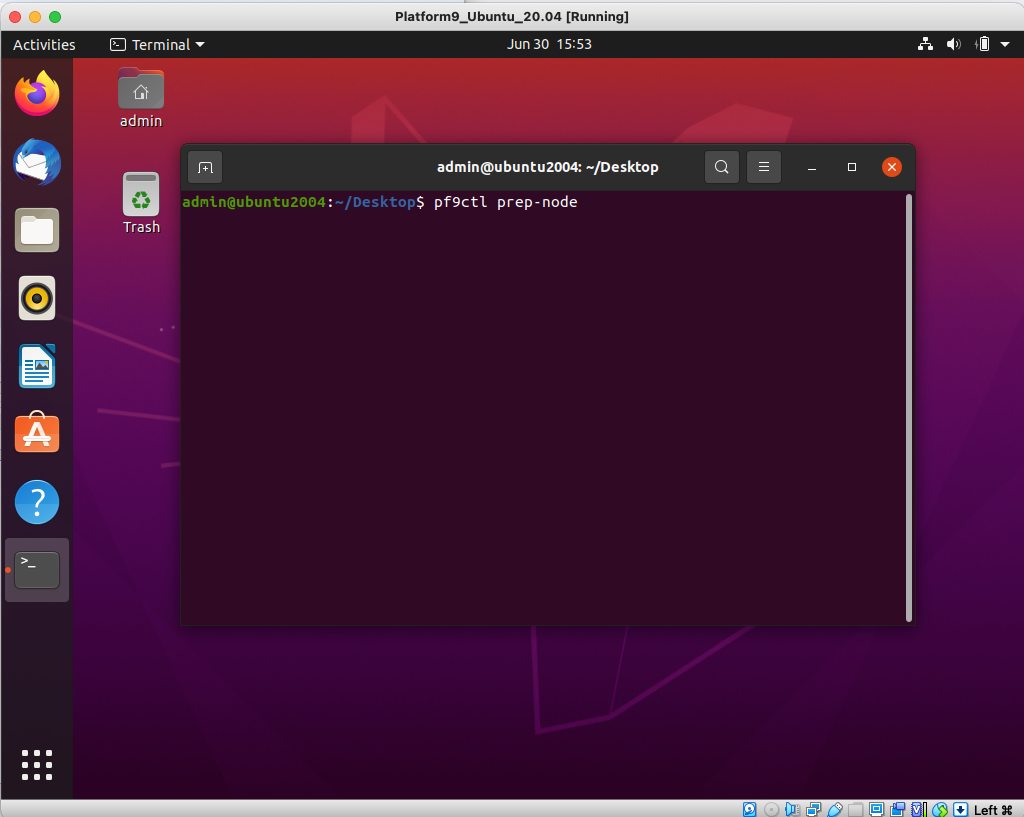
After logging into the VM, right-click on the desktop and select "Open in Terminal" to open a terminal interface.
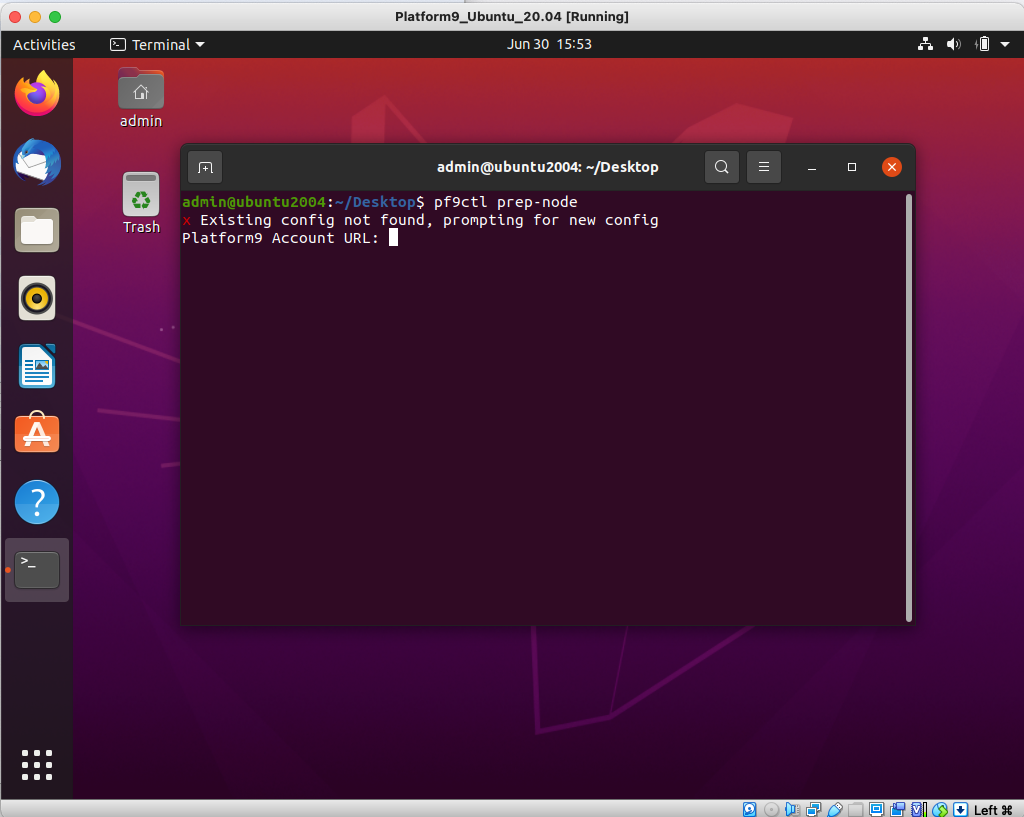
Within the terminal run pf9ctl prep-node
Configure the CLI using your Platform9 SaaS Management Plane URL, User Account, Region and Tenant details. After the correct configuration has been supplied, the CLI will connect the VM to your SaaS Management Plane and the VM can be used to build or scale a cluster.
Correcting the PF9 OVA Deployment Error in VMware vCenter
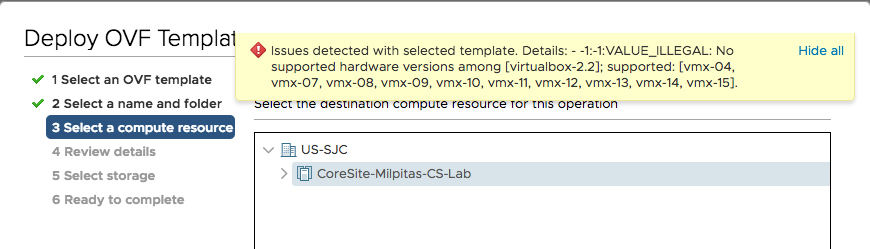
If you are receiving the following error when trying to deploy the OVA in VMware vCenter, use the following steps as a temporary guide to address this issue until the new OVA supporting VMware is published next week.
“The provided manifest file is invalid: Invalid OVF checksum algorithm: SHA1”

Step 1. Run the following commands to convert the OVA to SHA256 if the downloaded file fails to upload with the following error.
$ ovftool --shaAlgorithm=SHA256 Platform9_Ubuntu_20.04.ova Platform9_Ubuntu_20.04.ova-SHA256.ova /Applications/VMware\ OVF\ Tool/ovftool --lax Platform9_Ubuntu_20.04.ova-SHA256.ova Platform9_Ubuntu_20.04.ova-SHA256.vmxOpening OVA source: Platform9_Ubuntu_20.04.ova-SHA256.ovaThe manifest validatesOpening VMX target: Platform9_Ubuntu_20.04.ova-SHA256.vmxWarning: - Line 31: Unsupported hardware family 'virtualbox-2.2'. - Line 89: OVF hardware element 'ResourceType' with instance ID '7': No support for the virtual hardware device type '35'.Writing VMX file: Platform9_Ubuntu_20.04.ova-SHA256.vmxTransfer CompletedCompleted successfullyAfter this, you will see the following issue when deploying the OVA (This is expected behavior).
Step 2. Next, open the vmx file in vim and modify line 6 in the file Platform9_Ubuntu_20.04.ova-SHA256.vmx.
vim Platform9_Ubuntu_20.04.ova-SHA256.vmxStep 3. On LINE 6 of the .vmx file, Change the value FROM 18 to 13.
#virtualhw.version = “18” tovirtualhw.version = “13”Step 4. Then, convert the vmx file back to an OVA again.
$ /Applications/VMware\ OVF\ Tool/ovftool --lax Platform9_Ubuntu_20.04.ova-SHA256.vmx Platform9_Ubuntu_20.04_hw13.ova-SHA256.ovaNow you should be able to deploy the OVA file without any errors.
We will be pushing out an updated OVA next week to address this issue.