Install Portworx
Portworx is a hybrid cloud storage platform that is production ready and supports native integrations with VMware, AWS, Azure, Google and more. Portworx can also be used to build storage on physical servers or virtual machines that have mounted unformatted disks which is ideal for using Protworx with Platform9 BareOS clusters.
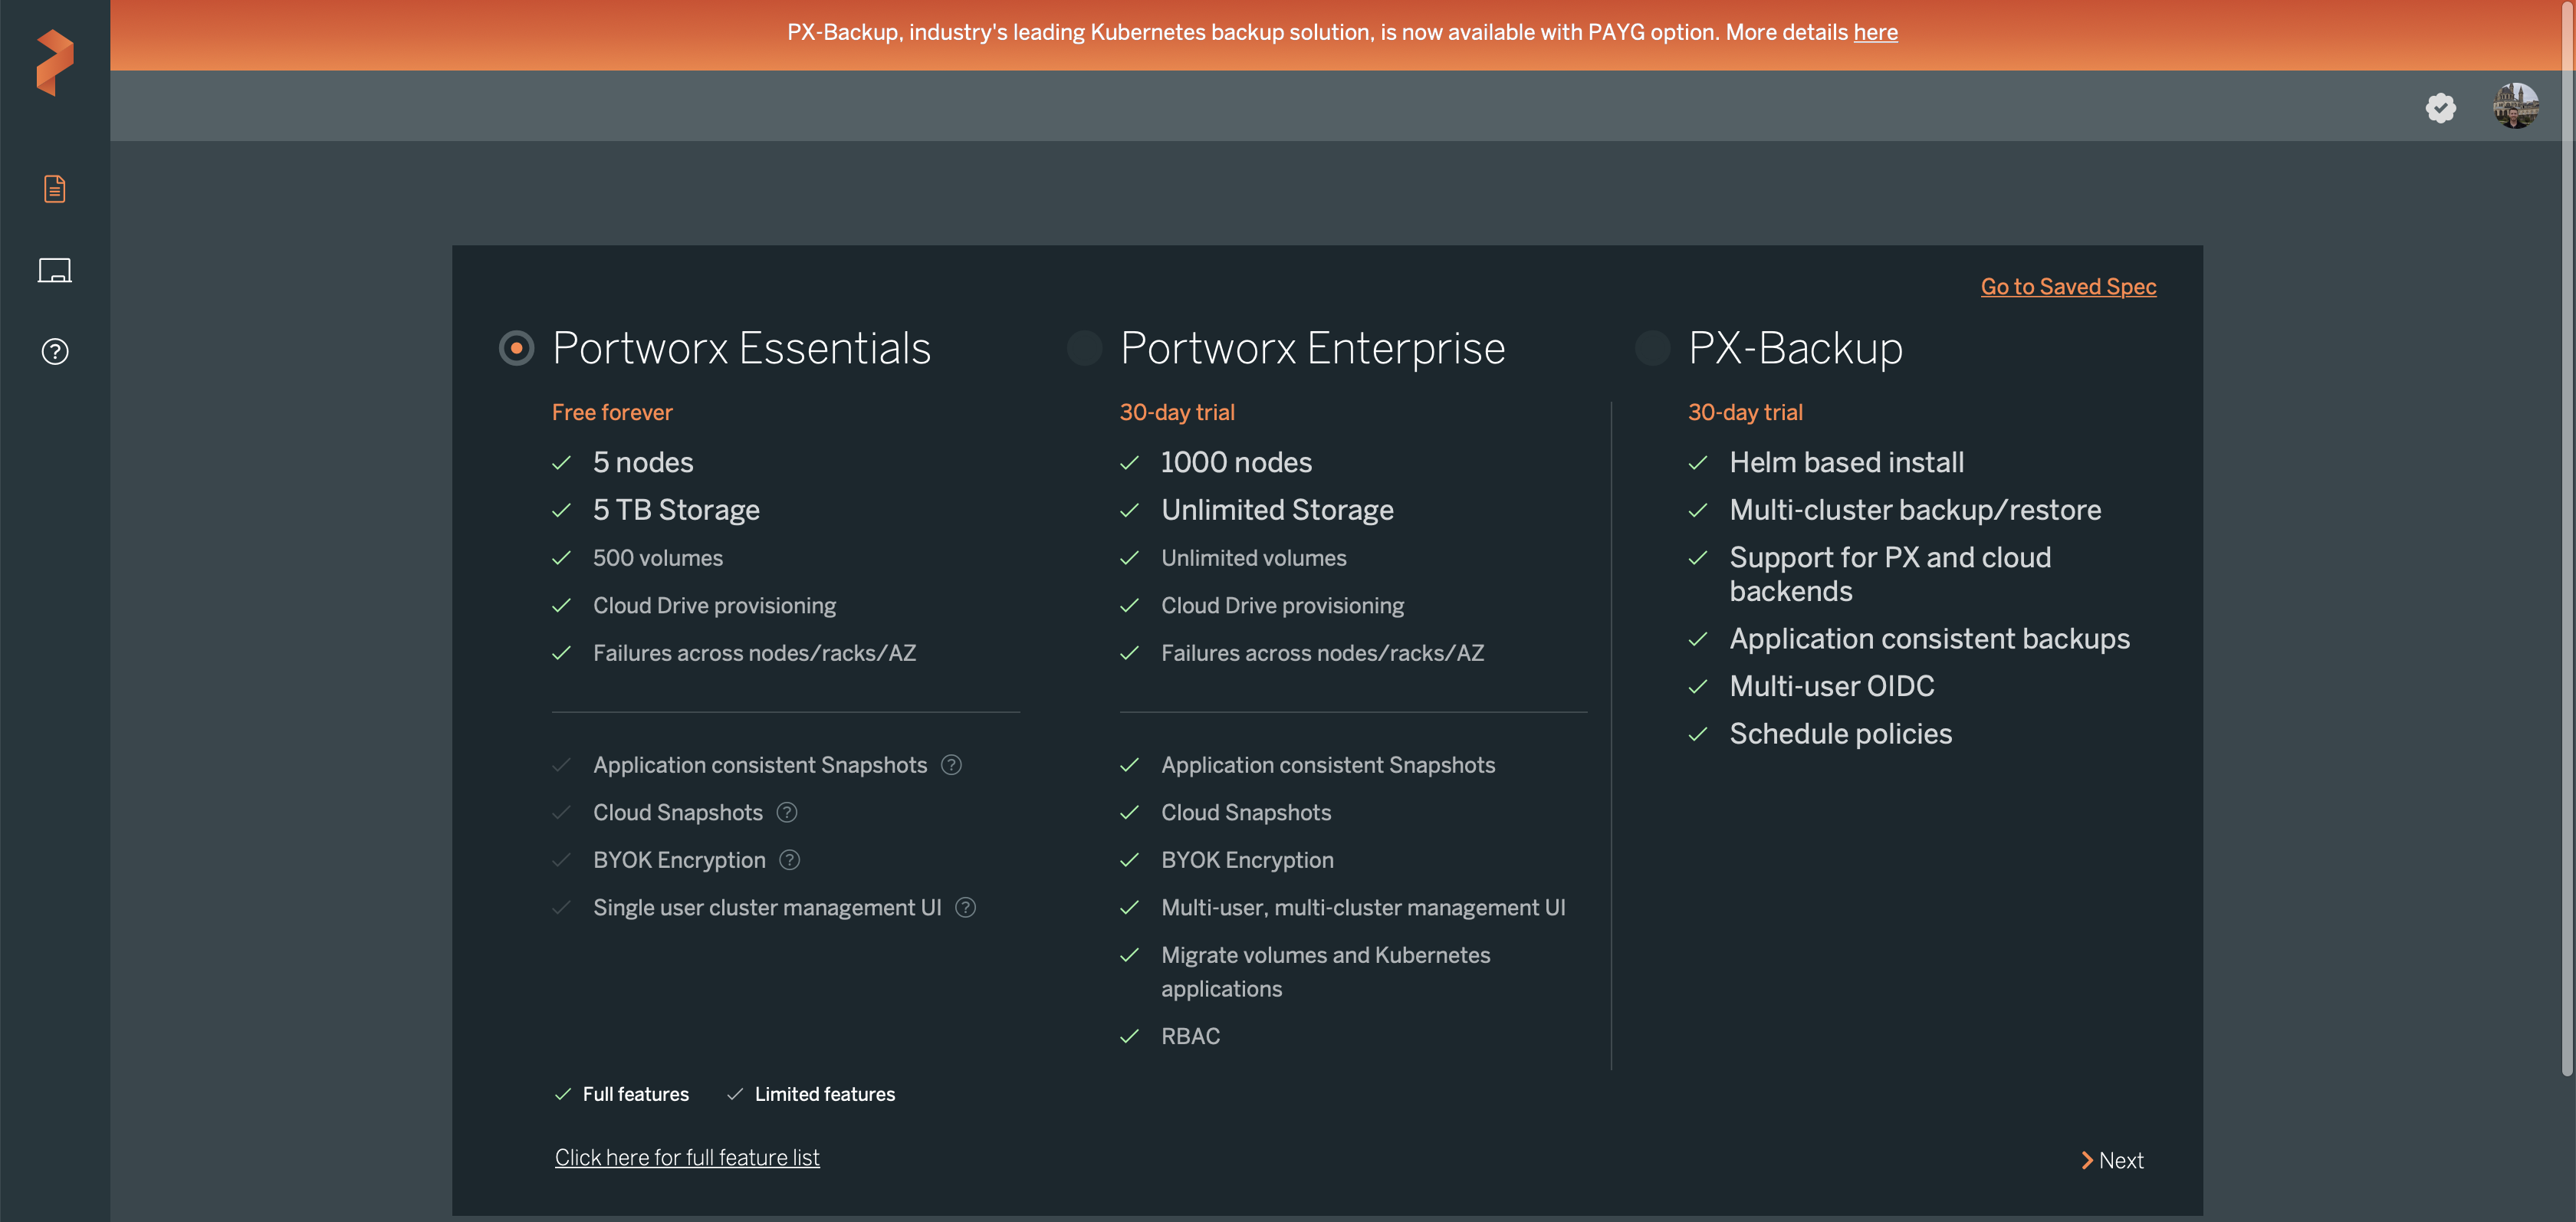
Portworx has a free platform, head to https://central.portworx.com/landing/register to create your free account. The free account allows you to deploy on clusters with up to 5 nodes with the following features:
- 5 nodes
- 5 TB Storage
- 500 volumes
- Cloud Drive provisioning
- Failures across nodes/racks/AZ
The full details of Portworx Essentials can be found here and the product documentation is here.
The following guide details how to deploy Portworx for a non-production/PoC environment.
Setup Portworx PoC
The minimum supported size for a Portworx cluster is three nodes. Each node must meet the following hardware, software, and network requirements:
| Requirement | ||
|---|---|---|
| Nodes | Minimum 3 Worker Nodes | |
| CPU | 4 CPU | |
| RAM | 4GB | |
Disk (free space)
| 2GB 3GB | |
| Backing drive | 8GB (minimum required) 128 GB (minimum recommended) | |
| Supported Storage | Storage drives must be unmounted block storage:
| |
| Ethernet NIC card | 10 GB (recommended) |
For the full list of prerequisites please read the Portworx Documentation here.
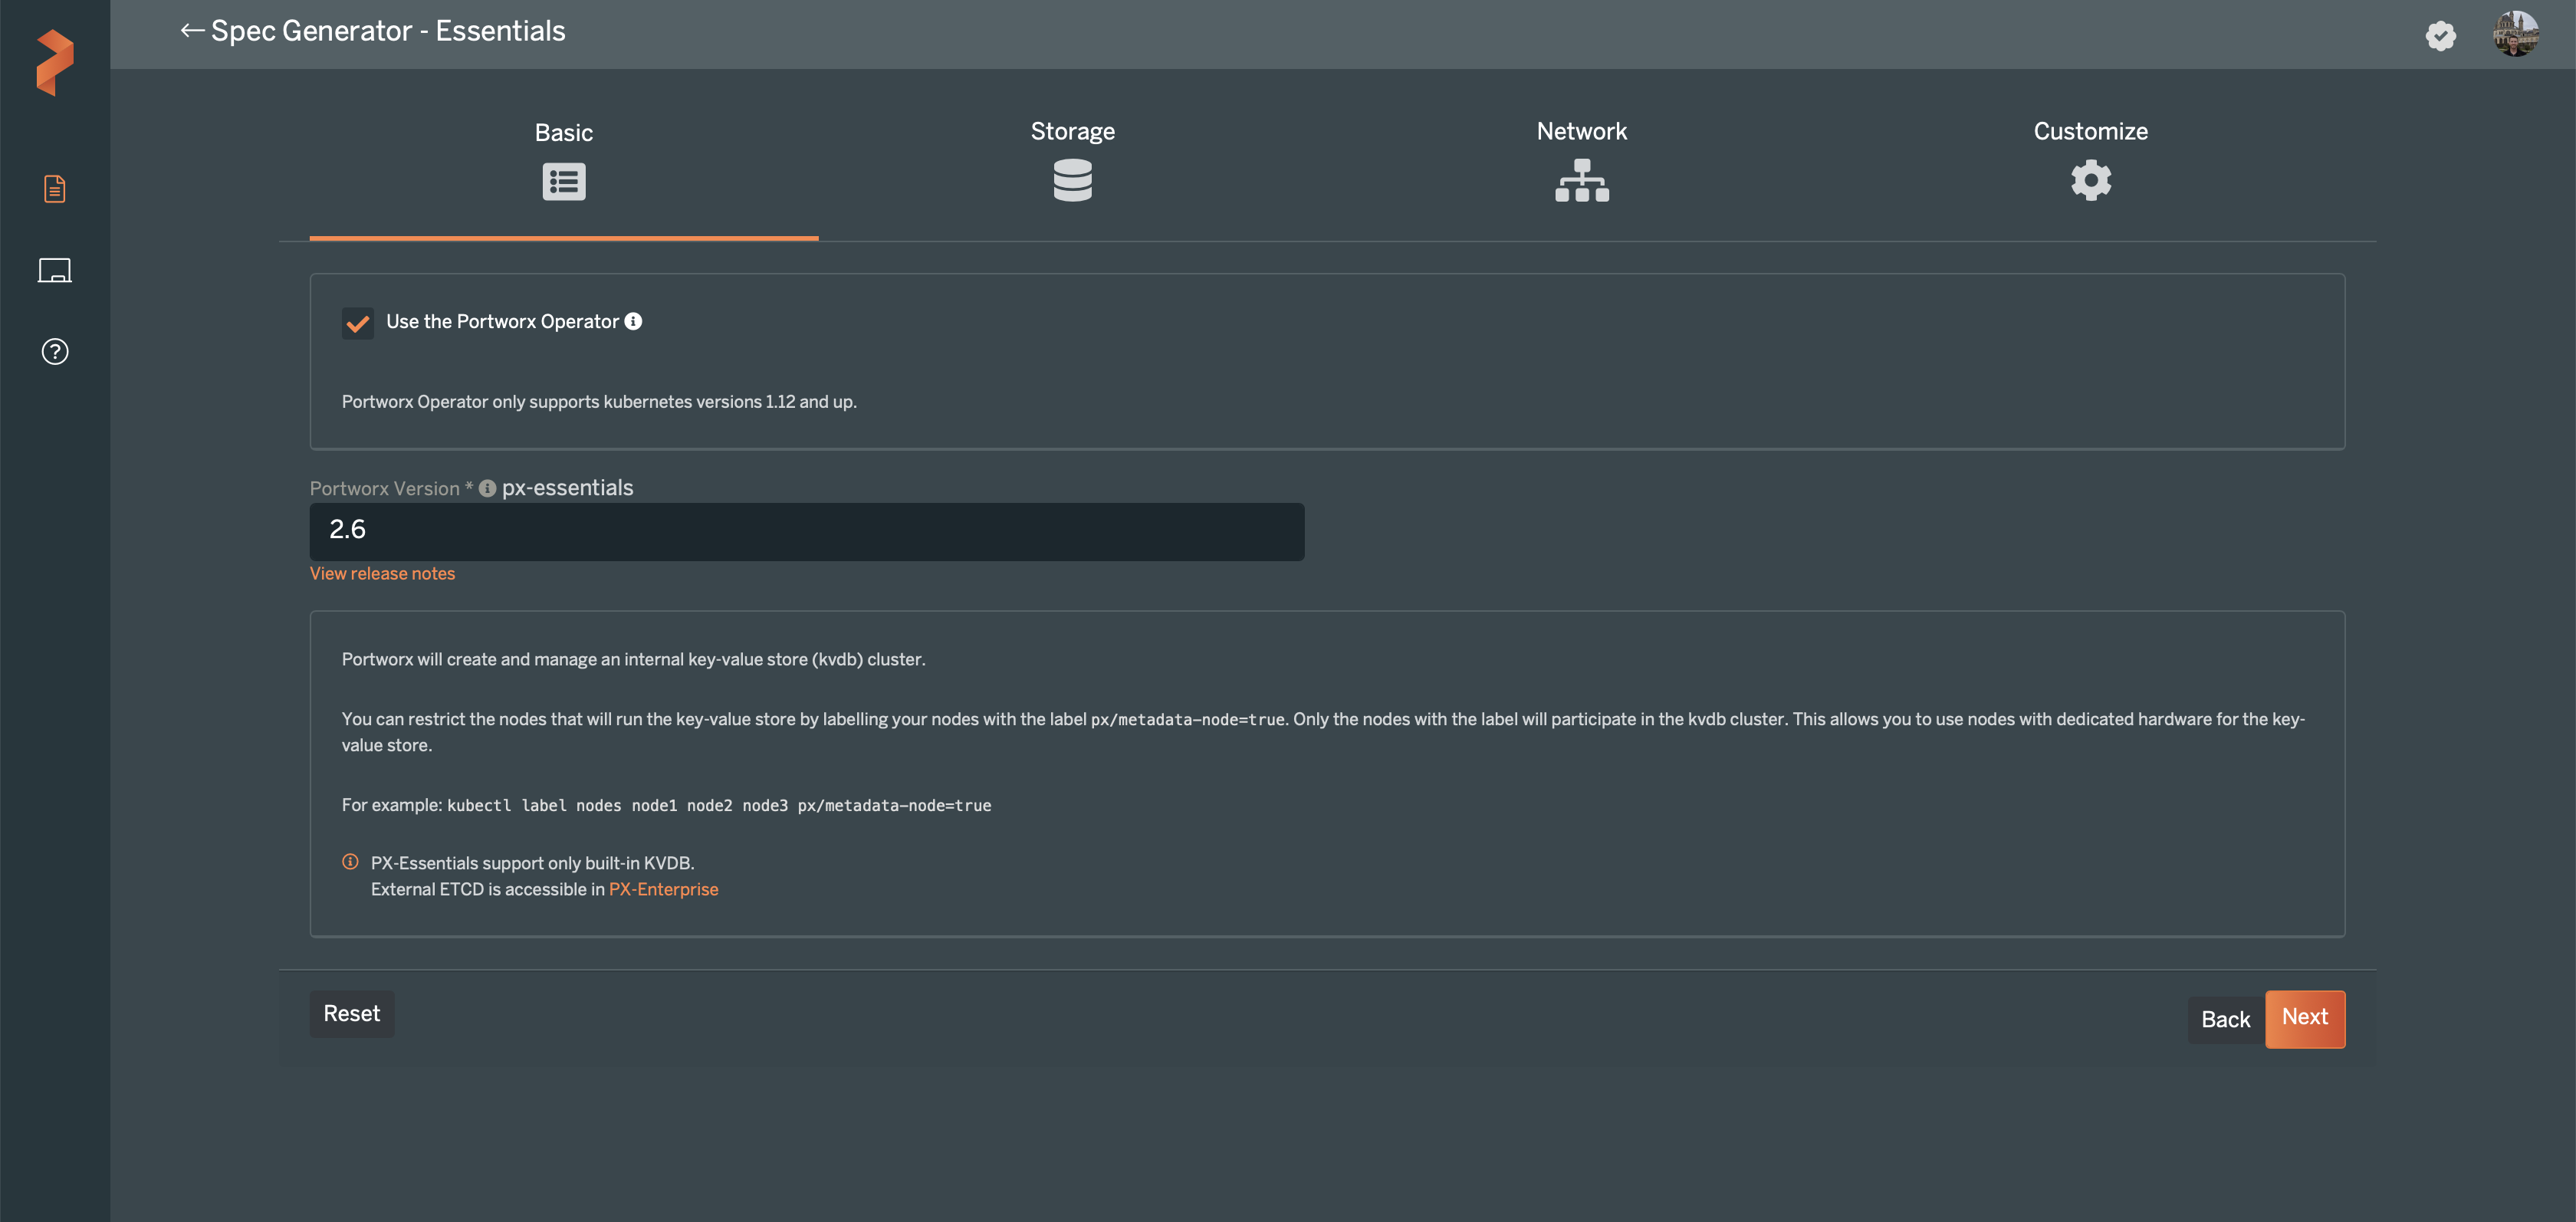
Step 1 - Create a Storage Specification
Portworx has a step by step wizard that will create a specification that is used to configure the platform. The following steps will create a storage spec for non-production use on a BareOS cluster. To use Portworx on VMware or a cloud provider ensure you select "Cloud" on the "Storage" step.
To see the steps to configure a production cluster or use a cloud provider view the Portworx documentation here.
Select Portworx Essentials to start.
Select "Use Portworx Operator"
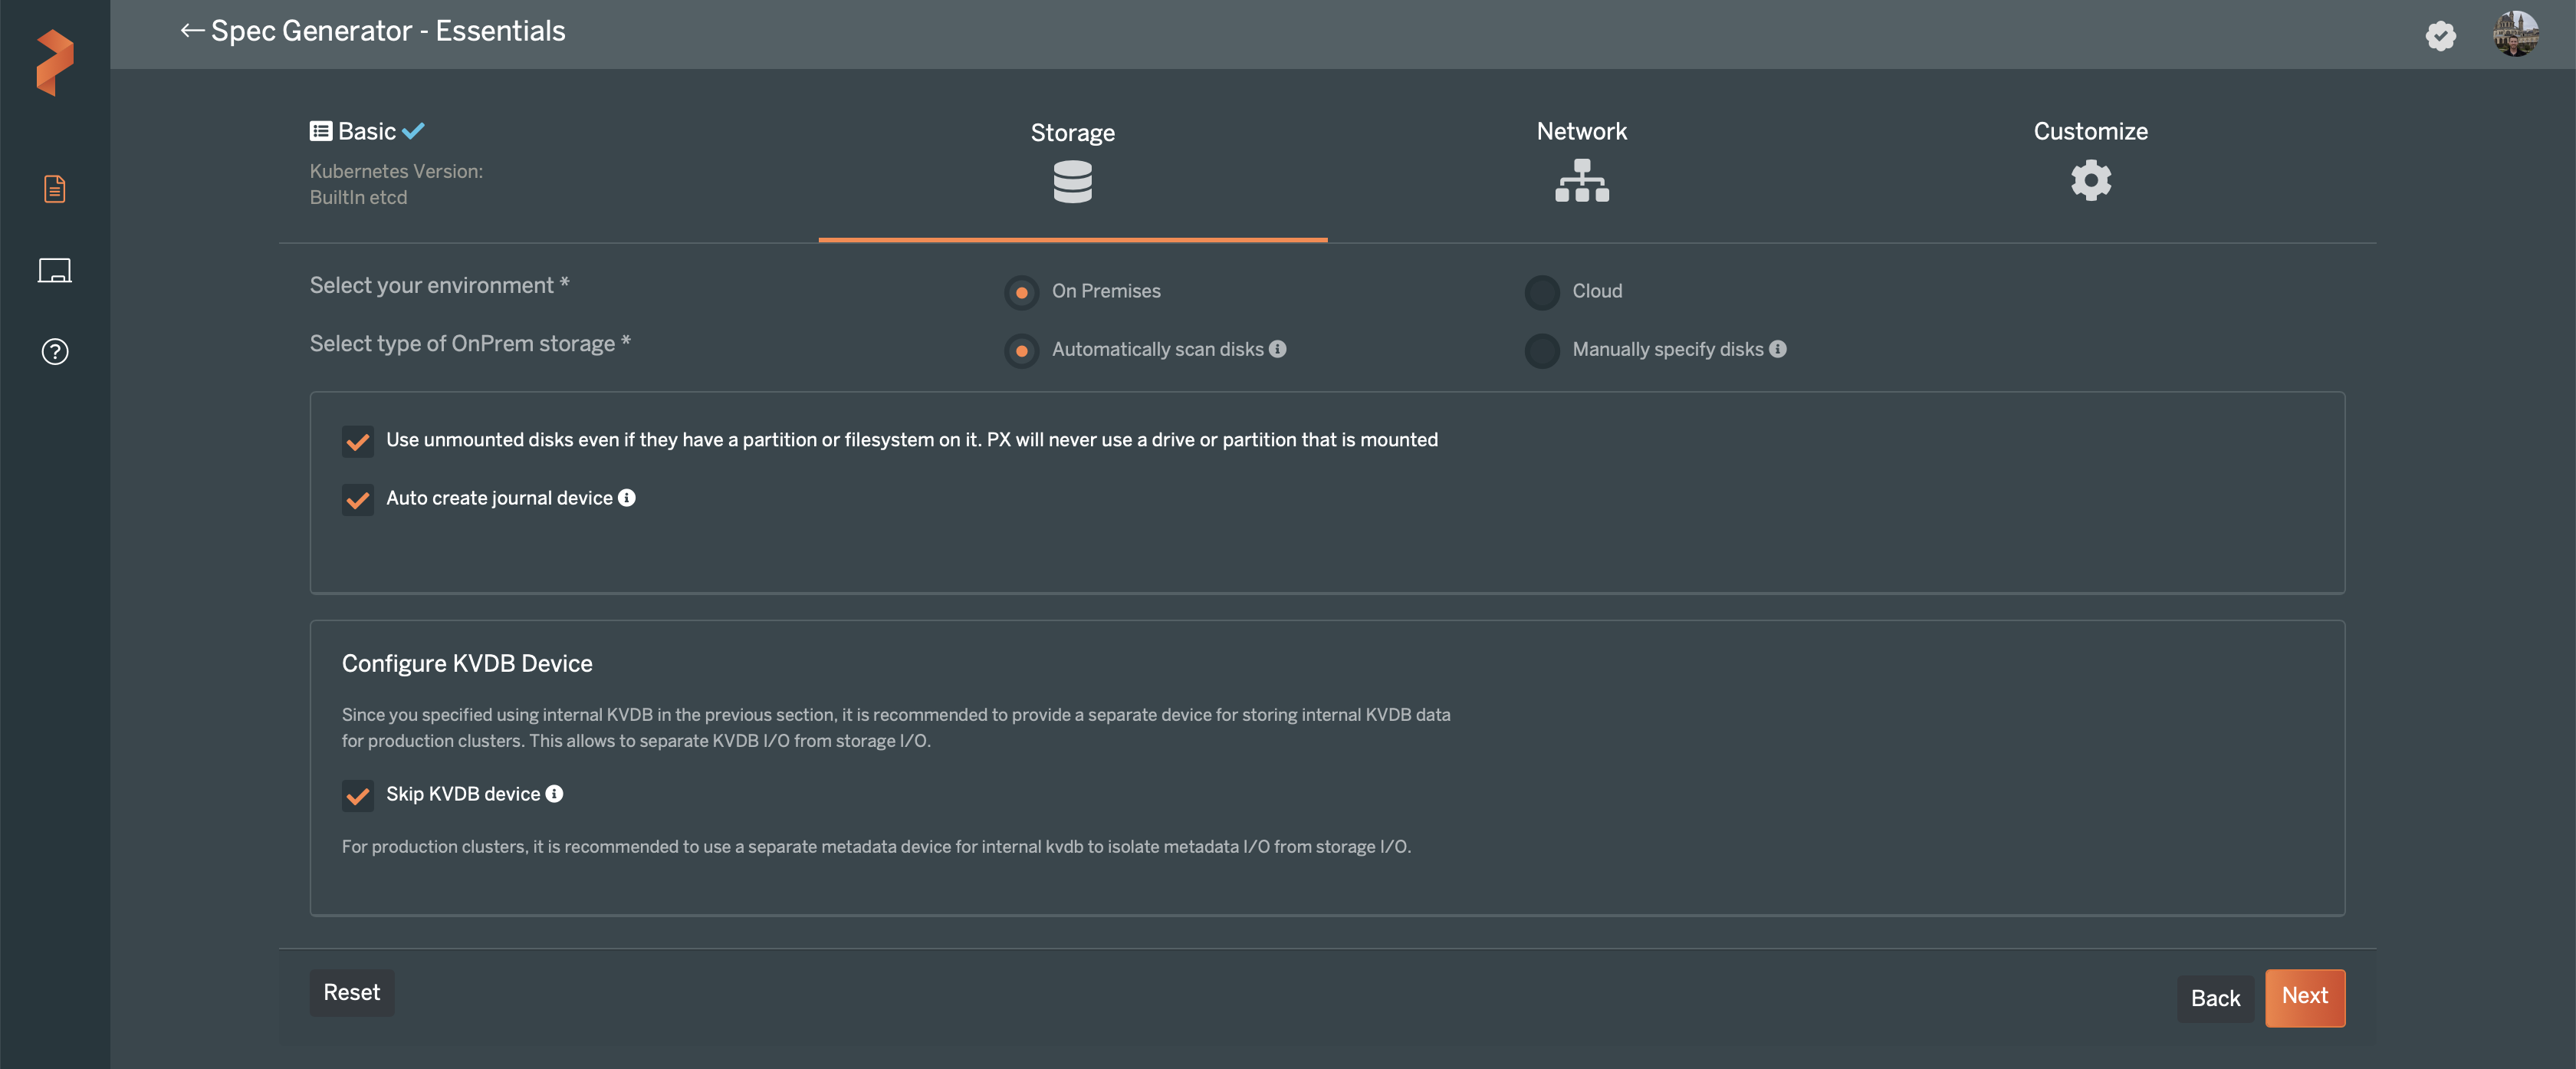
Select On Premises and Automatically scan disks as well as enabling:
- Use unmounted disks
- Auto Create Journal Device
- Skip KVDB Device (Do not use this in production deployments)
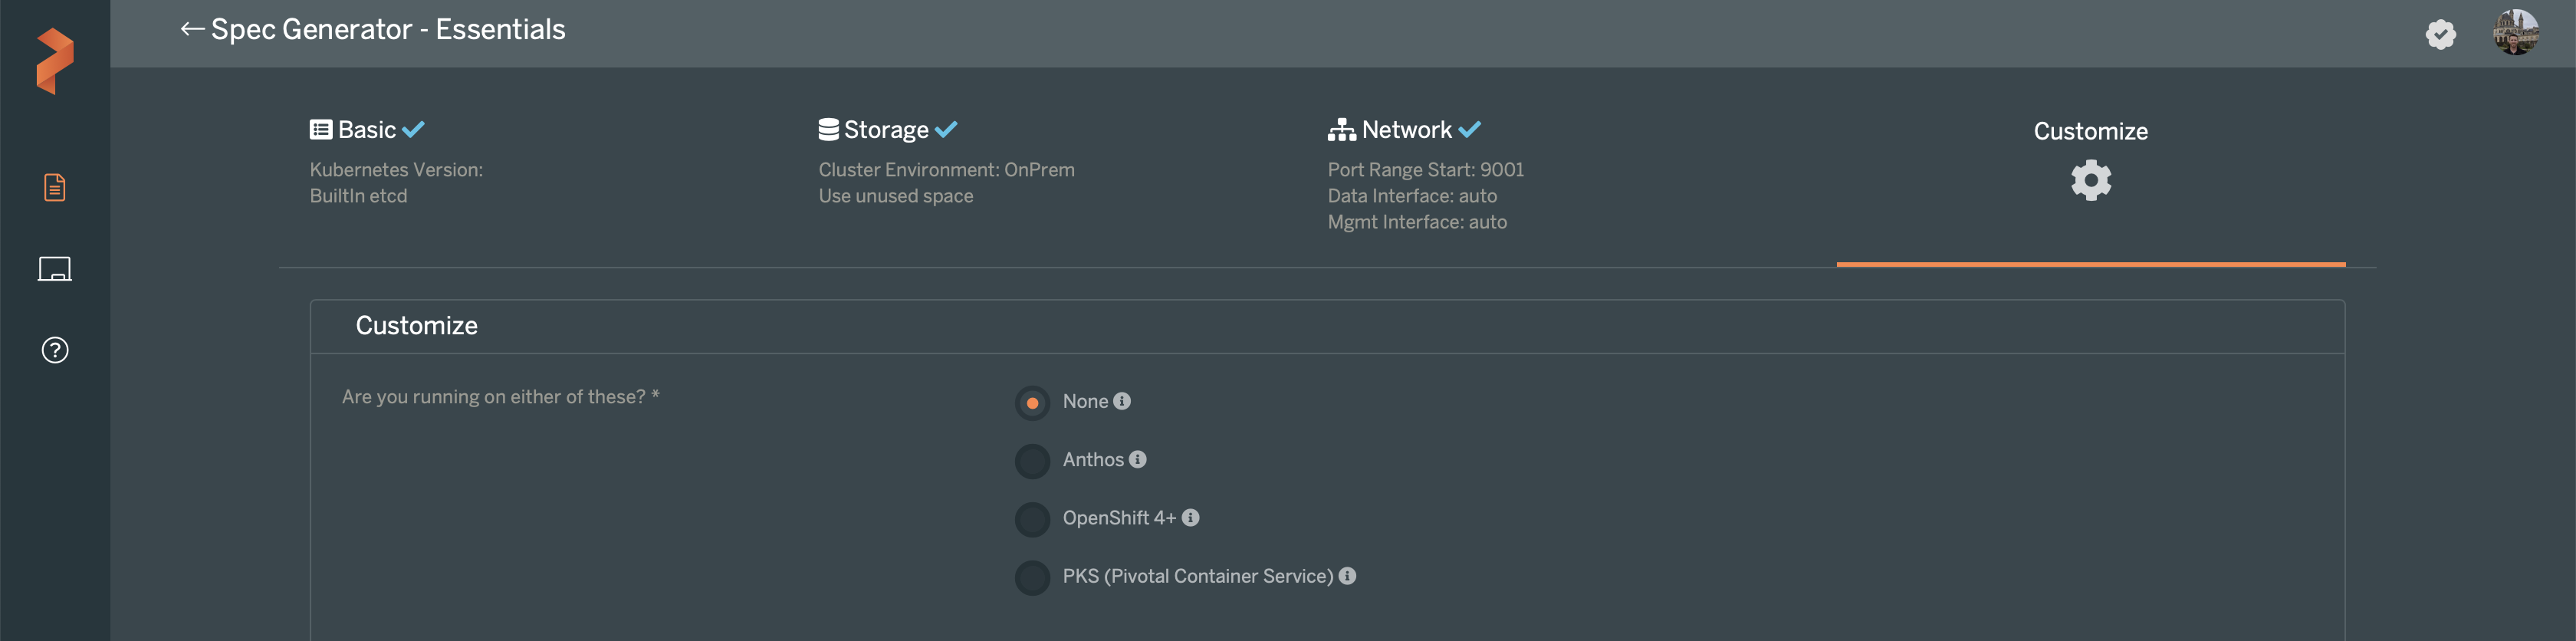
For network leave all items as the default.

The final step is Customization. First select None for the first customization.
Then expand ADVANCED SETTINGS and enable all the checkboxes.
____×

Finally, provide a name and tag for your storage configuration specification.
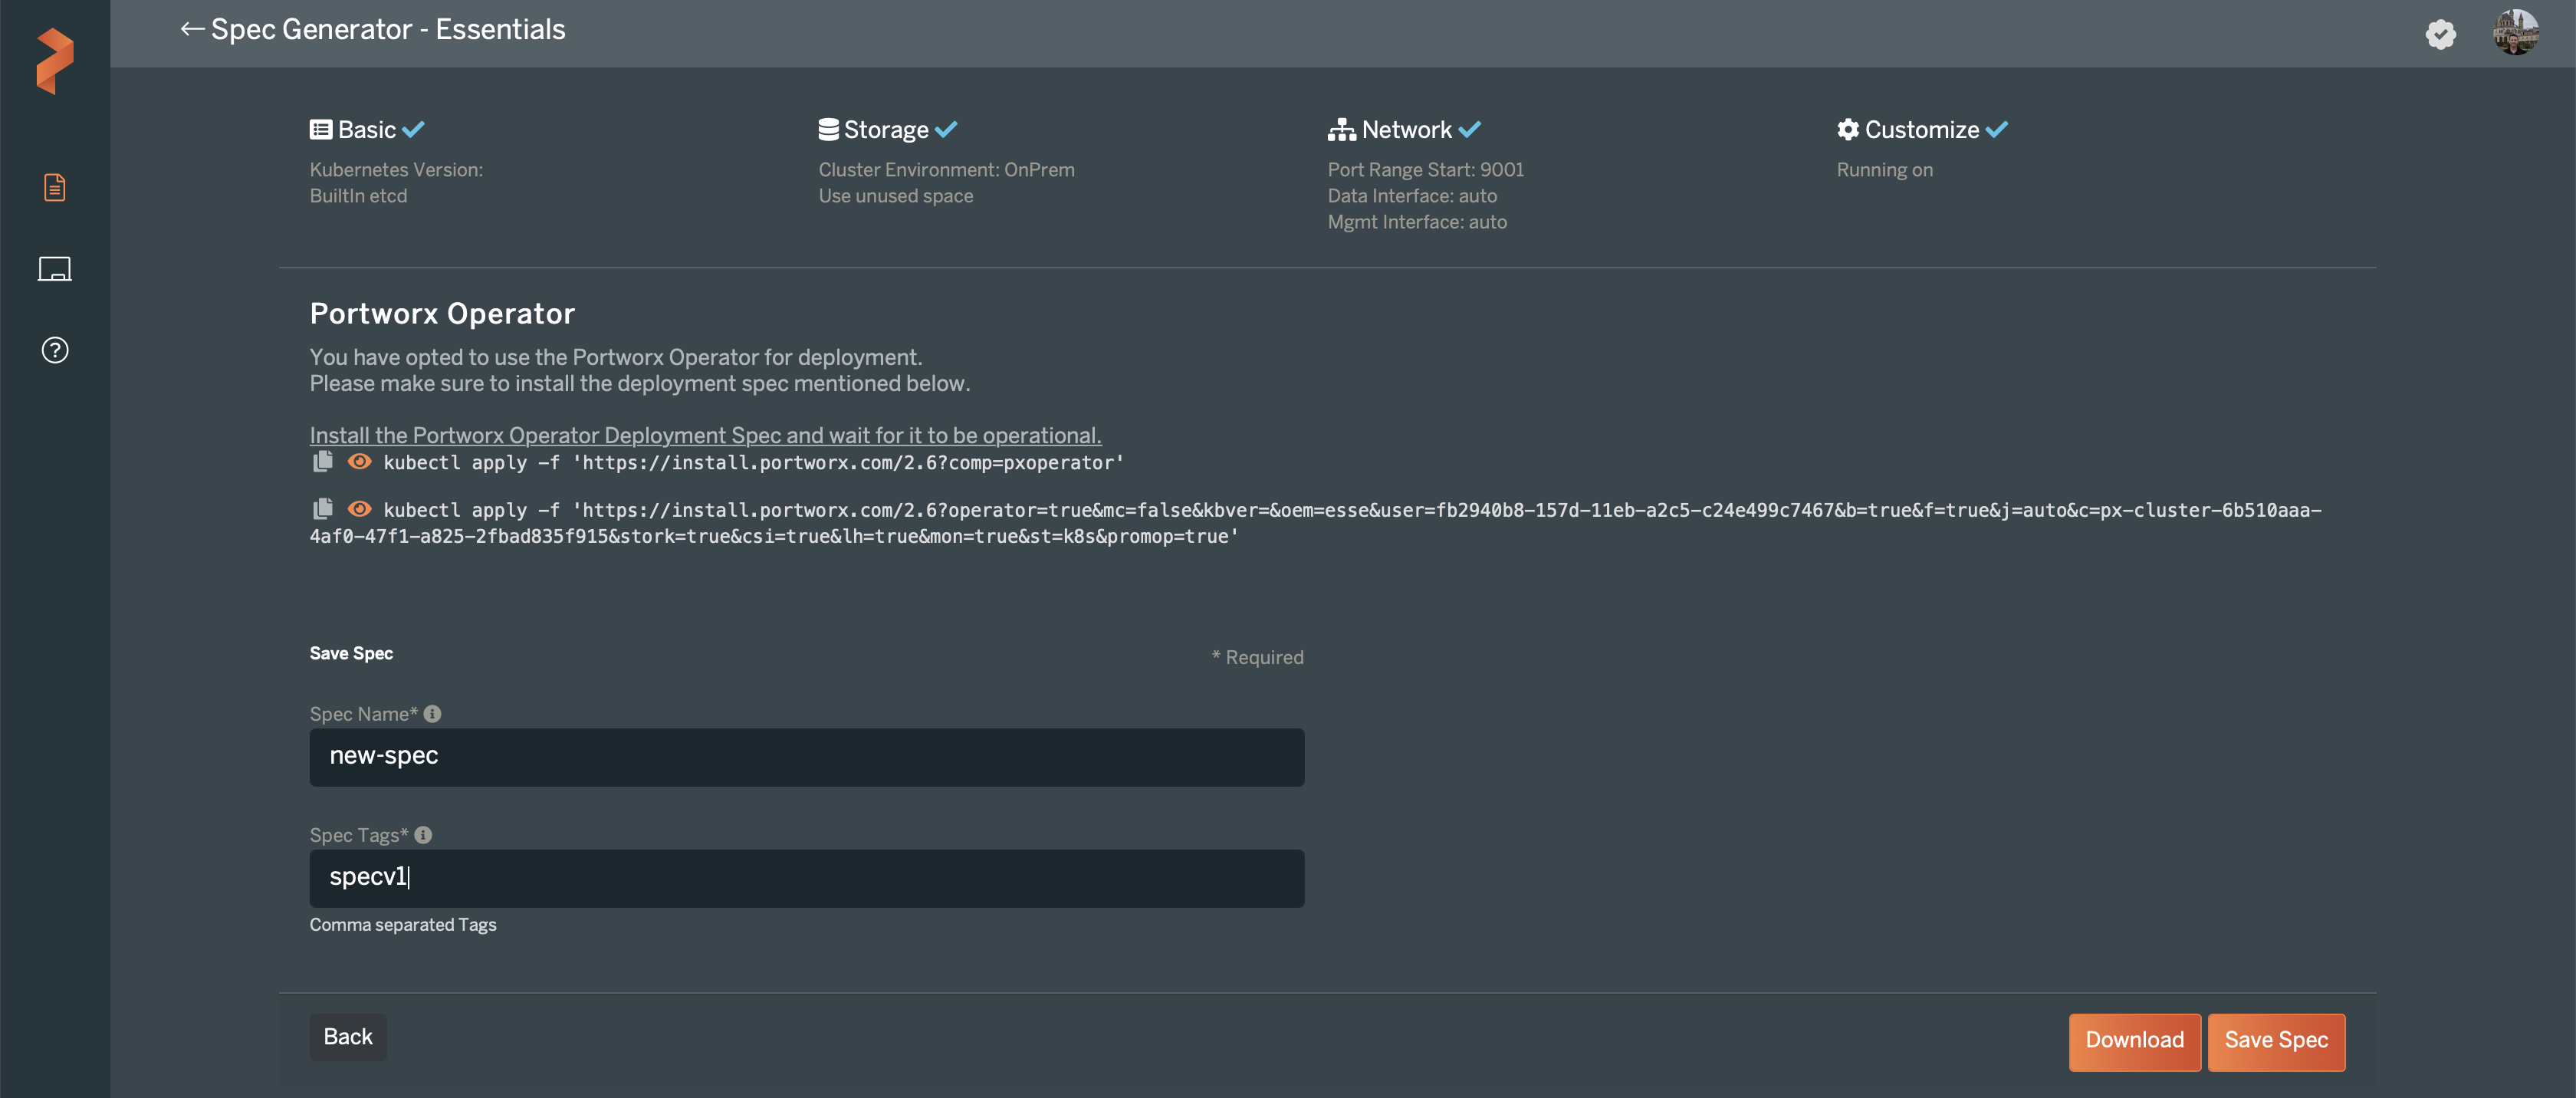
Step 2 - Deploy Storage Specification
Once your specification is configured you can use the provided commands to deploy Portworx.
- Install the Operator
kubectl apply -f 'https://install.portworx.com/2.6?comp=pxoperator'serviceaccount/portworx-operator createdclusterrole.rbac.authorization.k8s.io/portworx-operator createdclusterrolebinding.rbac.authorization.k8s.io/portworx-operator createddeployment.apps/portworx-operator created2. Install the Storage specification
kubectl apply -f 'https://install.portworx.com/2.6?operator=true&mc=false&kbver=&oem=esse&user=fb2940b8-157d-11eb-a2c5-c24e499c7467&b=true&f=true&j=auto&c=px-cluster-8d97ae0a-bc8d-4b9f-a091-27b6778f1778&stork=true&csi=true&lh=true&mon=true&st=k8s&promop=true'storagecluster.core.libopenstorage.org/px-cluster-8d97ae0a-bc8d-4b9f-a091-27b6778f1778 createdsecret/px-essential created3. Check Installation
Run the following command to view the status of Portworx.
kubectl -n kube-system get storagenodes -l name=portworxThe output will show all of the Portworx nodes and their state.
10.128.130.16 12433ab8-c7e9-46cb-a722-70669a9f5f7b Online 2.6.3.0-4419aa4 21m10.128.130.25 a91427a2-4eb1-44b9-8bc0-9b335911d40b Online 2.6.3.0-4419aa4 20m10.128.130.29 fa0a0f82-34bd-4cb5-8c42-d1443aa7d6fc Online 2.6.3.0-4419aa4 32mIf you need to troubleshoot run the following command
kubectl -n kube-system describe storagenode 10.128.130.29The output will quite verbose, the events section will be most helpful
Events: Type Reason Age From Message ---- ------ ---- ---- ------- Warning FailedSync 33m storagenode-controller Operation cannot be fulfilled on pods "px-cluster-8d97ae0a-bc8d-4b9f-a091-27b6778f1778-6xh9l": the object has been modified; please apply your changes to the latest version and try again Normal PortworxMonitorImagePullInPrgress 33m portworx, 10.128.130.29 Portworx image portworx/px-essentials:2.6.3 pull and extraction in progress Warning NodeStartFailure 31m (x12 over 32m) portworx, 10.128.130.29 Failed to start Portworx: failed to setup internal kvdb: failed to provision internal kvdb: Init Failure: Please remove /etc/pwx/.private.json to initialize a new node. WARNING: Removing /etc/pwx/.private.json will remove metadata from this node. Normal PortworxMonitorImagePullInPrgress 17m portworx, 10.128.130.29 Portworx image portworx/px-essentials:2.6.3 pull and extraction in progress Warning InternalKvdbSetupFailed 12m (x143 over 32m) portworx, 10.128.130.29 failed to setup internal kvdb: failed to provision internal kvdb: Init Failure: Please remove /etc/pwx/.private.json to initialize a new node. WARNING: Removing /etc/pwx/.private.json will remove metadata from this node. Warning NodeStateChange 6m39s portworx, 10.128.130.29 Node is not in quorum. Waiting to connect to peer nodes on port 9002. Normal NodeStartSuccess 6m14s portworx, 10.128.130.29 PX is ready on this node