Set up Microsoft Entra ID
Overview
Configure single sign-on (SSO) for your PCD environment using Microsoft Entra ID. This integration allows you to authenticate PCD resources through your existing Microsoft accounts.
Prerequisites
Before you begin, ensure you have:
- Administrative access to Microsoft Entra ID
- Administrative access to your PCD environment
- A Linux system with Python 3 installed
- Your PCD domain FQDN (fully qualified domain name)
Step 1: Create an Enterprise Application in Entra ID
Create a new enterprise application in Microsoft Entra ID to handle the SSO integration.
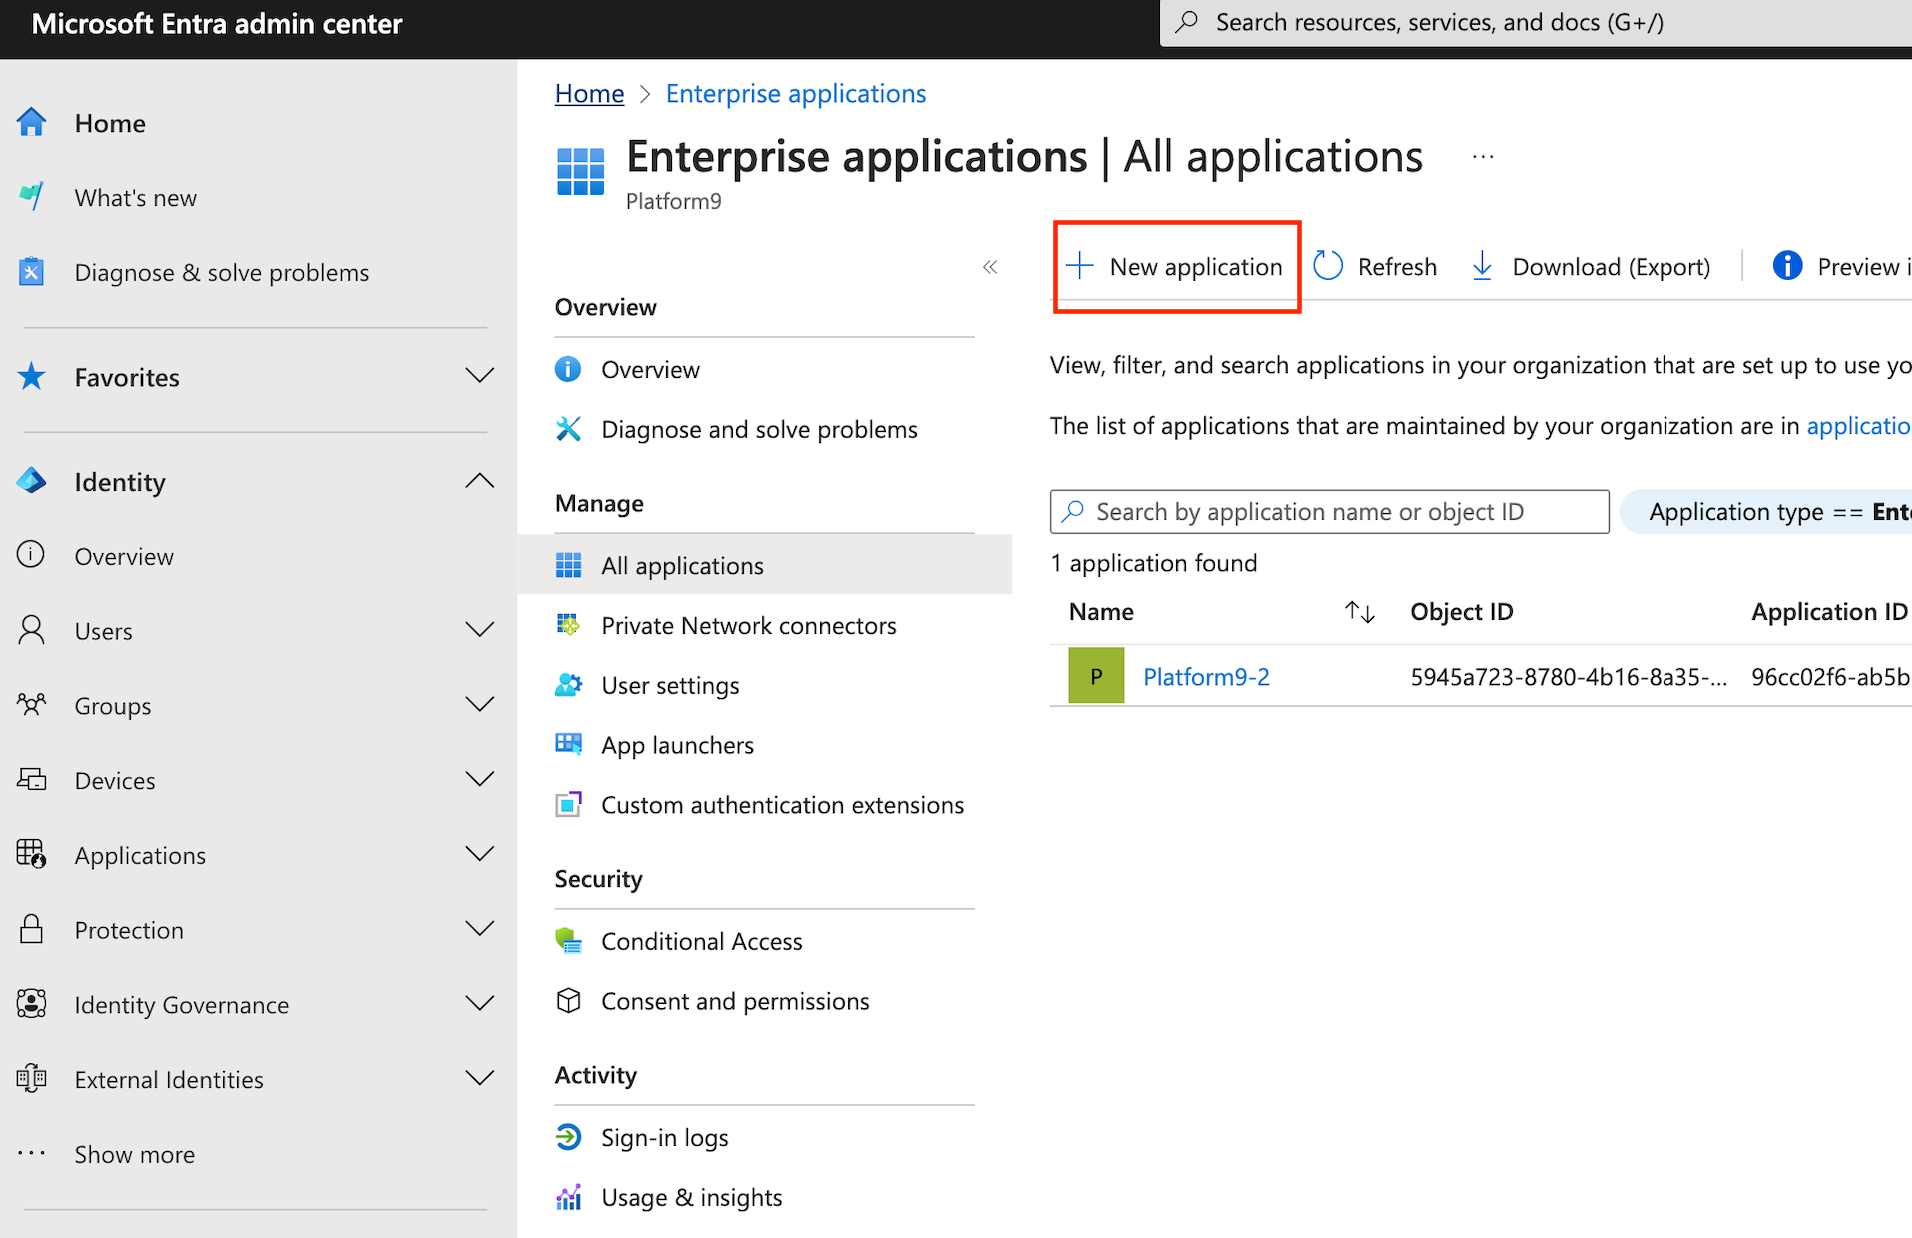
- Sign in to the Microsoft Entra admin center.
- Navigate to Entra ID > Enterprise apps > All applications.
- Select New application.
- On Browse Microsoft Entra Gallery select Create your own application.
You see options for cloud platforms, on-premises applications, and featured applications.
- Enter a name that you want to use to recognize the instance of the application.
- Select Integrate any other application you don't find in the gallery (Non-gallery).
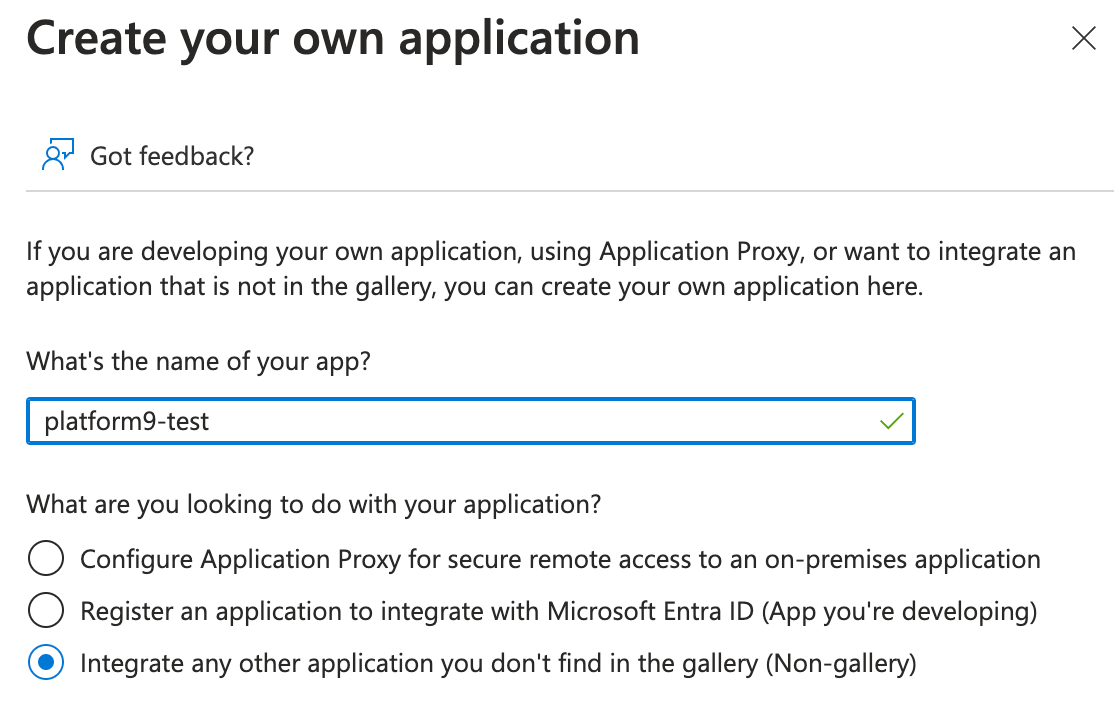
- Select Create.
Step 2: Enable SAML single sign-on
Enable SAML single sign-on for your enterprise application and configure the connection settings between Entra ID and your Private Cloud Director environment, while assigning user account to the application.
- Sign in to the Microsoft Entra admin center and then navigate to Browse to Entra ID > Enterprise apps > All applications.
- Enter the name of the existing application in the search box, and then select the application from the search results.
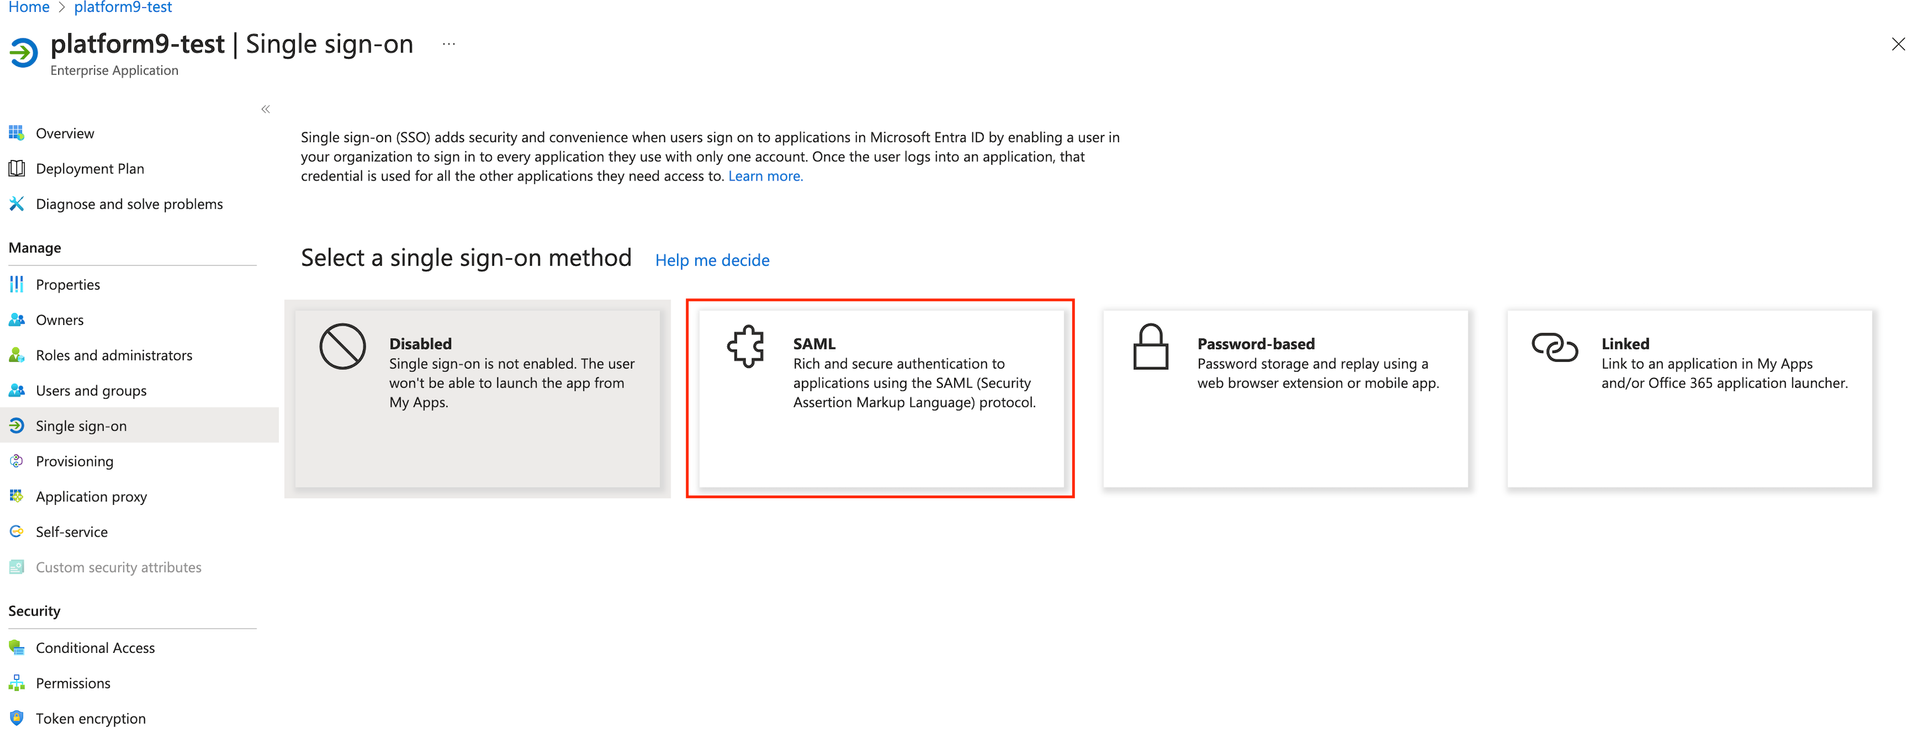
- Navigate to Manage and then select Single sign-on
- Select SAML as the single sign-on method.
- On Basic SAML Configuration, select Edit and then configure the following required fields.
| Field | Description |
|---|---|
| Identifier (Entity ID) | https://<DU_FQDN>/keystone |
| Reply URL (Assertion Consumer Service URL): | https://<DU_FQDN>/sso/IDP1/Shibboleth.sso/SAML2/POST |
Replace <DU_FQDN> with your actual domain FQDN without the region name.
For example, use companyx instead companyx-regionone
Optionally, you can choose to enter information to the optional fields.
- Select Save.
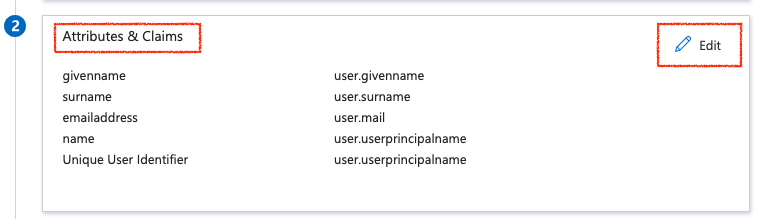
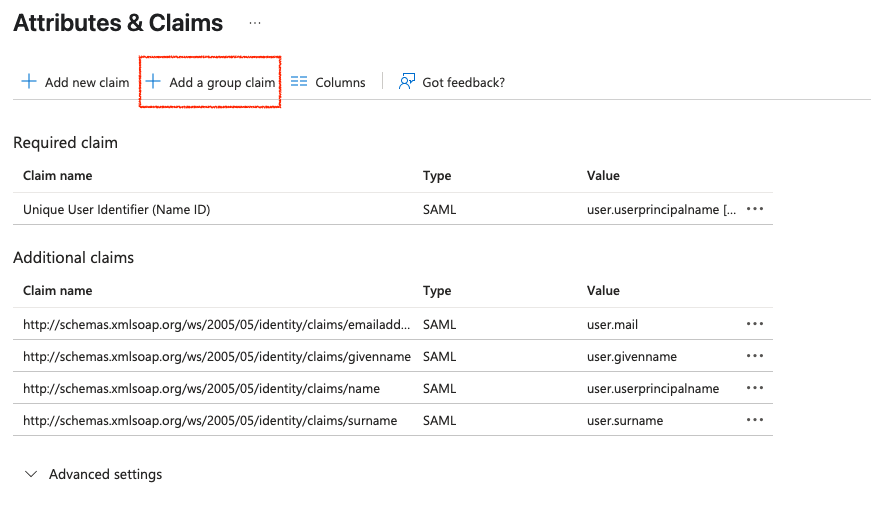
- On the Attributes & Claims, select Add a group claim and then configure the group settings according to your requirements.
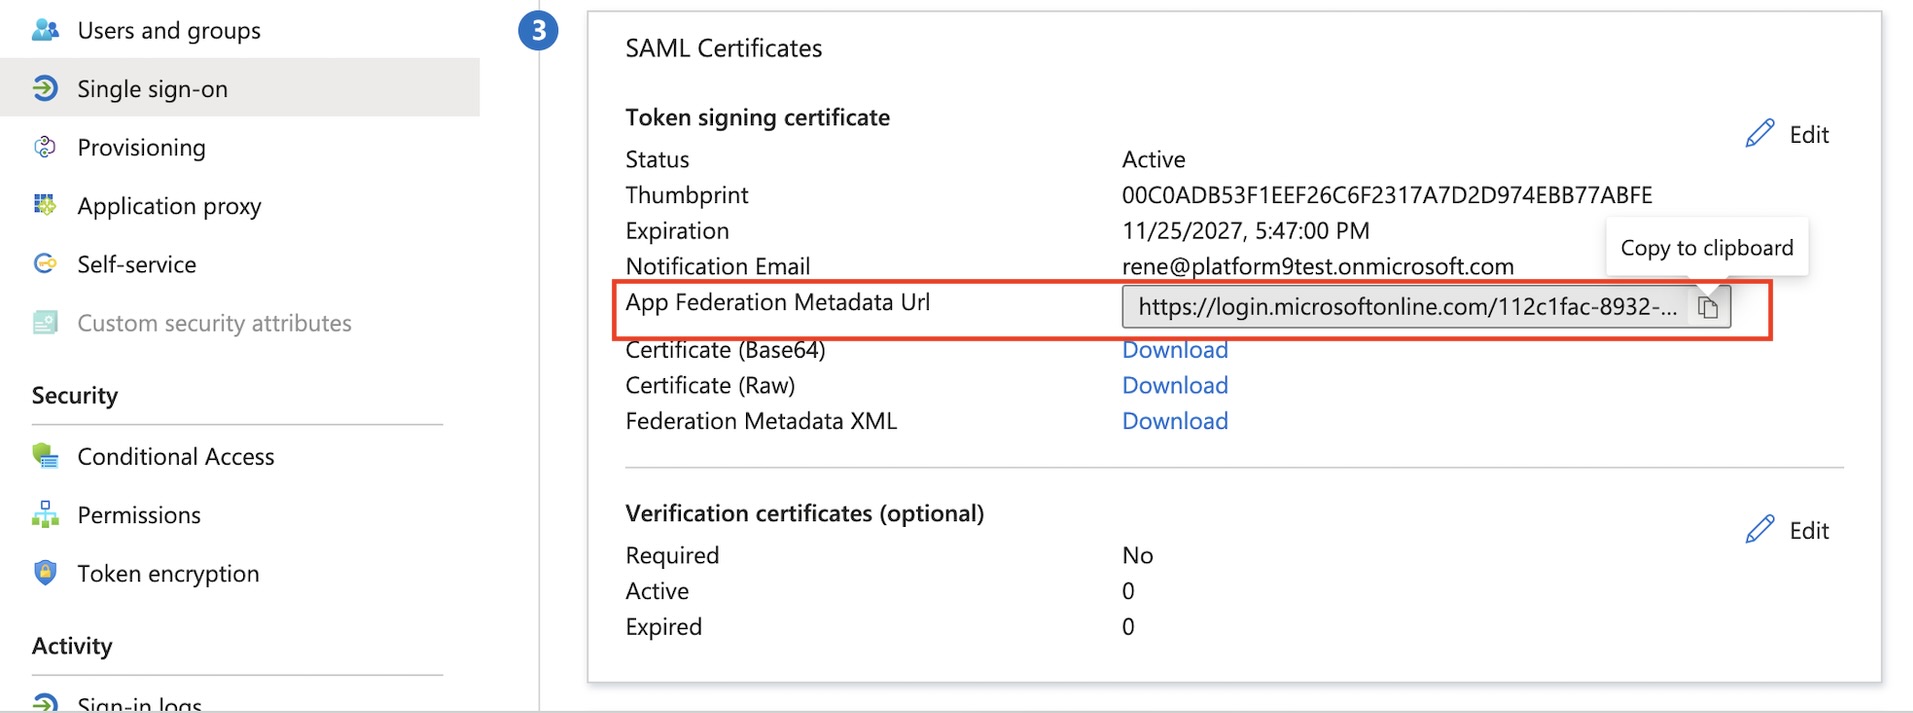
- Copy and securely save the App Federation Metadata URL value. You will require this URL during the PCD environment configuration.
- To assign users or groups to the application, perform the following steps.
- Navigate to Entra ID > Enterprise apps > All applications
- Select Users and groups and then select Add user/group
After assigning the user to the application, ensure that the application is set to be visible to the user. To make it visible to assigned users, select Properties and then set Visible to users? to Yes.
Your SAML single sign-on configuration is complete.
Step 3: Generate Attribute Mapping Files
Create the required attribute mapping files using the federation metadata from your Entra ID application.
- On your Linux system with Python 3, download the federation metadata using the wget command:
wget https://login.microsoftonline.com/YOUR_TENANT_ID/federationmetadata/2007-06/federationmetadata.xml?appid=YOUR_APP_IDReplace YOUR_TENANT_ID and YOUR_APP_ID with the actual values from your App Federation Metadata URL.
- Download the metadata parsing script
- Generate the attribute mapping file by running the following script against the federation metadata XML file.
./adfs-metadata-parse.py federationmetadata.xml > attribute_map.xml- Verify the generated file contains the correct attribute mappings.
Your attribute mapping file is ready.
Step 4: Configure PCD SSO Settings
Configure your PCD environment to use the Entra ID SSO integration.
- Log in to your PCD administrative interface.
- Navigate to Settings > Enterprise SSO.
- On the Enterprise SSO, enable SSO and configure the following settings.
| Field | Description |
|---|---|
| SSO Provider | Selection from the available options |
| Entity ID | Copy the Microsoft Entra Identifier from your Entra ID application configuration. |
| SAML Metadata URL | Enter the App Federation Metadata URL from your Entra ID application. |
| SSO Provider Attribute MAP in XML | Copy and paste the contents of the attribute_map.xml file you generated |

- Select Save.
- Select SAML Groups.
- Select Add Group to create a new SAML group.
- Configure the SAML Group Settings by filling in the following required fields:
| Field | Description |
|---|---|
| Name | Enter a unique name for the group |
| Description | Provide a brief description of the group |
| Username Attribute Mapping Template | Enter a template that defines how the username should be constructed using SAML attributes. Use the format {attributeKey} where attributeKey corresponds to the attributes available in your identity provider |
| Email Attribute Mapping Template | Enter a template that defines how the email address should be constructed using SAML attributes. Use the format {attributeKey} where attributeKey corresponds to the attributes available in your identity provider |
Template Examples:
{firstName} {lastName}- Combines first and last name with a space{firstName}-{lastName}- Combines first and last name with a dash{firstName}xxxx{lastName}- Combines first and last name with custom characters{email}- Uses the email attribute directly
The attribute keys must match those configured in your identity provider's attribute_map.xml file.
- On Group Settings continue with additional configuration as follows:
| Field | Description |
|---|---|
| Group Mapping | Configure tenant and role assignments |
| Tenants & Roles | Assign users to appropriate tenants and roles (Administrator or Self-Service User) |
- Select Add Group.
Your PCD SSO configuration is now complete.
Step 5: Test Your SSO Configuration
Verify that your SSO integration works correctly.
- Log out of your current PCD session.
- Open a new private or incognito browser window.
- Navigate to your PCD login page.
- Select Sign In with SSO.
- Complete the authentication process using your Microsoft credentials.
- Verify you can access PCD resources according to your assigned role.
You have now successfully configured SSO integration between PCD and Microsoft Entra ID. Users can now authenticate using their existing Microsoft accounts and access PCD resources based on their assigned roles and permissions.