Deploy your PMK OVA on VMware vSphere, WorkStation or Fusion
This article walks you through the steps to deploy PMK OVA on your VMware environment.
Platform9 has a purpose-built Ubuntu 20.04 virtual machine OVA / Template that can be used to simplify creation of a Kubernetes clusters on your VMware vSphere, Workstation or Fusion Environment.
Download & Launch the OVA
Download the OVA image. Once downloaded, open the file using one of these two software programs:
- VMware vSphere (Web Client)
- VMware Fusion/Workstation Player
- Oracle VirtualBox
As a part of the boot process, an attempt will be made to onboard the node to the Platform9 control plane.(i.e., the prep-node task will be run as a part of the start-up process of the VM). Since this operation takes anywhere from 3-5 minutes, the current state of the node can be reviewed by tailing the following log file.
$ tail -f pf9/log/ova_logs.txt
Make sure no other pf9ctl process is running at this time, as the prep-node command may take some time to complete.
Deploy Using VMware vSphere (Web Client)
Step 1. Modify Template Settings
First, the Deploy OVF Template option needs to be chosen to run the OVA file on vSphere.
Step 2. Source the OVA
Next, the OVA is either downloaded to the local machine, or the URL of the OVA image can be used.
When the OVA image is opened, a screen will appear that enables customization of the image. The image is preconfigured to use 4 GB of RAM, but we recommend increasing the RAM to at least 8 GB if your environment supports this.
To start the OVA select "Import" and the image will be added to your environment, once the image has been imported boot the VM.

Step 3. Select VM Options
Now assign a name to this VM, select the compute resource type, and then select the storage type (preferably thin provision, as it uses disk-space more efficiently than thick provisioning).
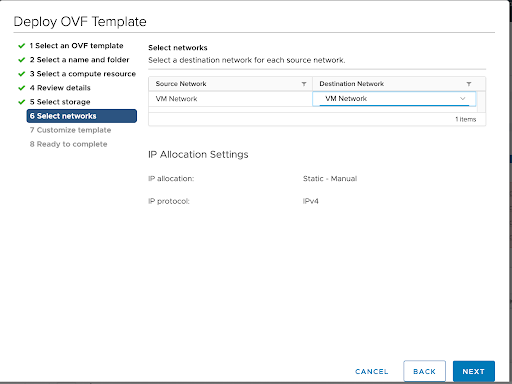
Step 4. Assign Network Settings
Next, add the network settings to the installation.
Check this location before deploying the VM, as the prep-node command is performed at boot up if the VM is connected to a network. If the prep-node task is not performed as a part of boot up sequence, it can be performed manually once the network connection is active.
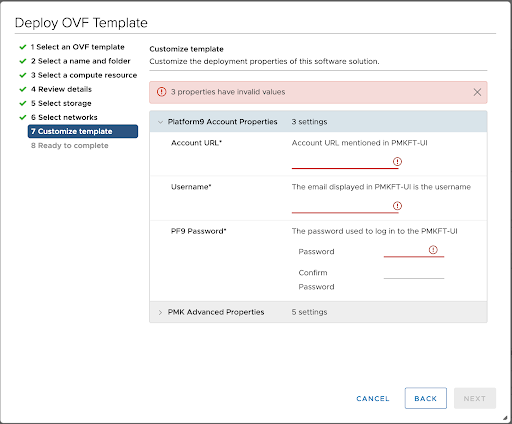
Step 5. Customize Template Properties
There is a list of customizable parameter settings in the Platform9 Account Properties. Once you click the dropdown list in the Customize Template section, add the following mandatory information to the input fields:
Account URL
Username
PF9 Password
These references need to be passed as a part of the deployment process so that the onboarding node can attach to our platform.
Once the OVA is imported in vSphere, the credentials to login into the VM are:
- Username: ubuntu
- Password: ubuntu
On the first boot up, the login screen will look similar to this image.
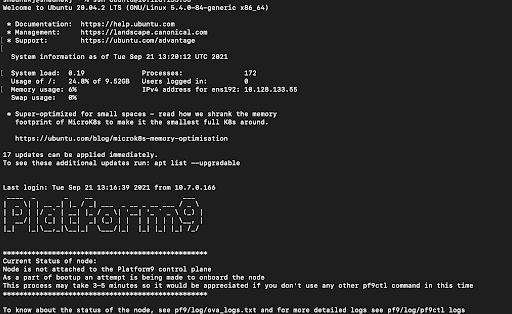
The current status of the node can be noted by looking at the pf9/log/ova_logs.txt file.

If the network connection is not active at the time of boot up, an attempt to onboard the node won’t be made. The status of network connection can also be found in /home/ubuntu/pf9/log/ova_logs.txt. In such a case, after connecting to a network, prep-node can be performed manually.
Step 6. Review
The node will be displayed when it has finished successfully attaching to the Platform9 control plane. A cluster can be created once the new node is connected and healthy.
Deploy Using VMware Workstation
To begin, download the OVA image and save it to an accessible location on your workstation. After the download completes, open the file using VMware Workstation.
As part of the boot process, an attempt will be made to onboard the node to the Platform9 control plane.(i.e., the prep-node command will be run as a part of the start-up process of the VM). To facilitate the process, have your login details ready. Since this operation takes anywhere from 3-5 minutes, the current state of the node can be viewed by examining the following log file.
tail pf9/log/ova_logs.txtStep 1. Source the OVA
After the OVA image is downloaded, open the VMware Workstation and click Player → File → Open. Locate and select the downloaded file and define the path for the new virtual machine, then click Next.
The default path for the new virtual machine is typically fine to use.
Step 2. Import and Select the VM Options
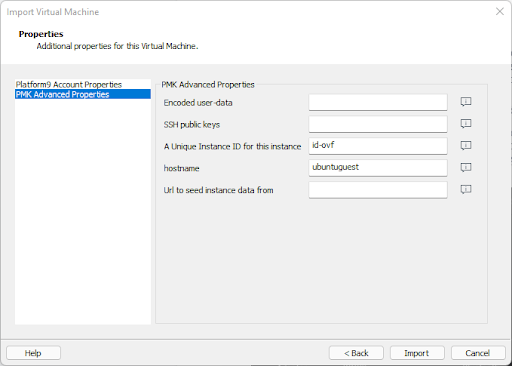
Fill in the required account details needed to link the VM to your Platform9 UI.
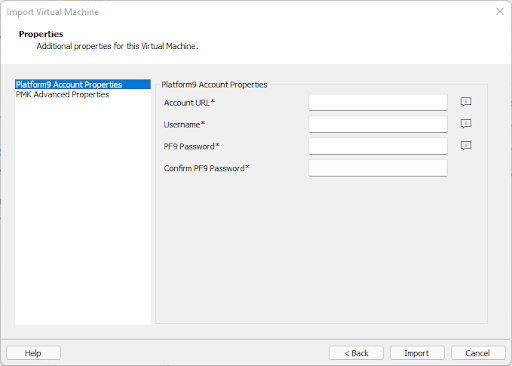
Next, click on the PMK Advanced Properties directly under the Platform Account Properties option. Fill out any additional, details needed for this VM. Options here include:
- Encoded user data
- SSH public keys
- The instance ID name
- Hostname.
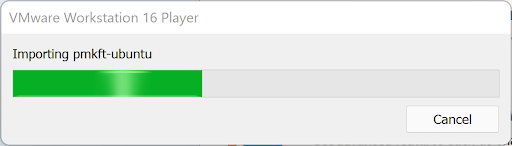
When finished, click the
VMware Workstation will begin importing the OVA image.
Step 3. Log into the VM
Once the Workstation player window opens, you will see a screen similar to the following. At this point, the prep-node command is being run. Once completed, a connection attempt is made to attach the VM to your management plane.

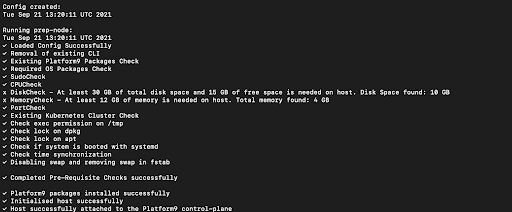
While the process is running, you can monitor its progress by tailing the /home/ubuntu/pf9/log/ova_logs.txt file.
tail -f /home/ubuntu/pf9/log/ova_logs.txtIf after 5 - 10 minutes, you do not see the host connected to the management plane, a connection failure may have taken place. This can happen if the network connection is not active at the time of boot up or the connection was interrupted. The status of network connection can be located in the /home/ubuntu/pf9/log/ova_logs.txt.
Manual Connection
If this circumstance occurs, verify your internet (or network) connection, and manually rerun the prep-node command from within the VM.
Step 1. Login
To start this process, enter your credentials into the login screen.
- User: ubuntu
- Password: ubuntu
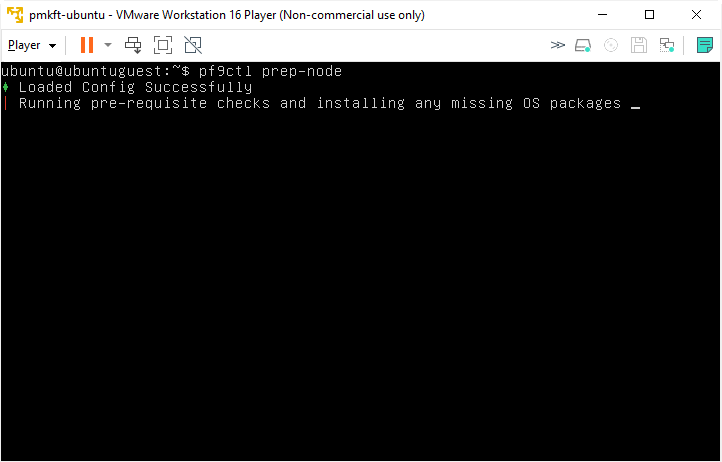
Step 2. Prepare the node
Once logged in, run the pf9ctl prep-node command. This will begin the connection process.
Once the prep-node command completes successfully, use the CLI to enter your login information. This consists of:
- Your unique Platform9 management plane URL
- Username
- Password
- Region
- Tenant
After the correct login information has been supplied, the CLI will attempt to connect the VM to your SaaS Management Plane, after which the VM can be used to build or scale a cluster.