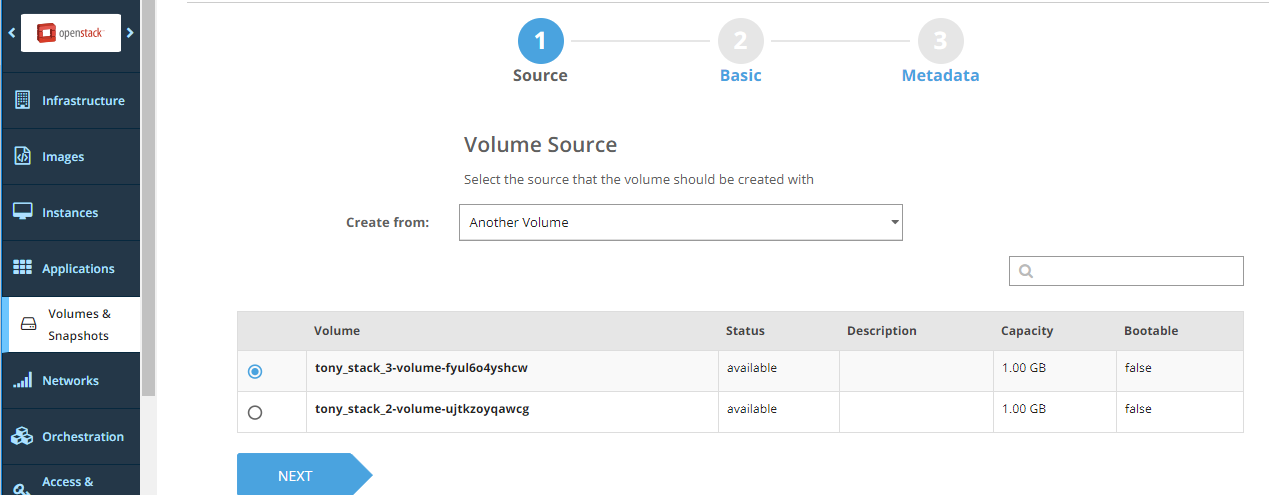
Create Volume from Another Volume
You can create a volume from an existing volume.
You must be a self-service user or an administrator to perform this operation.
To create a volume from an existing volume, follow the steps given below.
1. Log in to Clarity.
2. Click Volumes and Snapshots in the left panel.
3. Click Create New Volume seen on the top right corner.
4. Select the Another Volume option in Create From.

5. Select the option for the required volume from the list of volumes.
6. Click Next.
7. Enter the following details for the volume.
| Field | Description |
|---|---|
| Name | Volume Name |
| Description | Volume Description |
| Volume Type | Volume type is metadata that is used to provide additional properties when a volume is configured. Volume types are predefined by the cloud administrator. If no volume types have been defined, the default value is none. |
| Size | Volume size. When you create a volume from another volume, the size must be equal to or greater than the size of the volume from which you are creating the volume. |
8. (Optional) Select the Bootable check box to create a bootable volume.
9. Click Next.
10. Add metadata to the volume by entering a key-value pair. To add more metadata to the volume, click Add key-value metadata and enter a new key-value pair. Repeat the step as many times as necessary to add metadata.
11. Click Create.
A volume is created successfully from another volume. The volume can be attached to an instance. You can take a snapshot of the volume or upload the volume to Glance as an image.