Okta SAML Connector for Platform9
Platform9 supports Single Sign On with Okta. This tutorial describes the procedure for configuring Platform9 as Okta application. Once the application is configured, you can follow these steps to grant your Okta users access to the Platform9 cloud.
Step 1: Create a New SAML Connector
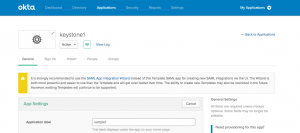
After logging in as admin, search for “Template SAML 2.0 App”. This app is deprecated by Okta, however it works with Platform9.
Step 2: Configure SAML Connector
Give your application connector a suitable label as shown below —
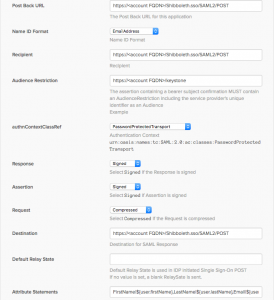
Step 3: Configure Okta Connection Settings
- Post Back URL: Set it to https://<Account FQDN>/Shibboleth.sso/SAML2/POST
- Name ID Format: Leave it as is.
- Recipient: Set it to https://<Account FQDN>/Shibboleth.sso/SAML2/POST
- Audience Restriction: Set it to https://<Account FQDN>/keystone
- authnContextClassRef: Leave it as is.
- Response: Leave it as is.
- Assertion: Leave it as is.
- Request: Leave it as is.
- Destination: Set it to https://<Account FQDN>/Shibboleth.sso/SAML2/POST
- Default Relay State: Set it to https://<Account FQDN>/clarity/#/signin/sso
- Attribute Statements: Configure as needed. These are the attributes which show up as part of SAML assertion posted to the Platform9 environment. They can be used to create mappings in OpenStack. These mappings provide a way to associate Okta users to resources in OpenStack. At a minimum, the attributes FirstName and LastName of the user are needed.
That is it! Once you grant permissions to Okta users as described here, they can start using Platform9 based OpenStack cloud right away.