OpenStack Tutorial: Cinder Block Storage Integration in Platform9
This tutorial describes Cinder block storage integration support in Platform9 Managed OpenStack.
Cinder support enables Platform9 Managed OpenStack to:
– Integrate with your existing or new block storage technologies, and
– Provide support for operations such as creation, deletion, snapshot, upload-to-glance-image, attach and detach can be done through the Platform9 controller UI.
Contents
- Cinder integration with different storage devices
- Enabling Cinder
- Adding cinder role during authorization of a new host.
- Adding cinder role by editing an already authorized hypervisor.
- Volume operations
- Create, Delete, Attach and Detach volumes
- Volume snapshots
- Upload to image
- Boot instance from volume
Cinder Integration with Various Storage Technologies/Platforms
OpenStack Cinder enables advance integration with different storage platforms that you might have deployed. Here’s a list of all OpenStack Cinder Plugins that are active or available today. Platform9 currently has tested and enabled out of box integration with a subset of these. If there’s a specific plugin/storage vendor that you’d like to integrate with Platform9 Managed OpenStack, please contact support@platform9.com with more info and we’d be happy to test out the integration and enable it for you!
Here are tutorials on few of our current integrations:
Enabling OpenStack Cinder
Cinder storage service is enabled in Platform9 by assigning ‘block storage’ role to one of your hypervisor nodes. You can either add a new hypervisor node and authorize the Cinder role on that hypervisor during the authorization workflow OR edit an already authorized hypervisor to enable Cinder role.
1) During Authorization of a New Hypervisor:
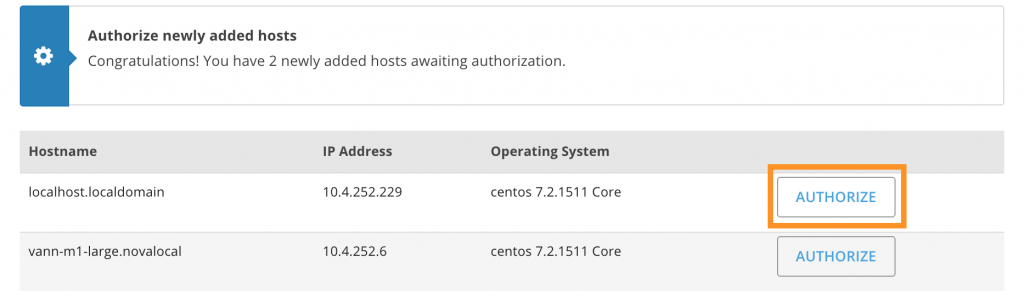
Click on the authorize button and follow the wizard. In the block storage step, tick the check box to enable block storage and then select the driver type – LVM in our case. Complete the wizard to authorize this hypervisor with the role.
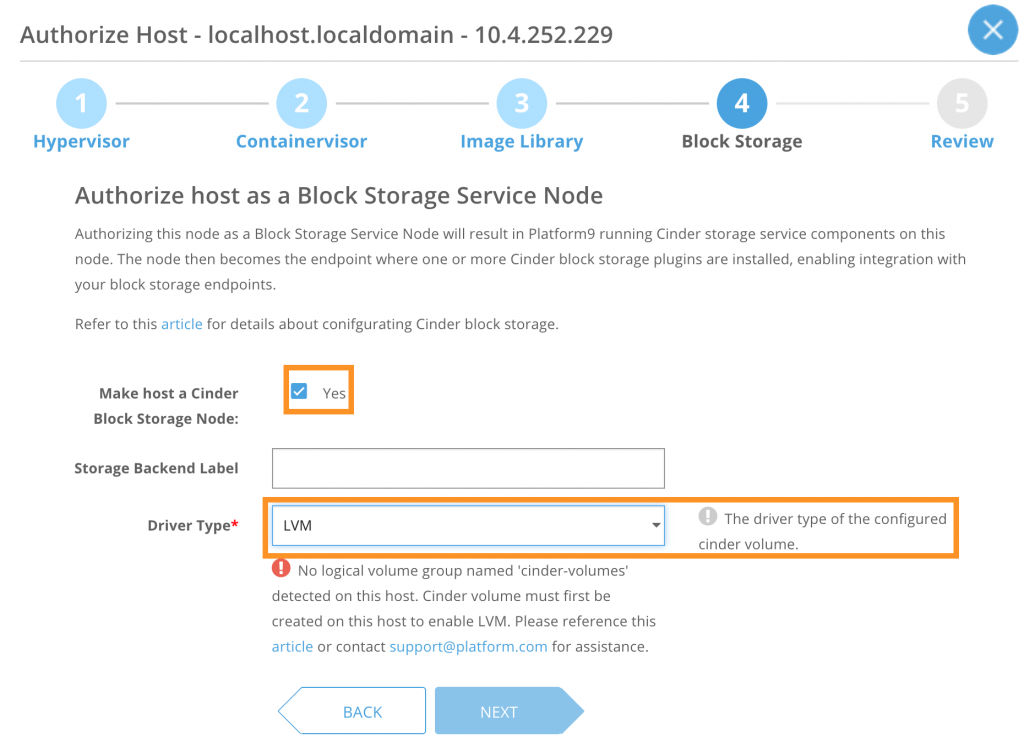
Note: The warning will go away when the prerequisites are met.
2) Adding Cinder Role to an Already-Authorized Hypervisor:
Click on the edit (A notepad type) button in the Actions column for the hypervisor that you want to add the cinder role.

Under the block-storage tab check the box and press the update block storage details button to add cinder role to the hypervisor.

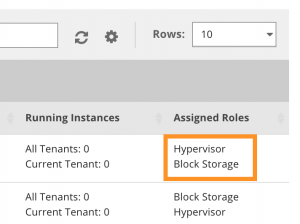
When cinder role has been added successfully, “block storage” will be displayed in in the roles column as shown below:
Create, Delete, Attach and Detach volumes
Volume operations can be performed from the Volumes and Snapshots page. Select the “Volume and Snapshots” button on the left had corner to open the page.
The page shows volume that have been created. A tab switches to the snapshots that have been created previously.
1) Creating a Volume
Click on the create volume button. Volume creation can be done in four ways: as a raw volume, or from a volume snapshot, an image or another volume.
Select one of the options to create a volume
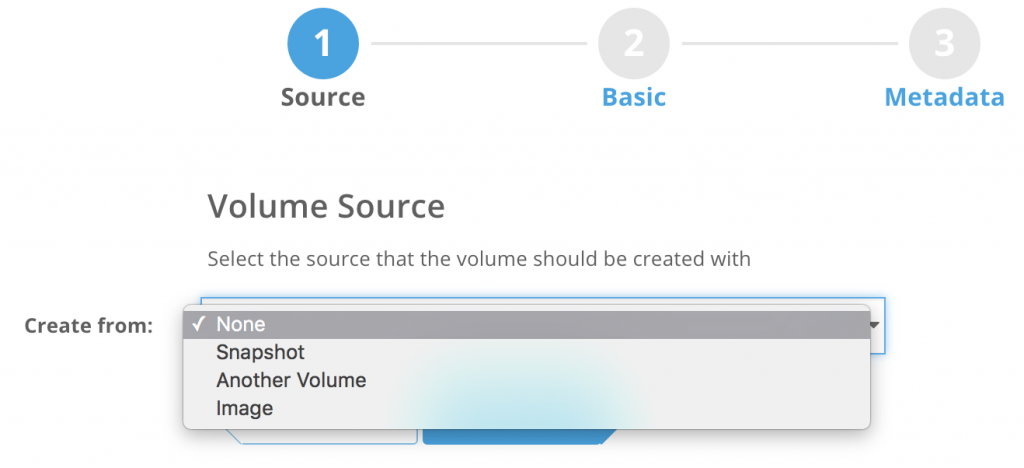
For a raw volume, option “None” the following are the configuration options present
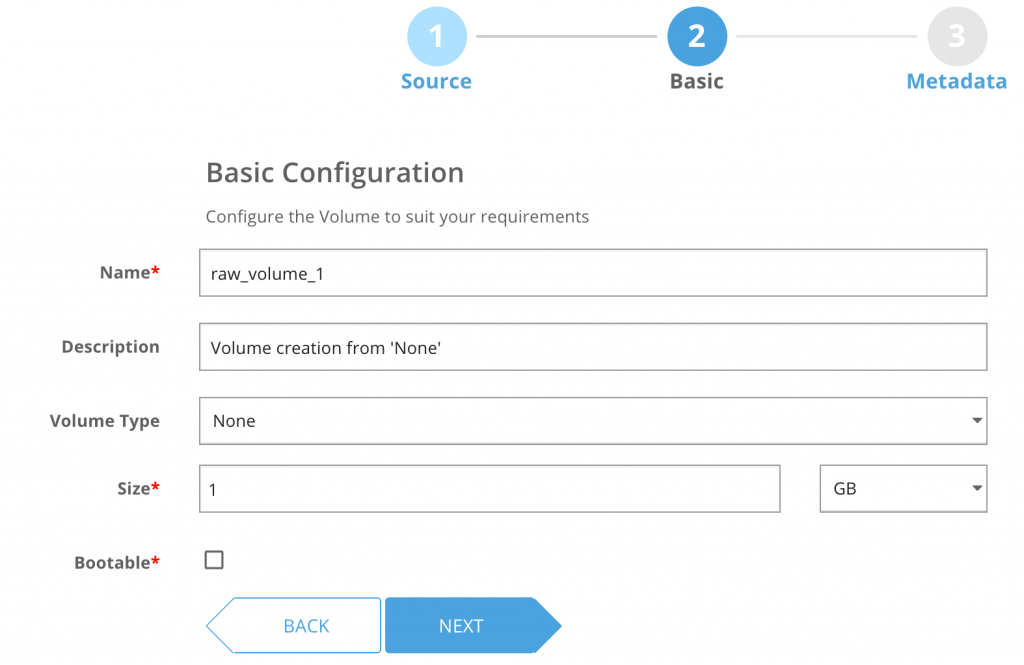
Clicking next takes you to the Tags configuration page. You can add key value pairs for this particular volume. It can be used for segregation and identification purposes.
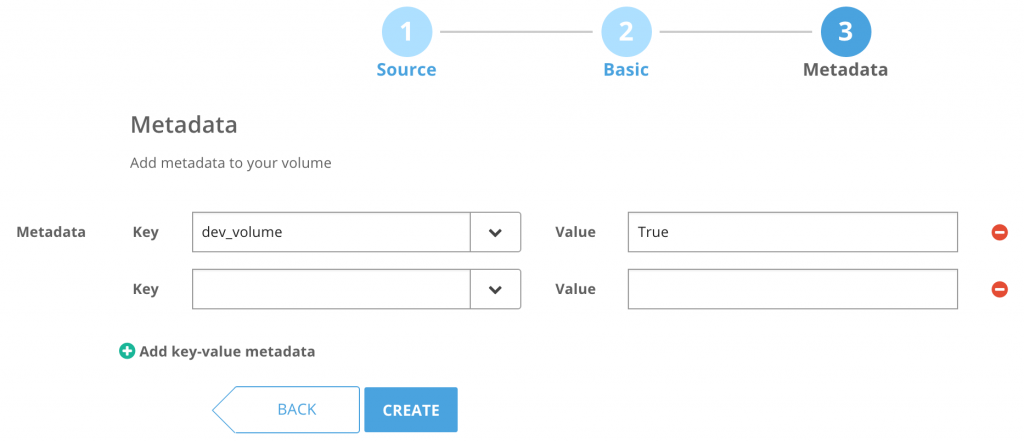
Clicking on Add Volume will create the new volume on the cinder-volumes volume group on the hypervisor that was assigned the block storage role.

Note: To create a volume from an Image, select the image that you would like to use to create the volume with. Also note that the “size of the volume” in the configuration step of the wizard should be more than the size of the image selected.

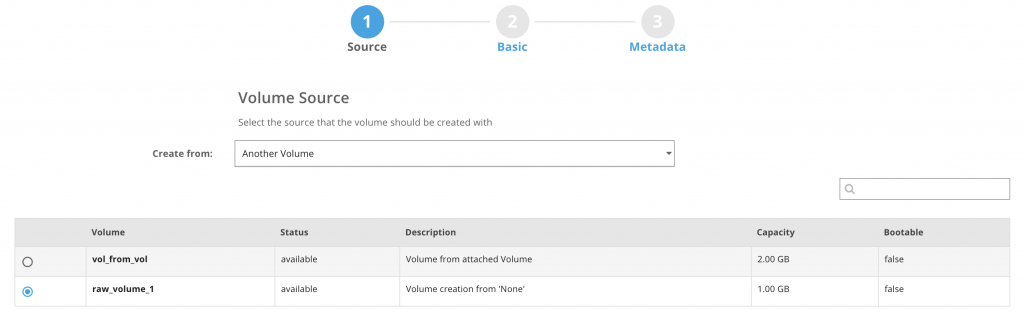
Note: To create a volume from a volume, select the volume from the list of volumes and following the wizard. This is similar to the creation of volumes from images. The volume that we choose to create a new volume from can be in-use (attached) state.
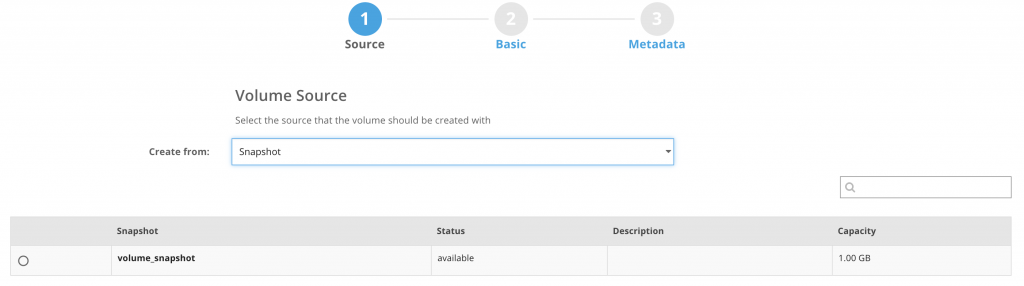
Note: To create a volume from a volume snapshot, select “Snapshot” from the drop down list for create from. Please note that you will be able to create a volume from a snapshot only if you previously have snapshots created from volumes. Check out the Snapshot section below to see how to create a volume snapshot.
Operations on a Created Volume
Actions on a volume such as delete, snapshot, upload to image and attach/detach can be done from the icons present in the action column for a given volume.

The recycle bin button deletes the volume.
The camera button takes a snapshot of the given volume.
The upload button will upload the volume to a glance image.
The edit notepad button can be used to change the properties of the volume, extend it, attach/detach it to a VM and also edit tags.
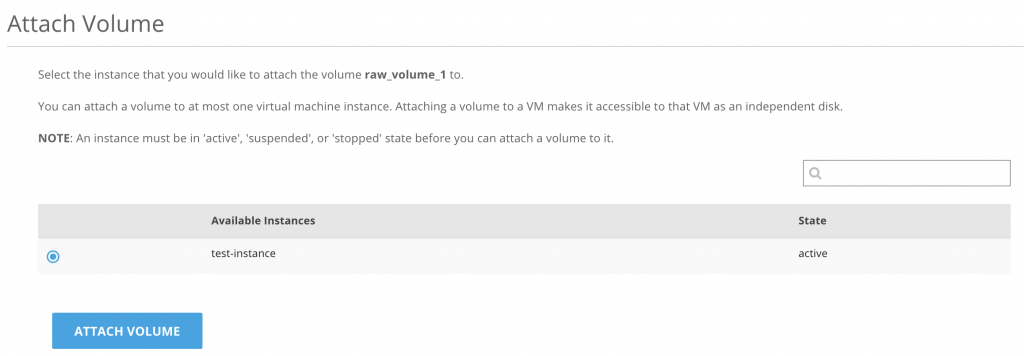
2) Attach a Volume
Use the Attachment Operations tab in the edit page (can be accessed using the [+] button), select the VM that you want the volume to be attached to and press the attach volume button.
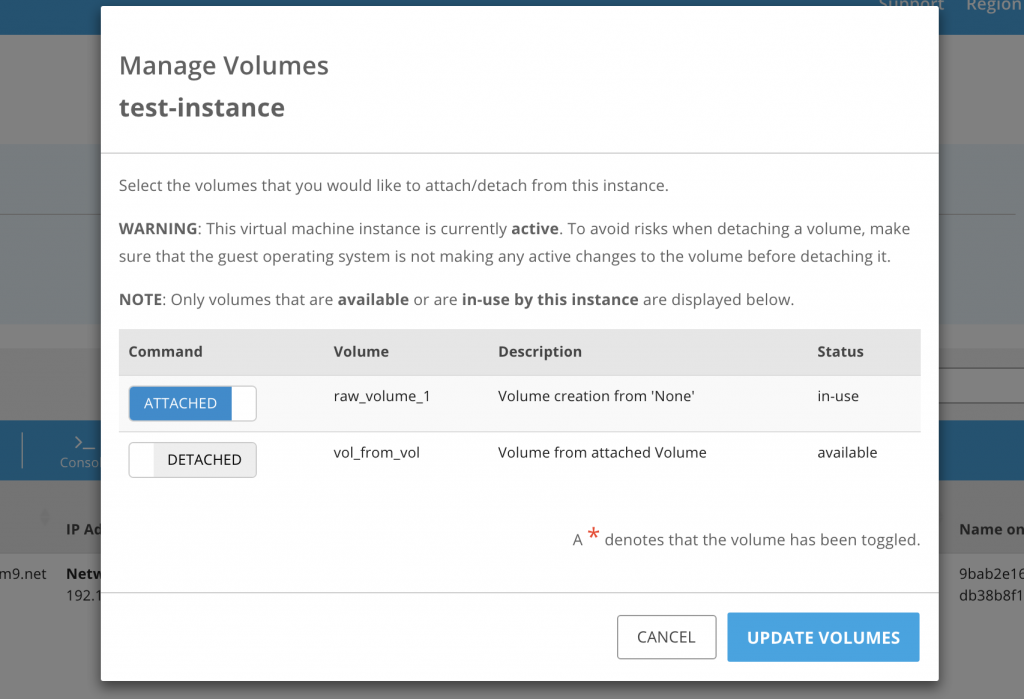
3) Detach a Volume
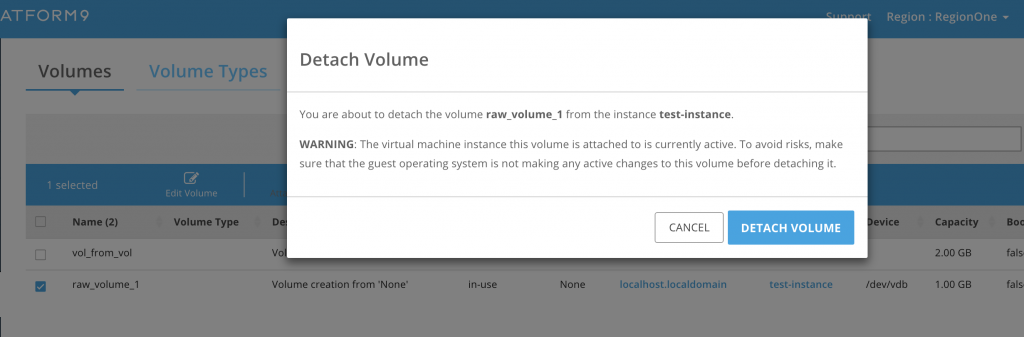
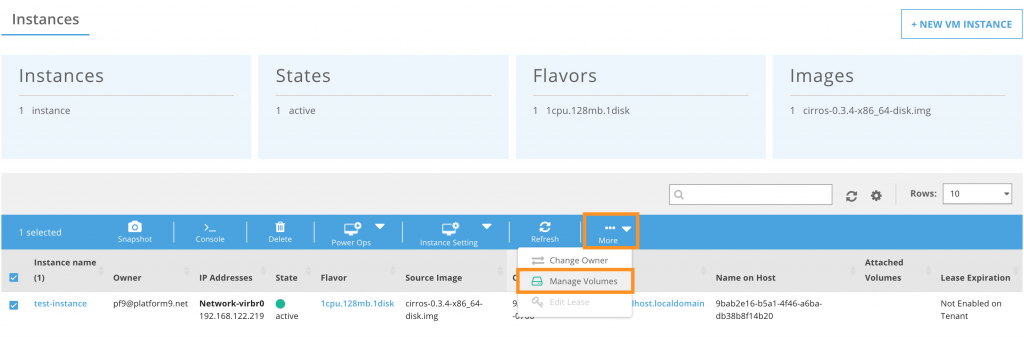
You can also perform these operations from the “Instances” page by clicking on the block device (hard drive icon) in the instance’s action box.
Volume Snapshot
To snapshot a volume use the Camera Icon ![]() and input the name and description for the snapshot.
and input the name and description for the snapshot.
NOTE: Making a snapshot of a volume in use (attached to a VM) might have unforeseen consequences. This is because there could be I/O operations in progress during snapshot process and this might cause inconsistencies in the snapshot.
The icons in the action box are also colored red when the operations aren’t supposed to be performed.
When you create a snapshot of a volume, the “Volume snapshot” tab will list it with status as ‘creating’ till the snapshot process completes after which the state changes to “available”

Upload to Image
Similar to volume snapshot this action creates a glance image out of the volume. The image created will be uploaded to the glance server if the hypervisor where the volume is present and the hypervisor to which the glance role is applied aren’t the same.
NOTE: When uploading a volume to an image, it is suggested that it is done when the volume is not in-use (not attached to a VM).
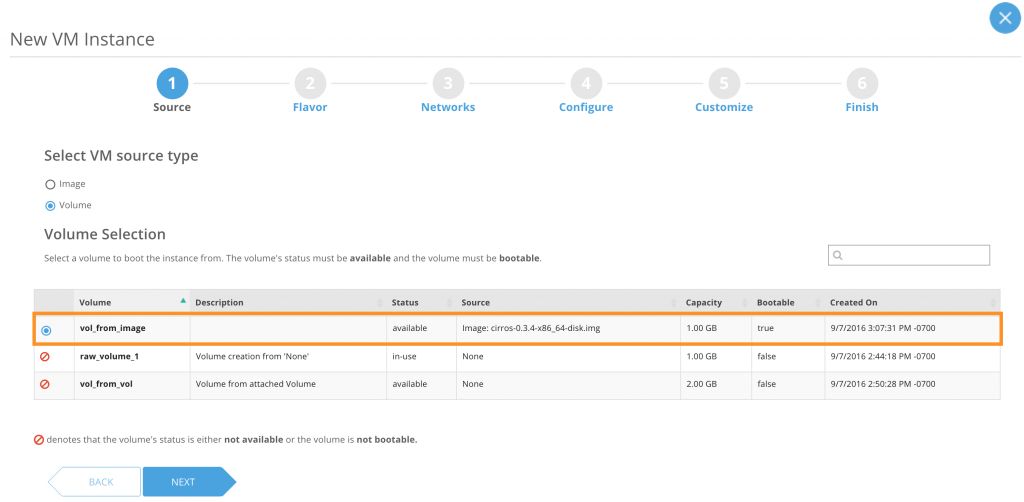
Boot Instance from Volume
An instance can be created from a volume instead of an image. Using a volume when creating an instance makes that volume the data store medium for the VM instead of an ephemeral disk. Thus when booting from a volume the flavor’s disk size does not play a role. The data that is written by the VM will be written to the volume itself.
To boot an instance from a volume, the volume must be bootable. When selecting a volume using which you would like to create a VM, if you see that none of the volumes are available that would either mean that the volume is “in-use” by another VM (attached to another VM) or is not bootable.
To mark a volume bootable, edit the volume properties using the “Notepad” action icon and check the bootable option.
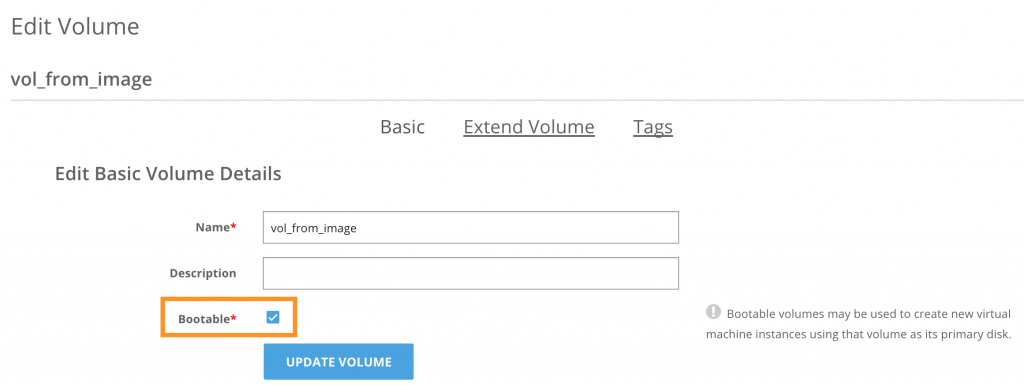
If there is at least one bootable volume and that volume is in the “available” state, you can use that volume as a boot source for a VM.